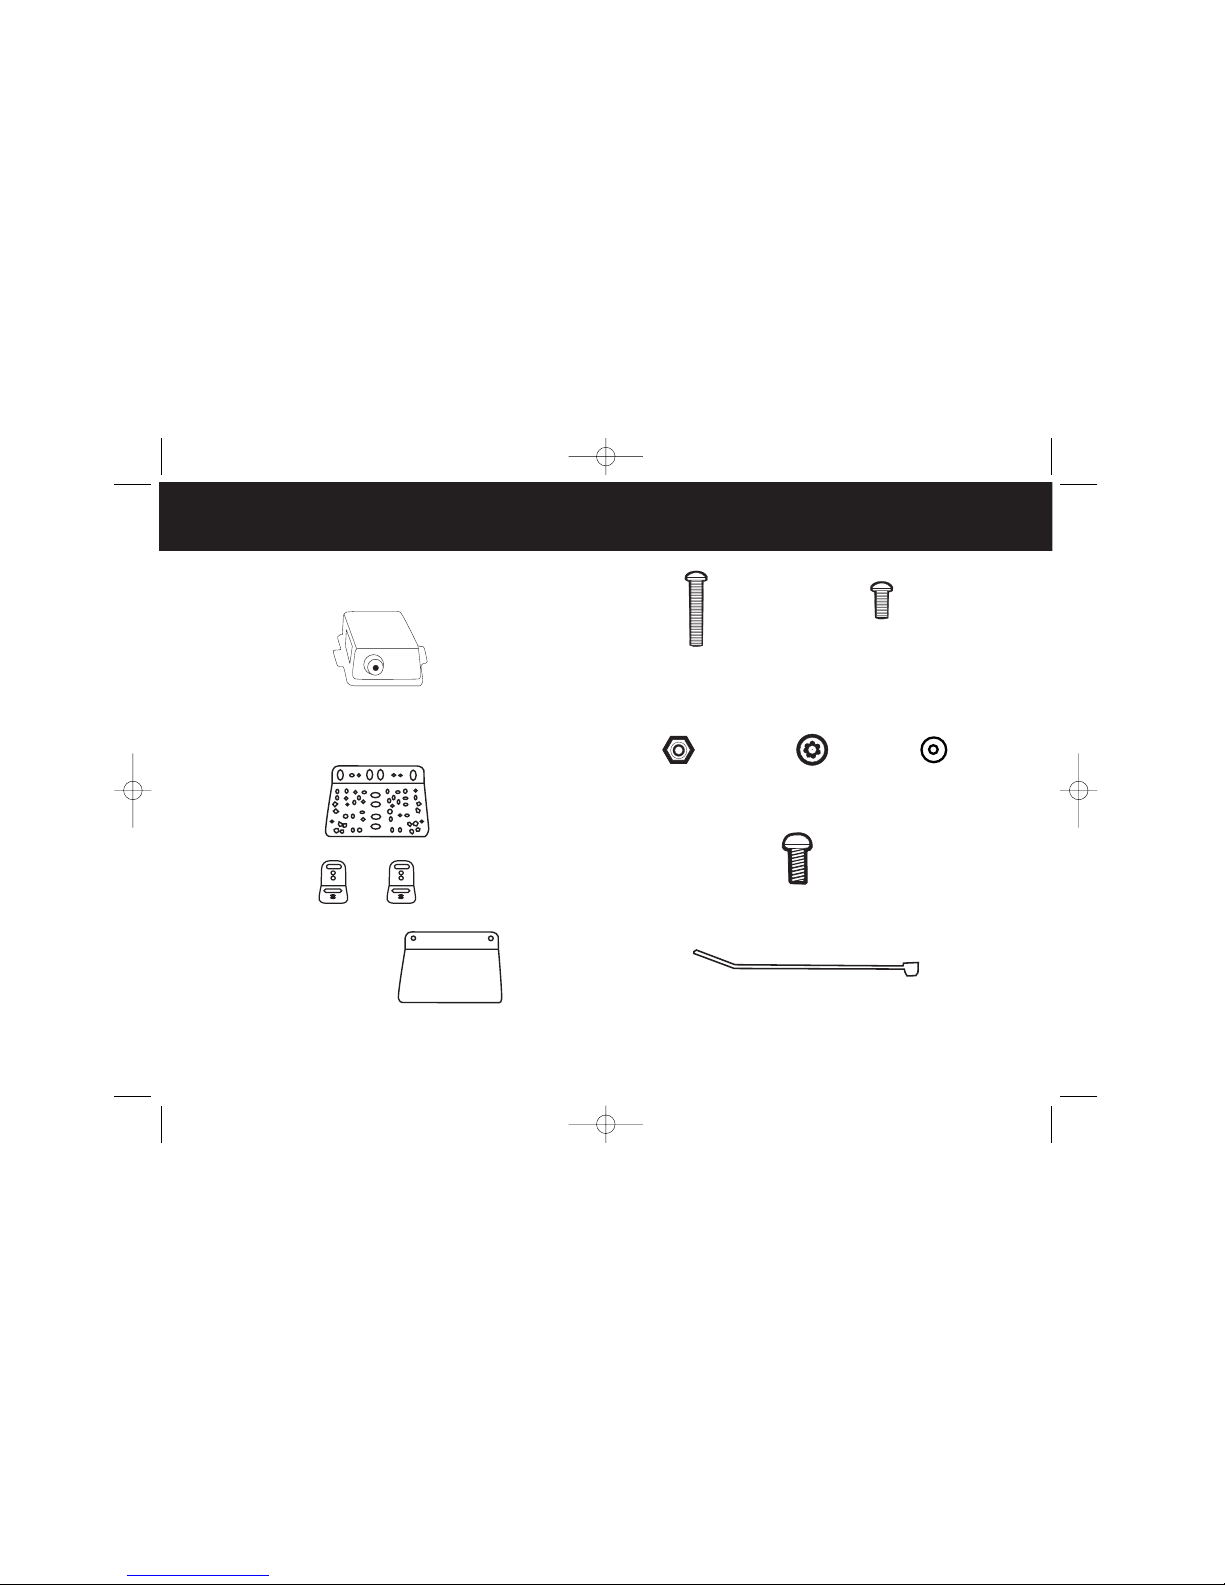
Whistler 3300SWRA User manual

INSTALLATION
INSTRUCTIONS
SWRA-3300
REAR ANTENNA FOR MODEL 3300
REMOTE RADAR DETECTOR
THE WHISTLER GROUP
CORPORATE HEADQUARTERS
13016 N. Walton Blvd.
Bentonville, AR 72712
TEL (501) 273-6012 FX (501) 273-2927
www.whistlergroup.com
PRODUCT DEVELOPMENT CENTER
25 Industrial Ave.
Chelmsford, MA 01824
TEL (978) 244-1400 FX (978) 244-1492
CUSTOMER RETURN CENTER
1201 N. Dixieland Rd.
Rogers, AR 72756
Consumer Relations Tel (800) 531-0004
Email: info@whistlergroup.com
P/N 3300SWRA, © WHISTLER 2000
3300 Superwideband remote 10/4/00 9:38 AM Page 1

Dear Whistler Owner,
Congratulations on your purchase of the SWRA-
3300 (Superwideband Remote Antenna), a new and
innovative Whistler accessory for use with the Whistler
3300 remote radar laser detector.
Reflecting our continued commitment of providing
leading edge products, the SWRA-3300 is designed for
drivers interested in gaining increased rear detection
range.
The SWRA-3300 delivers long range warning of all
radar guns operating on X, K, and superwideband Ka
frequencies when transmitted from behind.
To fully acquaint yourself with the operation of the
SWRA-3300 and how it interacts with the front radar
receiver, we recommend reading this entire manual.
Enjoy your Whistler SWRA-3300 and please drive safely.
Sincerely,
THE WHISTLER GROUP
Topic Page
SWRA-3300 Receiver and
Mounting Brackets 2
Mounting Fasteners 3-4
Tools Required 5
Installation Of Radar Antenna 6-10
Making The Connections 11
Control Panel Memory 12
Troubleshooting Guide 13
Warranty 14-16
Specifications 17
TABLE OF CONTENTS
3300 Superwideband remote 10/4/00 9:38 AM Page 3

2
WHISTLER SWRA-3300 COMPONENTS MOUNTING FASTENERS
3
Large L
Bracket (1)
Small L
Brackets (2)
45º Reflector
(For use when
mounting antenna
in vertical position.)
Antenna Mounting Brackets And 45º Reflector
Bolt
#10-32 x 1-1/4"
Bolt
#10-32 x 1/2"
Nut
#10-32 Lock
Washer Flat
Washer
AB
Sheet metal
Screw
#6 x 3/4"
CDE
F
G
4" Cable Tie
3300 Superwideband remote 10/4/00 9:38 AM Page 5

Reference Description/Use Qty.
A Bolt #10-32 x 1-1/4" 2
• Fastens Large L or Small L
Bracket to vehicle support.
B Bolt #10-32 x 1/2" 2
• Fastens Small L to Large L
Bracket (optional approach).
C Nut #10-32 4
• Use with #10-32 bolts.
D Lock Washer 4
• Use with #10-32 bolts.
E Flat Washer 2
• Use with #10-32 bolts.
F Sheetmetal Screw #6 x 3/4" 6
• Fastens Large L/Small L
Bracket or 45º Reflector to
radar antenna.
G 4" Cable Tie 4
• Secures cable from radar
antenna at various locations in
or under the vehicle.
Note: If mounting fasteners are missing from your package, please
call 1-800-531-0004 for replacements.
5
MOUNTING FASTENERS TOOLS REQUIRED
4
Tools Required For Installation
• Phillips or Blade Screwdriver
• 3/8" Open End Wrench
• Electric Drill
• Drill Bit: 13/64"
• Pencil
• Other Tools May Be Required Based On Your Vehicle
Type Or Requirements For Customized Installation
3300 Superwideband remote 10/4/00 9:38 AM Page 7

7
6
INSTALLATION OF RADAR ANTENNA INSTALLATION OF RADAR ANTENNA
General Information
The radar antenna is waterproof and designed to be mounted
at the front of your vehicle. In most vehicles the best mounting
location is directly below or behind the bumper. Other locations
which provide concealment and/or protection of the antenna
such as on the rear deck (next to the third brake light) may be
acceptable. Radar signals will pass through non-metallic materials
such as fiberglass and plastic, however, be sure to mount the
receiver away from any metal, as it will block the receiver’s
antenna. Because the optimal location for mounting the
antenna varies by vehicle type, the hardware supplied is
designed to offer a wide variety of mounting options. We
suggest choosing the option that enables the antenna to be
securely fastened and provides the ANTENNA window adequate
rearward visibility.
NOTE: Use of hardware that is not supplied or DRILLING
into the case will cause damage to the receiver and void
the warranty.
Antenna Mounting Brackets
There are two types of mounting brackets for the antenna:
Large L (1) and Small L (2). The Large L bracket fastens to the
antenna using two or more screws (#6 x 3/4"). Slide the screw
through the hole on the flange of the antenna and then tighten
into the metal bracket (do not over tighten). The Large L
Bracket may be fastened to the antenna in a variety of
positions as shown on page 7.
The layout of holes on the large L Bracket accommodates multiple antenna
mounting positions.
This arrangement provides flexibility for fastening the antenna
/bracket assembly to your vehicle in a manner that allows the
antenna window (ANTENNA) to have a rearward looking view
of the road behind.
The Small L Brackets (2) may also be fastened to the antenna
in different positions as shown below:
The Small L Brackets may be fastened to any of the six holes on the antenna.
Use one #6 x 3/4" screw to fasten each Small L Bracket to the
antenna. Again, do not over tighten the screws.
In some situations it may be advantageous to use both the Large L
and Small L Brackets to install the antenna in a vehicle.
3300 Superwideband remote 10/4/00 9:38 AM Page 9

8
INSTALLATION OF RADAR ANTENNA INSTALLATION OF RADAR ANTENNA
9
Horizontal Mounting
When mounting the antenna in a horizontal position (or on an
angle between), remember to keep the ANTENNA window as
close to perpendicular as possible to the road surface (ANTENNA
window should not be angled up toward the sky or down toward
the road surface).
Mounting Vertical (with 45º Reflector)
For vehicles that do not have sufficient clearance behind the bumper
(about 5") to mount the antenna in a horizontal position, the 45º
Reflector should be used.
The 45º Reflector is attached to the antenna with two screws (#6 x 3/4")
on the side of the antenna housing marked ANTENNA. Slide the
screws through the corner holes on the flange of the antenna housing
and then tighten into the metal reflector (do not over tighten).
Large L and Small L Brackets may be used in combination.
The Small L Brackets are fastened to the Large L Bracket using
the #10-32 x 1/2" bolts, #10-32 nuts and lock washers.
To fasten the Large L or Small L Brackets to your vehicle, mark
the supporting structure through the appropriate holes in the
brackets, then drill the holes in the supporting structure with a
13/64" drill bit. Attach the bracket(s) to the supporting structure
using two bolts (#10-32 x 1-1/4") and corresponding nuts, flat
washers, and lock washers. You may also use 2 #6 sheet metal
screws. Because rough road surfaces can cause excessive
vibration or bouncing, be certain to fasten the bracket(s)
securely to your vehicle.
Horizontal Or Vertical Mounting Of Antenna
The antenna can be attached to the vehicle in a horizontal or
vertical position, or at any angle between these two points.
Select the position that allows you to fasten the antenna to
your vehicle in the most secure manner.
Radar antenna mounted in horizontal position.
Best mounting angle for optimum detection of all types of radar guns
3300 Superwideband remote 10/4/00 9:38 AM Page 11

10 11
INSTALLATION OF RADAR ANTENNA
Mount the antenna to the vehicle such that the ANTENNA window
is facing the road surface, sky, right or left of the vehicle, and the
reflector has an unobstructed view of the road ahead.
Radar antenna mounted(vertical) with 45º Reflector.
Mounted in this position, radar signals are reflected into the
ANTENNA window.
This side facing
rearward traffic
Signal
Antenna window
Antenna Cable To Control Panel
Once the antenna is installed, run the cable along the inside of
the vehicle or under it to the engine compartment. If using the
latter, find a location in the firewall where other wires (or the
speedometer cable) enter the passenger compartment and
feed the stereo jack connection through. Be careful not to
interfere with or disconnect other wires, cables, or mechanical
systems of your vehicle while routing the antenna cable. Also,
keep the antenna cable away from any areas in the vehicle that
may become hot. Four cable ties are provided to secure the
antenna cable at various points on the vehicle.
Engaging SWRA
To engage the rear radar antenna:
1.Unplug power cable from the console or turn vehicle off if
console is wired to a switched 12 volt source.
2. Plug the stereo jack connector (straight ended cable) at the end
of the rear antenna cable into the RADAR 2 port on the back of the
control panel.
3. Reapply power. Display reads:
Press Dark for Yes or City for No.
4. When radar is received from the rear the display reads:
MAKING THE CONNECTION
R2 ON?
K* 9
3300 Superwideband remote 10/4/00 9:38 AM Page 13

The SWRA-3300 is expertly engineered and designed to exacting
quality standards to provide you with reliable, trouble-free
operation. If your unit has been correctly installed following the
guidelines in this manual, but is not operating optimally, please
refer to the troubleshooting guide below.
PROBLEM: No display or audio.
• Check fuse in power cable, replace if necessary.
• Check fuse in fuse box, replace if necessary.
• Make sure power cable is properly grounded.
PROBLEM: Display shows R1error.
• Warning communicates “loss of link” between control
panel and front antenna (RADAR 1).
• Check antenna connection at back of control panel.
• Contact factory, if you suspect antenna is defective.
PROBLEM: Display shows R2 error.
• Engage SWRA-3300. See page 11.
• Warning communicates “loss of link” between control
panel and rear antenna (RADAR 2); occurs only if rear
antenna has been installed.
• Check antenna connection at back of control panel.
• Contact factory is you suspect rear antenna is defective.
If difficulties occur which cannot be solved by information in
this Troubleshooting Guide, please call Whistler Consumer
Relations at 1-800-531-0004 before returning your unit for service,
Please allow 3-5 days for email response.
12 13
TROUBLESHOOTING GUIDE
Memory For Feature Selected
Your preference for feature settings is maintained even
when the unit is unplugged. If power to the Whistler is
removed, the user selectable features are retained in
memory.
3300 Superwideband remote 10/4/00 9:38 AM Page 15

14 15
WARRANTY WARRANTY
Consumer Warranty
This receiver has the same warranty as the main unit. The
warranty is to the original purchaser only against all defects in
materials and workmanship (this limited warranty is void if
the unit is abused, modified, installed improperly, if the
housing and/or serial number have been removed). There
are no express warranties covering this product other than
those set forth in this warranty. All express or implied warranties
for this product are limited. Whistler is not liable for damages
of any type arising from the use, misuse, or operation of this
product.
NOTE: This warranty does not include installation or reinstallation
charges.
Service Under Warranty
During the warranty period, defective units will be repaired or
replaced (with the same or a comparable model), at
Whistler’s option, without charge to the purchaser when
returned prepaid, with dated proof of purchase to the address
below. Units returned without dated proof of purchase will be
handled as described in section “Service Out Of Warranty.”
Due to the specialized equipment necessary for testing a
radar/laser receiver, there are no authorized service stations for
Whistler brand detectors other than the factory.
When returning a unit for service under warranty, please follow
these instructions:
1. Ship the unit in the original carton or in a suitable sturdy
equivalent, fully insured, with return receipt requested, and
shipping charges prepaid to:
Whistler Repair Dept.
1201 North Dixieland Rd.
Rogers AR 72756
IMPORTANT: Whistler will not assume responsibility for loss or
damage incurred in shipping. Therefore, please ship your unit
insured with return receipt requested.
2. Include with your unit the following information, clearly printed:
• Your name and street address (for shipping via UPS), and a
daytime telephone number. (No P.O. Box please.)
• A detailed description of the problem (e.g., “Unit per
forms self-test but does not respond to radar”).
• A copy of your dated proof of purchase or bill of sale.
3. Be certain your unit is returned with its serial number. For
reference, please write your unit’s serial number in the following
space: s/n __________________.
Units without serial numbers are not covered under warranty.
IMPORTANT: To validate that your unit is within the warranty
period, make sure you keep a copy of your dated proof of
purchase.
3300 Superwideband remote 10/4/00 9:38 AM Page 17

16 17
WARRANTY SPECIFICATIONS
Service Out Of Warranty
Units will be repaired at “out of warranty” service rates when:
•The unit no longer belongs to the original owner.
•Dated proof of purchase is not supplied.
•The unit has been returned without its serial number.
•The unit has been abused, modified, installed improperly,
or had its housing removed.
The minimum out of warranty service fee for your Whistler
detector is $55.00 (U.S.). If you require out of warranty service,
please return your unit as outlined in the section “Service
Under Warranty” along with a certified check or money order
for $55.00. Payment may also be made by MasterCard or VISA;
personal checks are not accepted. In the event repairs cannot
be covered by the minimum $55.00 service fee, you will be
contacted by a Whistler technical service specialist who will
outline options available to you. If you elect not to have your
unit repaired/replaced, it will be returned to you along with
your certified check or money order.
IMPORTANT: When returning your unit for service, be certain
to include a daytime telephone number.
Consumer Relations
If you have questions concerning the operation of your Whistler
detector, or require service during or after the warranty period,
please call Consumer Relations at 1-800-531-0004.
Representatives are available to answer your questions Monday
- Friday from 8:00 a.m. to 5:00 p.m. (CST), or contact us via
email: info@whistlergroup.com.
• Dimensions:
Antenna: 1.4"H x 3.2"W x 4.2"L
• Weight:
Antenna: 7.5 oz.
• Radar Frequencies:
10.500 - 10.550 GHz (X Band)
24.050 - 24.250 GHz (K Band )
33.400 - 36.000 GHz (Ka Superwideband)
• Operating Temperature Range:
-20˚C to +80˚C (-4˚F to +176˚F)
• Power Requirements:
Operational 12 to 15 volts DC, 200mA nominal
One or more U.S. patents apply:
#4,315,261; #5,146,227; #5,379,456; #5,666,120 and #5,990,821.
Specifications are subject to change without notice.
3300 Superwideband remote 10/4/00 9:38 AM Page 19
This manual suits for next models
1
Table of contents
Popular Antenna manuals by other brands

Opticum Red
Opticum Red OPTIMA HD 750 manual

Cisco
Cisco Aironet AIR-ANT5114P2M-N System requirements

CUSHCRAFT
CUSHCRAFT MA5V Assembly and installation instructions

Steren
Steren COM-835 user manual

KVH Industries
KVH Industries TracPhone V11IP quick start guide

Andrew
Andrew 9.3-Meter ESA Installating and operation manual