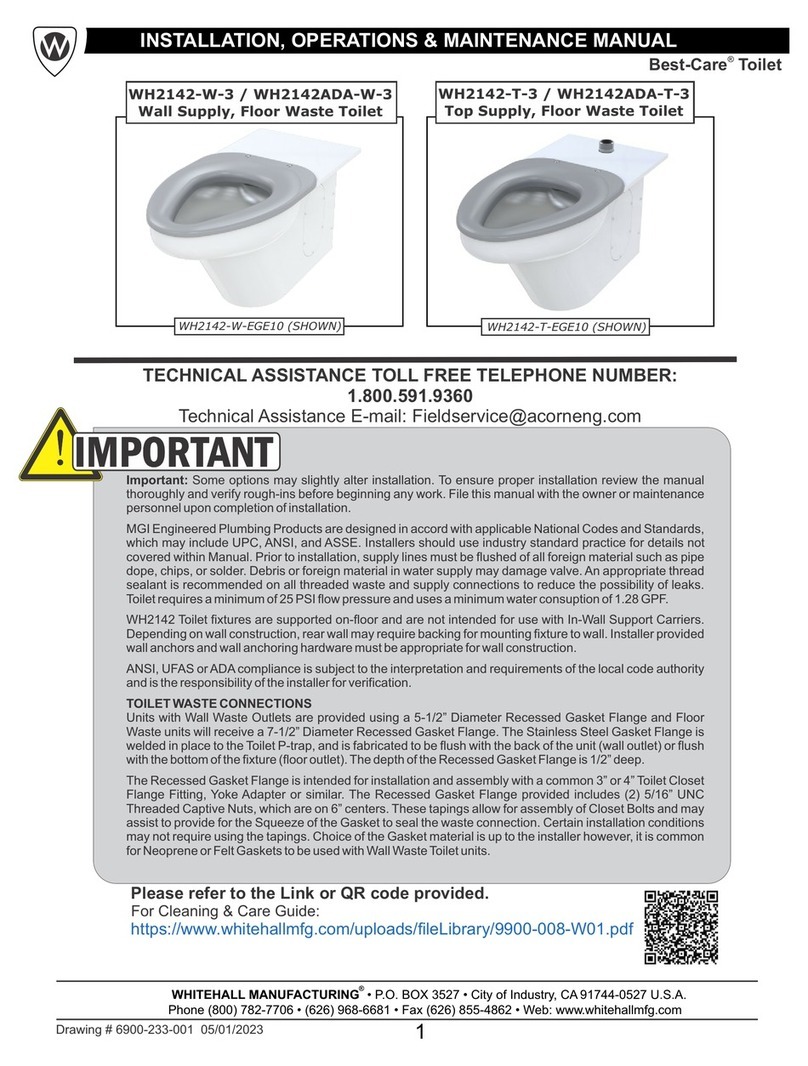
Whitehall WH2145 Series User manual

Page 1 of 8
®
Cover Page . . . . . . . . . . . . . . . . . . . . . . . . . . . . . . . . . . . . . . . . . . . . . . . . . . 1
Dimensional Data . . . . . . . . . . . . . . . . . . . . . . . . . . . . . . . . . . . . . . . . . . . . . . 2
Warranty. . . . . . . . . . . . . . . . . . . . . . . . . . . . . . . . . . . . . . . . . . . . . . . . . . . . . 8
TABLE OF CONTENTS
Installation . . . . . . . . . . . . . . . . . . . . . . . . . . . . . . . . . . . . . . . . . . . . . . . . . . 4-6
Rough-Ins. . . . . . . . . . . . . . . . . . . . . . . . . . . . . . . . . . . . . . . . . . . . . . . . . . . . 3
Troubleshooting . . . . . . . . . . . . . . . . . . . . . . . . . . . . . . . . . . . . . . . . . . . . . . . 7
REQUIRED ITEMS FOR INSTALLATION - NOT SUPPLIED
Ligature Resistant
Cistern Tank Toilet
WH2145 Series
?Closet Ring Gasket
?Toilet Ballcock Water Supply Line
?Closet Flange Hardware
?1/2” x 13 UNC (4 Count) Closet Fixture Wall
Anchors (with Appropriate Tools)
?Ø7/16" X 5/8" (2 Count) Tank Back Panel Wall
Anchors and Anchoring Hardware
(with Appropriate Tools)
6900-210-001 Date: 08/01/18
WHITEHALL MANUFACTURING • P.O. BOX 3527 • City of Industry, CA 91744-0527 U.S.A.
Phone (800) 782-7706 • (626) 968-6681 • Fax (626) 855-4862 • Web: www.whitehallmfg.com

Page 2 of 8
Important: Some options may slightly alter installation. To ensure proper installation
review the manual thoroughly and verify rough-ins before beginning any work. File this
manual with the owner or maintenance personnel upon completion of installation.
Industry standard wall backing, for wall hung fixtures, is required. Installer provided wall
anchors and wall anchoring hardware must be appropriate for wall construction, and
have a minimum pull-out rating of 1000 lbs. (453.6 kg).
Instructions for Operation and Care of Toilet WH2145
DIMENSIONAL DRAWING
37
8" (98)
4
(102)"
171
4"
(440)
77
8"
(200)
153
8"
(391)
81
8"
(206)
303
4"
(781)
171
8"
(435)
143
4"
(375)
321
4"
(819)
6900-210-001 Date: 08/01/18
WHITEHALL MANUFACTURING • P.O. BOX 3527 • City of Industry, CA 91744-0527 U.S.A.
Phone (800) 782-7706 • (626) 968-6681 • Fax (626) 855-4862 • Web: www.whitehallmfg.com
Model WH2145-12 shown for
reference only. Overall Dimensions
may vary upon customer specified
fixture.

Page 3 of 8
Instructions for Operation and Care of Toilet WH2145
WH2145 TOILET
ROUGH-IN DRAWING:
C
L
15"
(381)
3" TYP
(279)
71
2"
(190)
12"
(305)
51
2"
(140)
A
B
D
ROUGH-IN FOR 7-1/2" CLOSET FLANGE WASTE
OUTLET BY OTHERS
WALL ANCHORS AND MOUNTING HARDWARE BY
OTHERS FOR CISTERN Ø7/16" x 5/8" LONG SLOT
WALL ANCHORS BY OTHERS FOR TOILET Ø5/8"
x 1-1/2" LONG SLOT PUNCHING, 4 PLACES
SUPPLY AND ANGLE STOP FOR CLOSET 7/8"
BALLCOCK SUPPLY INLET HOSE BY OTHERS
A
111
2"
(274)
7"
(178)
B
D
C
123
4"
(274)
291
2"
(794)
C
A
PUNCHING, 2 PLACES
WHITEHALL MANUFACTURING • P.O. BOX 3527 • City of Industry, CA 91744-0527 U.S.A.
Phone (800) 782-7706 • (626) 968-6681 • Fax (626) 855-4862 • Web: www.whitehallmfg.com
6900-210-001 Date: 08/01/18
Model WH2145-12 shown for reference
only. Waste Location will Vary upon
customer specified fixture.

Page 4 of 8
WH2145 TOILET
Instructions for Operation and Care of Toilet WH2145
INSTALLATION:
Carefully remove all fixture components from
packaging, preventing scratching or damage.
Inspect fixture and all parts from damages and all
parts that are bolted on.
1
1
2
NTS
3
4
5
6
7
NTS
8
1 Cistern Tank
2 Water Closet (Toilet)
3 Red Rubber Gasket
4 Black Rubber Gasket
5 1/4"-20 UNC
6 T-Bolt Assembly
7 1/4"-20 X 1" Hex Head Cap Screw
8 1/2"-13 UNC Toilet Mounting Hardware
Clean any construction debris out of Floor Flange
(provided by others) and install the T-Bolts into
slots of the Flange. Center Closet Gasket Ring
(provided by others) on Floor Flange.
2
Remove Fixture Access Panels. Align fixture
outlet over Closet Flange and against wall, setting
fixture on the floor firmly in place onto Closet
Flange and T-Bolts. Secure Closet Flange.
3
1 T-Bolt (Qty. 2)
2 Floor Flange (provided by others)
3 Closet Gasket Ring (provided by others)
4 Finished Floor
1 Access Panel (Qty. 2)
2 #10-32 Hex C/R Button Head Screw (Qty. 12)
4
3
2
1
2
1
3
3 Floor Flange
4 7-1/2" Gasket Flange, Waste
5 T-Bolt (Qty. 2)
1
2
1
2
3
4
45
WHITEHALL MANUFACTURING • P.O. BOX 3527 • City of Industry, CA 91744-0527 U.S.A.
Phone (800) 782-7706 • (626) 968-6681 • Fax (626) 855-4862 • Web: www.whitehallmfg.com
6900-210-001 Date: 08/01/18

Page 5 of 8
Instructions for Operation and Care of Toilet WH2145
WH2145 TOILET
INSTALLATION:
Anchor fixture through Access openings. With
Fixture secured to Closet Floor Flange, Anchor
fixture to wall. Wall Anchors are by others.
41 1/2"-13 UNC Toilet Mounting Hardware (Qty. 4)
2 Water Closet (Toilet) Mounting Channel
3 Water Closet (Toilet)
4 Cistern Tank
4
32
2
1
Grab Red Rubber Gasket and install onto Cistern
Tank by stretching Red Rubber Gasket over
Cistern Tank Bottom Nut.
5
2
1
With Red Gasket installed, position larger Black
Gasket onto Toilet as shown and secure Tank
Assembly to Toilet fixture using 1/4"-20 Hex Head
Cap Screws.
6
1
4
1
3
23
5
1 Cistern Tank
2 Red Rubber Gasket
1 Cistern Tank
2 Black Rubber Gasket
3 Water Closet (Toilet)
4 1/4"-20 X 1" Hex Head Cap Screw (Qty. 4)
5 Angle Top Cover
NOTE: Angle Stop Cover may be required to be
removed to fasten left hand side Cap Screws.
2
1
WHITEHALL MANUFACTURING • P.O. BOX 3527 • City of Industry, CA 91744-0527 U.S.A.
Phone (800) 782-7706 • (626) 968-6681 • Fax (626) 855-4862 • Web: www.whitehallmfg.com
6900-210-001 Date: 08/01/18

Page 6 of 8
Instructions for Operation and Care of Toilet WH2145
INSTALLATION:
With Fixture secured, remove Cistern Tank Top
Access Cover. Anchor Cistern Tank to wall
utilizing Ø7/16" X 5/8" slots. Anchoring and
Anchoring Hardware provided by others.
7
If Supply Cover was not removed in previous step,
remove Supply Cover.
8
Flush Supply Line thoroughly before making up
supply connections from Angle Stop and 7/8"
Ballcock Inlet Hose to inlet connection on Tank.
Re-install all Panels and Covers.
9
1 Cistern Tank
2 Cistern Tank Top Access Cover
3 Anchoring and Anchoring Hardware (Qty. 2)
4 #10-32 Hex C/R Button Head Screw (Qty. 8)
1 Cistern Tank
2 Water Closet (Toilet)
1 Angle Stop (provided by others)
2 7/8" Ballcock Inlet Hose (provided by others)
3 Water Closet (Toilet)
4 Cistern Tank
3 Supply Cover
4 #10-32 Hex C/R Button Head Screw (Qty. 4)
4
3
1
2
1
2
34
2
1
4
3
4
3
WH2145 TOILET
Test fixture and check for any leaks, before
re-installing all Panels and Covers.
WHITEHALL MANUFACTURING • P.O. BOX 3527 • City of Industry, CA 91744-0527 U.S.A.
Phone (800) 782-7706 • (626) 968-6681 • Fax (626) 855-4862 • Web: www.whitehallmfg.com
6900-210-001 Date: 08/01/18

Page 7 of 8
Instructions for Operation and Care of Toilet WH2145
TROUBLESHOOTING: WH2145 TOILET
7. WATER BETWEEN TANK AND BOWL DURING FLUSH:
c. Readjust Flush Valve chain length as needed.
b. Replace Flapper.
6. WATER CONTINUES FLOWING AFTER FLUSH CYCLE:
a. Verify Supply Tube Nut is tightened.
a. Refer to Fluidmaster Troubleshoot or contact Fluidmaster.
b. Verify Supply Tube is not damaged or cracked. If damaged, replace Supply Tube.
b. Verify Black and Red Rubber Gaskets are installed correctly
c. Replace Black and Red Rubber Gasket
8. WATER IS DRIPPING FROM SUPPLY TUBE:
a. Refer to Fluidmaster Troubleshooting.
c. Remove Tank Cover and place level across the Tank. Locate the Hex Cap Head Screws located
underneath Fixture. Adjust the Hex Cap Head Screws a quarter turn at a time one each side. With each
adjustment, verify tank is secure.
a. Refer to Fluidmaster Troubleshooting.
d. Adjust water level. Refer to Fluidmaster installation for Water Level information.
b. Decrease the water level.
g. Verify rim holes are completely clean.
h. New Black and Red Rubber Gasket may be required.
a. Refer to Fluidmaster Troubleshooting.
4. FILL VALVE TURNS ON AND OFF:
5. WATER LEVEL IN BOWL KEEPS DROPPING:
3. FIXTURE IS NOT FLUSHING PROPERLY:
a Refer to Fluidmaster Troubleshooting or contact Fluidmaster.
b. Fully open Supply Valve.
2. FIXTURE DOUBLE FLUSHES:
f. Adjust Flush Valve Floater.
e. Verify chain has only 1/4” of slack.
a. With a container, add water into the bowl until proper height is reached. Wait a few minutes.
b. Increase the water level.
● If Water Doesn’t drop, fixture is okay. Our recommendation would be to mark water level and keep track
for future reference.
a. Refer to Fluidmaster Troubleshooting.
c. Verify refill tube is connected with the Water Control and inserted into the overflow tube without any kinks
or damge.
● If Water drops, Bowl might have internal damage. Toilet may need to be replaced.
1. FIXTURE DOES NOT FLUSH COMPLETELY:
WHITEHALL MANUFACTURING • P.O. BOX 3527 • City of Industry, CA 91744-0527 U.S.A.
Phone (800) 782-7706 • (626) 968-6681 • Fax (626) 855-4862 • Web: www.whitehallmfg.com
6900-210-001 Date: 08/01/18

Page 8 of 8
Mailing Address:
P.O. Box 3527 • City of Industry, CA 91744-0527 U.S.A.
Physical Address:
15125 Proctor Avenue • City of Industry, CA 91746 U.S.A.
Phone 800-782-7706 • 626-968-6681
Fax 626-855-4862
Web: www.whitehallmfg.com
E-mail: [email protected]
®
MANUFACTURER'S WARRANTY
Member of
Whitehall Manufacturing Company warrants that its products are free from defects in material or workmanship under
normal use and service for a period of one year from date of shipment. Whitehall's liability under this warranty shall be
discharged solely by replacement or repair of defective material, provided Whitehall is notified in writing within one
year from date of shipment, F.O.B. Industry, California.
NOTICE TO KEEP ORIGINAL PACKAGING- Regarding warranty claims: customer must retain original packaging
for one year upon receipt of product. If packaging is discarded, it is the customer's responsibility to provide adequate
packaging. Any shipping claims that are a direct result of customer-provided packaging materials will be handled by
the shipper.
Go to to fill out eWarranty Registration, keyword search: WARRANTY.www.whitehallmfg.com
This warranty does not cover installation or labor charges, and does not apply to materials which have been
damaged by other causes such as mishandling or improper care or abnormal use. The repair or replacement of
the defective materials shall constitute the sole remedy of the Buyer and the sole remedy of Whitehall under this
warranty. Whitehall shall not be liable under any circumstances for incidental, consequential or direct charges caused
by defects in the materials, or any delay in the repair or replacement thereof. This warranty is in lieu of all other
warranties expressed or implied. Product maintenance instructions are issued with each fixture, and disregard or non-
compliance with these instructions will constitute an abnormal use condition and void the warranty. If you have any
questions or require technical assistance, please call 800-743-8219.
Instructions for Operation and Care of Toilet WH2145
WHITEHALL MANUFACTURING • P.O. BOX 3527 • City of Industry, CA 91744-0527 U.S.A.
Phone (800) 782-7706 • (626) 968-6681 • Fax (626) 855-4862 • Web: www.whitehallmfg.com
6900-210-001 Date: 08/01/18
Table of contents
Other Whitehall Toilet manuals
Popular Toilet manuals by other brands

Milomex
Milomex Z29552A Assembly and Safety Advice

INCINOLET
INCINOLET WB Installation & maintenance manual

Grohe
Grohe Sensia ARENA 39380SH0 user manual

Toto
Toto B542E installation guide

Thetford
Thetford TECMA FLEXI LINE Operation / installation / service manual

noken
noken ACRO COMPACT 100228733 N380000043 quick start guide