manuals.online logo
Brands
  1. Home
  2. •
  3. Brands
  4. •
  5. Wiedamark
  6. •
  7. Dj Equipment
  8. •
  9. Wiedamark LEH Series User manual

Wiedamark LEH Series User manual

This manual suits for next models

1

Other Wiedamark Dj Equipment manuals

Wiedamark 656 User manual

Wiedamark

Wiedamark 656 User manual

Wiedamark ColorSpot HP 36x1W RGB LEDs User manual

Wiedamark

Wiedamark ColorSpot HP 36x1W RGB LEDs User manual

Wiedamark ColorFlat 9 TriColor LED Par User manual

Wiedamark

Wiedamark ColorFlat 9 TriColor LED Par User manual

Wiedamark 7x15W RGBWA+UV User manual

Wiedamark

Wiedamark 7x15W RGBWA+UV User manual

Wiedamark ColorBlock RGB LED Wall Washer 36 1W ETL... User manual

Wiedamark

Wiedamark ColorBlock RGB LED Wall Washer 36 1W ETL... User manual

Wiedamark IRDE-14001B4-00D-13 User manual

Wiedamark

Wiedamark IRDE-14001B4-00D-13 User manual

Popular Dj Equipment manuals by other brands

MAGMATIC Prisma Wash 25 user manual

MAGMATIC

MAGMATIC Prisma Wash 25 user manual

HERA PROCOLOR 60 RGBW SERIES User manual & installation guide

HERA

HERA PROCOLOR 60 RGBW SERIES User manual & installation guide

EuroLite LED TSL-600 SCAN COB user manual

EuroLite

EuroLite LED TSL-600 SCAN COB user manual

Ledj Slimline 12HEX12 user manual

Ledj

Ledj Slimline 12HEX12 user manual

Laserworld Garden GS-50RG Xmas manual

Laserworld

Laserworld Garden GS-50RG Xmas manual

Chauvet OVATION E-930VW Quick reference guide

Chauvet

Chauvet OVATION E-930VW Quick reference guide

Snow Masters Zig Oscillator user manual

Snow Masters

Snow Masters Zig Oscillator user manual

EuroLite 50530554 user manual

EuroLite

EuroLite 50530554 user manual

Beamz BUV243 user manual

Beamz

Beamz BUV243 user manual

Eagletone 6 Eyes Flower user manual

Eagletone

Eagletone 6 Eyes Flower user manual

EuroLite FLD-1508 user manual

EuroLite

EuroLite FLD-1508 user manual

Technical Pro LG8xSEA user manual

Technical Pro

Technical Pro LG8xSEA user manual

JB Systems Lounge Laser DMX Operation manual

JB Systems

JB Systems Lounge Laser DMX Operation manual

Elation FUZE WASH Z350 user manual

Elation

Elation FUZE WASH Z350 user manual

Maverick MK3 WASH Quick reference guide

Maverick

Maverick MK3 WASH Quick reference guide

Infinity TF-260C7 Fresnel manual

Infinity

Infinity TF-260C7 Fresnel manual

Chauvet EVE E-50Z Quick reference guide

Chauvet

Chauvet EVE E-50Z Quick reference guide

Eliminator Lighting E 138 manual

Eliminator Lighting

Eliminator Lighting E 138 manual

manuals.online logo
manuals.online logoBrands
  • About & Mission
  • Contact us
  • Privacy Policy
  • Terms and Conditions

Copyright 2025 Manuals.Online. All Rights Reserved.

LEH SERIES LIGHT ENGINE
INSTRUCTION MENU
Welcome to use LEH series professional DMX intelligent light engine.Please read carefully the instruction menu before
using light engine.If you have any questions concerning the operation or maintains, please contact your wholesaler.
Collect all fibers in one bundle, enla
A. Safety Instruction
B. Technical Data
(1)
(2)
*
*
*
*
*
*
*
1. Make sure the Light Engine and Power Source have the same voltage;
2. Keep out of rain or moist area to avoid shock hazards;
3. Avoid to use at high temperature( 40 );
4.There is overtemperature protection inside the light engine,when the ambient temperature is too high or insufficient
ventilation LED will reduce brightness itself to improve life of itself.
Model: LEH-3121DMX
Voltage: 110V/220V AC
Power: 50W
Color: RGB
Light Source: 1-3 12W LED
Life of LED: 50000H
Standard aperture: 28mm/ 24mm/ 20mm(Optional: 30mm)
Size: 254 180 84.5mm
Gross Weight: 3.4Kg
Cut the fiber to the specified length. The cutting face should be vertical to the fiber and keep clean on the cutting side.
Peel off 50-60mm of the PVC protection cover of the fiber optic (if no PVC protection cover, no need to peel off any
fiber optic), be careful not to hurt the fiber optic itself.
Unscrew PG Connector, insert the fiber optic into the Fixing Flange and Fiber Connector, until it closely adherence to
the Fiber Connector then screw tight PG Connector.
Push gently the Fixing Flange and the Fiber into the Fixing- Ring, then screw down the screw.
Cut 100mm PVC cover before connecting the fiber with Light Engine. Please take care not to hurt the fiber optic.
ce all the fiber at the 10cm from fiber end with 130 heat-resistant tape. insert the
fiber optic into the PG connector and Fiber Connector, until it closely adherence to the Fiber Connector,cut the surface
neatly with hot knife .
Push gently the Fixing Flange and the Fiber into the Fixing Ring, screw down the screw.
≤℃
,
ΦΦΦ Φ
℃
3
C. Installation
1. Installation of the fiber optic:
Solid Core fiber optic(See Fig. 1):
Multi-string fiber optic(See Fig. 1):
NOTE: Please make sure that the fiber’s diameter is compatible to the fiber connetor ,it will fuse fiber if the
diameter of fiber connector is too big.Assure the surface is vertical to the fiber, clean, smooth, to avoid
decrease of the brightness or melt of the fiber string.
protection
LEH SERIES LIGHT ENGINE
1
Screw Front Case
Fixing Ring
Fixing Flange
PG Connector
Fiber Connector
Fig. 1
Fiber
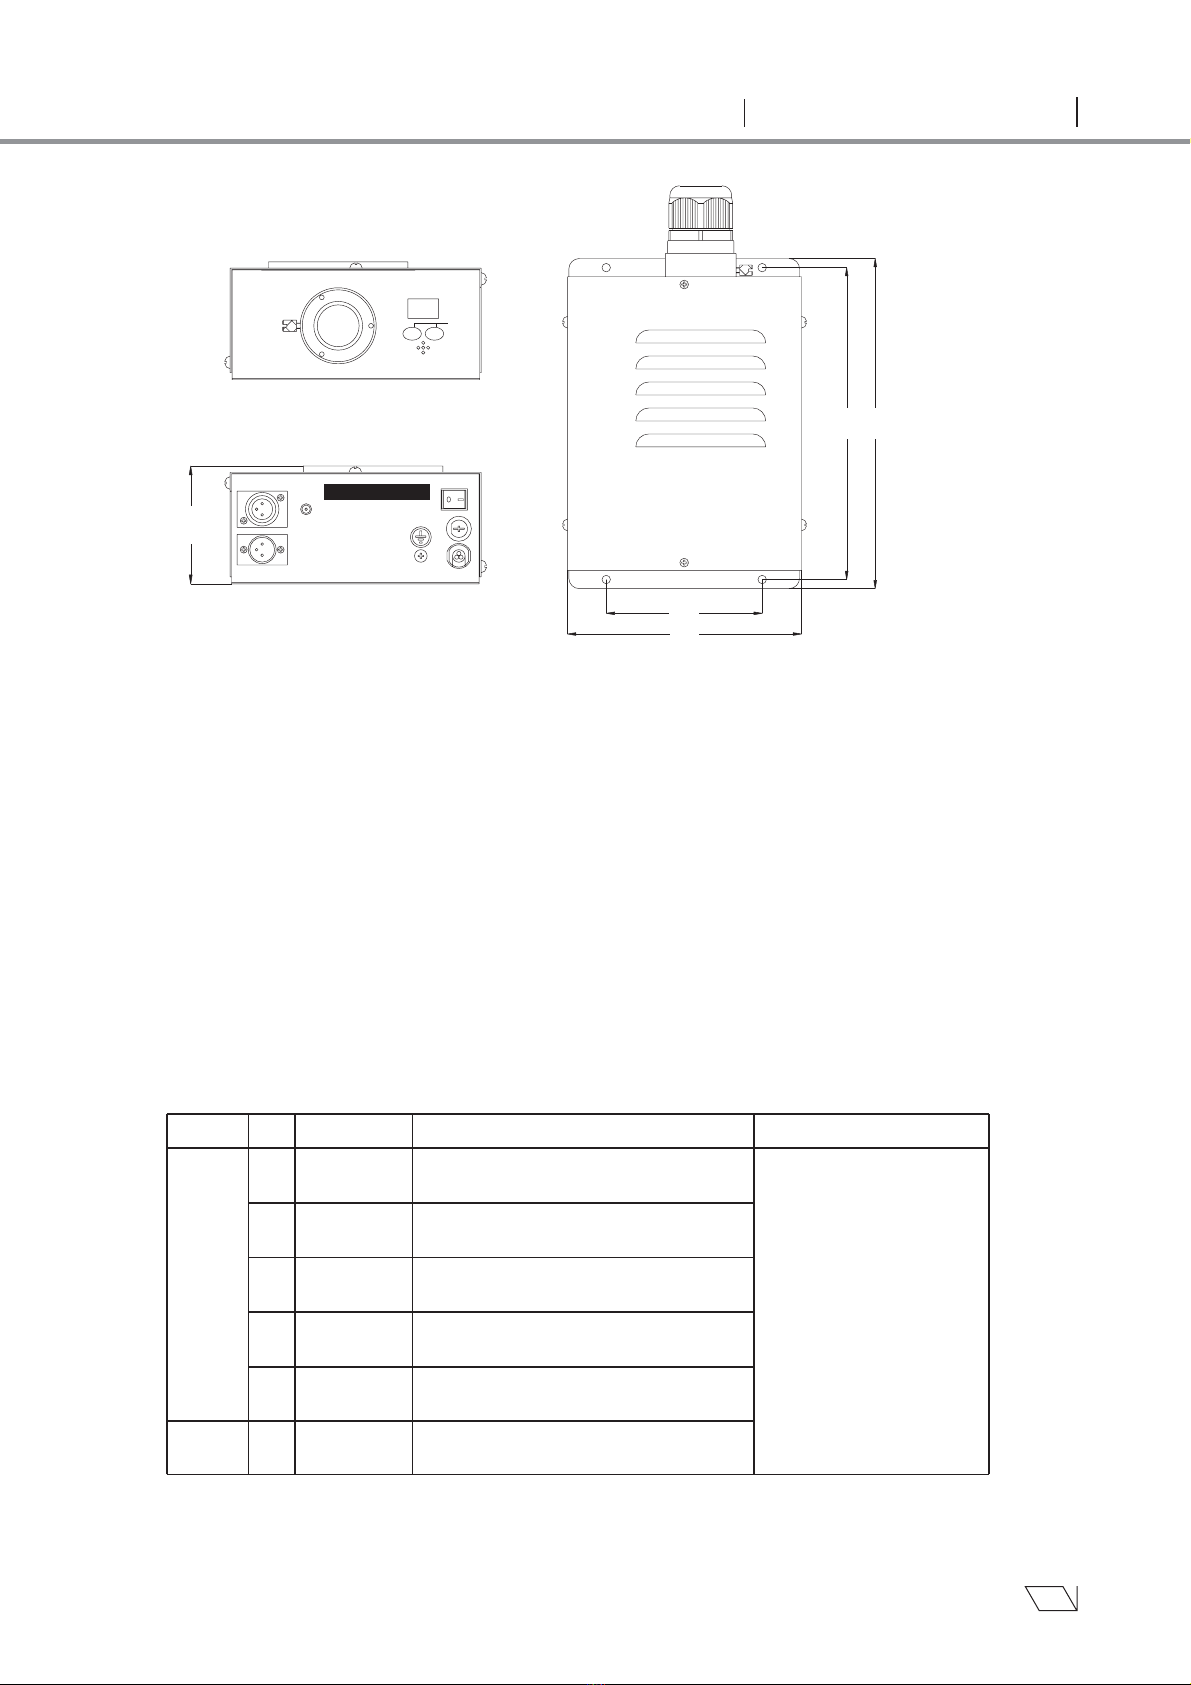
2. Installation dimension of light engine(
Light Engine Setting
2. Master/Slave mode:
DMX 512 signal control Mode: Signal comes out from DMX 512 Controller.
Master/Slave Mode: One Light Engine set as Master , while all the others set as Slave. Signal comes out from the
Master machine to control all other slave machines running synchronously.
DMX 512 signal control mode:
Address Setting:
see Fig.2):
D.
There are three control system for LEH-Series MASTER/SLAVE Light Engine:
Audio Control Mode: Light engines are controlled by sound.
Press button “UP” and “DOWN” at the same time(maybe many times),until the digital display shows “001”-“507”,
then press button “UP or “DOWN to select address.
Total 6 Channels
CH1:Red (256 level) CH2:Green (256 level)
CH3:Blue (256 level) CH4:RGB Dimmer (256 level)
CH5:Strobe/Program Speed (256 level) CH6:Preset Program(Only “P.00”-“P.15” are available,
“P.16”-“P.21” are not available)
The setting of Master/Slave
Notice:
If you need Master/Slaves change color
*
*
*
1.
(1)
(2) DMX Channels:
①
②
Notice When CH6 is not “0”,CH1-CH3 is not available,CH5 is preset program speed;
When CH6 is “0”,CH1-CH5 is available,CH5 is strobe.
:
synchronously, please set all of slaves into”001”;
If you need Master/Slaves chase to change color, please set slaves into “007”,”013” and so on
(add “6” one after another) .
①
②
MASTER
Slave
DMXReceiver
1.
If you haven t pressed the
buttons for long time,the digital
display will be turnoff, and the
buttons will be locked, press
“UP” or “DOWN” to restart
buttons operation (when power
it on, you also need to do like
this),it will display the last
operation menu.
3.If slaves have received the
DMX signal,then the 3rd digital
number of the digital screen
will be flickering.
Press two buttons at the same
time to switch among menus.
2. '
1
22 preset programs (see attached list,when it
display “PS.X”,please use UP/DOWN to get into
this menu)
P.00-P.21
2
PS.1-PS.2 are audio control programs (when it
display “P.XX”,please use UP/DOWN to get into
this menu)
PS.1 PS.2-
3setting of speed,total 8 levels:1/4S,1/2S,1S,2S,
3S,5S,8S,12S
S.00-S.07
4Adjusting of brightness,total 8 levels:d.00,d.10,
means100 brightness)%
d.20,
d.35,d.50,d.70,d.85,d.99.(d.99.
d.00-d.99.
5r.on=remote controllable,
r.oF=not remote controllable
r.on-r.oF
6DMX address, are available“001”-“507”
001-507
No.
STATUS MENU DESCRIPTION OF FUNCTIONS REMARKS
MENU
UP
FUSE
SWITCH
POWER
MIC
LED LIGHT ENGINE
LEH-3121DMX
DMX IN DMX OUT
AERIAL
84.5
120
180
240
254
DOWN
2
Fig.2
LEH SERIES LIGHT ENGINE
FUSE
SWITCH
POWER
DMX IN DMX OUT
AERIAL
FUSE
SWITCH
POWER
DMX IN DMX OUT
AERIAL
FUSE
SWITCH
POWER
DMX IN DMX OUT
AERIAL
FUSE
SWITCH
POWER
DMX IN DMX OUT
AERIAL
FUSE
SWITCH
POWER
DMX IN DMX OUT
AERIAL
FUSE
SWITCH
POWER
DMX IN DMX OUT
AERIAL
3.The connection of DMX Signal Control Mode(See Fig. 3):
4.The connection of Master/Slave Control Mode(See Fig. 4):
5.Signal wire and connector link(See Fig.5):
6.Wireless remote controller using(See Fig.6):
2
:
①
②
Signal wire should be 0.5mm audio wire
Press two buttons at the same time, when it display “r.on”or “r.oF”,please
use “UP”/“DOWN” to set the master into “r.on”(status of remote controllable),
then you can use remote controller.
(1) Select of program: Press“PRO”,then use “00”-“23” to select the suitable
program,or you can use “ ”,“ ” to select.
(2) Adjusting of brightness: Press “DIM”, then press “0”-“7” to select the suitable
brightness,or you can use “ ”,“ ” to adjust.
(3) Adjusting of speed Press”SP”,then press “0”-”7” to adjust the speed,
or you can use “ ”,“ ” to adjust.
Notice: Address code of slaves are not adjustable under remote control status.
When you are selecting program, only are
2
Attached List :
double-digit numbers recognizable (e.g. 00, 01, 02...)
PIN1: GND
PIN2: SIGNAL-
PIN3: SIGNAL+
1
1
2
23
3
DMX512 Controller
Slave 2
Slave 1
Slave 3
Slave 2
Slave 1
Master
RC-03
Wireless Remote Controller
Pro. No. Pro. No. Pro. No.
P.00
P.01
P.02
P.03
P.04
P.05
P.06
P.07
P.08
P.09
P.10
P. 11
P.12
P.13
P.14
P.15
No Light
White
Red
Green
Blue
Purple
Yellow
Sky-B
7 colors skip
6 colors skip
3 colors skip
7 colors fade
6 colors fade
3 colors fade
7 colors skip+7 colors fade
6 colors skip+6 colors fade
Function Function
7 colors skip & chase
6 colors skip & chase
3 colors skip & chase
7 colors fade & chase
6 colors fade & chase
3 colors fade & chase
7 colors skip & audio control
6 colors skip & audio control
P.16
P.17
P.18
P.19
P.20
P.21
PS.1
PS.2
Function
3
1
4
7
DIM
PRO
2
5
8
0
SP
3
6
9
Fig.3
Fig.4
Fig.6
Fig.5
LEH SERIES LIGHT ENGINE