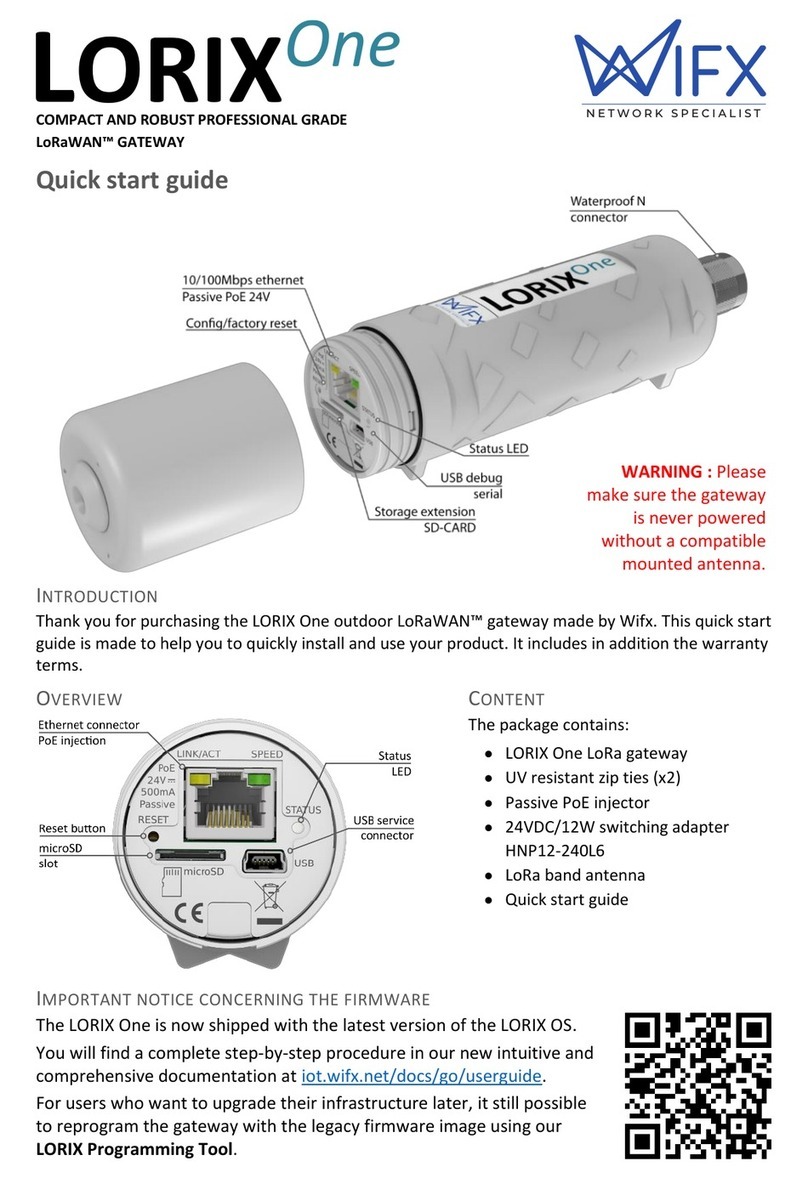
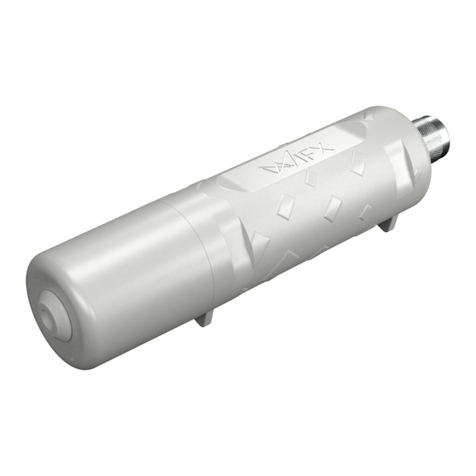
Wifx L1 User manual

Wifx L1 User manual revision 1.0
EN
Versions:
Revision
Note
Date
1.0
Initial public release
09/05/2022
1
OUTDOOR IP65 GATEWAY WITH EMBEDDED LORAWAN® CONCENTRATOR CHIP
User manual

Wifx L1 User manual revision 1.0
EN
2
1SUMMARY
1Summary ................................................................................................................................................................. 2
2Product specifications ............................................................................................................................................. 4
3Regulations.............................................................................................................................................................. 6
3.1 Version 863-870MHz band............................................................................................................................... 6
3.1.1 Europe / CE................................................................................................................................................ 6
3.2 Version 902-915MHz band............................................................................................................................... 7
3.2.1 USA –FCC Statement ................................................................................................................................ 7
3.2.2 Canada –ISED Statement.......................................................................................................................... 8
4General information................................................................................................................................................ 9
4.1 Online documentation ..................................................................................................................................... 9
4.1.1 Update information .................................................................................................................................. 9
4.1.2 Troubleshooting ........................................................................................................................................ 9
4.1.3 Open source licenses................................................................................................................................. 9
4.2 Connectivity/Interface...................................................................................................................................... 9
4.3 Start/Reset........................................................................................................................................................ 9
4.3.1 Procedures .............................................................................................................................................. 10
5Ethernet/PoE......................................................................................................................................................... 11
5.1 Power through passive PoE ............................................................................................................................ 11
6Service access........................................................................................................................................................ 12
6.1 Access methods.............................................................................................................................................. 12
6.1.1 Overview ................................................................................................................................................. 12
6.1.2 Network access ....................................................................................................................................... 12
6.2 USB ................................................................................................................................................................. 13
6.3 Network.......................................................................................................................................................... 14
6.3.1 mDNS ...................................................................................................................................................... 14
6.3.2 SSH .......................................................................................................................................................... 14
6.3.3 Web interface.......................................................................................................................................... 14
7Basic setup ............................................................................................................................................................ 16
7.1 Configure the network ................................................................................................................................... 16
7.1.1 Check the current status ......................................................................................................................... 16
7.1.2 DHCP ....................................................................................................................................................... 17
7.1.3 Static........................................................................................................................................................ 18
7.1.4 Network verification and troubleshooting.............................................................................................. 19
7.2 Security........................................................................................................................................................... 19
7.2.1 Password................................................................................................................................................. 19
7.3 System update................................................................................................................................................ 20
7.4 LoRa/LoRaWAN configuration........................................................................................................................ 22
7.4.1 LoRa (RF) ................................................................................................................................................. 22
7.4.2 LoRaWAN ................................................................................................................................................ 23

Wifx L1 User manual revision 1.0
EN
3
8Electrical................................................................................................................................................................ 24
8.1 Power consumption ....................................................................................................................................... 24
9Mechanical ............................................................................................................................................................ 25
9.1 Wifx L1............................................................................................................................................................ 25
9.2 Antenna 5dBi (8XX & 9XX versions)................................................................................................................ 25
10 Setup guide ........................................................................................................................................................... 26
10.1 General recommendations............................................................................................................................. 26
10.2 Standard mounting using a pole..................................................................................................................... 26
10.3 Mounting on wall (indoor) ............................................................................................................................. 30
10.3.1 Final control ............................................................................................................................................ 32
10.4 Mounting on wall (Outdoor) .......................................................................................................................... 33
10.4.1 Final control ............................................................................................................................................ 33

Wifx L1 User manual revision 1.0
EN
4
2PRODUCT SPECIFICATIONS
Version
Wifx L1
Physical specifications
Dimensions
See 9.1 Wifx L1
Weight
< 240 grams
Connectors
1 RJ45 Ethernet 100Mbps port
Max 100m. length, use shielded cable (S/UTP or U/FTP minimum)
1 USB-C service connector (service access only)
1 N type RF antenna connector
1 microSD SD Memory Card Specification v2.0 slot
Power specifications
Input supply
PoE
10-48VDC max. 800mA (through passive PoE)
Input supply
USB-C
4.5-5.5VDC max. 650mA
Power supply
See 5.1 Power through passive PoE
Consumption
See 8.1 Power consumption
Climatic specifications
Operating
temperature
-30°C to +70°C
-5°C to +40°C for the power supply (S-)HNP12-240L6, indoor use only
Storage
temperature
-20°C to +50°C
Operating
humidity
10% to 90% RH Non-condensing
Storage
humidity
5% to 90% RH Non-condensing
System
CPU
ARM® Cortex®-A5 @ 600MHz
RAM
256MB DDR2 @ 200MHz
Internal
memory
1GB NAND FLASH with 8bits hardware ECC
External
memory
microSD card slot, SDHC compatible, can be used as boot source
TABLE 1: PRODUCT SPECIFICATIONS

Wifx L1 User manual revision 1.0
EN
5
Version
8XX (863-870 MHz)
9XX (902-928 MHz)
RF specification
LoRa modulation
(Chirp spread
spectrum
modulation)
863-873MHz
Following Table 3: Certification
compliance version 863-870Mhz for
Europe
902-928MHz
FSK Modulation
863-873MHz
Following Table 3: Certification
compliance version 863-870Mhz for
Europe
Not applicable
Power of
transmission
Following Table 4: Duty cycles and
maximum EIRP version 863-870MHz
Max conducted power of 27dBm
TX frequency
tolerance
±4ppm including ageing, temperature compensated
RX min sensitivity
(10% PER)
-136dB (SF12BW125)
Antenna impedance
50 Ohm
TABLE 2: PRODUCT RF SPECIFICATIONS

Wifx L1 User manual revision 1.0
EN
6
3REGULATIONS
3.1 VERSION 863-870MHZ BAND
3.1.1 EUROPE /CE
The Wifx L1 8XX (863-870MHz) version complies with requirements RED standard requirements:
Certification compliance
RF
ETSI EN 300 220-1 V3.1.1 (2017-02)
ETSI EN 300 220-2 V3.2.1 (2018-06)
EMC
ETSI EN 301 489-1 V2.2.3 (2019-11)
ETSI EN 301 489-3 V2.1.1 (2019-03)
EN 55032:2015/A11:2020
EN 55035:2017/A11:2020
EN IEC 61000-3-2:2019
EN 61000-3-3: 2013/A1: 2019
Human safety
EN 50665:2017
Electrical safety
EN 62368-1:2014/A11:2017
TABLE 3: CERTIFICATION COMPLIANCE VERSION 863-870MHZ FOR EUROPE
For use in Europe, the Wifx L1 must comply with the ERC 70-3 requirements regarding duty cycle and maximum
EIRP. These parameters are summarized in the following table:
Duty cycle and maximum EIRP
ERC 70-3 Band
Frequency (MHz)
Power
Duty cycle
h1.3
863 –865
14dBm ERP
0.1%
h1.4
865 –868
14dBm ERP
1%
h1.5
868 –868.6
14dBm ERP
1%
h1.6
868.7 –869.2
14dBm ERP
0.1%
h1.7
869.4 –869.65
27dBm ERP
10%
h1.8
869.7 –870
7dBm ERP
No requirement
h1.9
869.7 –870
14dBm ERP
1%
TABLE 4: DUTY CYCLES AND MAXIMUM EIRP VERSION 863-870MHZ FOR EUROPE
If the antenna is changed, the output power must be adjusted to take the antenna’s gain into account and avoid
exceeding the values defined by the ERC 70-3 regulation.
Warning: some countries in Europe may have a specific frequency range, a maximum EIRP and duty cycle regulation.
Please check the local regulations before installing and using the Wifx L1 863-870MHz version.
For countries outside Europe, please check that the frequency range, the maximum allowed EIRP and duty cycle are
authorized.

Wifx L1 User manual revision 1.0
EN
7
3.2 VERSION 902-915MHZ BAND
The Wifx L1 9XX (902-928MHz) version complies with both FCC and IC regulation:
Certification compliance
CFR 47 FCC Part 15
FCC 47 CFR Part 15: 2014 - Part 15- Radio frequency devices
RSS 247
RSS-Gen –Issue 5, Avril 2018 –General requirements and Information for the Certification
of radio Apparatus
RSS-247 Issue 2, February 2017 –Digital Transmission Systems (DTSS), Frequency Hopping
Systems (FHSS) and License-Exempt Local Area Network (LE-LAN) Devices
TABLE 5: CERTIFICATION COMPLIANCE VERSION 902-915MHZ FOR USA/CANADA
The associated FCC and IC identifiers of the Wifx L1 902-928MHz version are:
FCC ID: 2APAZ-WGW-L02-01
IC: 23715-WGWL02
Model: Wifx L1
Some conditions must be met to maintain the FCC and IC compliance of the devices in the USA and Canada. These
conditions are detailed in the following paragraphs. For other countries, please check the specific regulations
regarding maximum allowed EIRP and duty cycle.
3.2.1 USA –FCC STATEMENT
This device complies with Part 15 of the FCC Rules. Operation is subject to the following two conditions: (1) this
device may not cause harmful interference, and (2) this device must accept any interference received, including
interference that may cause undesired operation.
Changes or modifications not expressly approved by the party responsible for compliance could void the user’s
authority to operate the equipment.
NOTE: This equipment has been tested and found to comply with the limits for a Class B digital device, pursuant to
part 15 of the FCC Rules. These limits are designed to provide reasonable protection against harmful interference in
a residential installation. This equipment generates uses and can radiate radio frequency energy and, if not installed
and used in accordance with the instructions, may cause harmful interference to radio communications. However,
there is no guarantee that interference will not occur in a particular installation. If this equipment does cause harmful
interference to radio or television reception, which can be determined by turning the equipment off and on, the
user is encouraged to try to correct the interference by one or more of the following measures:
•Reorient or relocate the receiving antenna.
•Increase the separation between the equipment and receiver.
•Connect the equipment into an outlet on a circuit different from that to which the receiver is connected.
•Consult the dealer or an experienced radio/TV technician for help important announcement.
Important Note:
Radiation Exposure Statement
This equipment complies with FCC radiation exposure limits set forth for an uncontrolled environment. This
equipment should be installed and operated with minimum distance 20cm between the radiator and your body.
This transmitter must not be co-located or operating in conjunction with any other antenna or transmitter.

Wifx L1 User manual revision 1.0
EN
8
3.2.2 CANADA –ISED STATEMENT
This device complies with Industry Canada license‐exempt RSS standard(s). Operation is subject to the following two
conditions:
1. This device may not cause interference, and
2. This device must accept any interference, including interference that may cause undesired operation of the
device. The digital apparatus complies with Canadian CAN ICES‐3 (B)/NMB‐3(B).
Le présent appareil est conforme aux CNR d'Industrie Canada applicables aux appareils radio exempts de licence.
L'exploitation est autorisée aux deux conditions suivantes :
1. l'appareil ne doit pas produire de brouillage, et
2. l'utilisateur de l'appareil doit accepter tout brouillage radio électrique subi, même si le brouillage est
susceptible d'en compromettre le fonctionnement.
This radio transmitter (ISED certification number: 23715-WGWL02) has been approved by Industry Canada to
operate with external antenna with the maximum permissible gain 5dBi indicated with impedance of 50Ω. Antenna
types not included in this list, having greater than the maximum gain indicated for that type, are strictly prohibited
for use with this device.
Le présent émetteur radio (numéro de certification ISED : 23715-WGWL02) a été approuvé par Industrie Canada
pour fonctionner avec une antenne externe avec le gain maximal autorisé de 5dBi indiqué avec une impédance de
50Ω. Les types d’antenne non inclus dans cette liste, ayant un gain supérieur au gain maximum indiqué pour ce type,
sont strictement interdits pour une utilisation avec cet appareil.
Radiation Exposure Statement
This equipment complies with Canada radiation exposure limits set forth for an uncontrolled environment. This
equipment should be installed and operated with minimum distance 20cm between the radiator & your body.
Déclaration d'exposition aux radiations
Cet équipement est conforme avec les limites d'exposition aux radiations du Canada dans un environnement non
contrôlé. Cet équipement doit être installé et utilisé à distance minimum de 20cm entre le radiateur et votre corps.

Wifx L1 User manual revision 1.0
EN
9
4GENERAL INFORMATION
4.1 ONLINE DOCUMENTATION
The online documentation is available at iot.wifx.net/docs and contains information about technical use of the
product including its operating system, the LORIX OS.
Complete documentation
The documentation in this user manual is minimal and more information, especially regarding LORIX OS, is
available online. Please consult it if you can’t find the information in this document.
4.1.1 UPDATE INFORMATION
The modifications made between each new release of LORIX OS are described under the online documentation
changelog page available at https://iot.wifx.net/docs/go/lorix-os/release-notes.
4.1.2 TROUBLESHOOTING
Frequent encountered problems are summarized under the online documentation troubleshooting page, with
suggested solutions available at https://iot.wifx.net/docs/go/lorix-os/troubleshooting.
4.1.3 OPEN SOURCE LICENSES
All the licenses of the open source softwares used or available in the package repository of the LORIX OS are available
at https://download.wifx.net/lorix-os/<LORIX OS release version>/licenses/, for example for the version 1.3.4, the
licenses are available at https://download.wifx.net/lorix-os/1.3.4/licenses/.
4.2 CONNECTIVITY/INTERFACE
4.3 START/RESET
The gateway automatically boots when connected to a power supply through passive PoE on the Ethernet cable or
through USB-C. After start-up, the status LED should blink briefly and turn off. Once the Linux OS starts, the status
LED (blue) will start blinking in “heartbeat” mode.
As soon as the service terminal can be used through the service USB-C connector, the service access LED (white)
turns on.
The reset button can be used to:
▪reset normally the gateway and start in normal operating mode
▪restore the gateway close to its original factory settings
▪enter in programming mode.

Wifx L1 User manual revision 1.0
EN
10
To press the button, use a thin tool such as a paper clip. Upon release, the status LED will briefly flash and then stop
to signal the reset action.
4.3.1 PROCEDURES
Short-press
Press briefly, for less than 1 second. The blue LED will briefly blink upon release
Long-press
Press and hold for several seconds. The blue LED will briefly blink after the delay specified below
Status LED
A short flash of the blue LED
Normal reset procedure
1. Short-press
2. The status LED will flash upon
release and the gateway will
reboot
Factory reset procedure
The factory reset procedure can be used to reset the initial default configuration and thus restore the device to
its original settings. This procedure is useful to solve a network misconfiguration or to recover a forgotten
password.
1. Wait at least 1 second after
another reset pressure.
2. Long-press for at least 10 seconds
3. After the LED starts blinking,
release the reset button.
4. The gateway will boot in factory
reset mode. When Linux has
started, a script will copy the
default files.
> 10sec
Programming mode procedure
This procedure is used to enter in programming mode. It enables the possibility to reprogram the gateway using
the Atmel SAM-BA programming tool through the USB port as summarized on the NAND Programming page of
the wiki.
1. Remove the microSD card from
the device
2. Wait at least 1 second for
another reset pressure
3. Perform 2 short presses with
less than 1 second between
each press
4. Perform a third long press for
more than 3 seconds (but less
than 5 seconds)
< 1sec < 1sec
> 3sec

Wifx L1 User manual revision 1.0
EN
11
5ETHERNET/POE
Connector details:
RJ45 Pin
number
Wire color
Function
1
Green
TX+
2
Green/white
TX-
3
Orange
RX+
4
Blue
VPOE1
Voltage 1 for PoE powering (must be connected with pin 5)
5
Blue/white
VPOE1
Voltage 1 for PoE powering (must be connected with pin 4)
6
Orange/white
RX-
7
Brown
VPOE2
Voltage 2 for PoE powering (must be connected with pin 8)
8
Brown/white
VPOE2
Voltage 2 for PoE powering (must be connected with pin 7)
TABLE 6 ETHERNET/POE CONNECTION
The yellow LED shows the LINK and the ACTIVITY on the Ethernet connection:
OFF No link
ON Link
Blink Link and activity
The green LED shows the actual SPEED of the Ethernet connection:
OFF 10Base-T
ON 100Base-TX
5.1 POWER THROUGH PASSIVE POE
The Wifx L1 gateway is mainly powered through passive PoE using the Ethernet connector. The power is injected
through a PoE injector as shown below:
VPOE1 and VPOE2 (in Table 6) represent both power lines of the gateway. Power must be injected in the power input
connector using the switching power supply provided with the LORIX One only:
Reference HNP12-240L6
Output voltage 24VDC
Output courant 500mA

Wifx L1 User manual revision 1.0
EN
12
6SERVICE ACCESS
The embedded Linux can be accessed and configured either through the service USB Type-C connector or through
SSH or web interface with a working Ethernet connection.
Default user and password
The default user is admin and the password is lorix4u. This is useful and easy to remember during the initial
configuration time but we strongly advise changing the password as soon as possible as explained in 7.2.1
Password.
6.1 ACCESS METHODS
6.1.1 OVERVIEW
This diagram gives an overview of the methods you
can use to access the gateway. If you have only
USB or if network is not configured (or IP is not
known), you have always terminal access through
the USB service connector.
As soon as the network is configured and working,
you can decide either to use terminal through
network (SSH) or the more user-friendly web
interface through your favourite web browser.
If your network doesn’t have a DHCP server, you
need to configure a static IP address using the USB
access.
Gateway access
Network
Web interface
Yes
Terminal
(Serial over USB)
No
Terminal
(SSH) Web GUI
No
Yes
DHCP server Yes
Define a static IP
through USB
No
6.1.2 NETWORK ACCESS
To reach the gateway through the web interface or
through SSH if you prefer using a terminal, you
need a working network with a DHCP server (which
will provide a dynamic IP address) or define a static
IP address for your gateway.
If your gateway has an IP and you know it, you can
simply reach it as explained at 6.3 Network.
If you don’t know the IP but probably have a DHCP
server, you can’t try to reach it using mDNS as
explained at 6.3.1 mDNS or find the IP from the
router’s admin interface.
Finally, you can find the IP or configure it as static
through the USB interface.
Gateway access
Known IP ?
USB access to find
the IP address
Configure the
network
Network access
No
Yes
mDNS ? No
Yes
Has an IP ?
Yes No

Wifx L1 User manual revision 1.0
EN
13
6.2 USB
The gateway has a USB Type-C connector which provides a virtual COM port as soon as the service LED (white) turns
on. Accessing the gateway this way allows you to debug and configure the system. This is also the only way to reach
the service terminal when the network is not accessible or not yet configured.
USB Connection consideration
The USB connection should be used exclusively for service administration/configuration and should not be left
connected during normal use. The IP65 level is also not guaranteed during USB service connector use.
To access the gateway through USB:
1. Power up the gateway with passive PoE through the Ethernet connector or through the USB directly
2. Connect a PC to the gateway with a A C cable
3. The virtual COM port is automatically detected by the PC
a. On Windows a new virtual COM port will appear in the device manager under the name ELMO
GMAS (COMxx)
b. On Linux a new virtual COM port will appear in the folder /dev/ttyACMxx
4. A terminal program like PuTTY or minicom can be used with the following parameters:
baudrate 921600
data bits 8
stop bits 1
parity none
flow control none

Wifx L1 User manual revision 1.0
EN
14
6.3 NETWORK
6.3.1 MDNS
The gateway will announce itself through the mDNS protocol (aka Zeroconf, Bonjour) with its default hostname on
the ‘.local’ domain. The default hostname is composed of the prefix l1-and the last 6 characters of the MAC address
as lowercase: l1-xxxxxx.
This means that you can reach your gateway with the following address: l1-xxxxxx.local.
Example
The gateway MAC address show on the sticker is FC:C2:3D:AA:BB:CC
This hostname is therefore l1-aabbcc
You can reach the gateway at l1-aabbcc.local
To contact the gateway through mDNS, your network must support this feature (with IGMP snooping disabled)
and you must be on the same subnetwork than the gateway to contact.
6.3.2 SSH
The gateway provides an SSH server and be accessed through SSH as soon as configured and connected to a working
network using an SSH client program like PuTTY or ssh on Linux.
To access the gateway with SSH:
1. Power up the gateway
2. A terminal program like PuTTY or ssh can be used with the following parameters:
address IP address or mDNS hostname
port 22
3. Accept the RSA key fingerprint if asked
6.3.3 WEB INTERFACE
The gateway provides a web graphical interface and can be accessed through your favorite web explorer.
As explained previously, you can reach the gateway through its IP address or through mDNS. Also, you can choose
between HTTP (not secure) and HTTPs (SSL secured) by prefixing the address with http:// respectively https://.
Example
For the IP address 192.168.1.148, you can reach the gateway using http://192.168.1.148 or
https://192.168.1.148. This is also correct with mDNS as you could reach the gateway with http://l1-aabbcc.local
or https://l1-aabbcc.local.

Wifx L1 User manual revision 1.0
EN
15
6.3.3.1 SECURITY WARNING
If you access the gateway with SSL support (HTTPs), you will get a security warning. The form can differ from one
web browser to another but the concept stays the same. You receive this error because the SSL certificate of the
gateway is self-signed as we don’t know the address at the certificate creation time.
You can always accept this security warning but it depends on your browser so please consult its documentation to
know how to accept the risk and move forward.
Security consideration
This security warning is important to let you know that the certificate is not trust by a global certification issuer.
If you know the IP address is correct as long as it is in your local network, it still secures your connection and avoid
anyone to see data exchange (like user/password) between your computer and the gateway.
We suggest then to use HTTPs when possible.

Wifx L1 User manual revision 1.0
EN
16
7BASIC SETUP
This chapter is made to help you to easily configure your gateway during the initial configuration process. It follows
chronological configuration when possible so you should read it like a step by step configuration procedure and pass
some steps when they are not required for your setup.
7.1 CONFIGURE THE NETWORK
The USB access is made for service only usage since the gateway is primarily made to be reached through an IP
network. The first step is then to configure the network aspects through the USB service access.
7.1.1 CHECK THE CURRENT STATUS
7.1.1.1 IP ADDRESS
You can see the current IP address (v4 and v6) by using the command ifconfig:
$ ifconfig eth0
eth0 Link encap:Ethernet HWaddr fc:c2:3d:aa:bb:cc
inet addr:192.168.1.10 Bcast:192.168.1.255 Mask:255.255.255.0
inet6 addr: fe80::fec2:3dff:fe2d:56f1/64 Scope:Link
inet6 addr: aaaa:bbbb:1:0:bbbb:3dff:fe2d:56f1/64 Scope:Global
inet6 addr: aaaa:bbbb:1:0:dddd:ca08:6889:a36b/64 Scope:Global
UP BROADCAST RUNNING MULTICAST MTU:1500 Metric:1
RX packets:10219756 errors:3 dropped:30251 overruns:0 frame:3
TX packets:58541 errors:0 dropped:0 overruns:0 carrier:0
collisions:0 txqueuelen:1000
RX bytes:493144710 (470.2 MiB) TX bytes:14043284 (13.3 MiB)
Interrupt:27
The field inet addr returns the IPv4 addresses, inet6 addr fields return the IPv6 addresses.
7.1.1.2 CONNECTIVITY
You can test the current connectivity to see if the gateway has access to local, global or no access at all:
$ nmcli networking connectivity check
full
The possible result values are:
•none
the host is not connected to any network.
•portal
the host is behind a captive portal and cannot reach the full Internet.
•limited
the host is connected to a network, but it has no access to the Internet.
•full
the host is connected to a network and has full access to the Internet.
•unknown
the connectivity status cannot be found out.
7.1.1.3 CONNECTION INFORMATION
The main connection provided by the system is called backhaul in LORIX OS and represents the connection
established on the eth0 device (main and only Ethernet connector of the product).

Wifx L1 User manual revision 1.0
EN
17
You can display its various parameters using the nmcli utils as follow:
$ nmcli connection show backhaul
connection.id: backhaul
connection.uuid: 390e5c2b-7312-415e-80e6-7b94a5c24fc3
connection.stable-id: --
connection.type: 802-3-ethernet
connection.interface-name: eth0
connection.autoconnect: yes
connection.autoconnect-priority: 1
connection.autoconnect-retries: 0 (forever)
connection.multi-connect: 0 (default)
connection.auth-retries: -1
connection.timestamp: 1637144771
connection.read-only: no
connection.permissions: --
connection.zone: --
connection.master: --
connection.slave-type: --
connection.autoconnect-slaves: -1 (default)
connection.secondaries: --
connection.gateway-ping-timeout: 0
connection.metered: unknown
connection.lldp: default
connection.mdns: -1 (default)
connection.llmnr: -1 (default)
connection.wait-device-timeout: -1
802-3-ethernet.port: --
802-3-ethernet.speed: 0
802-3-ethernet.duplex: --
802-3-ethernet.auto-negotiate: no
802-3-ethernet.mac-address: --
802-3-ethernet.cloned-mac-address: --
802-3-ethernet.generate-mac-address-mask:--
802-3-ethernet.mac-address-blacklist: --
802-3-ethernet.mtu: auto
802-3-ethernet.s390-subchannels: --
802-3-ethernet.s390-nettype: --
802-3-ethernet.s390-options: --
802-3-ethernet.wake-on-lan: default
802-3-ethernet.wake-on-lan-password: --
lines 1-38
There is a lot more parameters which are not displayed here and that you can display using the up/down keyboard
keys to move through the parameters list.
Lower case parameters are configuration, upper case ones are related to the resulting situation (connection) and
give you information about the current status.
For example, the value IP4.ADDRESS[1] is interesting and returns in this case 192.168.1.10/24. Note the /24 at the
end which represent the netmask.
7.1.2 DHCP
By default, the gateway has a DHCP client waiting for an IP address and other configuration from a DHCP server. This
is the most standard and simple way to manage it. If you have found an IP address at the previous step, it means
you have a DHCP server which is configured correctly.
You can then either use the IP address or the mDNS hostname if you are in the same sub-network.

Wifx L1 User manual revision 1.0
EN
18
Additional configuration
Additional DHCP configuration is often not required but if you need to modify parameters or add route for
example, you can either use the web interface (Network →Ethernet →Settings) or consult nmcli’s
documentation
1
if you prefer the terminal access (USB or SSH).
7.1.3 STATIC
Following connection display described at 7.1.1.3 Connection information, you can modify connection parameters
like setting the method to manual and the IP address, netmask, etc.
7.1.3.1 DEFINE A STATIC IPV4ADDRESS WITH CUSTOM DNS
The following commands will define a fixe IPv4 address, the gateway and DNS addresses and finally set the method
to manual (use auto to come back to DHCP):
$ nmcli connection modify backhaul ipv4.address 192.168.1.11/24
$ nmcli connection modify backhaul ipv4.gateway 192.168.1.1
$ nmcli connection modify backhaul ipv4.dns 8.8.8.8
$ nmcli connection modify backhaul ipv4.method manual
Apply the new parameters with the following command:
$ nmcli connection up backhaul
The nmcli show connection command returns now the following:
$ nmcli connection show backhaul
[…]
ipv4.method: manual
ipv4.dns: 8.8.8.8
[…]
ipv4.addresses: 192.168.1.11/24
ipv4.gateway: 192.168.1.1
[…]
IP4.ADDRESS[1]: 192.168.1.11/24
IP4.GATEWAY: 192.168.1.1
IP4.ROUTE[1]: dst = 192.168.1.0/24, nh = 0.0.0.0, mt = 100
IP4.ROUTE[2]: dst = 0.0.0.0/0, nh = 192.168.1.1, mt = 100
IP4.DNS[1]: 8.8.8.8
[…]
From the web interface, you can observe the graphical equivalent:
1
nmcli —command-line tool for controlling NetworkManager
https://developer.gnome.org/NetworkManager/stable/nmcli.html

Wifx L1 User manual revision 1.0
EN
19
7.1.4 NETWORK VERIFICATION AND TROUBLESHOOTING
You should have a working network configuration at this time and the following chapter will help you to verify it.
The first things to do is to test again the network connectivity as described in chapter 7.1.1.2 Connectivity, you should
get the result “full”.
If not, your configuration is not right or your network block outgoing connection. In all case, you must be able to
reach your main gateway, this can be verified using the command ping (with our example gateway):
$ ping 192.168.1.1
PING 192.168.1.1 (192.168.1.1) 56(84) bytes of data.
64 bytes from 192.168.1.1: icmp_seq=1 ttl=64 time=6.43 ms
64 bytes from 192.168.1.1: icmp_seq=2 ttl=64 time=6.43 ms
64 bytes from 192.168.1.1: icmp_seq=3 ttl=64 time=6.45 ms
^C
--- 192.168.1.1 ping statistics ---
3 packets transmitted, 3 received, 0% packet loss, time 2004ms
rtt min/avg/max/mdev = 6.425/6.434/6.453/0.013 ms
Or traceroute:
traceroute 192.168.1.1
traceroute to 192.168.1.1 (192.168.1.1), 30 hops max, 38 byte packets
1 192.168.1.1 (192.168.1.1) 6.357 ms 6.380 ms 6.324 ms
If you don’t have access to the gateway, verify your network parameters and be sure you have reloaded your
connection.
If you have access to the gateway, contact your IT support to verify for example outgoing connection are authorized
for your device.
If all is working, you can now reach your gateway using SSH and the web interface which will be used by default for
the next chapters.
7.2 SECURITY
7.2.1 PASSWORD
One of the first step to do once logged in the web interface is to change the admin password. Unless you use your
gateway for development in a controlled network, this is a basic security advice which can prevents obviously easy
attack to be done.

Wifx L1 User manual revision 1.0
EN
20
To change it, click on the user (Top right corner of the web interface) →Settings:
Enter the current password and the new one twice and click on Save button. You then get a notification which
confirms the password has been changed.
7.3 SYSTEM UPDATE
The network and security aspects have been defined. Prior to concrete usage of the product, we advise to update it
to the latest available system version.
For that, go into System →Update and verify if a new version is available:
Other manuals for L1
1
Table of contents
Other Wifx Gateway manuals
Popular Gateway manuals by other brands
Funkwerk
Funkwerk bintec R230a user guide
ZyXEL Communications
ZyXEL Communications P-660HN-51 - V1.10 manual
golmar
golmar Stadio Plus 4502/AL instruction manual
Sierra Wireless
Sierra Wireless Raven EDGE user guide

ZyXEL Communications
ZyXEL Communications VFG6005 Easy setup guide
Moxa Technologies
Moxa Technologies MGate 5121 Series Quick installation guide
