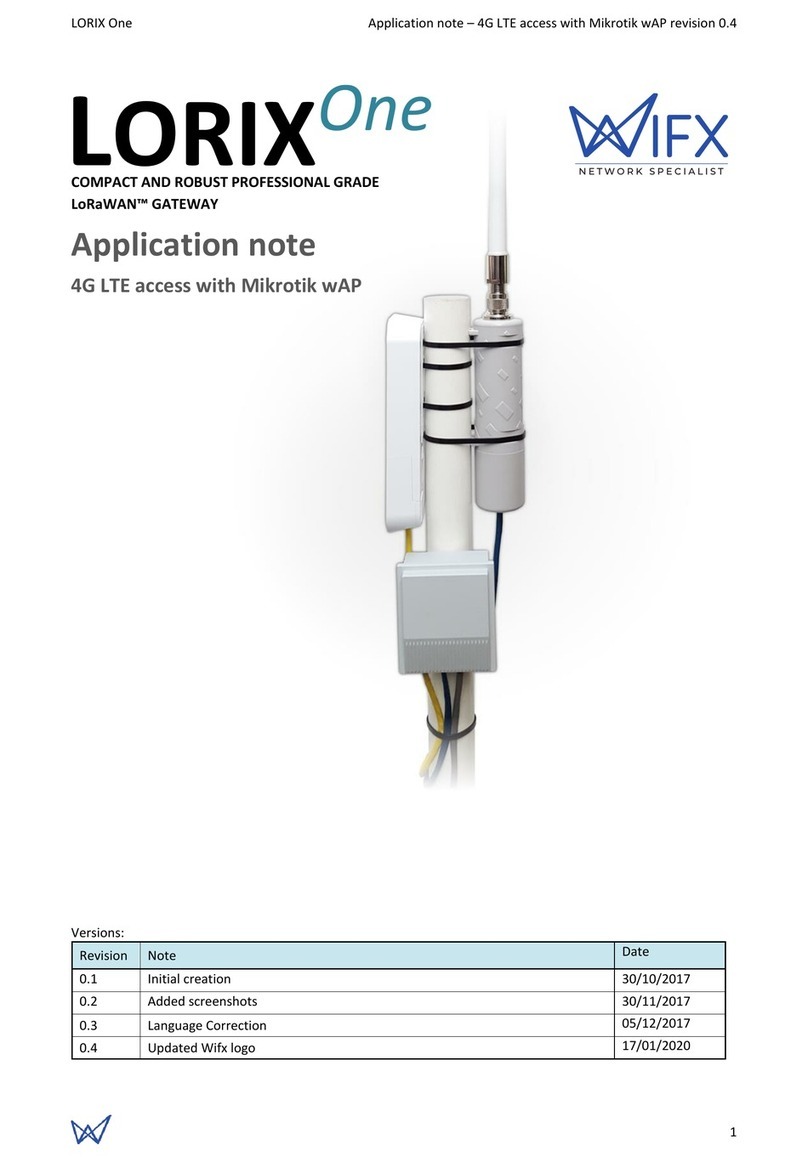
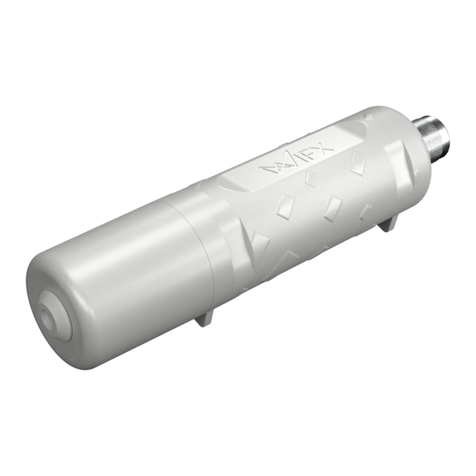
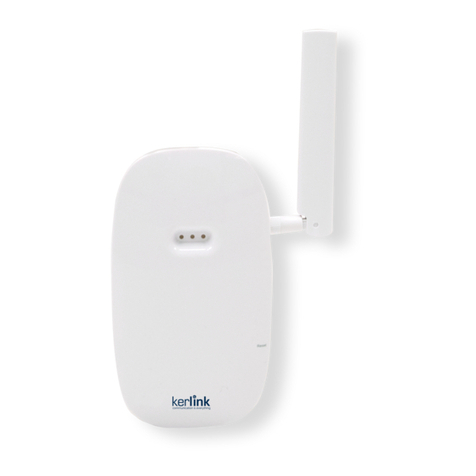
Wifx Lorix One User manual

LORIX One User manual revision 1.1
1
Low cost LoRa IP43/IP65 gateway
User manual
Waterproof N
connector
USBdebug
serial
StatusLED
10/100Mbpsethernet
Passive PoE24V
Config/factoryreset
Storageextension
SD-CARD
Versions:
Revision
Note
Date
0.1
Initial creation
08/14/2016
0.2
Modified
09/08/2016
0.9
Product release pre-revision
04/21/2017
1.0
Added TTN cloud application
Added system update
05/03/2017
1.1
Updated operating temperature and power supply following safety
certification requirements
07/30/2017

LORIX One User manual revision 1.1
2
1SUMMARY
1Summary .............................................................................................................................................................. 2
2Product Specifications.......................................................................................................................................... 4
3General information............................................................................................................................................. 5
3.1 Wiki.............................................................................................................................................................. 5
4Connectivity/Interface ......................................................................................................................................... 5
5Start/Reset ........................................................................................................................................................... 5
5.1 Procedures .................................................................................................................................................. 5
6Ethernet/PoE........................................................................................................................................................ 6
6.1 Power through passive PoE ......................................................................................................................... 7
7Administration terminal access............................................................................................................................ 7
7.1 USB .............................................................................................................................................................. 7
7.2 SSH............................................................................................................................................................... 8
8System access & configuration ............................................................................................................................ 8
8.1 Login ............................................................................................................................................................ 8
8.2 User/Password ............................................................................................................................................ 9
8.2.1 Define or change a password.................................................................................................................. 9
8.3 Root privileges............................................................................................................................................. 9
8.3.1 Sudo command ....................................................................................................................................... 9
8.3.2 Su command ........................................................................................................................................... 9
8.4 Edit a file.................................................................................................................................................... 10
8.4.1 Using Vi ................................................................................................................................................. 10
8.4.2 Using Nano............................................................................................................................................ 10
8.5 Configuring LAN connection parameters .................................................................................................. 11
8.5.1 Static configuration ............................................................................................................................... 11
8.5.2 DHCP configuration............................................................................................................................... 11
8.5.3 Network restarting................................................................................................................................ 11
8.6 System update........................................................................................................................................... 12
8.6.1 Main servers.......................................................................................................................................... 12
8.6.2 Manual update...................................................................................................................................... 12
8.6.3 Package install....................................................................................................................................... 12
8.7 Cloud applications ..................................................................................................................................... 12
8.7.1 LORIOT .................................................................................................................................................. 12
8.7.2 Packet-forwarder .................................................................................................................................. 13
8.7.3 TTN Packet-forwarder ........................................................................................................................... 13
8.7.4 Wifx clouds-manager ............................................................................................................................ 13

LORIX One User manual revision 1.1
3
8.8 LoRa concentrator utilities ........................................................................................................................ 14
8.8.1 SX1301 reset pin control....................................................................................................................... 14
8.8.2 Test binaries.......................................................................................................................................... 14
8.8.3 Util binaries ........................................................................................................................................... 14
9SD Card............................................................................................................................................................... 15
9.1.1 Insertion/removal ................................................................................................................................. 15
10 Electrical............................................................................................................................................................. 15
10.1 Power consumption .................................................................................................................................. 15
11 Mechanical ......................................................................................................................................................... 16
11.1 IP43 (Semi-waterproof) ............................................................................................................................. 16
11.2 IP65 (Waterproof) ..................................................................................................................................... 16
11.3 Fixation ...................................................................................................................................................... 16

LORIX One User manual revision 1.1
4
2PRODUCT SPECIFICATIONS
Version
IP43 (Semi-waterproof)
IP64 (Waterproof)
Physical specifications
Dimensions
See 11.1 IP43 (Semi-waterproof)
See 11.2 IP65 (Waterproof)
Weight
< 230 grams
Connectors
1 RJ45 Ethernet 10/100Mbps port
Max 100m. length, use shielded cable for outdoor use
1 USB micro-B service connector (service access only)
1 N type RF antenna connector
1 microSD SD Memory Card Specification v2.0 slot
Power specifications
Input supply
24VDC 500mA (through passive PoE)
Power supply
See 6.1 Power through passive PoE
Consumption
See 10.1 Power consumption
Climatic specifications
Operating
temperature
-30°C to +55°C
-5°C to +40°C for the power supply HNP12-240L6, indoor use only
Storage
temperature
-20°C to +70°C
Operating
humidity
10% to 90% RH Non-condensing
Storage
humidity
5% to 90% RH Non-condensing
Certifications compliance
Radio & EMC
RED 2014/53/EU (European Radio Equipment Directive)
ETSI EN 300 220-2
EN 61000-6-1:2007
IEC 61000-6-1:2005 (ed2.0)
ETSI EN 301 489-3 V1.6.1:2013
Human safety
EN 62209-2
IEC/EN 62479-1
Electrical safety
EN 60950
System
CPU
ARM® Cortex™-A5 @ 600MHz
RAM
128 MBytes DDR2 @ 200MHz
Internal
memory
256 MBytes NAND FLASH with 4bit hardware ECC
External
memory
microSD card slot, SDHC compatible, can be used as boot source
TABLE 1 PRODUCT SPECIFICATION

LORIX One User manual revision 1.1
5
3GENERAL INFORMATION
3.1 WIKI
The LORIX One wiki is accessible at www.lorixone.io/wiki and contains information about technical use of the
product. It contains for example explanation on how to use the toolchain to create custom binaries or to flash the
internal NAND memory.
4CONNECTIVITY/INTERFACE
Ethernet connector
PoE injection
Reset button
microSD
slot
Status
LED
USB service
connector
5START/RESET
The gateway automatically boots when connected to passive PoE through the Ethernet cable. On boot, the status
LED blinks shortly then goes off to signal the power up status. Once the Linux OS started, the status LED starts
blinking in “heartbeat” mode.
The reset button can be used to reset the gateway, to enter in factory reset mode or to enter in debug
programming mode. For a simple reset, just press the reset button with a thin tool like a paper clip shortly. On
release, the status LED will flash shortly and then goes off to signal the reset action.
5.1 PROCEDURES
Short-press
Pressure during less than 1 second. The blue LED blinks shortly on release.
Long-press
Pressure for long time. The blue LED blinks shortly after the delay.
Status LED
A short flash from the blue LED

LORIX One User manual revision 1.1
6
Normal reset procedure
1. Short-press
2. The status LED flashes on release
and the gateway reboots.
Factory reset procedure
The factory reset procedure is used to put back the default parameters. It’s useful in case of network
misconfiguration for example or if in case of a forgotten password which would be reset.
1. Wait at least one second from
another reset pressure
2. Long-press for at least 10 seconds
3. After the blue LED flashes, release
the reset button
4. The gateway boot in factory reset
mode
> 10sec
Programming mode procedure
This mode is used to enter in programming mode. Useful to reprogram the gateway using the Atmel SAM-BA
programming tool by USB as explained in the wiki.
1. Remove an eventual microSD card
2. Wait at least one second from
another reset pressure
3. 2 shorts press with less than 1
second between each
4. Third long press for more than 3
seconds (and less than 5 seconds)
< 1sec < 1sec
> 3sec
6ETHERNET/POE
Connector details:
RJ45 Pin
number
Color wire
Function
1
Green
TX+
2
Green/white
TX-
3
Orange
RX+
4
Blue
VPOE1
Voltage 1 for PoE powering (must be connected with terminal 5)
5
Blue/white
VPOE1
Voltage 1 for PoE powering (must be connected with terminal 4)
6
Orange/white
RX-
7
Brown
VPOE2
Voltage 2 for PoE powering (must be connected with terminal 8)
8
Brown/white
VPOE2
Voltage 2 for PoE powering (must be connected with terminal 7)
TABLE 2 ETHERNET/POE CONNECTION
The yellow LED shows the LINK and the ACTIVITY on the Ethernet connection:

LORIX One User manual revision 1.1
7
OFF No link
ON Link
Blink Link and activity
The green LED shows the actual SPEED of the Ethernet connection:
OFF 10Base-T
ON 100Base-TX
6.1 POWER THROUGH PASSIVE POE
The LORIX One gateway is exclusively powered through passive PoE using the Ethernet connector. The power is
injected through a PoE injector as shown:
DATA + POWER
DATA
POWER
VPOE1 and VPOE2 (in Table 2) represent the two power lines of the gateway. Power must be injected in the power
input connector using only the switching power supply provided with the LORIX One:
Reference HNP12-240L6
Output voltage 24VDC
Output courant 500mA
7ADMINISTRATION TERMINAL ACCESS
The embedded Linux can be accessed through either the USB connector or through SSH with a working Ethernet
connection.
7.1 USB
The LORIX One gateway has an USB micro-B type connector which provides virtual COM port. Accessing the
gateway this way allows you to debug and configure the software. This is the only way to access the terminal when
the network isn’t accessible (without SSH access).
USB Connection consideration
Please note that the gateway can’t be powered through the USB and needs to be powered with the passive PoE
through the Ethernet cable.
In addition, the USB connection is only intended to be used for administration/configuration and should not be
left connected during normal use. In addition, the IPxx level is not guarantee during USB service connector use.
To access the gateway with USB:
1. Power up the gateway with passive PoE through the Ethernet cable
2. Connect a PC to the gateway with a A mini-B cable
3. The virtual COM port is automatically detected by the PC

LORIX One User manual revision 1.1
8
a. On Windows a new virtual COM port appears in the device manager with the name COMxx
b. On Linux a new virtual COM port appears in /dev/ttyACMxx
4. A terminal program like PuTTY or minicom can be used with the following parameters:
baudrate 115200
data bits 8
stop bits 1
parity none
flow control none
7.2 SSH
The LORIX One gateway provides a SSH server and can be accessed through SSH as soon as connected to a working
network using a SSH client program like PuTTY or ssh on Linux.
You need to know its IP address in order to access the gateway through SSH.
To access the gateway with SSH:
1. Power up the gateway with passive PoE through the Ethernet cable
2. A terminal program like PuTTY or ssh can be used with the following parameters:
address depending on your config
port 22
3. Accept the RSA key fingerprint as asked
8SYSTEM ACCESS &CONFIGURATION
8.1 LOGIN
When the connection is made by USB, the following text appears:
Poky (Yocto Project Reference Distro) 2.1.2 sama5d4-lorix-one /dev/ttyGS0
sama5d4-lorix-one login:

LORIX One User manual revision 1.1
9
With SSH:
Login as:
The login by default is admin and password lorix4u. It strongly recommended to change the password as soon as
possible and as explained in the user/access chapter.
Enter the login admin and validate with ENTER to be prompted for the password:
login as: admin
admin@root's password:
_ ____ _____ _______ __ ____
| | / __ \| __ \|_ _\ \ / / / __ \
| | | | | | |__) | | | \ V / | | | |_ __ ___
| | | | | | _ / | | > < | | | | '_ \ / _ \
| |___| |__| | | \ \ _| |_ / . \ | |__| | | | | __/
|______\____/|_| \_\_____/_/ \_\ \____/|_| |_|\___|
-----------------------------------------------------
LoRa gateway www.lorixone.io
sama5d4-lorix-one:~$
8.2 USER/PASSWORD
Security issue with the default password
By default, all the gateways have the same password and user should change it before any “production” use. As
usual, complex password with lower and uppercase, number and special character is preferable to increase the
security of the access.
8.2.1 DEFINE OR CHANGE A PASSWORD
To define a new password, use the passwd command as follow:
sama5d4-lorix-one:~$ passwd
Changing password for admin
Enter the new password (minimum of 5 characters)
Please use a combination of upper and lower case letters and numbers.
New password: <new password>
Re-enter new password: <new password>
passwd: password changed.
8.3 ROOT PRIVILEGES
Most of the files or executables are limited to root access on the gateway. The main goal is to protect and avoid
wrong manipulation. Depending on the rights of these files, to read, write or execute them unless being root user.
8.3.1 SUDO COMMAND
Given that terminal access isn’t possible with root user (for security reasons), the command sudo can be used to
temporarily execute a command as root user:
sama5d4-lorix-one:~$ sudo reboot
Password:
The command reboot is executed as root user after the password has been entered which is not possible as admin
user. The sudo command is valid once a time and must be applied for each command needed to be executed as
root. Once the password is entered, it’s cached for 15min.
8.3.2 SU COMMAND
It’s sometime useful to manipulate multiple files with root access without using the sudo command for each
action. This can be done by using the su command (stands for substitute user) which permits to change the
session’s owner and can, for example, be used to become the root user.

LORIX One User manual revision 1.1
10
sama5d4-lorix-one:~$ whoami
admin
The actual user is admin.
sama5d4-lorix-one:~$ sudo su
Password:
sama5d4-lorix-one:/home/admin# whoami
root
The command sudo su allows becoming root (su command without argument is a shortcut for su root).
sama5d4-lorix-one:/home/admin# su admin
sama5d4-lorix-one:~$ whoami
admin
As root user, the sudo command isn’t necessary to use the command su.
Security issue or error using su command
The commands sudo and su are powerful and allow user to modify/corrupt important files or (mis)use critical
command. su command is particularly dangerous since user may forget its privileges over the time.
8.4 EDIT A FILE
You can edit a file with two different program, Vi or Nano. They are both very simple but very different in term
of use.
8.4.1 USING VI
Vi is less intuitive but very efficient when you master it. You can edit a text file, existing or not using the following
command:
sama5d4-lorix-one:~$ vi file.txt
Or prefixed with sudo if the file is root access protected.
Once opened, there is two main mode, insert or command in which we begin.
Basically, you pass from the command mode to the insert mode by typing "i" or "a".
"i" for insert will begin insertion where the cursor is.
"a" for append will begin insertion at the next character.
In the insert mode, you can modify the file as any text editor and you can quit the insert mode by simply typing
ESC.
In the command mode, you can type ":" followed by one or many command:
":w" for writing the modifications
":q" to quit the program
":q!" to force quitting if modification has been made but not saved
":wq" to write and quit
There are other options which will not be described here but many tutorial can be found on the web.
8.4.2 USING NANO
Nano is less efficient but far more intuitive and user friendly. This is the one you would choose if you are not
familiar with terminal. You can edit a text file, existing or not using the following command:

LORIX One User manual revision 1.1
11
sama5d4-lorix-one:~$ nano file.txt
Or prefixed with sudo if the file is root access protected.
Once opened, you can navigate in the file with the arrow key, modify, add or delete text like a standard file editor.
Nano use the CTRL key to accept command and is easy to use since all the command are detailed at the bottom.
The "^" character represent the CTRL key. For example, you can quit nano using CTRL+X.
8.5 CONFIGURING LAN CONNECTION PARAMETERS
The network parameters are in the file /etc/network/interfaces. You can use your favourite edit program to
modify it:
sama5d4-lorix-one:~$ sudo vi /etc/network/interfaces
And the content by default:
# /etc/network/interfaces -- configuration file for ifup(8), ifdown(8)
# The loopback interface
auto lo
iface lo inet loopback
# Wired or wireless interfaces
auto eth0
iface eth0 inet static
address 192.168.1.50
netmask 255.255.255.0
gateway 192.168.1.1
dns-nameservers 192.168.1.1
The first group defines the local network loop and should not be modified unless you know what you are doing.
The second group defines the main Ethernet port of the gateway (namely eth0). It’s configured with a static IP
address by default (192.168.1.50).
8.5.1 STATIC CONFIGURATION
It possible to configure a static configuration with parameters as follow:
auto eth0
iface eth0 inet static
address <IP address>
netmask <Network mask>
gateway <Gateway IP address>
dns-nameservers <DNS1 address> [<DNS2 address>] [<DNS3 address>]
8.5.2 DHCP CONFIGURATION
It possible to configure a DHCP configuration with parameters as follow:
auto eth0
iface eth0 inet dhcp
8.5.3 NETWORK RESTARTING
Once the parameters are saved, you can restart (or simply stop) the networking system by using the networking
script file:
sama5d4-lorix-one:~$ sudo /etc/init.d/networking {start|stop|restart}

LORIX One User manual revision 1.1
12
Warning concerning network modification and SSH
If you access the gateway with SSH, keep in mind that modification in the network interface could stop your
connection with the gateway.
8.6 SYSTEM UPDATE
The product has the possibility to be updated manually using the package manager opkg which is similar to the
Debian package manager dpkg in a lighter version.
8.6.1 MAIN SERVERS
The main server containing the packages is located at http://lorixone.io/yocto/feeds/2.1.2/. This information is
written in the file /etc/opkg/base-feeds.conf of the gateway and can be modified to handle more server addresses
for example.
More information about opkg can be found at https://code.google.com/archive/p/opkg/ or in the Yocto
documentation which can generate directly all the packages for the product.
8.6.2 MANUAL UPDATE
To update the list of available package (without updating the packages), the following command must be done
prior to any update (it will not affect the system at this point):
sama5d4-lorix-one:~$ sudo opkg update
Downloading http://lorixone.io/yocto/feeds/2.1.2/all/Packages.gz.
Updated source 'all'.
Downloading http://lorixone.io/yocto/feeds/2.1.2/cortexa5hf-neon/Packages.gz.
Updated source 'cortexa5hf-neon'.
Downloading http://lorixone.io/yocto/feeds/2.1.2/sama5d4_lorix_one/Packages.gz.
Updated source 'sama5d4_lorix_one'.
Downloading http://lorixone.io/yocto/feeds/2.1.2/sama5d4_lorix_one/Packages.gz.
Updated source 'sama5d4_lorix_one_sd'.
Once the list of packages updated, you can start the update by running:
sama5d4-lorix-one:~$ sudo opkg upgrade
This command will update every packages already installed and which are not up to date.
Services stop during updates
If updates are available, some services which are concerning could be stopped during the update and then
restarted afterwards, for example, LoRa cloud applications.
8.6.3 PACKAGE INSTALL
Some packages which are not installed by default can be installed using the following command:
sama5d4-lorix-one:~$ sudo opkg install <pkgs>
Packages availability can be consulted at the address http://lorixone.io/yocto/feeds/2.1.2/ and under each
subdirectories in the files Packages.
8.7 CLOUD APPLICATIONS
8.7.1 LORIOT
The LORIX One gateway is preinstalled with the LORIOT cloud application. The application is available under the
directory /opt/lorix/clouds/loriot.
To test the LORIOT cloud, create an account for free at loriot.io and add a new gateway using the MAC address of
your LORIX gateway (under the form XX:XX:XX:XX:XX:XX) which you can find on the back label or using the
command ifconfig under Linux (SSH or USB):

LORIX One User manual revision 1.1
13
sama5d4-lorix-one:~$ ifconfig
eth0 Link encap:Ethernet HWaddr XX:XX:XX:XX:XX:XX
[…]
lo Link encap:Local Loopback
[…]
8.7.2 PACKET-FORWARDER
Semtech provides as well a packet forwarder (https://github.com/Lora-net/packet_forwarder). The related
program and some other utilities related to it are available in the directory /opt/lorix/clouds/packet_forwarder.
The main configuration file is global_conf.json and contains with other parameters the TX lookup table of the
gateway. The file global_conf_2dBi_indoor.json and global_conf_4dBi_outdoor.json contain respectively the
power for indoor and outdoor antenna.
To modify the power table and use the 2dBi antenna:
sama5d4-lorix-one:~# cd /opt/lorix/clouds/packet-forwarder/
sama5d4-lorix-one:/opt/lorix/clouds/packet-forwarder# sudo cp global_conf_2dBi_indoor.json
global_conf.json
The file local_conf.json contains more gateway specific parameters and can be customized according to source
code.
8.7.3 TTN PACKET-FORWARDER
The Things Network is a free and collaborative LoRa network. The cloud application is based on the Semtech
packet-forwarder and is available under the directory /opt/lorix/clouds/ttn.
The main configuration file is global_conf.json and contains with other parameters the TX lookup table of the
gateway as the standard packet-forwarder. The file EU_global_2dBi_indoor.json and EU_global_4dBi_outdoor.json
contain respectively the power for indoor and outdoor antenna.
To modify the power table and use the 2dBi antenna:
sama5d4-lorix-one:~# cd /opt/lorix/clouds/ttn/
sama5d4-lorix-one:/opt/lorix/clouds/ttn# sudo cp EU_global_conf_2dBi_indoor.json global_conf.json
The file local_conf.json contains (and can be updated) latitude, longitude, altitude, description and administrator
e-mail.
8.7.4 WIFX CLOUDS-MANAGER
The desired clouds can be easily configured by SSH or USB using the following command:
sama5d4-lorix-one:~$ /etc/init.d/clouds-manager.sh {start|stop|restart|force-reload|status|configure}
It permits to see the actual status of the running cloud if any without special permission but needs to be root to
modify configuration, start, stop or restart.
8.7.4.1 CONFIGURATION
Before running the configuration, you need to stop eventual running cloud:
sama5d4-lorix-one:~$ /etc/init.d/clouds-manager.sh stop
Password:
Stopping cloud loriot... done.
Once stopped, you can modify the configuration:
sama5d4-lorix-one:~$ /etc/init.d/clouds-manager.sh configure
==========================================
| LORIX One clouds manager configuration |
==========================================

LORIX One User manual revision 1.1
14
Actual configuration:
autostart=true
cloud=loriot
Do you want to enable autostart at boot time?
[Yes|No]
> no
Which cloud app. do you want to use ?
[loriot|packet-forwarder|ttn]
> loriot
New configuration:
autostart=false
cloud=loriot
It allows two parameters, the first one is the “autostart” option which defines if either or not the cloud will start
automatically during boot time (default=yes).
The second option which is asked for is the cloud itself and let you decide now between LORIOT, the Semtech
packet-forwarder or the TTN (The Things Network) packet-forwarder.
8.8 LORA CONCENTRATOR UTILITIES
Clouds-manager incompatibility
Please note that the clouds-manager and its sub application cloud can’t run during usage of tests and util
applications. Prior to use tools, the clouds-manager should be stopped as explained at the point 8.7.4 Wifx
clouds-manager
Semtech provides utilities to test the SX1301 LoRa concentrator chip and to perform RX/TX performance tests as
well. All the binaries relative to gateway are located under the /opt/lorix/utils directory ordered into subdirectory.
8.8.1 SX1301 RESET PIN CONTROL
The reset pin of the SX1301 LoRa concentrator chip is accessible through the script /etc/init.d/reset_lgw.
sama5d4-lorix-one:~$ sudo /etc/init.d/reset_lgw {start|stop|restart}
The start argument will disable the reset signal and activates the SX1301.
The stop argument will enable the reset signal and deactivates the SX1301.
The restart will perform a pulse on the reset signal then activates the SX1301.
This script is automatically called with start during system start and with stop during system shutdown.
8.8.2 TEST BINARIES
All the test binaries related to the libloragw (https://github.com/Lora-net/lora_gateway) are located into the
/opt/lorix/tests folder.
The following tests are available:
test_loragw_cal
test_loragw_hal
test_loragw_spi
test_loragw_gps
test_loragw_reg
The related Git repository gives more information.
8.8.3 UTIL BINARIES
On the top of the libloragw library, the lora_gateway repository provides utilities to test RX/TX functionalities of
the SX1301 LoRa concentrator.

LORIX One User manual revision 1.1
15
The following utils are available under the directory /opt/lorix/utils:
util_lbt_test
util_pkt_logger
util_spectral_scan
util_spi_stress
util_tx_continuous
util_tx_test
In addition, the configuration files global_conf.json and local_conf.json are used by the program util_pkt_logger.
They provide parameters for channels configuration, etc.
9SD CARD
The LORIX One gateway has a microSD slot and is compatible with microSD cards following the SD Memory Card
Specification Version 2.0 including SDHC.
A microSD card can be used to extend the internal FLASH memory (256MB), alternatively, the gateway can boot
from the SD card if a bootable file is found.
9.1.1 INSERTION/REMOVAL
To insert the SD card, simply push it into the hole until it makes a “click” sound. To remove it, push it again until
the “click” sound, the SD card will stand out on release.
10 ELECTRICAL
10.1 POWER CONSUMPTION
Task (@ 20°C ambient)
Voltage [V]
Current [mA]
Power [W]
Linux only running
RF part disable
24
42
1,01
LoRa gateway with util_pkt_logger
6 channels for RX
24
105
2,52
LoRa gateway with util_pkt_logger
8 channels for RX
24
117
2,81

LORIX One User manual revision 1.1
16
11 MECHANICAL
11.1 IP43 (SEMI-WATERPROOF)
45 (1.77)
198 (7.80)
100 (3.94)
Dimensions: mm (inch)
11.2 IP65 (WATERPROOF)
198 (7.80)
45 (1.77)
Dimensions: mm (inch)
11.3 FIXATION
The LORIX One gateway is designed to be placed vertically with antenna upwards.
If you wish to tighten the LORIX One to a pole, you can do it with the provided mounting loops. The LORIX One
comes bundled with two mounting loops - guide the loops around the LORIX One though the provided edge
markings, and around the pole where it will be mounted.
You should avoid connecting a loose Ethernet cable to the Ethernet port, secure the cable to a wall or the pole, so
that the cable weight is not pulling the port. It’s recommended to secure the Ethernet cable less than 2m. from the
gateway device. This is to ensure that the cable doesn't damage the port by its weight or doesn't fall out.

-
-
-
-
-
-
-
-
-
45 (1.77)
IP43
198 (7.80)
45 (1.77)
IP65
Dimensions: mm (inch)
Other manuals for Lorix One
5
Table of contents
Other Wifx Gateway manuals
Popular Gateway manuals by other brands
Technische Alternative
Technische Alternative BL-NET manual
SMC Networks
SMC Networks EX500-GPR1A-X8 Series instruction manual
ZyXEL Communications
ZyXEL Communications AMG1302-T series user guide
NETGEAR
NETGEAR VVG834 datasheet

TANDBERG
TANDBERG Codian GW 3201 Series Getting started
Netgate
Netgate SG-3100 manual
