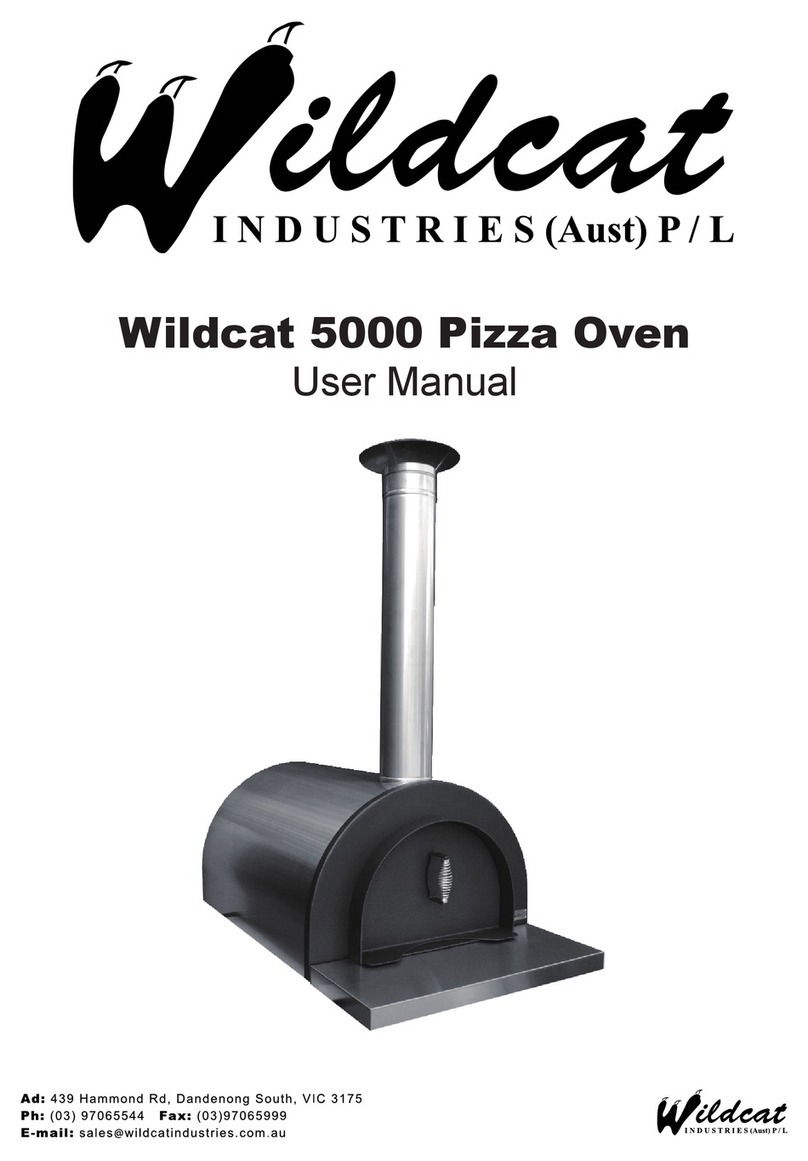
Wildcat 5000 User manual

for Wildcat 5000 Pizza Oven
Trolley Assembly
Instruction
Ad:35 Marconi Dr, Dandenong Sout h , VIC 3175
Ph: (03) 97949956 Fax:(03) 86681677
E-mail:sales@wildcatindustries.com.au

Carton Contents
*Tools:
- No.2 Philips head screwdriver
- Cordless drill with Philips head bit
- 2 x sml shifters
or
- 1 x 10mm socket
- 1 x 10mm spanner
- 1 x 16mm spanner
1 x LHS Top Panel
1 x RHS Top Panel
2 x Side Bottom Brace
1 x Front Panel (with Wildcat badge)
1 x Rear Top Panel
2 x Front/Rear Bottom Brace
3 x Cross Braces
4 x Triangular Braces
5 x Woodstack Panels
4 x 50mm Square Tube Legs
4 x Lockable Castors with 10mm bolts
68 x M6x16 Black Pan Head Screws
12 x M6x16 Countersunk Philips Head Screws
52 x M6 Flange Nuts
Components
2
Ad: 35 Marconi Dr, Dandenong South, VIC 3175
Ph: (03) 97949956 Fax: (03) 86681677
E-mail: [email protected]
Congratulations on your purchase of the Wildcat Product.
Please read these instructions carefully.
For tips, tricks, recipes, FAQ’s, downloads and more,
please visit our website.
www.mypizzaoven.com.au

Step (1) - Unload all of the components and assemble the ‘RHS’ + ‘LHS’ bottom braces to x2 of
the legs and ensure the nutserts on the legs are facing outwards and that the nutserts on
the braces (both RHS + LHS) are facing upright.
Using the 6mm black pan head screws, keeping them loose (only finger tight).
Step (2) - Now attach both Front Bottom brace and Bottom Rear brace.
Remember to keep all 6mm black pan head screws finger tight.
Front Bottom
Front Rear
RHS
LHS
Top Side
(holes closer to edge)
Assembling Step. 1 & 2
3
Ad: 35 Marconi Dr, Dandenong South, VIC 3175
Ph: (03) 97949956 Fax: (03) 86681677
E-mail: [email protected]
Congratulations on your purchase of the Wildcat Product.
Please read these instructions carefully.
For tips, tricks, recipes, FAQ’s, downloads and more,
please visit our website.
www.mypizzaoven.com.au

Step (3) - Attach the RHS + LHS Top panels to the legs.
Simply sit the panels on the legs and align the holes on the sides.
Screw the holes for both sides (finger tight).
Step (4) - Now attach the Front Top panel (with the WILDCAT badge).
Just simply align the holes for side panels.
Use the 6mm black pan head screws with flange nuts and continue to keep the only finger tight.
Front Top
LHS
Top
RHS
Top
Front LHS
Front RHS
Assembling Step. 3 & 4
4
Ad: 35 Marconi Dr, Dandenong South, VIC 3175
Ph: (03) 97949956 Fax: (03) 86681677
E-mail: [email protected]
Congratulations on your purchase of the Wildcat Product.
Please read these instructions carefully.
For tips, tricks, recipes, FAQ’s, downloads and more,
please visit our website.
www.mypizzaoven.com.au

Step (5) - Now it’s time to attach the Top Rear panel. Sit the panel on the legs and align the holes.
Use the 6mm black pan head screws and continue to keep the only finger tight.
Step (6) - Now that your trolley is upright. It’s time to install the Triangular Braces (x4).
Place them out along the four legs and use 6mm black pan head screws with flange nuts.
Top Rear
Assembling Step. 5 & 6
5
Ad: 35 Marconi Dr, Dandenong South, VIC 3175
Ph: (03) 97949956 Fax: (03) 86681677
E-mail: [email protected]
Congratulations on your purchase of the Wildcat Product.
Please read these instructions carefully.
For tips, tricks, recipes, FAQ’s, downloads and more,
please visit our website.
www.mypizzaoven.com.au

Step (8) - Place the 3x Cross Braces through the middle of the trolley and with 12off
6mm countersunk head screws with flange nuts. You can now tighten all the way.Place the
5x Woodstack Panel and simply align the holes on the two bottom side braces with
20off 6mm black pan head screws with flange nuts. You can now tighten all the way.
Step (7) - Attach all four castors to the underside of each legs.
A. Fit the castor wheels to each corner as shown.
Tighten the 10mm hex bolt using a 16mm spanner
B. Now the castor units are ready to roll. You can now stand
the trolley back up right.
Step (9) - Using a cordless drill go around and tighten every screws.
Ensuring all are now tight. Be careful not to overtighten and burr the head
Cross Braces
Woodstack
Assembling Step. 7,8 & 9
6
Ad: 35 Marconi Dr, Dandenong South, VIC 3175
Ph: (03) 97949956 Fax: (03) 86681677
E-mail: [email protected]
Congratulations on your purchase of the Wildcat Product.
Please read these instructions carefully.
For tips, tricks, recipes, FAQ’s, downloads and more,
please visit our website.
www.mypizzaoven.com.au

Step (10) - Insert the stainless steel front tray and white fibre ceramic board into the top of the
trolley and push down flush w/ trolley.
Step (11) - Place the Wildcat 5000 oven on top of the trolley and if your oven is stainless steel,
remove stainless steel protector before first firing.
*The side tables shown in the drawing are sold separately.
Assembling Step. 10 & 11
7
Ad: 35 Marconi Dr, Dandenong South, VIC 3175
Ph: (03) 97949956 Fax: (03) 86681677
E-mail: [email protected]
Congratulations on your purchase of the Wildcat Product.
Please read these instructions carefully.
For tips, tricks, recipes, FAQ’s, downloads and more,
please visit our website.
www.mypizzaoven.com.au

The heavy duty powder coated finish on your Wildcat Pizza Oven/Trolley should require no more
than the occasional wipe with a damp cloth to keep it looking good. Heavier food stains can be
safely removed with a non abrasive proprietry household cleaner. Occasionally it may be necessary
to re-tighten the screws.
With a Wildcat Pizza Oven fitted, the Oven/Trolley combination is very heavy and will require a
minimum of 2 adults to move it safely on flat smooth surfaces only.
• Do not attempt to move the Oven/Trolley combination on uneven ground.
• Never attempt to move the Oven/Trolley whilst there is an active fire in the oven, or while hot.
• Ensure all castors are locked before using the Oven.
• Do not operate the Oven on uneven or sloping ground.
Don’t forget to check our interactive website for lots of Recipes, Tips and Tricks and Cooking
Video Demonstrations. You can join us on our FB page mypizzaoven and Wildcat Owner’s Den.
Members can also share their own recipes with other satisfied Wildcat Woodfired Oven owners at
We take this opportunity to thank you for your purchase and trust that you and your family will
enjoy many hours of outdoor gormet cooking!
Wildcat Industries maintains a comprehensive web site for customer convenience. For service or
general enquiries please try our website first, or for further assistance contact Wildcat Industries.
Due to Wildcat Industries (Aust) Pty. Ltd. ongoing commitment to product quality and
improvement we reserve the right to alter products and/or specifications without notice.
© Copyright 2015 Wildcat Industries (Aust) Pty. Ltd.
SAFETY WARNING:
www.mypizzaoven.com.au
Address: 35 Marconi Drive, Dandenong South, VIC 3175
Ph: (03) 9794 9956 Fax: (03) 8668 1677
Email: [email protected]
www.mypizzaoven.com.au
www.wildcatindustries.com.au
Maintenance & Safe Operation
8
Contact Information
Ad: 35 Marconi Dr, Dandenong South, VIC 3175
Ph: (03) 97949956 Fax: (03) 86681677
E-mail: [email protected]
Congratulations on your purchase of the Wildcat Product.
Please read these instructions carefully.
For tips, tricks, recipes, FAQ’s, downloads and more,
please visit our website.
www.mypizzaoven.com.au

Wildcat Industries are constantly striving to improve our existing range and develop new and
innovative products. Here are just a few!
Side Table for 5000 Trolley
Wildcat Firepit
Wildcat 5000 Oven Cover
Pizza Trays
Wildcat Flue Kits
Pizza Peel - stainless steel
with a solid timber handle
Accessories & Other Products
9
Ad: 35 Marconi Dr, Dandenong South, VIC 3175
Ph: (03) 97949956 Fax: (03) 86681677
E-mail: [email protected]
Congratulations on your purchase of the Wildcat Product.
Please read these instructions carefully.
For tips, tricks, recipes, FAQ’s, downloads and more,
please visit our website.
www.mypizzaoven.com.au
Other manuals for 5000
4
Table of contents
Other Wildcat Kitchen Appliance manuals


