Operating Instructions
1-Make sure the power switch is in the off position. Loosen the 2 thumb screws
on the battery door and remove the battery door. Slide the battery holder (Model:
MA-21 has 2 battery holders) out of the battery compartment just far enough to
change or insert new batteries. Don’t pull the battery holder out to far as you will
strain the power connector wires. Don’t remove the battery wire snap connector
from the battery holder. Install batteries into the battery holder. Make sure to
observe the polarity of the batteries while installing them. When sliding the battery
holder or holders back into the battery compartment make sure not to pinch the
battery holder’s power wire. Install the battery door and hand tighten the 2 thumb
screws to secure the battery door. The user may use AA alkaline batteries, AA
lithium batteries or AA nimh rechargeable batteries to power the system. You may
also use a 14.4 volt lithium battery pack with model MA-15 or a 18.5 volt lithium
battery pack with model MA-21.
Battery door
Power switch
Models: MA-15 & MA-21
Installing or removing batteries
This equipment has been tested and found to comply with the limits for a class B digital device,
pursuant to part 15 of the FCC Rules. These limits are designed to provide reasonable protection
against harmful interference in a residential installation. This equipment generates, uses and can
radiate radio frequency energy and if not installed and used in accordance with the instructions,
may cause harmful interference to radio communications. However, there is no guarantee that
interference will not occur in a particular installation. If this equipment does cause harmful
interference to radio or television reception, which can be determined by turning the equipment
off and on, the user is encouraged to try to correct the interference by one or more of the following
measures:
* Reorient or relocate the receiving antenna.
* Increase the separation between the equipment and receiver.
* Connect the equipment into an outlet on a circuit different from that to which the receiver is
connected.
* Consult the dealer or an experienced radio/TV technician for help.
In order to maintain compliance with FCC regulations, shielded cables must be used with this
equipment. Operation with non-approved equipment or unshielded cables is likely to result in
interference to radio and TV reception. The user is cautioned that changes and modifications
made to the equipment without the approval of manufacturer could void the user's authority to
operate this equipment.
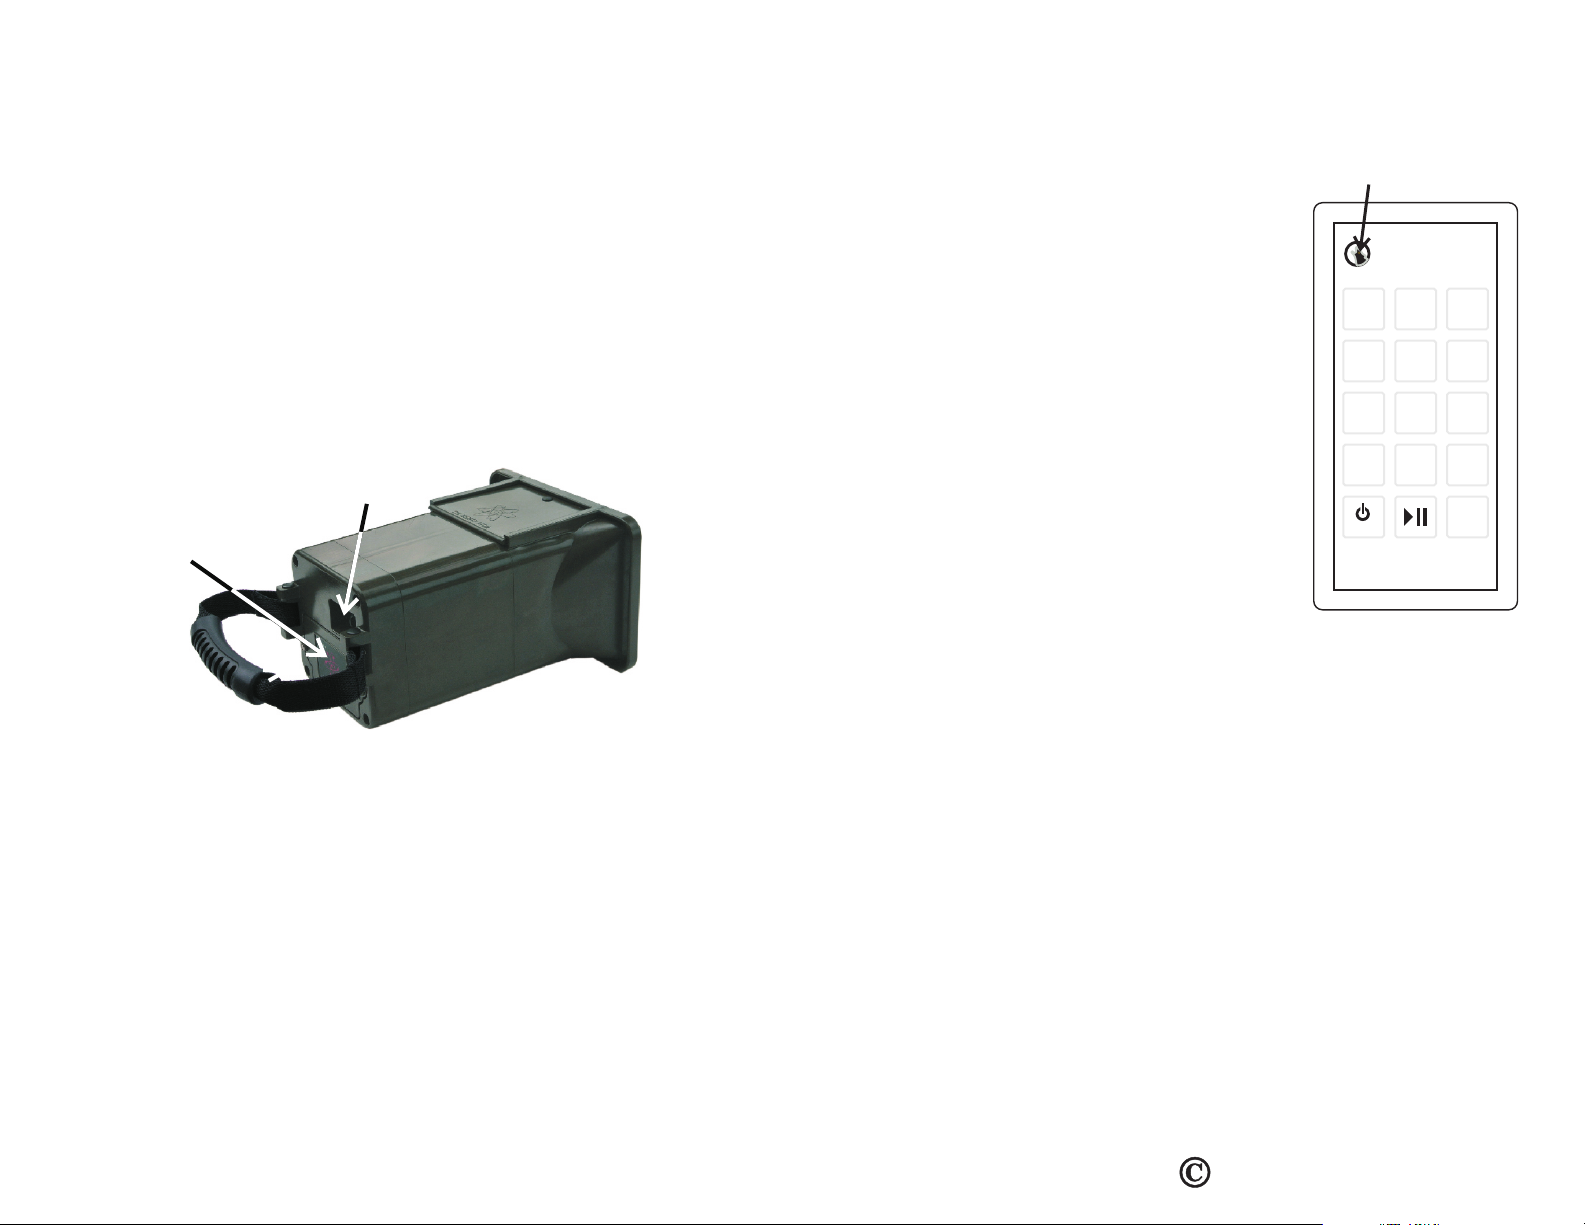
Transmitter Operating Instructions
Keypad functions
1- To turn the transmitter on, press the shift
key (power on key). The gold color power led
located in the eye of the coyote logo will turn
on and the transmitter will stay powered for 1
minute and then turn off to increase battery life.
2- To play a sound, just enter the exact number
of the sound you wish to play on the keypad
and then press the play key. To play the previous
sound played, press and hold the shift key down
then press and release the play key.To pause a
sound press the play/pause key.
3- The volume control has 6 levels of volume.
One key press for each volume level of change.
To increase volume press the volume + key.
To decrease volume press the volume - key.
If you press and hold the shift key and then
press the volume + key the volume will go to
the highest level. If you press and hold the
shift key and then press the volume - key the
volume will go to the lowest level.
Favorite sounds
You can assign any sound you have to keys 0 to 9. To assign a sound to a key,
play the sound you want to be a favorite. While the sound is playing press and
hold the shift key and then press the FAV-SET key. Next press one key (0 thru 9)
to store that sound. To play one of your favorite sounds first press the FAV key and
then the numbered key of the favorite sound you want to play. You can have a total
of 10 favorite sounds. You can also change any or all of your favorite sounds at any
time using the method described above.
Transmitter sleep mode
The user can control the time the transmitter stays active before it turns off to save
battery power. To set the power save time in seconds, press 9992XXXPLAY where
the XXX stands for the amount of seconds you want the transmitter to stay on.
Example: If you enter 9992060 then press the play key, the transmitter will stay
active for 60 seconds. If you enter 480 the transmitter will stay active for 8 minutes.
You can enter up to 999 seconds maximum. Remember to press the play key after
entering the active time.
NOTE: The transmitter can use 2 AAA nimh
rechargable batteries, 2 AAA alkaline or
2 AAA lithium batteries.
www.wildlifetech.com
Wildlife Technologies
Wireless Remote Control
12
0
45
78
SHIFT
VOL
-
Power on indicator
3
6
9
FAV
SET
+
VOL
Wildlife Technologies 2012


