Important Safety Information
Statements in this manual preceded by the following words
are of special significance.
WARNING!
Means there is the possibility of personal
injury to yourself or others.
CAUTION!
Means there is the possibility of damage to
the equipment.
Other information of particular importance has been placed
in italic type like this.
WARNING!
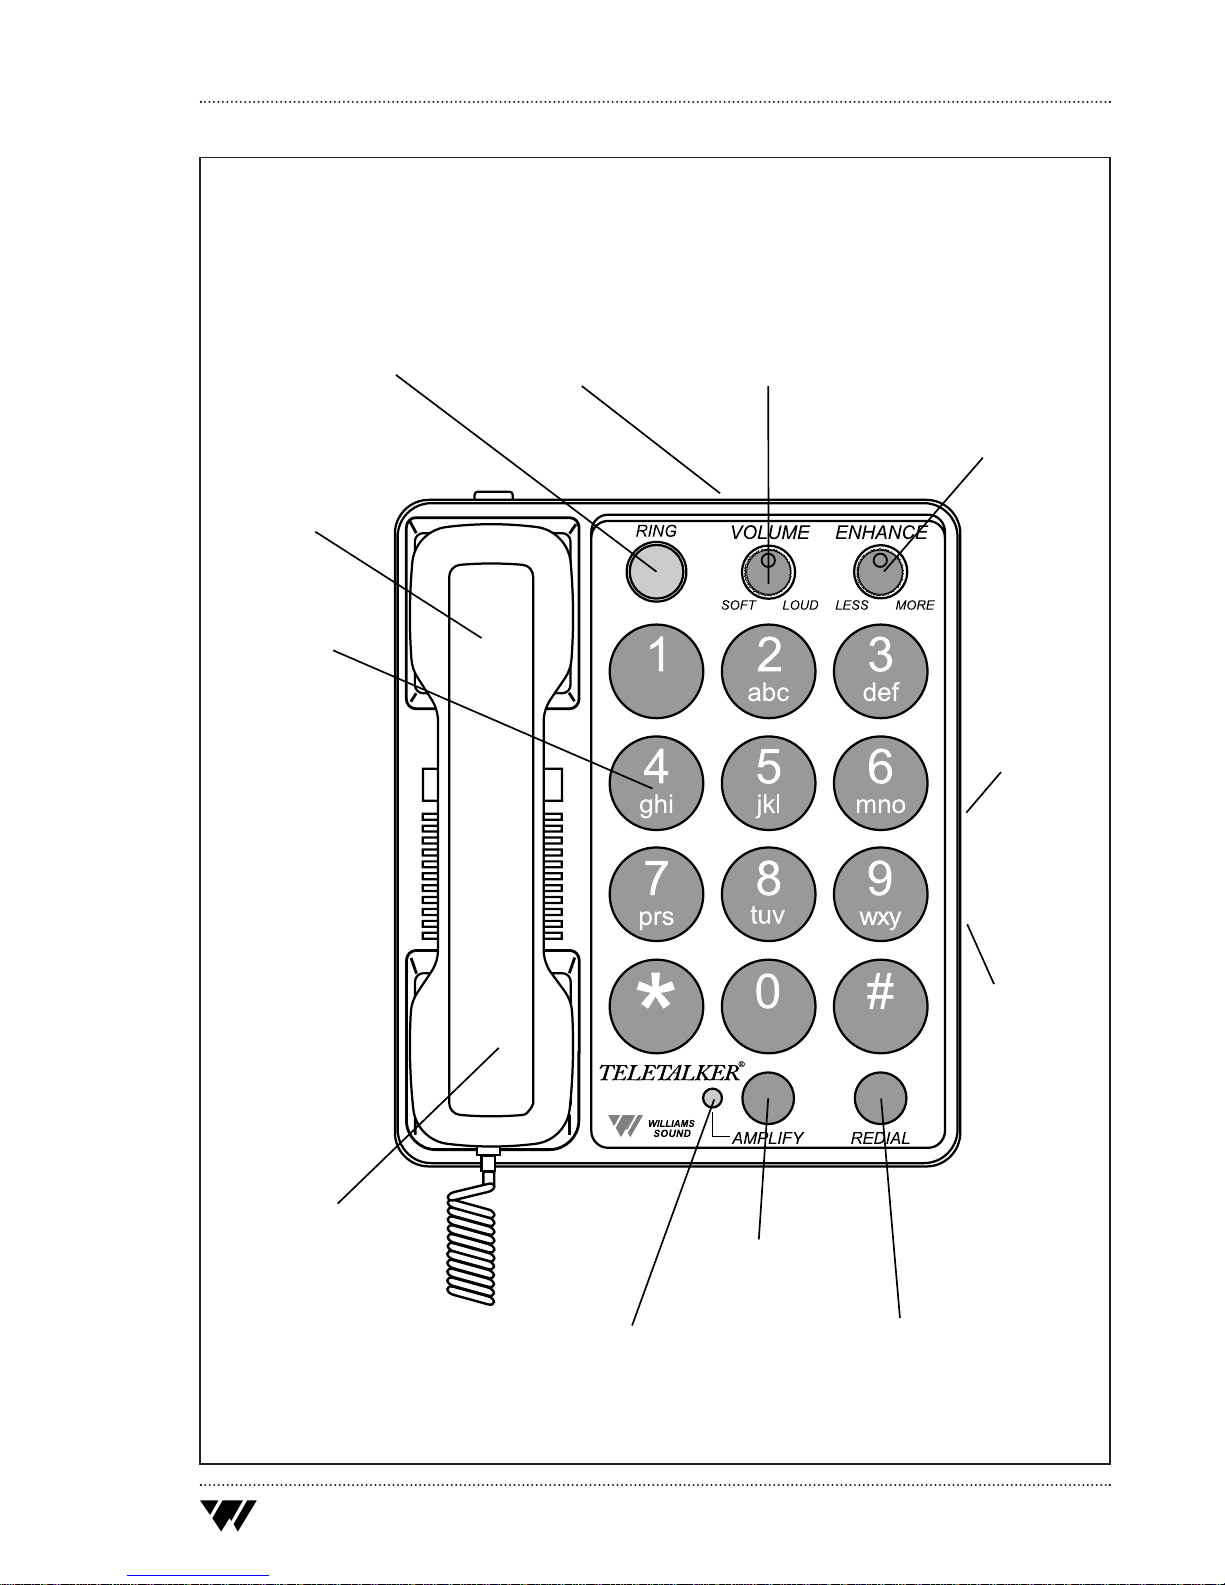
TheTeleTalker is capable of amplifying sounds to a very loud
volume. To prevent misuse of the phone by someone who is
unfamiliar with its operation and capabilities,DO NOT
remove the warning labels. Instruct all potential users in its
proper operation. Do not let children play with the
TeleTalker. When theAMPLIFY function is not activated,the
TeleTalker functions as a normal telephone.
WARNING!
This telephone can produce very high (loud) sound levels.
Always adjust controls to minimum settings before using the
phone and alert other users that hearing damage can poten-
tially result from misuse.
WARNING!
This product can be hazardous if immersed in water. To
avoid the possibility of electrical shock,do not use it while