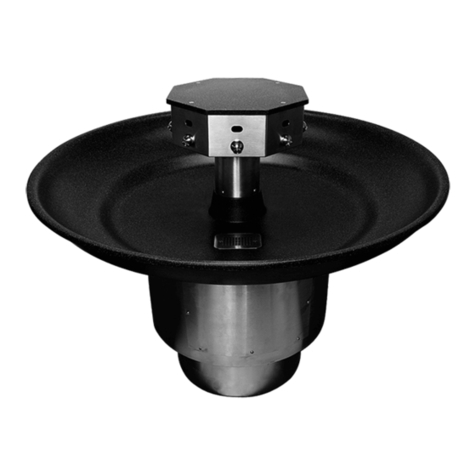
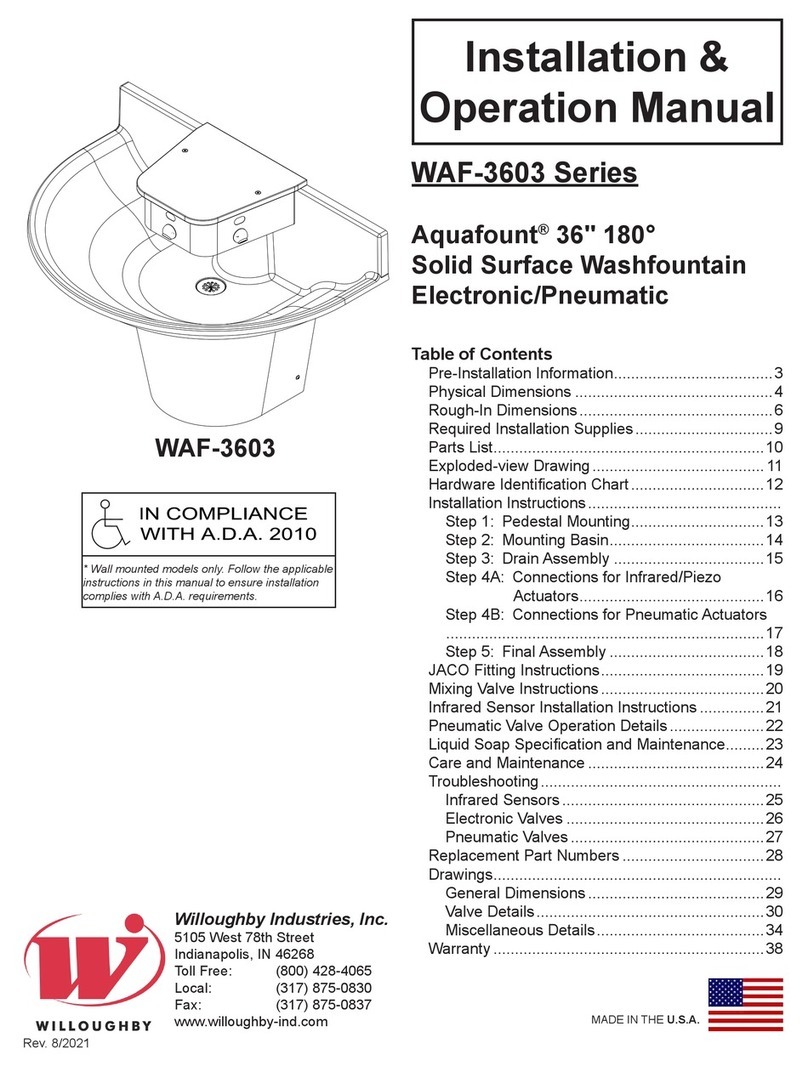
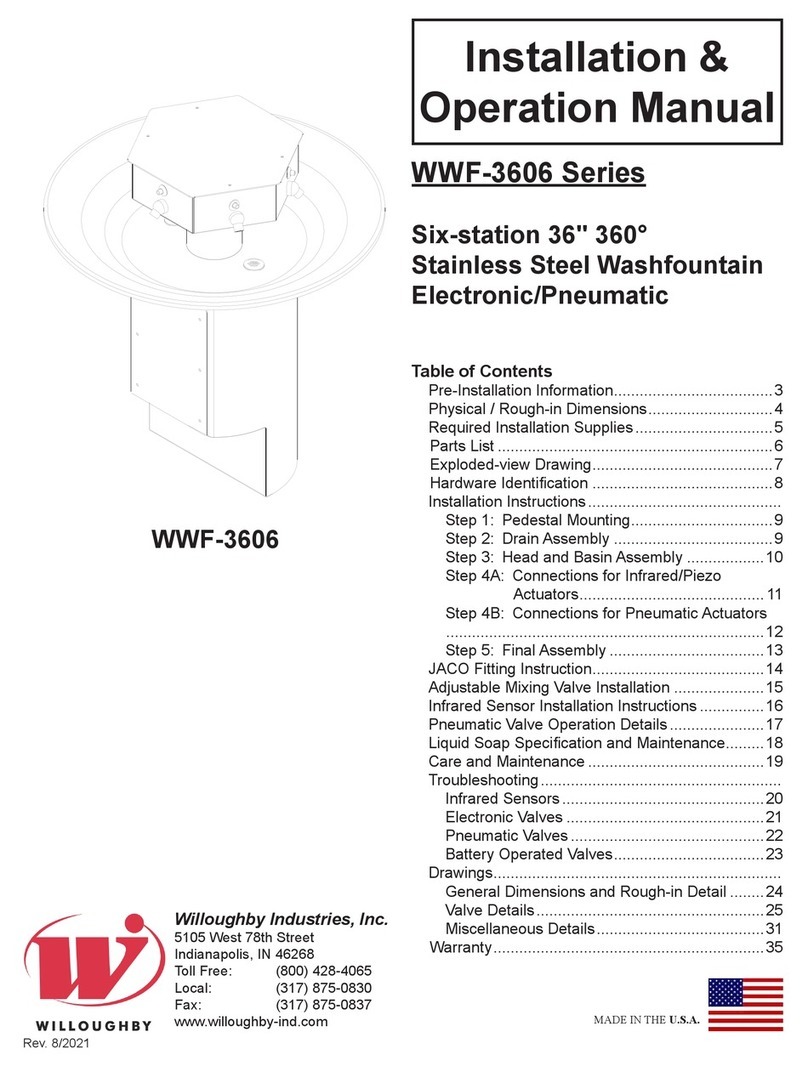
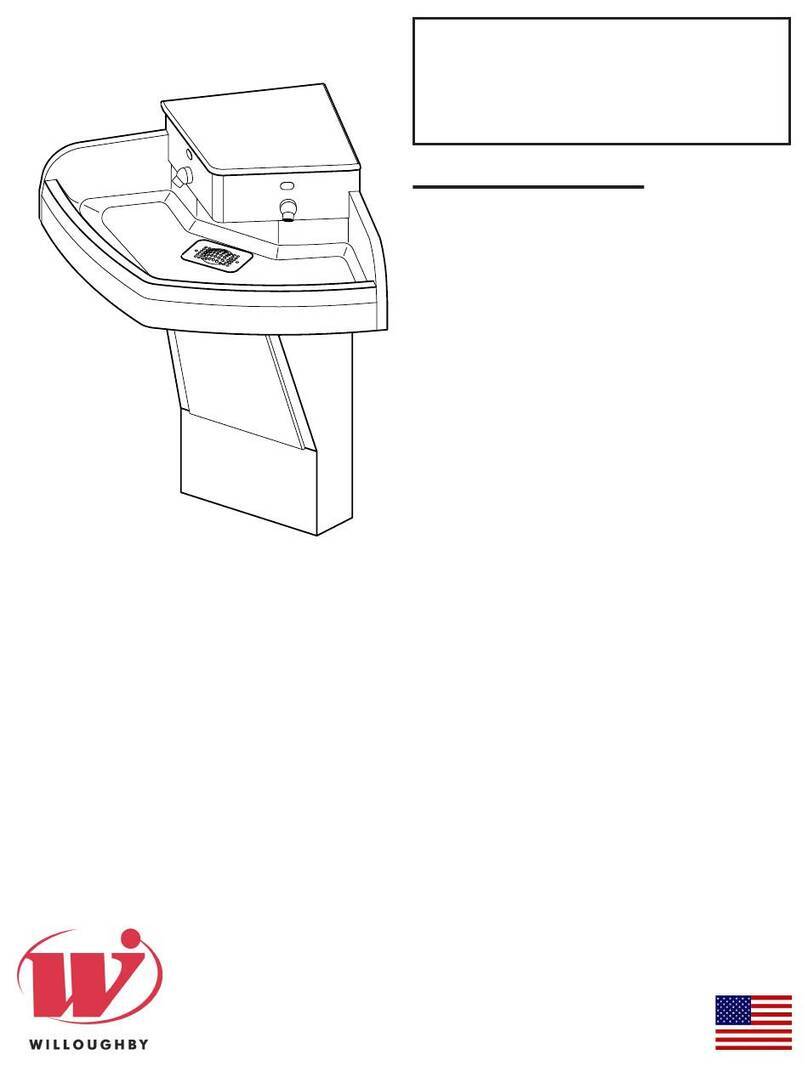
Willoughby Aquafount WAF-5404 Series User manual

Rev. 1/2019
Installation &
Operation Manual
Willoughby Industries, Inc.
5105 West 78th Street
Indianapolis, IN 46268
Toll Free: (800) 428-4065
Local: (317) 875-0830
Fax: (317) 875-0837
www.willoughby-ind.com MADE IN THE U.S.A.
WAF-5403 Series
WAF-5404 Series
Aquafount®54" 180°
Solid Surface Washfountain
Electronic/Pneumatic
Table of Contents
Pre-Installation Information������������������������������������� 3
Physical Dimensions ����������������������������������������������4
Rough-In Dimensions ���������������������������������������������6
Required Installation Supplies ��������������������������������9
Parts List���������������������������������������������������������������10
Exploded-view Drawing ���������������������������������������� 11
Hardware Identication Chart �������������������������������12
Installation Instructions ���������������������������������������������
Step 1: Pedestal Mounting�������������������������������13
Step 2: Mounting Basin������������������������������������14
Step 3: Drain Assembly �����������������������������������15
Step 4A: Connections for Infrared/Piezo
Actuators�������������������������������������������16
Step 4B: Connections for Pneumatic Actuators
��������������������������������������������������������������������������17
Step 5: Final Assembly ������������������������������������18
JACO Fitting Instructions��������������������������������������19
Mixing Valve Instructions ��������������������������������������20
Infrared Sensor Installation Instructions ���������������21
Liquid Soap Specication and Maintenance��������� 22
Care and Maintenance �����������������������������������������23
Troubleshooting��������������������������������������������������������
Infrared Sensors �����������������������������������������������24
Electronic Valves ����������������������������������������������25
Pneumatic Valves ���������������������������������������������26
Replacement Part Numbers ���������������������������������27
Drawings�������������������������������������������������������������������
General Dimensions �����������������������������������������28
Rough-in Dimensions ���������������������������������������30
Valve Details�����������������������������������������������������32
Miscellaneous Details��������������������������������������� 38
Warranty ���������������������������������������������������������������42
* Wall mounted models only. Follow the applicable
instructions in this manual to ensure installation
complies with A.D.A. requirements.
WAF-5404

Page 2Rev. 1/2019 www.willoughby-ind.com
Installation & Operation Manual
Aquafount®180° Washfountain
WAF-5403 Series / WAF-5404 Series
Willoughby Industries, Inc. TOLL FREE (800) 428-4065 ● LOCAL (317) 875-0830 ● FAX (317) 875-0837
(Page intentionally left blank)

Page 3Rev. 1/2019 www.willoughby-ind.com
Installation & Operation Manual
Aquafount®180° Washfountain
WAF-5403 Series / WAF-5404 Series
Willoughby Industries, Inc. TOLL FREE (800) 428-4065 ● LOCAL (317) 875-0830 ● FAX (317) 875-0837
Pre-Installation Information
When installing the Willoughby Industries' WAF-5403/5404 Series washfountain system:
Before Step 1 of the installation instructions, ensure that rough-ins are in the correct location�
The valve assembly, including the spray head, MUST NOT BE connected until after
all lines have been ushed to remove the small particles of debris that are inherent
with new construction projects and all chemicals that are used in ushing are purged
from the system�
Chemicals used in ushing plumbing systems can attack the internal components of
the valve and spray head and severely damage them, so any ushing of the system
must be followed by a full ushing with pure water to clear any harsh chemicals
remaining in the system� Debris in the system if allowed to enter the valve assembly
and spray head can cause poor performance or outright failure�
Again DO NOT attempt to connect the valve assembly and spray head until after all
ushing is complete and pure water is the only media that will be passing through the
system� Damage to the valve assembly or spray head caused by harsh chemicals or
debris will not be covered by the manufacturer's warranty�
INSTALLATION INSTRUCTIONS
Visit our website at http.//www.willoughby-ind.com
2210 West Morris Street • P.O. Box 21217 • Indianapolis, IN 46221
(317) 638-2381 • Fax: (317) 638-6110 • (800) 428-4065
© Rev. 11/2007 Page 3
Installation notice!
Check Rough-in location and flush lines prior to hook up!
When installing the Willoughby Industries’ WAW, WAF, or WWF series
washfountains or lavatory deck systems:
Before Step 1 of the installation instructions, ensure that rough-ins are in the correct
location.
It is essential that the water supply lines be thoroughly flushed prior to making final
connection to the hot and cold water supply lines. These lines must be flushed
sufficiently to remove the small particles of debris that are inherent with new
construction projects. If this debris is not removed, the valving in these units will be
damaged. Do not attempt to remove aerators to flush debris into the lavatory. The
damage can only be fixed by replacing the valves. Damage to valves caused by debris
will not be covered by the manufacturers warranty.
Installation notice!
Check Rough-in location and flush lines prior to hook up!
© Rev. 5/2010
Check Rough-In location PRIOR to installation
Flush lines thoroughly PRIOR to hook-up
Check Rough-In location PRIOR to installation
Flush lines thoroughly PRIOR to hook-up


Page 4Rev. 1/2019 www.willoughby-ind.com
Installation & Operation Manual
Aquafount®180° Washfountain
WAF-5403 Series / WAF-5404 Series
Willoughby Industries, Inc. TOLL FREE (800) 428-4065 ● LOCAL (317) 875-0830 ● FAX (317) 875-0837
Physical Dimensions- Floor-mounted Unit
*WAF-5403-FL unit shown; WAF-5404-FL will have same pedestal dimensions.

Page 5Rev. 1/2019 www.willoughby-ind.com
Installation & Operation Manual
Aquafount®180° Washfountain
WAF-5403 Series / WAF-5404 Series
Willoughby Industries, Inc. TOLL FREE (800) 428-4065 ● LOCAL (317) 875-0830 ● FAX (317) 875-0837
Physical Dimensions- Wall-mounted Unit
*WAF-5404 unit shown; WAF-5403 will have same pedestal dimensions.

Page 6Rev. 1/2019 www.willoughby-ind.com
Installation & Operation Manual
Aquafount®180° Washfountain
WAF-5403 Series / WAF-5404 Series
Willoughby Industries, Inc. TOLL FREE (800) 428-4065 ● LOCAL (317) 875-0830 ● FAX (317) 875-0837
Rough-in Dimensions- Floor-mounted Unit
*WAF-5403-FL unit shown; WAF-5404-FL will have same rough-in dimensions.

Page 7Rev. 1/2019 www.willoughby-ind.com
Installation & Operation Manual
Aquafount®180° Washfountain
WAF-5403 Series / WAF-5404 Series
Willoughby Industries, Inc. TOLL FREE (800) 428-4065 ● LOCAL (317) 875-0830 ● FAX (317) 875-0837
9-11/16"
17"
23-11/16" A.F.F.
(FOR 34" A.D.A.
RIM HEIGHT)
NOTED
2 PLCS:
A5404-0026
AS NOTED
1
Indianapolis, Indiana
BEH
BEH 06-18-14
06-18-14
A
ANGLE:
A
SIZE:
54" SOLID SURFACE WASHFOUNTAIN - OFF FLOOR - 34" RIM HEIGHT
SHEET:REV.:
ORIG.:REVISION:
SCALE: 1:5
FRACTIONS:
EXCEPT AS
3 OF 3
REF.:
TOLERANCES
TITLE / DESC.: WAF-5404 PART #:
MAT'L:
3 PLCS:
0.03
0.015
1/32"
Willoughby Industries, Inc.
STANDARD
RIM HEIGHT OF 34" AFF.
WATER SUPPLY
110V GFCI ELECTRICAL OUTLET
LOCATION OF THE 110 / 24 VAC
FINISHED FLOOR
CODES FOR THE MOUNTING
CONSULT LOCAL ELECTRICAL
(EL1, IR ONLY)
FOR ALTERNATE RIM HEIGHT.
ADJUST DIMENSIONS ACCORDINGLY
CLASS 2 TRANSFORMER
1/2" HOT AND COLD
NOTE:
ROUGH-IN DIMENSIONS ARE FOR A
WALL MOUNTED ROUGH-IN SHOWN.
FOR FLOOR MOUNTED ROUGH-IN,
CONTACT FACTORY.
3-1/16"
5-9/16"
1-5/8"
12"
12-7/8"
7-13/16" 7-13/16"
26-1/2"
15-1/4"
4"
1-9/16"
4"6"11-1/4"
2-1/2"
20-3/8"
17X 5/16" THRU
7-3/4"
1-1/2" DRAIN
6-1/4"
15-3/8"
WILLOUGHBY
Rough-in Dimensions- Wall-mounted Unit
*WAF-5404 unit shown; WAF-5403 will have same rough-in dimensions.

Page 8Rev. 1/2019 www.willoughby-ind.com
Installation & Operation Manual
Aquafount®180° Washfountain
WAF-5403 Series / WAF-5404 Series
Willoughby Industries, Inc. TOLL FREE (800) 428-4065 ● LOCAL (317) 875-0830 ● FAX (317) 875-0837
(Page intentionally left blank)

Page 9Rev. 1/2019 www.willoughby-ind.com
Installation & Operation Manual
Aquafount®180° Washfountain
WAF-5403 Series / WAF-5404 Series
Willoughby Industries, Inc. TOLL FREE (800) 428-4065 ● LOCAL (317) 875-0830 ● FAX (317) 875-0837
Required Installation Supplies
• Proper mounting hardware
• Hardware for waste oulet connections
• Gasket for waste outlet connection
• Shims (for installation if necessary)
• Supply piping
• Silicone caulk
• Plumbers putty
WARNING: Willoughby Industries does not assume any
responsibility for personal injury or damage to equipment
due to an improperly installed WAF-5403/5404 Series
washfountain.

Page 10Rev. 1/2019 www.willoughby-ind.com
Installation & Operation Manual
Aquafount®180° Washfountain
WAF-5403 Series / WAF-5404 Series
Willoughby Industries, Inc. TOLL FREE (800) 428-4065 ● LOCAL (317) 875-0830 ● FAX (317) 875-0837
Parts List
*XX REPRESENTS THE WASH FOUNTAIN COLOR
WHITE GRANITE=WG
SAND STONE=SS
GRAY GRANITE=GG
BLACK GRANITE=BG
SEA GREEN=SG
NOCTURNAL BLUE=NB
GLACIER WHITE=GW
BONE=B
ITEM
#
DESCRIPTION PART NUMBER (P/N)
- 3-STATION
PART NUMBER (P/N)
- 4-STATION
154" HALF-ROUND BASIN - SOLID SURFACE 800540C-XX* 800540C-XX*
2PEDESTAL ASSEMBLY (WALL-MOUNT) WAF5404-WA WAF5404-WA
PEDESTAL ASSEMBLY (FLOOR-MOUNT) WAF5404-FL WAF5404-FL
3
ACTUATOR HOUSING / VALVE HEAD KIT - INFRARED WAF5403-I WAF5404-I
ACTUATOR HOUSING / VALVE HEAD KIT - PIEZO WAF5403-E WAF5404-E
ACTUATOR HOUSING / VALVE HEAD KIT - PNEUMATIC WAF5403-P WAF5404-P
4
STND� SPRAY HEAD ASSEMBLY- WAF
(AERATOR SPRAY HEAD, 0.5 GPM- #320157A)
(SPRAY HEAD BASE, 45*- #800001)
320157A-ASMB 320157A-ASMB
5TOP COVER- SOLID SURFACE 800333LP-XX* 800441LP-XX*
6DRAIN ASSEMBLY (WAF) 380281 380281
7VALVE BRACKET ADAPTER (WAF) S600417 S600417
8ACCESS COVER (WALL-MOUNT) S600481 S600481
ACCESS COVER (FLOOR-MOUNT) S600171 S600171
9-12 HARDWARE KIT 800258 800258
NOT SHOWN
INFRARED SENSOR 700150 700150
PIEZO PUSHBUTTON 701179-C 701179-C
ACTUATOR PUSHBUTTON 600307 600307
ELECTRONIC VALVE ASSEMBLY 803105-3EL 803105-4EL
PNEUMATIC VALVE ASSEMBLY 803105-3PW 803105-4PW
CHECKSTOP ASSEMBLY 980183 980183
STAINLESS STEEL FLEX HOSE (6") 980506 980506
STAINLESS STEEL FLEX HOSE (20") 980520 980520
POWERS HYDROGUARD T/P (LFe480) 700480ELF 700480ELF
POWER SUPPLY - INFRARED 800137B 800138B
POWER SUPPLY - PIEZO 800139A 800140A
PLUG-IN TRANSFORMER - INFRARED 701210 701210
PLUG-IN TRANSFORMER - PIEZO 701210 701211
PNEUTRONIC TIMER 330043 330043

Page 11Rev. 1/2019 www.willoughby-ind.com
Installation & Operation Manual
Aquafount®180° Washfountain
WAF-5403 Series / WAF-5404 Series
Willoughby Industries, Inc. TOLL FREE (800) 428-4065 ● LOCAL (317) 875-0830 ● FAX (317) 875-0837
Exploded-view Drawing
ITEM # PART # DESCRIPTION QTY.
1 800540C-XX 54" HALF ROUND BASIN 1
2 S600476 PEDESTAL - WALL MOUNT - 34" RIM 1
3 S600196 4 STATION HEAD ASSEMBLY 1
4 320157A-ASMB STANDARD SPRAY HEAD ASS'Y FOR
WASHFOUNTAINS, 0.5 GPM 4
5 800441LP-XX 4 STATION TOP COVER - SOLID SURFACE 1
6 380281 WASHFOUNTAIN DRAIN ASSEMBLY, 1-1/2" NPSM 1
7 S600417 VALVE BRACKET ADAPTER - WWF / WAF 1
8 S600481 ACCESS COVER 1
9 800144 1/4-20 X 1/2" PHILLIPS TRUSS HEAD SCREW 7
10 4500NSS 1/4-20 X 1/2" BUTTON HEAD SECURITY SCREW 12
11 800127 1/4-20 X 1-1/2" FH SECURITY SCREW 2
12 800113 TINNERMAN NUT 1/4-20, S/S 6
NOTE:
TO ORDER REPLACEMENT SOLID SURFACE PARTS,
SPECIFY DESIRED COLOR BY REPLACING "XX" IN
PART NUMBER WITH CORRESPONDING COLOR CODE:
B BONE
BG BLACK GRANITE
GG GREY GRANITE
GW GLACIER WHITE
NB NOCTURNAL BLUE
RC RED CORAL
SG SEA GREEN
SS SANDSTONE
WG WHITE GRANITE
1
3
12
12
4
11
5
10
8
2
7
6
9
10
2 PLCS: BEH
BEH 06-18-14
06-18-14
A2 OF 3
AS NOTED
A5404-0026
Indianapolis, Indiana
1:14
NOTED
A
SIZE:
54" SOLID SURFACE WASHFOUNTAIN - OFF FLOOR - 34" RIM HEIGHT
SHEET:REV.:
ORIG.:REVISION:
SCALE: REF.:
1
3 PLCS:
PART #:
MAT'L:
FRACTIONS:
TOLERANCES
EXCEPT AS
WAF-5404
TITLE / DESC.:
ANGLE:
0.03
0.015
1/32"
Willoughby Industries, Inc.
STANDARD
WILLOUGHBY
*WAF-5404 (wall-mounted) unit shown

Page 12Rev. 1/2019 www.willoughby-ind.com
Installation & Operation Manual
Aquafount®180° Washfountain
WAF-5403 Series / WAF-5404 Series
Willoughby Industries, Inc. TOLL FREE (800) 428-4065 ● LOCAL (317) 875-0830 ● FAX (317) 875-0837
Hardware Identication Chart
INSTALLATION INSTRUCTIONS
Visit our website at http.//www.willoughby-ind.com
2210 West Morris Street • P.O. Box 21217 • Indianapolis, IN 46221
(317) 638-2381 • Fax: (317) 638-6110 • (800) 428-4065
© Rev. 1/2007 Page 11
HARDWARE
Identification Chart
© Rev. 5/2010

Page 13Rev. 1/2019 www.willoughby-ind.com
Installation & Operation Manual
Aquafount®180° Washfountain
WAF-5403 Series / WAF-5404 Series
Willoughby Industries, Inc. TOLL FREE (800) 428-4065 ● LOCAL (317) 875-0830 ● FAX (317) 875-0837
Parts supplied:
• Complete Unit (Pre-assembled)
•
Note: Hardware for wall anchoring by others.
Note: Use anchors that are adequate for the type of wall: drywall, concrete, metal studs,
wood studs, etc.
Note: Refer to rough-in drawing for backplate mounting hole locations to achieve 34"
rim height.
1�) Measure and mark the vertical centerline of the washfountain on the wall. Mark a level line at the
height prescribed by the rough-in drawing for the pedestal backplate center hole. Drill a hole for
a wall anchor (supplied by others) at this height mark.
Make sure that the intended anchor locations will provide adequate backing to support the
installed washfountain. If adequate backing does not exist, install appropriate support backing or
relocate unit before proceeding with installation (backing provided by others).
2�) Mount the pedestal on the wall using a wall anchor through the backplate center hole and the
rst drilled hole. DO NOT TIGHTEN THIS FIRST WALL ANCHOR ALL THE WAY, as you may
need to adjust the pedestal to ensure it is level�
3�) Make sure the pedestal is level and plumb against the wall, then mark and drill holes for the rest
of the wall anchors as specied by the rough-in drawing.
4�) Ensure once more the pedestal is level, then secure it to the wall using the remaining anchors
(supplied by others). Make sure all wall anchors are tight and secure against the pedestal
backplate.
Note: Be sure backplate is level and plumb against the wall so that water in basin will
drain correctly once assembly is completed.
Installation Instructions
PEDESTAL BACKPLATE
PEDESTAL BACKPLATE
CENTER HOLE
VALVE MOUNTING TAB
WALL ANCHORS
(SUPPLIED BY OTHERS)
NOTE:
FOR CLARITY OF WALL ANCHOR MOUNTING LOCATIONS, ONLY
THE BACKPLATE PORTION OF THE PEDESTAL IS SHOWN.
Step 1: Pedestal Mounting

Page 14Rev. 1/2019 www.willoughby-ind.com
Installation & Operation Manual
Aquafount®180° Washfountain
WAF-5403 Series / WAF-5404 Series
Willoughby Industries, Inc. TOLL FREE (800) 428-4065 ● LOCAL (317) 875-0830 ● FAX (317) 875-0837
Installation Instructions (cont.)
SECURITY SCREWS
SHIPPING BOLTS
ACTUATOR HOUSING
BASIN
(SUPPLIED BY OTHERS)
WALL ANCHORS
PEDESTAL
1/4-20 X 1/2" PHILLIPS
TRUSS HEAD SCREWS
TOP LEDGE
Step 2: Mounting Basin
Parts supplied:
• Solid Surface Basin
• Actuator Housing
• Pedestal Backplate
Removing the top cover. Mounting the basin and actuator housing to
the backplate and wall.
1�) Remove top cover from the valve head kit by loosening the security screws as shown in the
above-left diagram� Set the top cover, screws, and nuts aside�
2�) With the help of an assistant, place basin on top ledge of the pedestal assembly�
3�) Carefully mark mounting holes on wall through the basin, then remove the basin and drill the
mounting holes�
4�) Replace the basin and valve head kit as shown in the above-right diagram.
5�) Fasten wall anchors (supplied by others) through the basin and valve head kit holes securely,
but DO NOT OVERTIGHTEN; this can damage the solid surface basin and valve head kit.
6�) Secure the basin to the pedestal by fastening the1/4-20 x 1/2" Philips truss head screws up
through the pedestal basin mounting ring into the threaded inserts on the bottom of the basin�
Note: BE SURE to use the truss head screws included with the washfountain. Using
longer screws than those provided can damage the solid surface basin.

Page 15Rev. 1/2019 www.willoughby-ind.com
Installation & Operation Manual
Aquafount®180° Washfountain
WAF-5403 Series / WAF-5404 Series
Willoughby Industries, Inc. TOLL FREE (800) 428-4065 ● LOCAL (317) 875-0830 ● FAX (317) 875-0837
Installation Instructions (cont.)
Step 3: Drain Assembly
Parts/Materials supplied:
• Solid surface basin
• Drain assembly (see diagram)
• Plumbers putty (supplied by others)
1�) As shown on the diagram, apply a small (approx�
1/4" dia. 6" long) strand of plumbers putty on the
underside of the drain basket lip (putty supplied
by others)�
2.) Insert the drain basket down through the basin
drain hole�
3.) Secure the drain basket in place by tting the
rubber and stainless steel washers onto the drain
assembly from the underside of the basin�
Tighten the locknut onto the drain basket assembly,
sandwiching the washers between the basin and
locknut.
Note: Over-tightening the locknut or security
screw can damage the solid surface
basin and/or drain assembly components.
4.) Secure the drain cover to the drain basket using the
provided screw�
WASHERS

Page 16Rev. 1/2019 www.willoughby-ind.com
Installation & Operation Manual
Aquafount®180° Washfountain
WAF-5403 Series / WAF-5404 Series
Willoughby Industries, Inc. TOLL FREE (800) 428-4065 ● LOCAL (317) 875-0830 ● FAX (317) 875-0837
Installation Instructions (cont.)
Parts supplied:
• Valve Assembly (pre-installed)
• 3/8" x 4' Multi-Colored Water Lines
• Small Diameter Multi-Colored Pneumatic Tubing
• 1/4-20 x 1/2" security screws
• 1/4-20 tinnerman nuts
Note: Use wire tie mounts and wire ties to route
and secure wiring. Wires are long enough to
accommodate various routing paths. Longer
tubes may need to be bundled with wire ties so
they do not come in contact with sharp corners.
INSTALLATION INSTRUCTIONS
Visit our website at http.//www.willoughby-ind.com
2210 West Morris Street • P.O. Box 21217 • Indianapolis, IN 46221
(317) 638-2381 • Fax: (317) 638-6110 • (800) 428-4065
© Rev. 1/2007 Page 6
Parts supplied:
· Valve Assembly
Plug-In Transformer
Terminal Block Plate
4’ x 3/8" multi-colored water lines
· ¼-20 x ½” security screws
· ¼-20 tinnerman nuts
· Wire ties
· Wire tie mounts (adhesive backed)
1.) Locate terminal block plate and attach to pedestal using ¼-20 x ½” security screws and
tinnerman nuts.
2.) Locate the group of loose colored wires coming from the terminal block plate labeled “UPPER”.
3.) Feed two like-colored wires into each of the actuator housing assembles.
Note: Use wire tie mounts and wire ties to route and secure wiring. Wires are long enough to
accommodate various routing paths. Longer wires may need to be bundled with wire ties so that
they do not come in contact with sharp corners.
4.) Plug both like-colored wires into the actuator as shown above (either wire will work on each
connector).
5.) Locate the 3/8" x 4’ colored tubing water lines. Match up the color of tubing with the color of wire
and run the tubing into each of the actuator housings. Loosen the plastic nut and firmly push the
tubing into the elbow connector located in each spray head. Tighten nut securely. Repeat for
each spray head, being sure to match each of the colors together (wire and tubing).
6.) Connect each set of like-colored wires and tubing to each of the manifolded valves.
STEP FOUR-A
Connections for Infrared / Piezo Actuators
Infrared
Piezo
© Rev. 5/2010
Piezo Push Button Actuator
INSTALLATION INSTRUCTIONS
Visit our website at http.//www.willoughby-ind.com
2210 West Morris Street • P.O. Box 21217 • Indianapolis, IN 46221
(317) 638-2381 • Fax: (317) 638-6110 • (800) 428-4065
© Rev. 1/2007 Page 6
Parts supplied:
· Valve Assembly
Plug-In Transformer
Terminal Block Plate
4’ x 3/8" multi-colored water lines
· ¼-20 x ½” security screws
· ¼-20 tinnerman nuts
· Wire ties
· Wire tie mounts (adhesive backed)
1.) Locate terminal block plate and attach to pedestal using ¼-20 x ½” security screws and
tinnerman nuts.
2.) Locate the group of loose colored wires coming from the terminal block plate labeled “UPPER”.
3.) Feed two like-colored wires into each of the actuator housing assembles.
Note: Use wire tie mounts and wire ties to route and secure wiring. Wires are long enough to
accommodate various routing paths. Longer wires may need to be bundled with wire ties so that
they do not come in contact with sharp corners.
4.) Plug both like-colored wires into the actuator as shown above (either wire will work on each
connector).
5.) Locate the 3/8" x 4’ colored tubing water lines. Match up the color of tubing with the color of wire
and run the tubing into each of the actuator housings. Loosen the plastic nut and firmly push the
tubing into the elbow connector located in each spray head. Tighten nut securely. Repeat for
each spray head, being sure to match each of the colors together (wire and tubing).
6.) Connect each set of like-colored wires and tubing to each of the manifolded valves.
STEP FOUR-A
Connections for Infrared / Piezo Actuators
Infrared
Piezo
© Rev. 5/2010
Infrared Sensor Actuator
1.) Locate the terminal block plate and attach to the pedestal using 1/4-20 x 1/2" security screws
and tinnerman nuts�
2.) Locate the group of loose colored wires coming from the terminal block plate labeled "UPPER".
3.) Feed 2 like-colored wires into each of the actuator housing assemblies (either the Infrared or
Piezo assemblies, whichever applies to the installation).
4.) Plug both like-colored wires into the actuator as shown above (either wire will work on each
connector)�
5.) Locate the 3/8" multi-colored water lines. Match the color of each water line with the
corresponding color of wiring� Run the end of each water line up through the basin to the head
kit. Match the color of each water line to the spray head assembly below each actuator.
On each corresponding spray head, loosen the plastic nut on the plastic connector
and rmly push the water line through the plastic nut into the tting. Tighten the plastic nut to
secure the water line to the spray head. Repeat for each remaining water line. (**see JACO
Fitting Instructions on Page 19 for further detail)�
6.) Once all water lines have been attached to their corresponding spray heads, on each
corresponding manifolded valve assembly, loosen the plastic nut on the plastic connector and
rmly push the water line through the plastic nut into the tting. Tighten plastic nut to secure
the water line to the valve assembly� Repeat for each water line�
7.) Connect each set of like-colored wires to each of the manifolded valves.
Step 4A: Connections for Infrared/Piezo Actuators

Page 17Rev. 1/2019 www.willoughby-ind.com
Installation & Operation Manual
Aquafount®180° Washfountain
WAF-5403 Series / WAF-5404 Series
Willoughby Industries, Inc. TOLL FREE (800) 428-4065 ● LOCAL (317) 875-0830 ● FAX (317) 875-0837
Installation Instructions (cont.)
Step 4B: Connections for Pneumatic Actuators
Parts supplied:
• Valve Assembly (pre-installed)
• 3/8” x 4’ Multi-Colored Water Lines
• Small Diameter Multi-Colored
Pneumatic Tubing
• 1/4-20 x 1/2" security screws
• 1/4-20 tinnerman nuts
Note: Use wire tie mounts and wire ties to
route and secure tubing. Longer tubes
may need to be bundled with wire ties so
that do not come in contact with
sharp corners.
1�) Locate the small multi-colored pneumatic tubing� Feed each one into each of the actuator
housing assemblies�
2.) Plug each tube onto the hose barb on the back of the push button.
3.) Locate the 3/8" multi-colored water lines. Match the color of each water line with the
corresponding color of tubing� Run the end of each water line up through the basin to the head
kit. Match the color of each water line to the spray head assembly below each push button
actuator. On each corresponding spray head, loosen the plastic nut on the plastic connector
and rmly push the water line through the plastic nut into the tting. Tighten the plastic nut to
secure the water line to the spray head. Repeat for each remaining water line. (**see JACO
Fitting Instructions on Page 19 for further detail)�
4.) Once all water lines have been attached to their corresponding spray heads, on each
corresponding manifolded valve assembly, loosen the plastic nut on the plastic connector and
rmly push the water line through the plastic nut into the tting. Tighten plastic nut to secure
the water line to the valve assembly� Repeat for each water line�
5.) Connect each set of like-colored tubing to each of manifolded valves.
Pneumatic Push Button (Similar 3-station unit shown)

Page 18Rev. 1/2019 www.willoughby-ind.com
Installation & Operation Manual
Aquafount®180° Washfountain
WAF-5403 Series / WAF-5404 Series
Willoughby Industries, Inc. TOLL FREE (800) 428-4065 ● LOCAL (317) 875-0830 ● FAX (317) 875-0837
Step 5: Final Assembly
Parts supplied:
• Solid Surface Top Cover
• Access Cover
• 1/4-20 Tinnerman Nut
• 1/4-20 x 1" Security Screw
• 1/4-20 x 1-1/2" Flat Head
Security Screws
1�) Make all nal plumbing connections to valve inlets using supplied ex hoses (ex hoses have
shut-o valves attached that should be connected to the supply inlets).
2�) Once all of the connections in the actuator housings are complete, locate the transformer.
NOTE: PLUG-IN TRANSFORMER (IF NEEDED) MUST BE USED WITH A GROUND FAULT
INTERRUPT (GFCI) RECEPTACLE TO HELP PREVENT POSSIBLE ELECTRICAL SHOCK.
3�) Test the system for leaks (both supply and waste).
4�) Using 1/4-20 x 1-1/2" at head security screws, attach top cover to the actuator housing.
5�) Using 1/4-20 x 1" security screws, attach shroud to the backplate.
Installation Instructions (cont.)
TOP COVER
1/4-20 X 1-1/2" FLAT HEAD SECURITY SCREW
1/4-20 X 1/2"
SECURITY SCREW
ACCESS COVER

Page 19Rev. 1/2019 www.willoughby-ind.com
Installation & Operation Manual
Aquafount®180° Washfountain
WAF-5403 Series / WAF-5404 Series
Willoughby Industries, Inc. TOLL FREE (800) 428-4065 ● LOCAL (317) 875-0830 ● FAX (317) 875-0837
INSTALLATION INSTRUCTIONS
Visit our website at http.//www.willoughby-ind.com
2210 West Morris Street • P.O. Box 21217 • Indianapolis, IN 46221
(317) 638-2381 • Fax: (317) 638-6110 • (800) 428-4065
© Rev. 11/2006
Note: It is not necessary to disassemble this fitting for application. Merely insert tubing to stop and
tighten seal.
1. Cut tubing end squarely and remove the internal burrs.
2. Insert the tubing through the back of the nut all the way through the nut assembly to the tube stop
in the fitting body (see illustration). If the tubing does not enter the nut easily, loosen the nut one turn
and reinsert the tubing all the way to the tube stop in the fitting body.
3. Turn the nut hand tight.
4. Wrench tighten the nut 1½ - 2 turns.
5. All nuts must be retightened when the system reaches projected operating temperature.
Note: To ensure proper assembly, tubing MUST be fully inserted into the fitting body all the way to
the tube stop.
Note: Squeaking sound when tightening nut is normal. For pipe threaded connections, Teflon tape
must be used.
JACO Fitting
Instructions
JACO Fitting Instructions

Page 20Rev. 1/2019 www.willoughby-ind.com
Installation & Operation Manual
Aquafount®180° Washfountain
WAF-5403 Series / WAF-5404 Series
Willoughby Industries, Inc. TOLL FREE (800) 428-4065 ● LOCAL (317) 875-0830 ● FAX (317) 875-0837
Mixing Valve Instructions
INSTALLATION INSTRUCTIONS
Visit our website at http.//www.willoughby-ind.com
2210 West Morris Street • P.O. Box 21217 • Indianapolis, IN 46221
(317) 638-2381 • Fax: (317) 638-6110 • (800) 428-4065
© Rev. 11/2007 Page 15
To Install
Q
NOTE: Installation should be in accordance with accepted
plumbing practices. Flush all piping thoroughly before installa-
tion.
1. Locate a suitable place for the tempering valve. Valve should
be accessible for service and adjustment and as close to the
point-of-use as possible.
2. Connect hot and cold water to the supply valve using 1/2”
NPT or 3/8” compression connections.
3. Connect outlet of tempering valve to fi xture(s) using 1/2”NPT
or 3/8” compression connections.
4. Turn on hot and cold water supplies. If any leaks are
observed, tighten connections as necessary to stop leaks
before proceeding.
5. Turn on fi xture and allow water to fl ow for 2 minutes.
Measure water temperature at outlet. If water is not at
desired temperature, adjust as necessary.
Specifi cations
Q
e480-00 .......................................................1/2" NPT (Rough Bronze)
e480-01 .................................................... 1/2" NPT (Rough Chrome)
e480-10 ...................................... 3/8"Compression (Rough Bronze)
e480-11 .....................................3/8"Compression (Rough Chrome)
Capacity: ................................................................. 4.0 gpm (15.0 l/m)
Approach Temperature: .......................... 5°F (2.8°C) above set pt.
Max. Operating Pressure: ......................................125psi (862 kpa)
Max. Static Pressure: ............................................. 125psi (862 kpa)
Max. Hot Water Temperature: ....................................180°F (82°C)
Temp. Adjustment Range:
............................................ ASSE Type T/P: 95 – 110°F (43-48°C)
................................................. ASSE Type T: 80 – 120°F (27-49°C)
Minimum Flow: ........................................................ 0.5 gpm (2.2 l/m)
Checks: ......................................................................................Integral
Construction: ........................................................... Cast Brass Body
Certifi ed: ................................................................................CSA B125
Listing .....................................................ASSE 1016-1996 (Type T/P)
.............................................................................................ASSE 1070
To Adjust Temperature
Q
1. Loosen locknut.
2. Turn on fi xture and run water for at least two (2) minutes
to allow supply temperature to stabilize.
3. Turn temperature stem counter-clockwise for hotter or
clockwise for colder outlet temperature.
4. Tighten locknut to prevent accidental or unauthorized
temperature adjustment.
5. Re-check outlet temperature.
Repair Kit
Q
Motor Repair Kit ........................................................................480-270
HydroGuard
®
T/P Series e480
Lavatory Combination Valve
Installation Instructions
IS-P-e480
Figure 1
Figure 2: Typical Installation
Outlet
Hot Water
Inlet
Temperature
Adjustment
Stem
Locknut Cold Water
Inlet
Advanced Thermal Activation
© Rev. 5/2010
This manual suits for next models
1
Table of contents
Other Willoughby Plumbing Product manuals

Willoughby
Willoughby WAF-2200 Series User manual

Willoughby
Willoughby Aquafount WAF-3603 Series User manual

Willoughby
Willoughby LRFC 703000IR User manual

Willoughby
Willoughby AquaFount WAF-4400 Series User manual

Willoughby
Willoughby WH-2800 Series User manual

Willoughby
Willoughby WWF-3606 User manual

Willoughby
Willoughby WH-1900 User manual

Willoughby
Willoughby AquaFount WAF-3606 Series User manual