© by WilTec Wildanger Technik GmbH Item 51331 Page 4
http://www.WilTec.de
http://www.aoyue.eu 03 2022-1
http://www.teichtip.de
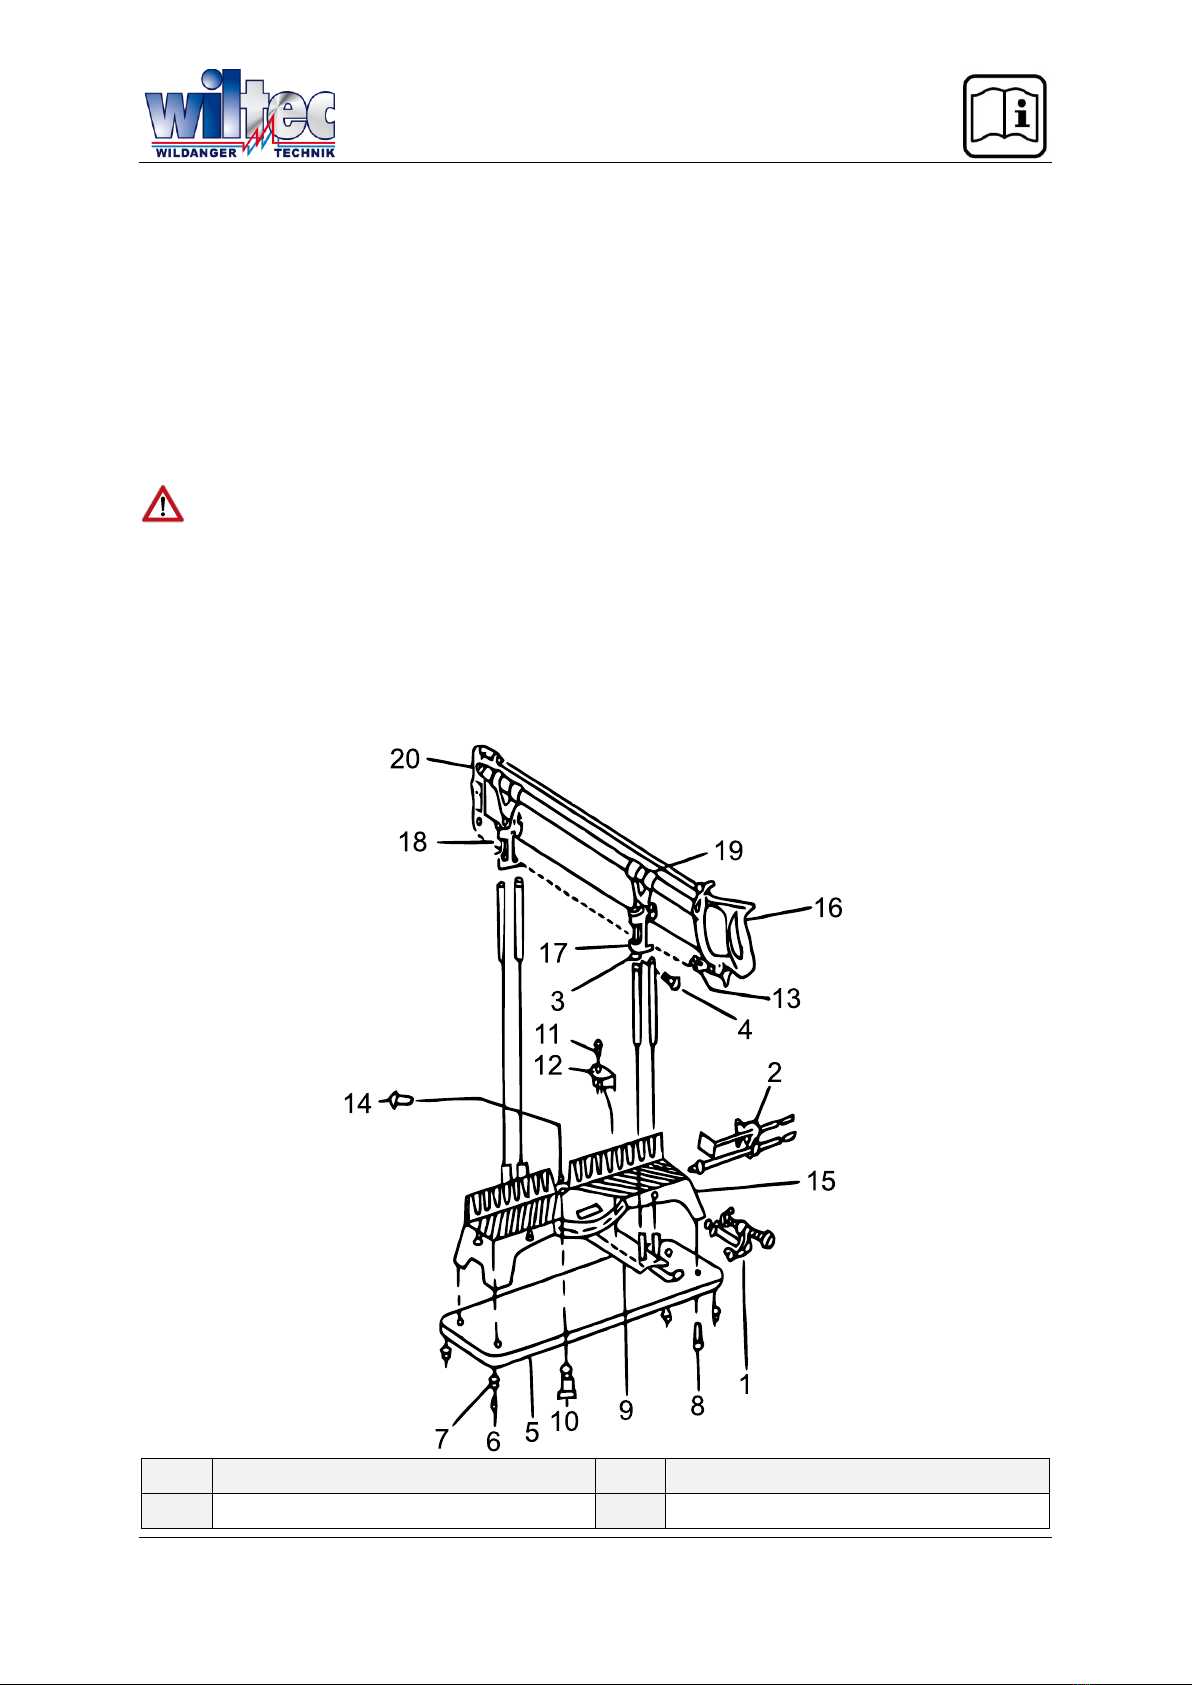
1. Saw table: The sturdy saw table consists of high-quality cast iron covered by a layer of rust
protection varnish. Aside from the pre-set angles shown above, the angle can be adjusted man-
ually with help of the angle adjusting screw.
2. Saw blade: The saw blade included in the scope of delivery is intended for cutting wood and
can easily be exchanged.
3. Cutting depth adjustment: The cutting depth can be adjusted manually in order to meet your
demands.
4. Guide bar: Four guide bars ensure an exact, stable and secure handling of the saw.
Assembly and adjustment
First, remove the saw and its parts from its packaging, check its integrity, and carefully read the opera-
tion manual. Check every part before setting this product up.
1. Place the base plate (5) on the end of the saw table (15) and attach it with help of the seat
screw (8).
Attention: The seat screw (8) should be tightly attached with help of a screw-wrench to
prevent the screw from loosening during the daily use.
2. Place the pivot spindle (10) into the round hole of the angle plate (9) and turn the saw table (15)
in a manner that causes its underside face upwards. Then carefully attach the pivot spindle (10)
to the saw table (15) with the help of a wooden hammer. Fasten the pivot spindle (10) with the
angle adjusting screw (14) by putting the same into the respective hole of the angle plate (9).
Mount the locator (12) to the angle plate (9) and fix it in place with the locator screw (11). After-
wards insert the screws to ensure that the angle plate (9) is reliably and permanently connected
to the saw table (15).
Attention: The clearance between the left, the right, the upper and lower parts the angle
plate (9) and the saw table (15) should not be too large to enable a perpendicular position be-
tween saw blade (18) and the saw table (15).
3. Adjust the cutting depth setting (3) with help of the guide bar and fix the adjusting screw (4)
before then adjusting the saw mount (17) according to your demands by using the guide bars.
4. Screw the vertical (2) and the horizontal vice (1) to the saw table (15) in a position matching the
requirements of your task.
Use
1. To horizontally adjust the cutting angle, lightly lift the saw at its handle (16) and set the angle
plate (9) to the desired angle. Adjust and fix the cutting depths setting (3) to regulate the cutting
depth.
2. To vertically adjust the cutting angle, loosen the screws on both sides of the angle plate (9),
bring the saw the saw to the desired position and once again tighten the screws. Please consider
the maximum cutting angle and make sure to use the cutting depth setting (3) to ensure that the
saw does not damage the surface of the sawing table.