WilTec 61950 User manual

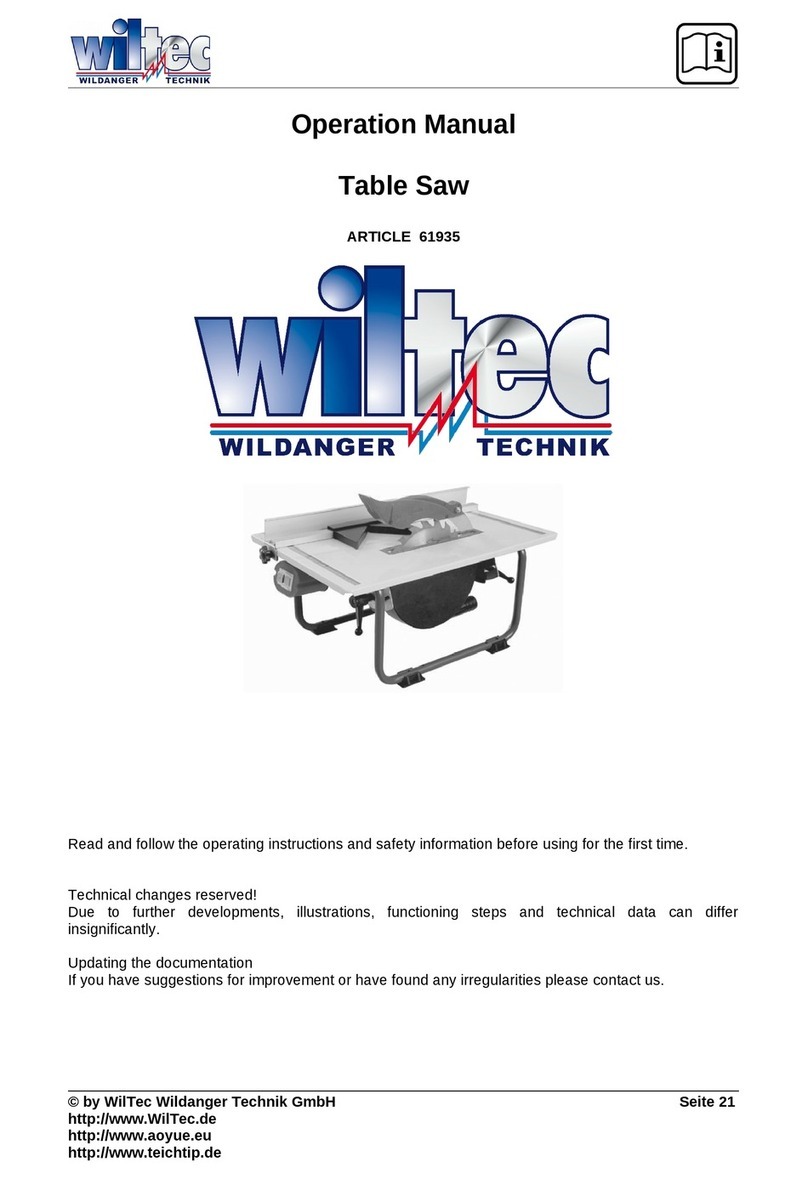
Operation Manual
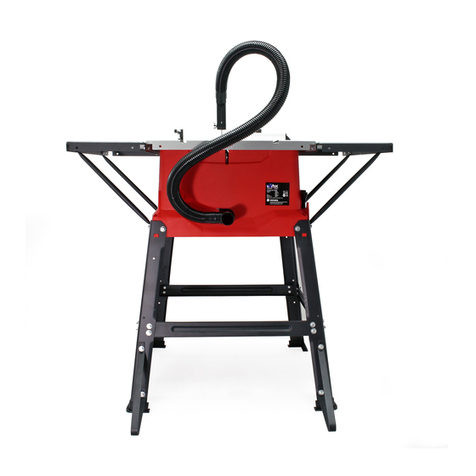
Bench-Type Circular Saw
61950
Illustration similar, may vary depending on model
Read and follow the operating instructions and safety information before using for the first time.
Technical changes reserved!
Due to further developments, illustrations, functioning steps and technical data can differ insignificantly.
Updating the documentation
If you have suggestions for improvement or have found any irregularities, please contact us.

© by WilTec Wildanger Technik GmbH Item 61950 Page 2
http://www.WilTec.de
http://www.aoyue.eu 05 2021-1
http://www.teichtip.de
The information contained in this document may alter at any time without previous notice. It is prohibited
to copy or spread any parts of this document in any way without prior written allowance. All rights re-
served.
The WilTec Wildanger Technik GmbH cannot be held accountable for any possible mistakes in this
operating manual, nor in the diagrams and figures shown.
Even though, the WilTec Wildanger Technik GmbH has undergone biggest possible efforts to ensure
that the operating manual is complete, faultless and up to date, mistakes cannot be entirely avoided.
If you should find a mistake or wish to make a suggestion for improvement, we look forward to hearing
from you.
Send an e-mail to:
or use our contact form:
https://www.wiltec.de/contacts/
The most recent version of this manual in various languages can be found in our online shop via:
https://www.wiltec.de/docsearch
Our postal address is:
WilTec Wildanger Technik GmbH
Königsbenden 12
52249 Eschweiler
Germany
Do you wish to pick goods up? Our pick-up address is:
WilTec Wildanger Technik GmbH
Königsbenden 28
52249 Eschweiler
Germany
To shorten the waiting time and allow for a rapid on-site transaction, we ask you to call us previously or
placing your order via the webshop.
E-mail: service@wiltec.info
Tel:+49 2403 55592-0
Fax: +49 2403 55592-15
To return orders for exchange, repair or for other purposes, please use the following address. Attention!
To allow for a smooth execution of your complaint or return, it is important to contact our customer
service team before returning the goods.
Returns Department
WilTec Wildanger Technik GmbH
Königsbenden 28
52249 Eschweiler
E-mail: [email protected]o
Tel:+49 2403 55592-0
Fax: +49 2403 55592-15

© by WilTec Wildanger Technik GmbH Item 61950 Page 3
http://www.WilTec.de
http://www.aoyue.eu 05 2021-1
http://www.teichtip.de
Introduction
Thank you for purchasing this quality product. To minimize the risk of injury we urge that our clients
take some basic safety precautions when using this device. Please read the operation instruc-
tions carefully and make sure you have understood its content.
Keep these operation instructions safe.
Warning! Wear earmuffs. Noise can permanently damage your hearing.
Warning! Wear a respirator mask. While working with wood or other materials, dust harmful to your
lungs can accumulate. Never use the device on materials that contain asbestos.
Warning! Always wear protective glasses. Sparks, splinters, or dust generated during use can lead
to blindness.
Warning! Risk of injury. Never reach into the moving saw blade.
Danger!
When using the device, a few safety precautions must be observed to avoid injuries and damage. Please
read the complete operating instructions and safety regulations with due care. Keep this manual in a
safe place so that the information is available at all times. If you give the device any other person, hand
over these operating instructions and safety regulations, too. We cannot accept any liability for damage
or accidents which arise due to a failure to follow these instructions and the safety instructions.
Safety regulations
Warning! Do read all safety regulations and instructions. Any errors made in following the safety
regulations and instructions may result in an electric shock, fire, and/or serious injury. Keep all safety
regulations and instructions in a safe place for future use.
Safe work
•Keep the work area tidy. Work area disorder can lead to accidents.
•Take environmental influences into account.
◦Do not expose electric tools to rain.
◦Do not use electric tools in a damp or wet environment.
◦Make sure that the work area is well-illuminated.
◦Do not use electric tools where there is a risk of fire or explosion.
•Protect yourself from electric shock. Avoid physical contact with earthed parts (e. g., pipes,
radiators, electric ranges, cooling units).
•Keep children away. Do not allow other persons to touch the device or the cable. Keep them
away from your work ares.
•Securely store unused electric tools. Unused electric tools should be stored in a dry, elevated
or closed location out of the reach of children.
•Do not overload your electric tool. They work better and more safely in the specified output
range.
•Use the correct electric tool.
◦Do not use low-output electric tools for heavy work.
◦Do not use the electric tool for purposes for which it is not intended. For example, do not
use hand-held circular saws for the cutting of branches or logs.

© by WilTec Wildanger Technik GmbH Item 61950 Page 4
http://www.WilTec.de
http://www.aoyue.eu 05 2021-1
http://www.teichtip.de
◦Do not use the electric tool to cut firewood.
•Wear suitable clothing.
◦Do not wear wide clothing or jewellery, which can become entangled in moving parts.
◦When working outdoors, anti-slip footwear is recommended.
◦Tie long hair back in a hair net.
•Use protective device.
◦Wear protective goggles.
◦Wear a mask when carrying out dust-creating work.
•Connect a dust extraction device if you will process wood, materials similar to wood, or
plastics.
◦If connections for dust extraction and a collecting device are present, make sure that they
are connected and used properly.
◦When processing wood, materials similar to wood, and plastics, operation in enclosed
spaces is only permitted with the use of a suitable extraction system.
•Secure the workpiece.
◦Use clamps or a vice to hold the workpiece in place. In this manner, it is held more securely
than with your hand.
◦An additional support is necessary for long work-pieces (table, trestle, etc.) in order to pre-
vent the machine from tipping over.
◦Always press the workpiece firmly against the working plate and stop in order to prevent
bouncing and twisting of the workpiece.
•Avoid abnormal posture.
◦Make sure that you have secure footing and always maintain your balance.
◦Avoid awkward hand positions in which a sudden slip could cause one or both hands to
come into contact with the saw blade.
•Take care of your tools.
◦Keep cutting tools sharp and clean in order to be able to work better and more safely.
◦Follow the instructions for lubrication and for tool replacement.
◦Check the connection cable of the electric tool regularly and have it replaced by a recog-
nised specialist when damaged.
◦Check the extension cables regularly and replace them when they are damaged.
◦Keep the handle dry, clean and free of oil and grease.
•Pull the plug out of the socket.
◦During non-use of the electric tool or prior to maintenance and when replacing tools such
as saw blades, bits, milling heads.
◦When the saw blade is blocked due to abnormal feed force during cutting, turn the machine
off and disconnect it from power supply. Remove the work piece and ensure that the saw
blade runs free. Turn the machine on and start a new cutting operation with a reduced feed
force.
◦Never remove loose splinters, chips or jammed wood pieces from the running saw blade.
•Do not leave a tool key inserted. Before switching on the machine, make sure that keys and
adjusting tools are removed.
•Avoid inadvertent starting. Make sure that the switch is off when you plug the plug into an
outlet.
•Use extension cables for outdoors.
◦Only use approved and appropriately identified extension cables for use outdoors.
◦Only unroll the cable from its reel.
•Stay attentive. Pay attention to what you are doing. Stay attentive when working. Do not use
the electric tool when you are distracted.
•Check the electric tool for potential damage.
◦Protective devices and other parts must be carefully inspected to ensure that they are fault-
free and function as intended prior to their being re-used.
◦Check whether the moving parts function faultlessly and do not jam, or whether parts are
damaged. All parts must be correctly mounted and all conditions must be fulfilled to ensure
fault-free operation of the electric tool.
◦The moving protective hood may not be fixed in the open position.

© by WilTec Wildanger Technik GmbH Item 61950 Page 5
http://www.WilTec.de
http://www.aoyue.eu 05 2021-1
http://www.teichtip.de
◦Damaged protective devices and parts must be properly repaired or replaced by a recog-
nised workshop, insofar as nothing different is specified in the operating manual.
◦Damaged switches must be replaced at a customer service workshop.
◦Do not use any faulty or damaged connection cables.
◦Do not use any electric tool on which the switch cannot be switched on and off.
•Attention! Special caution for double mitre cuts.
•Attention! Use of other insertion tools and other accessories can entail a risk of injury.
•Have your electric tool repaired by a qualified electrician. This electric tool conforms to the
applicable safety regulations. Repairs may only be performed by an electrician using original
spare parts. Otherwise, accidents can occur.
•Do not use the cable for purposes for which it is not intended. Do not use the cable to pull
the plug out of the outlet. Protect the cable from heat, oil and sharp edges.
Additional safety instructions
Safety precautions concerning saw blades
Warning!
•Do not use damaged, cracked or deformed saw blades.
•Replace a worn table insert.
•Only use saw blades recommended by the manufacturer which conform to EN 847-1.
Warning!
•Keep attention when changing the saw blade. The cutting width is not smaller and the main
blade thickness of the saw blade is not greater than the thickness of the gap wedge!
•Make sure that a suitable saw blade for the material to be cut is selected.
•Wear suitable personal protective device. This includes a hearing protection to avoid the risk of
becoming hearing impaired, a respiratory protection to avoid the risk of inhaling harmful dust.
•Wear gloves when handling saw blades and rough materials.
•Carry saw blades in a container whenever practical.
•Wear goggles. Sparks generated during work or splinters, chippings and dust coming from the
device can lead to loss of eyesight.
•Connect a dust collecting device to the electric tool when sawing wood. The emission of dust is
influenced, among other things, by the type of material to be processed, the significance of local
separation (collection or source), and the correct setting of the hood/guide plates/guides.
•Do not use saw blades made of high-speed alloy steel (HSS steel).
•In times of non-use, keep the push stick or the push block with the electrical power tool in its
holder at all times.
Safety precautions concerning maintenance and repair
•Pull out the mains plug for any adjustment or repair tasks.
•The generation of noise is influenced by various factors, including the characteristics of saw
blades, condition of saw blade and electric tool. Use saw blades which were designed for re-
duced noise development, insofar as possible. Maintain the electric tool and tool attachments
regularly and if necessary, initiate repairs in order to reduce noise.
•Report faults on the electric tool, protective devices or the tool attachment to the person respon-
sible for safety as soon as they are discovered.
Safe work
•Use the push stick or handle with sliding wood, to pass the workpiece securely out off the saw
blade.
•Make sure that the riving knife is always used, and is set up correctly.
•Use the upper blade guard and set it to the correct position.
•Only use saw blades for which the maximum permissible speed is not lower than the maximum
spindle speed of table saws and which are suitable for the material to be cut.

© by WilTec Wildanger Technik GmbH Item 61950 Page 6
http://www.WilTec.de
http://www.aoyue.eu 05 2021-1
http://www.teichtip.de
•Do not cut rebates or grooves without fitting a suitable guard, e. g., a tunnel-type guard, over
the saw table.
•Circular saws must not be used for slotting jobs (cutting grooves which end in the workpiece).
•When transporting the electric tool, only use the transport devices. Never use the protective
devices for handling or transport.
•Make sure that the upper part of the saw blade is covered during transport, e. g., by the protec-
tive device.
•Be sure to only use spacers and spindle rings specified by the manufacturer as suitable for the
intended purpose.
•The floor around the machine must be level, clean and free of loose particles, such as chips
and cutting residues.
•Always stand to the side of the saw blade when working with the saw.
•Do not remove any cutting residues or other parts of workpieces from the cutting zone while the
machine is running and the saw unit is not at rest.
•Make sure that the machine is always secured on a workbench or a table if at all possible.
•Support long workpieces (e. g., with a roller table) to prevent them sagging at the end of a cut.
•Attention! Never remove loose splinters, chips or jammed pieces of wood while the saw blade
is running.
•Switch off the machine to troubleshoot or remove jammed pieces of wood. First disconnect
the main power plug.
•Refitting, including adjusting and measuring works, and cleaning must be carried out only when
the motor is switched off. Disconnect the main power plug first.
•Before switching on again, ensure that keys and adjustment tools have been removed.
•Warning! This electric tool generates an electromagnetic field during operation. This field can
impair active or passive medical implants under certain conditions. In order to prevent the risk
of serious or deadly injuries, we recommend that persons with medical implants consult with
their physician and the manufacturer of the medical implant prior to operating the electric tool.
Safety precautions for the handling of saw blades
•Only use insertion tools if you are familiar with their use.
•Observe the maximum speed. The maximum speed specified on the insertion tool may not be
exceeded. If specified, observe the speed range.
•Observe the motor/saw blade direction of rotation.
•Do not use any insertion tools with cracks. Sort out cracked insertion tools. Repairs are not
permitted.
•Clean grease, oil and water off of the clamping surfaces.
•Do not use any loose reducing rings or bushes for the reducing of holes on saw blades.
•Make sure that fixed reducer rings for securing the insertion tool have the same diameter and
have at least 1/3of the cutting diameter.
•Make sure that fixed reducer rings are parallel to each other.
•Handle insertion tool with caution. They are ideally stored in the originally package or special
containers. Wear protective gloves in order to improve grip and to further reduce the risk of
injury.
•Prior to the use of insertion tools, make sure that all protective devices are properly fastened.
•Prior to use, make sure that the insertion tool meets the technical requirements of this electric
tool and is properly fastened.
•Only use the supplied saw blade for sawing operations in wood, materials similar to wood, plas-
tics and non-ferrous metals (except for magnesium and alloys containing magnesium).

© by WilTec Wildanger Technik GmbH Item 61950 Page 8
http://www.WilTec.de
http://www.aoyue.eu 05 2021-1
http://www.teichtip.de
№.
Name
№
Name
1
Sawing table
14
Stop rail
2
Table insert
15
Parallel stop
3
Saw blade
16
Legs
4
Saw blade guard
16a
Rubber foot
5
Extractor adapter
16b
Support frame
6
Riving knife
17
Long crossbar
7
Cross stop
18
Short middle bar
8
Table width extension
19
Hexagonal screw
9
Push stick
20
Hexagonal screw nut
10
Base frame
21
Cross stop
11
On/off switch
21a
Long struts
11a
Overload protection switch
21b
Longitudinal struts
12
Hand wheel
22a
Ring wrench 10/21 mm
13
Adjusting and locking grip
22b
Ring wrench 10/13 mm
Items supplied
Please check that the article is complete as specified in the scope of delivery. If parts are missing, please
contact our service centre or the sales outlet where you made your purchase at the latest within 5 work-
ing days after purchasing the product and upon presentation of a valid bill of purchase.
•Open the packaging and take out the device with care.
•Remove the packaging material and any packaging and/or transportation braces (if available).
•Check to see if all items are supplied.
•Inspect the device and accessories for transport damage.

© by WilTec Wildanger Technik GmbH Item 61950 Page 9
http://www.WilTec.de
http://www.aoyue.eu 05 2021-1
http://www.teichtip.de
•If possible, keep the packaging until the end of the guarantee period.
•Danger! The device and packaging material are no toys. Do not let children play with plastic
bags, foils or small parts. There is a danger of swallowing or suffocating!
•Pieces:
◦Legs 4× (16)
◦Long crossbar 2× (17)
◦Short middle bar 2× (18)
◦Short support 2× (21b)
◦Long support 2× (21a)
◦Traverse 4× (fig. 5, 21c)
◦Support frame 2× (16b)
◦Table width extension 2× (8)
◦Rubber feet 4× (16a)
◦Parallel stop (15)
◦Saw blade guard (4)
◦Cross stop (7)
◦Extractor adapter (5)
◦Push stick (9)
◦Ring wrench 10/21 mm (22a)
◦Ring wrench 10/13 mm (22b)
◦Hexagonal screw 36× (19)
◦Hexagonal screw nut 28× (20)
◦Riving knife
Proper use
The bench-type circular saw is designed for the slitting and cross-cutting (only with the cross stop) of all
types of timber commensurate with the machine size. The device is not to be used for cutting any type
of round wood.
The device is to be used only for its prescribed purpose. Any other use is deemed to be a case of
misuse. The user / operator and not the manufacturer will be liable for any damage or injuries of any
kind caused as a result of this.

© by WilTec Wildanger Technik GmbH Item 61950 Page 10
http://www.WilTec.de
http://www.aoyue.eu 05 2021-1
http://www.teichtip.de
Please note that our device has not been designed for use in commercial, trade or industrial applications.
Our warranty will be voided if the machine is used in commercial, trade or industrial businesses or for
equivalent purposes.
The device is to be operated only with suitable saw blades (saw blades made of HM or CV) It is prohib-
ited to use any type of HSS saw blade and cutting-off wheel.
To use the device properly, you must also observe the safety information, the assembly instructions and
the operating instructions to be found in this manual. All persons who use and service the device have
to be acquainted with these operating instructions and must be informed about the potential hazards of
the device. It is also imperative to observe the accident prevention regulations in force in your area. The
same applies for the general rules of health and safety at work.
The manufacturer will not be liable for any changes made to the device nor for any damage resulting
from such changes. Even when the device is used as prescribed it is still impossible to eliminate certain
residual risk factors.
The following hazards may arise in connection with the construction and design of the device:
•contact with the saw blade in the uncovered saw zone;
•reaching into the running saw blade (cut injuries);
•kick-back of workpieces and parts of workpieces;
•saw blade fracturing;
•catapulting of faulty carbide tips from the saw blade;
•damage to hearing if essential ear-muffs are not used;
•harmful emissions of wood dust when used in closed rooms.
Technical data
Intake voltage
220–240 V~50 Hz
Power (W)
S1 1800
S6 25 % 2000
Max. speed (
rpm
)
5500
Saw blades (×2) (㎜)
For wood 250×30×2.8 (24 teeth)
For fine cuttings 250×30×2.8 (48 teeth)
Table
Size (㎜)
642×485
With extension left/right (㎜)
642×940
Height (㎜)
830
Max. cutting depth 90° (㎜)
85
Max. cutting depth 45° (㎜)
65
Height adjustment (㎜)
0–85
Saw blade tilt (°)
0–45
Weight (㎏)
19
Operating mode S6 25 %: Continuous operation with idling (cycle time 10 min). To ensure that the motor
does not become excessively hot, it may only be operated for 25 % of the cycle at the specified rating
and must then be allowed to idle for 75 % of the cycle.

© by WilTec Wildanger Technik GmbH Item 61950 Page 11
http://www.WilTec.de
http://www.aoyue.eu 05 2021-1
http://www.teichtip.de
Danger! Noises and vibrations
Sound and vibration values have been measured in accordance with EN 61029.
Sound pressure level LpA (㏈(A))
91
Uncertainty KpA (㏈)
3
Sound power level LWA (㏈(A))
104
Uncertainty KWA (㏈)
3
The quoted values are emission values and not necessarily reliable workplace values. Although there
is a correlation between emission and immission levels, it is impossible to draw any certain conclusions
as to the need for additional precautions. Factors with a potential influence on the actual immission level
at the workplace include the duration of impact, the type of room, and other sources of noise etc., e. g.,
the number of machines and other neighbouring operations. Reliable workplace values may also vary
from country to country. With this information the user should at least be able to make a better assess-
ment of the dangers and risks involved.
Wear earmuffs. The impact of noise can cause damage to hearing.
Keep the noise emissions and vibrations Keep the noise emissions and vibrations to a minimum.
•Only use appliances which are in perfect working order.
•Service and clean the appliance regularly.
•Adapt your working style to suit the appliance.
•Do not overload the appliance.
•Have the appliance serviced whenever necessary.
•Switch the appliance off when it is not in use.
Caution! Residual risks
Even if you use this electric power tool in accordance with instructions, certain residual risks cannot be
rules out. The following hazards may arise in connection with the construction and layout of the device:
•damage to lungs if no suitable protective dust mask is used;
•damage to hearing if no suitable ear protection is used.
Before starting the device
Before you connect the device to the mains supply make sure that the data on the rating plate are
identical to the mains data.
Warning! The maximum permissible system impedance is 0.340 Ω at the interface point of the user’s
supply.
Warning! Always pull the power plug before making adjustments to the device.
•Unpack the bench-type circular saw and check it for damage which may have occurred in transit.
•The machine has to be set up where it can stand firmly, e. g., on a work bench, or it must be
bolted to a strong base.
•All covers and safety devices have to be properly fitted before the machine is switched on.
•It must be possible for the saw blade to run freely.
•When working with wood that has been processed before, watch out for foreign bodies such as
nails or screws etc.
•Before you actuate the on/off switch, make sure that the saw blade is correctly fitted and that
the moving parts of the device run smoothly.

© by WilTec Wildanger Technik GmbH Item 61950 Page 12
http://www.WilTec.de
http://www.aoyue.eu 05 2021-1
http://www.teichtip.de
Assembly
Warning! Pull out the power plug before carrying out any maintenance,
resetting or assembly work on the machine!
Assembling the base frame
•Turn the saw upside down and place it on the floor.
•Use the washers and the hex screws (19) to fasten the 4 legs (16) loosely to the saw.
•Now use the hex screws (19), the washers and the nuts (20) to fasten the longitudinal struts
(21b) and the cross-struts (fig. 5, 21c) loosely to the legs.
•Please note: The longer struts (21a) have to be used on the sides.
•Finally, tighten all screws and nuts on the base frame.
•Screw the additional legs (16) to the rear legs so that they point towards the rear of the machine.
•Plug the rubber feet (16a) onto the legs (16).
•Mount the tool hooks on the side of a front leg.
Fitting/removing the saw blade guard
•Mount the saw blade (3) on the riving knife (6) so that the screw fits through the hole in the riving
knife.
•Do not tighten the screw (19) too far –the blade guard (4) must be able to move freely.
•To remove the saw blade guard, proceed in reverse order.
Warning! The guard hood (4) must always be lowered over the workpiece
before you begin to cut.
Setting in the riving knife
•Danger! Pull out the power plug.
•Set the riving knife (6) to the max. cutting depth, move it to a 0° position and lock it in place.
•Remove the saw blade guard.
•• Take out the table insert (2).
•• Slacken the fixing screw (19).
Setting for maximum cuts
•Push the riving knife (6) until the gap between the saw table (1) and the upper edge of the riving
knife (6) is approx. 10 cm.
•The distance between the blade (5) and the riving knife (6) should be 3–5 mm.
•Re-tighten the screw (19) and mount the table insert (2).
Changing the table insert
•To prevent an increased danger of injury, the table insert should be changed whenever it is
worn or damaged.
•Remove the saw blade guard (4).
•Remove the screws (19).
•Take out the worn table insert (2).
•To fit the replacement table insert, proceed in reverse order.

© by WilTec Wildanger Technik GmbH Item 61950 Page 13
http://www.WilTec.de
http://www.aoyue.eu 05 2021-1
http://www.teichtip.de
Fitting/replacing the blade
•Danger! Pull out the power plug first.
•Remove the table insert by undoing the two countersunk head screws.
•Undo the nut with a size 24 wrench on the nut itself and a second fork wrench on the motor
shaft to apply counter-pressure.
•Important! Turn the nut in the direction of rotation of the saw blade.
•Take off the outer flange and pull the old saw blade off the inner flange by dropping the blade
at an angle.
•Clean the blade flange thoroughly before fitting the new blade.
•Mount and fasten the new saw blade in reverse order.
•Important! Note the running direction. The cutting angle of the teeth must point in running
•direction, i. e. forwards (see the arrow on the blade guard).
•Refit and set the riving knife (6) and the saw guard (4).
•Check to make sure that all safety devices are properly mounted and in good working condition
before you begin working with the saw again.
Assembling the table width extension
•Use the screws (19) and nuts (20) to fasten the table width extensions (8) loosely to the saw
table (1).
•Screw the supports loosely onto the saw housing and onto the table width extensions.
•Align the table width extensions level with the saw table.
•Finally, re-tighten all screws.
Using the saw
On/off switch
•To turn the saw on, press the green “I” button. Wait for the blade to reach its maximum speed
of rotation before commencing with the cut.
•To turn the machine off again, press the red “O” button.
Cutting depth (fig. 1)
Turn the hand crank (12) to set the blade (3) to the required cutting depth.
Turn
anti-clockwise
to obtain
a larger
cutting depth.
clockwise
a smaller
Parallel stop
•Stop height
◦The parallel stop (15) supplied with the circular saw has two different guide faces.
◦To change from the stop rail (14) to the lower guide face, you have to slacken the two
knurled screws in order to disconnect the stop rail (14) from the holder.
◦Remove the two knurled screws through the one slot in the stop rail and insert them in the
other slot.
◦Remount the stop rail on the holder.
◦The procedure for changing over to the higher guide face is similar.
•Cutting width
◦The parallel stop (15) has to be used when you make longitudinal cuts in wooden work-
pieces.

© by WilTec Wildanger Technik GmbH Item 61950 Page 14
http://www.WilTec.de
http://www.aoyue.eu 05 2021-1
http://www.teichtip.de
◦The parallel stop can be mounted on either side of the saw table (1).
◦The parallel stop has to be mounted in the guide rail (14) of the saw table (1).
◦The parallel stop can be set to the required dimension with the help of the scale on the
guide rail.
◦You can clamp the parallel stop in the required position by pressing the eccentric lever.
•Setting the stop length
◦The stop rail can be moved in the longitudinal direction in order to prevent the workpiece
from becoming jammed.
◦Rule of thumb: The rear end of the stop comes up against an imaginary line that begins
roughly at the centre of the blade and runs at an angle of 45° to the rear.
◦Set the required cutting width –slacken the knurled screws, and push the stop rail forward
until it touches the imaginary 45° line. –Re-tighten the knurled screws.
Cross stop
•Slide the cross stop (21) into the groove of the table.
•Slacken the knurled screw.
•Turn the cross stop until the arrow points to the angle required.
•Re-tighten the knurled screw.
•Important! Do not push the stop rail too far toward the blade. The distance between the stop
rail and the blade should be approx. 2 cm.
Setting the angle
•Undo the fixing handle.
•Turn the handle to set the desired angle on the scale.
•Lock the fixing handle again in the required angle position.
Overload protection switch
The motor of this appliance is protected against overload by an overload protection switch (11a). If the
rated current is exceeded, the overload switch switches the appliance off . After a short cooling-off time,
the appliance can be switched back on by pressing the overload protection switch.
Operation
Warning!
•After every new adjustment, we recommend you to make a trial cut in order to check the new
settings.
•After switching on the saw, wait for the blade to reach its maximum speed of rotation before
commencing with the cut.
•Take extra care when starting the cut!
•Never use the device without the suction function.
•Regularly check and clean the suction channels.
•The cap on the blade guard can be removed in order to be able to connect a suction hose to
the blade guard.
•A suction adapter set for connecting a vacuum extraction system to the blade guard and to the
suction adapter is available as an accessory.
Longitudinal cuts (fig. 19)
•Longitudinal cutting (also known as slitting) is when you use the saw to cut along the grain of
the wood. Press one edge of the workpiece against the parallel stop while the flat side lies on
the saw table. The guard hood must always be lowered over the workpiece.
•When you make a longitudinal cut, never adopt a working position that is in line with the cutting
direction.

© by WilTec Wildanger Technik GmbH Item 61950 Page 15
http://www.WilTec.de
http://www.aoyue.eu 05 2021-1
http://www.teichtip.de
•Set the parallel stop in accordance with the workpiece height and the desired width.
•Switch on the saw.
•Place your hands (with fingers closed) flat on the workpiece and push the workpiece along the
parallel stop and into the blade.
•Guide at the side with your left or right hand (depending on the position of the parallel stop) only
as far as the front edge of the guard hood.
•Always push the workpiece through to the end of the splitter.
•The piece cut off remains on the saw table until the blade is back in its position of rest.
•Secure long workpieces against falling off at the end of the cut (e. g., with a roller stand).
Cutting narrow workpieces
•Be sure to use a push stick (9) when making longitudinal cuts in workpieces smaller than
120 mm in width. A push stick is supplied with the saw! Replace a worn or damaged push stick
immediately.
•Be sure to use a push block when making longitudinal cuts in very narrow workpieces with a
width of 30 mm and less. The low guide face of the parallel stop is best used in this case.
•There is no push block supplied with the saw! (Available from your specialist dealer.) Replace
the push block without delay when it is worn.
Bevel cuts
•Bevel cuts must always be used using the parallel stop (15).
•Set the blade to the desired angle.
•Set the parallel stop in accordance with the workpiece width and height.
•Carry out the cut in accordance with the work-piece width.
Cross cuts
•Slide the cross stop (7) into one of the grooves in the table and adjust to the required angle. If
you also want to tilt the blade, use the groove which prevents your hand and the cross stop from
making contact with the blade guard.
•Press the workpiece firmly against the cross stop.
•Switch on the saw.
•Push the cross stop and the workpiece toward the blade in order to make the cut.
Warning!
•Always hold the guided part of the workpiece. Never hold the part which is to be cut off.
•Push the cross stop forward until the workpiece is cut all the way through.
•Switch off the saw again. Do not remove the pieces cut off until the blade has stopped rotating.
Replacing the power cord
Danger! If the power cable for this device is damaged, it must be replaced by the manufacturer or its
after-sales service or similarly trained personnel to avoid danger.
Cleaning, maintenance and ordering of spare parts
Danger! Always pull out the mains power plug
before starting any cleaning work.
Cleaning
•Keep all safety devices, air vents and the motor housing free of dirt and dust as far as possible.
Wipe the device with a clean cloth or blow it with compressed air at low pressure.
•We recommend that you clean the device immediately each time you have finished using it.

© by WilTec Wildanger Technik GmbH Item 61950 Page 16
http://www.WilTec.de
http://www.aoyue.eu 05 2021-1
http://www.teichtip.de
•Clean the device regularly with a moist cloth and some soft soap. Do not use cleaning agents
or solvents; these could attack the plastic parts of the device. Ensure that no water can seep
into the device. The ingress of water into an electric tool increases the risk of an electric shock.
Carbon brushes
In case of excessive sparking, have the carbon brushes checked only by a qualified electrician.
Danger! The carbon brushes should not be replaced
by anyone but a qualified electrician.
Maintenance
There are no parts inside the device which require additional maintenance.
Ordering replacement parts
Please quote the following data when ordering replacement parts:
•type of machine,
•article number of the machine,
•identification number of the machine,
•replacement part number of the part required.
Storage
Store the device and accessories in a dark and dry place at above freezing temperature. The ideal
storage temperature is between 5 ℃and 30 ℃. Store the electric tool in its original packaging.

© by WilTec Wildanger Technik GmbH Item 61950 Page 19
http://www.WilTec.de
http://www.aoyue.eu 05 2021-1
http://www.teichtip.de
Disposal regulations
EU guidelines regarding the disposal of scrap electric appliances (WEEE, 2012/19/EU) were imple-
mented in the law related to electrical and electronic device and appliances.
All WilTec electric devices that fall under the WEEE regulations are labelled with the crossed-out
wheeled waste bin logo. This logo indicates that this electric device must not be disposed with the do-
mestic waste.
The company WilTec Technik GmbH has been registrated in the German registry EAR under the WEEE-
registration number DE45283704.
Disposal of used electrical and electronic appliances
(intended for use in the countries of the European Un-
ion and other European countries with a separate col-
lection system for these appliances).
The logo on the article or on its packaging points out
that this article must not be treated as normal house-
hold waste but must be disposed to a recycling collec-
tion point for electronic and electrical waste device. By
contributing to the correct disposal of this article you
protect the environment and the health of your fellow
men. Environment and health are threatened by inap-
propriate disposal.
Material recycling helps reduce the consumption of raw materials.
Additional information on recycling this article can be provided by your local community, municipal waste
disposal facilities or the store where you purchased the article.
Address:
WilTec Wildanger Technik GmbH
Königsbenden 12 / 28
D-52249 Eschweiler
Important notice:
The reprint or reproduction, even of excerpts, and any commercial use, even in part of this instructions
manual require the written permission of WilTec Wildanger Technik GmbH.
Other manuals for 61950
1
Other WilTec Saw manuals

WilTec
WilTec 61076 User manual

WilTec
WilTec 62850 User manual

WilTec
WilTec 61950 User manual

WilTec
WilTec 51331 User manual

WilTec
WilTec 61935 User manual

WilTec
WilTec 61935 User manual

WilTec
WilTec 61917 User manual

WilTec
WilTec 61123 User manual

WilTec
WilTec 51331 User manual

WilTec
WilTec 62554 User manual
Popular Saw manuals by other brands

Batavia
Batavia THOE MULTISAW BT-PS006 operating instructions

Virutex
Virutex TM33W operating instructions

Roller
Roller Fox Translation of the original instruction manual

EINHELL
EINHELL 4326311 operating instructions

Würth
Würth Master PS 350 operating instructions

WESTLAND MACHINERY
WESTLAND MACHINERY FTA-202G user manual