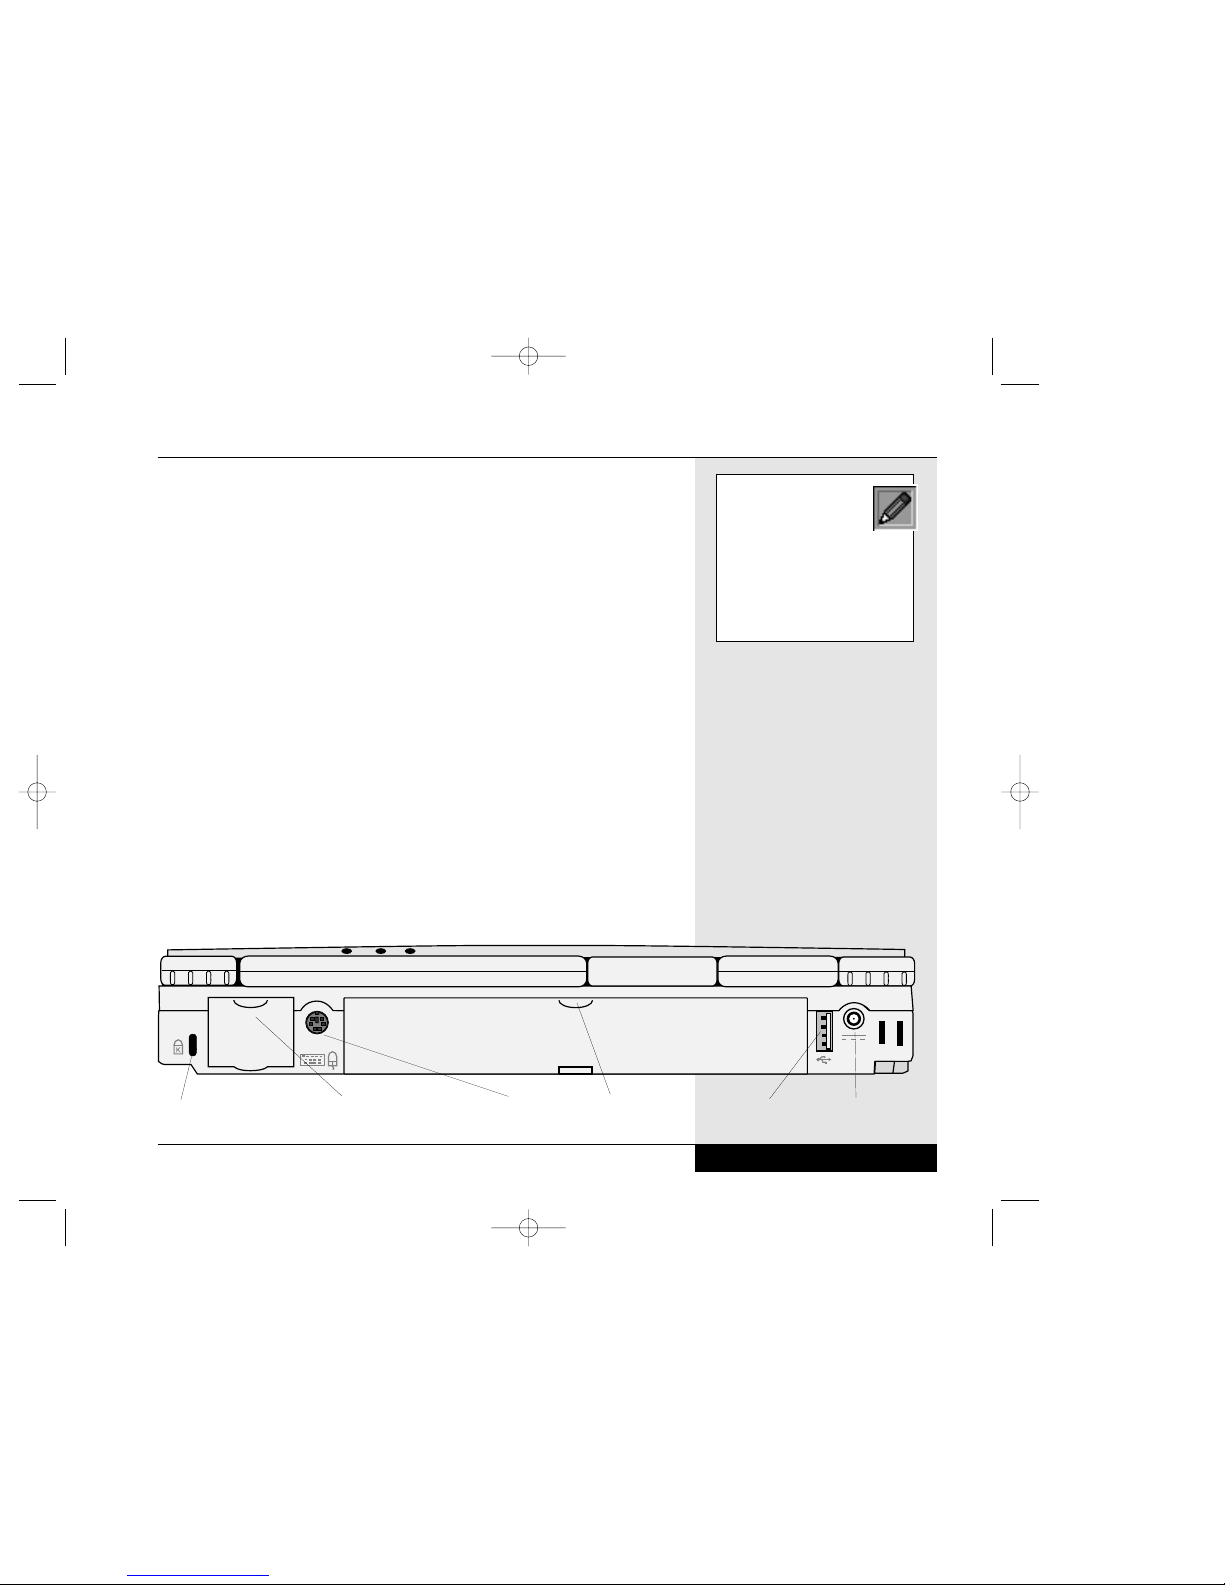
THE FRONT (Figure 1.1)
The front release latch is used for releasing the display panel to reveal the
LCD screen and keyboard of the WinBook XL3. To open the display panel:
slide the release latch to the right and gently lift the display panel to a
vertical position.
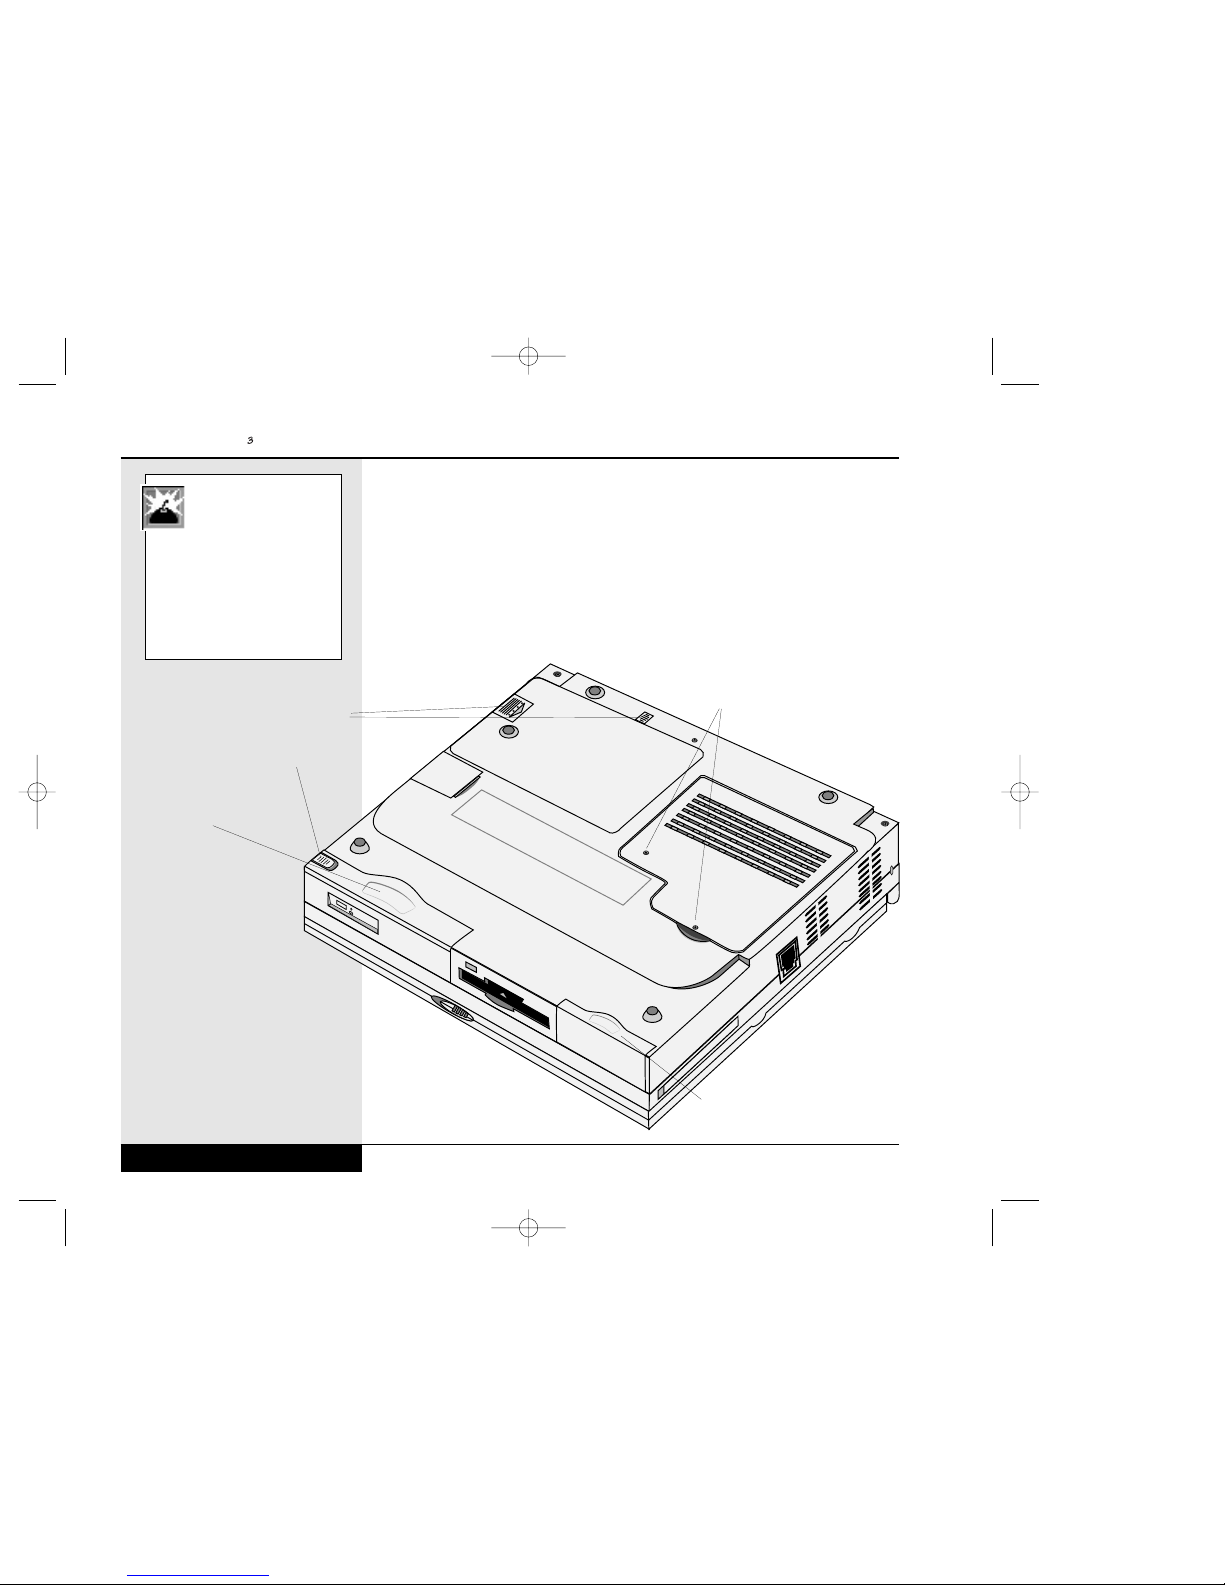
The hard disk drive for your system can be removed to allow for an easy
upgrade. You will need to first remove the release screw through the bottom
of the unit, as described in Chapter Seven.
The floppy disk drive or LS-120 drive is built into your system. If your
WinBook XL3 came with an LS-120 drive, you will be able to use this drive
to read or write to standard 3.5” floppy disks or to high-capacity LS-120
SuperDisks. If your unit came with a floppy disk drive, you will be able
to use 3.5” floppy disks, but not LS-120 disks.
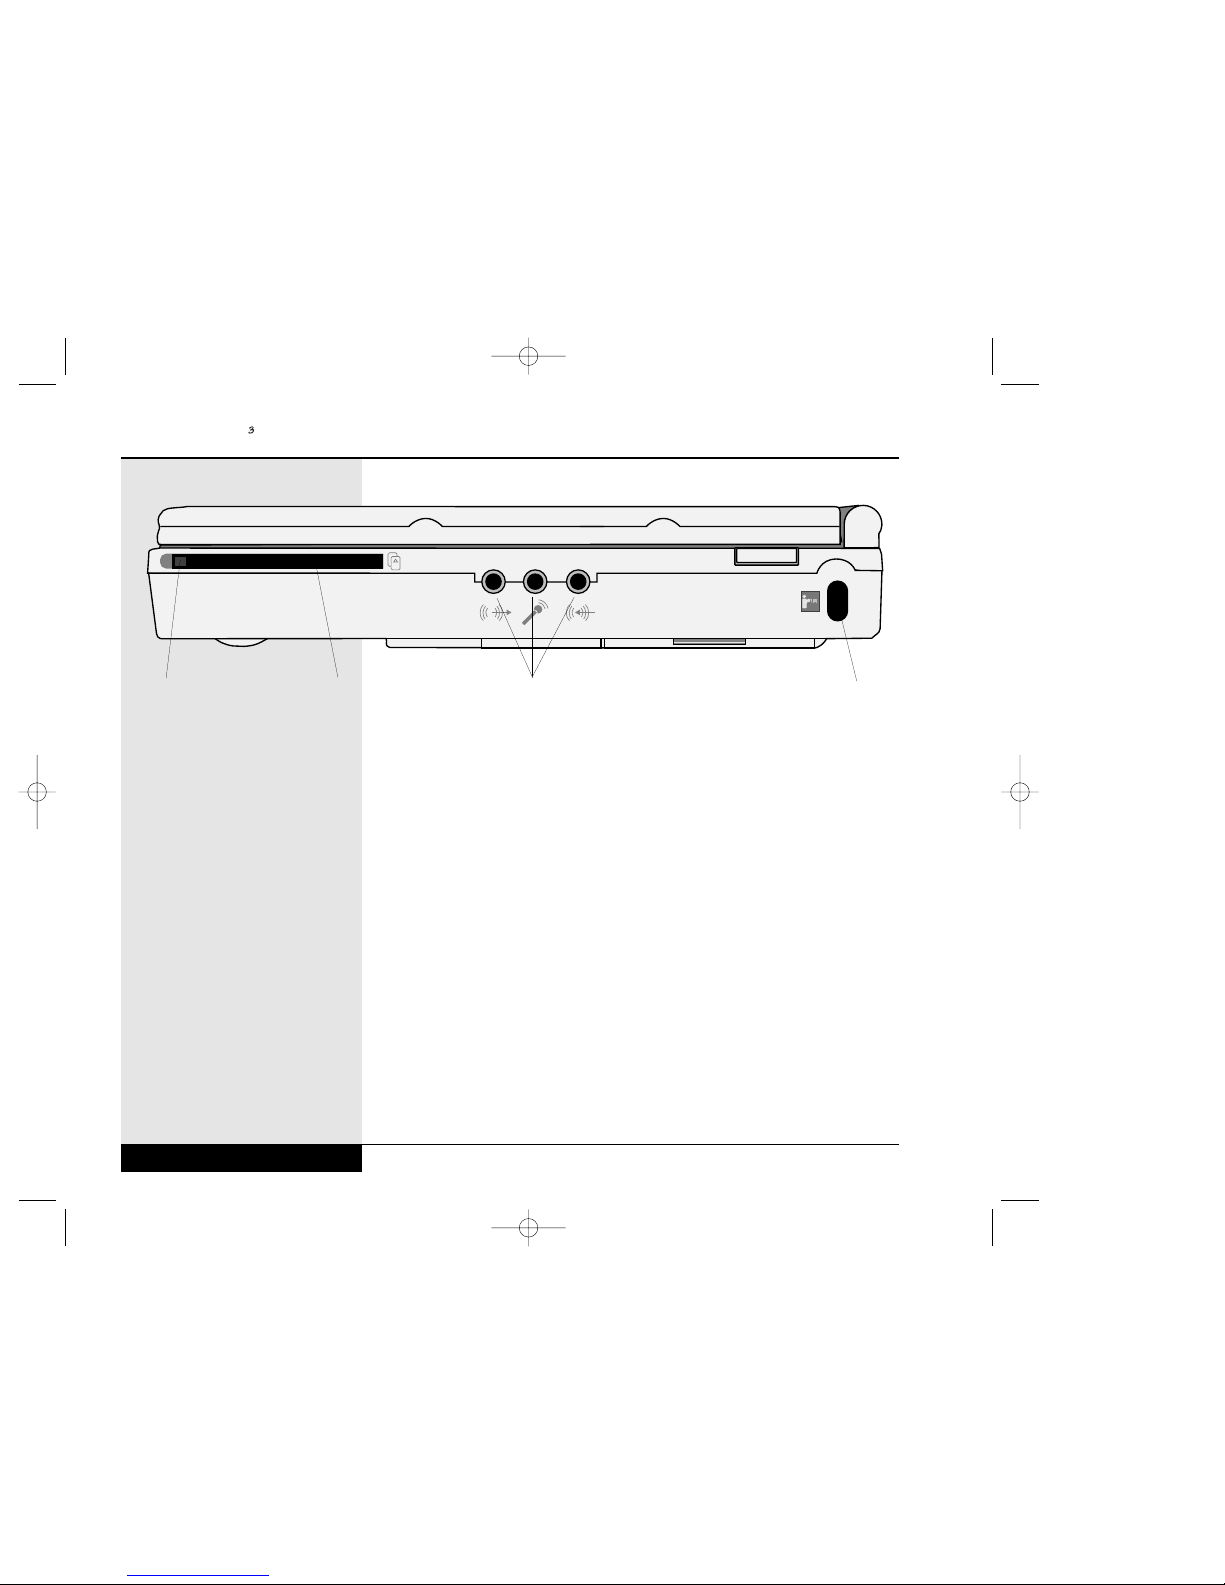
The CD-ROM or DVD drive is built into the system. To open the drive,
turn on the system and press the release button. The door will slide open.
Chapter 1: Getting Started
1.5
Figure 1.1: Front View of the Closed WinBook XL3
Display Panel Release
CD-ROM or DVD Drive
LS-120 Drive or Floppy Drive
If your unit came with
an LS-120 drive, there is
a motor for ejecting the
disks, as opposed to the spring
in a 3.5” floppy drive. You will
need to have the power on to
eject a disk from an LS-120 drive.
If you need to retrieve a disk and
cannot power up the system,
there is a small emergency
release hole located just above
the disk slot. Gently insert a
paper clip into the hole to manu-
ally eject the disk. This method is
designed to be used occasionally
for an emergency retrieval of a
disk and should not be used as
a regular method of removing
disks. Your drive will last longer
if you remove the disk using the
normal unloading method.
01 XL3 Manual v.1 9/13/99 8:13 AM Page 1.5