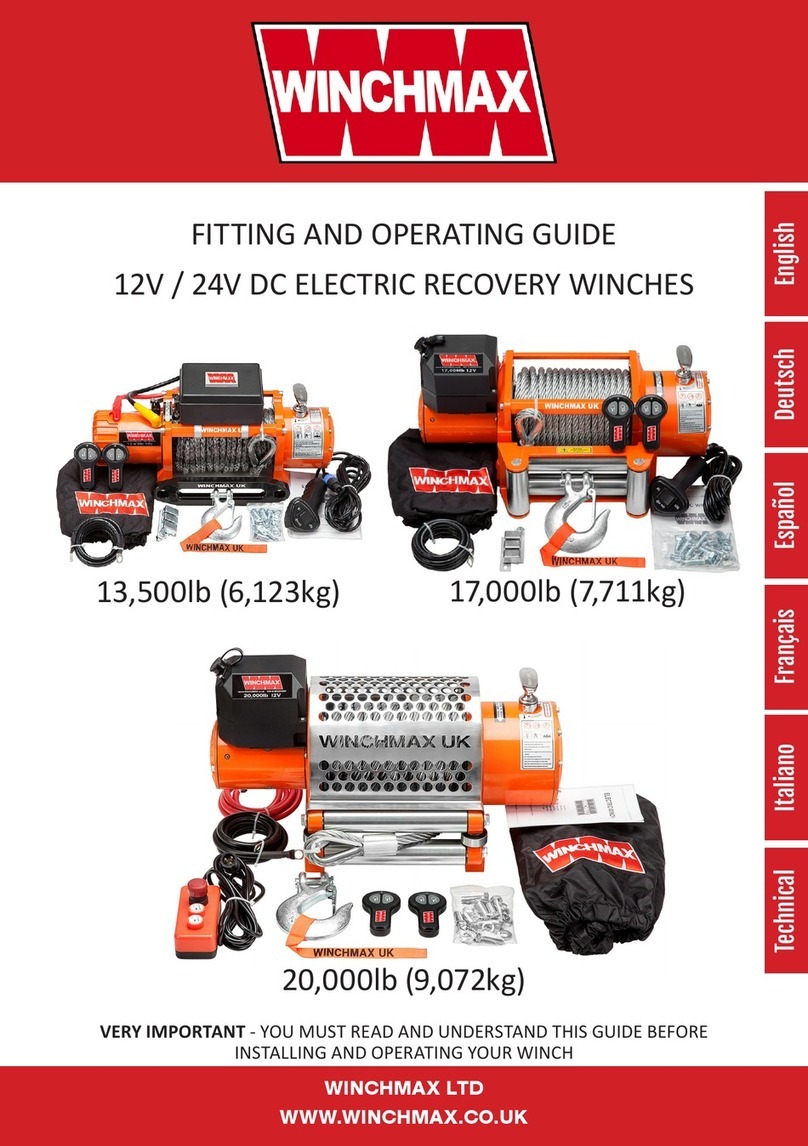
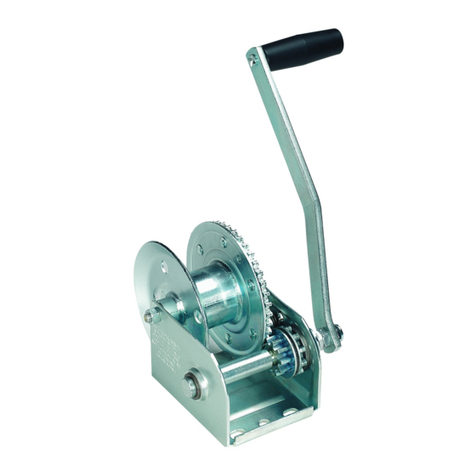
Winchmax Hydraulic Winch User manual

FITTING AND OPERATING
OWNERS GUIDE
WINCHMAX HYDRAULIC RANGE
10,000lb
15,000lb
20,000lb
VERY IMPORTANT - YOU MUST READ AND UNDERSTAND THIS GUIDE BEFORE
INSTALLING AND OPERATING YOUR WINCH
WINCHMAX LTD
WWW.WINCHMAX.CO.UK

Thank you for buying a WINCHMAX hydraulic winch suitable for mid duty commercial
vehicle recovery operaons. By correctly installing and using this product within its
limitaons, as per the instrucons provided and general good pracce, you can expect
many years of trouble-free service.
IMPORTANT
PLEASE READ AND UNDERSTAND THIS ENTIRE MANUAL BEFORE INSTALLING OR
OPERATING THIS PRODUCT – FAILURE TO DO SO COULD RESULT IN DAMAGE TO
PROPERTY, SERIOUS INJURY OR DEATH. UNDERTAKE A FULL SAFETY CHECK AND
RISK ASSESSMENT BEFORE EACH USE. ONLY SUITABLY TRAINED AND QUALIFIED
OPERATORS SHOULD USE THE WINCH.
Whilst we have aempted to provide comprehensive guidance for the safe operaon of
this winch, it remains the operator’s responsibility to evaluate and minimise the potenal
risk before and during every operaon. Please ensure that this guide is kept with the
winch for easy reference and do not hesitate to contact WINCHMAX if you require any
claricaon of its contents.
Warnings and General Safety Informaon
• No loose clothing or jewellery should be worn to prevent entanglement in moving
parts.
• Good quality overalls, non-slip protecve footwear, thick leather gloves and eye
protecon should be worn.
• It is the operator’s responsibility to ensure he/she and all spectators remain at a safe
distance. For spectators, this should be at least 1.5 mes the rope length being used.
• Never stand between the winch and the load.
• Never use a damaged winch. Check your winch thoroughly, including all electrical
connecons before use. Any damaged parts should be replaced, using only genuine
WINCHMAX parts.
• Check the direcon of rotaon is correct, the wire must load on and o the boom
of the drum.
• If a wire rope breaks or pulls loose under load it can lash back with signicant force.
We recommend using a heavy winch blanket/damper draped over the rope towards
the hook end to reduce whiplash in the event of rope failure.
• Protect the winch from shock/snatch loads - do not allow the winch rope to be
yanked by a rolling load or moving vehicle as this could momentarily more than
double the load on the rope potenally causing catastrophic failure.
• Never drive your vehicle to assist the winch in any way.
• Do not use the winch rope to tow vehicles.
• Do not submerge winch.
• Do not use winch if the rope is frayed or damaged.
• Always use hand saver tab and protecve gloves when handling the hook, or applying
hand tension when loading the rope back into the drum.

• Never hook the winch rope back on itself as this will cause strand damage.
• Do not use the winch as a hoist or for overhead liing. Do not use the winch to li,
support or move personnel.
• Always ensure that the winch rope re-spools onto the drum ghtly evenly, do not
allow cable bunching.
• Never aempt to use a non-sheathed synthec rope with a roller fairlead designed
for wire rope.
• Never approach the winch, hook or cable if someone else is at the controls.
• Always be certain the anchor point can withstand the load and will not slip.
• Protect the wireless remote from any possibility of accidental operaon.
• Never leave the wander lead connected when not in use, protect the wander lead
cable from damage or entrapment in the cable drum.
• Always shut down the hydraulic pump before undertaking any maintenance on the
winch.
Physical Installaon
WARNING: Correct installaon of your winch is vital for correct and safe operaon. It is
the responsibility of the installer to ensure that the winch is installed in accordance with
this guide and all relevant regulaons.
When unpacking, make sure that the item is intact and undamaged. If any part is missing
or damaged, please contact your supplier immediately.
• Only install your winch with a genuine WINCHMAX mounng plate or bumper. For
these instrucons, we are describing installaon using a pre-drilled WINCHMAX
mounng plate suitable for atbed installaons.
• The winch must be mounted with the direcon of pull perpendicular to the mounng
bolt xings and the mounng point on the vehicle must be capable of withstanding
the maximum rated pull of the winch.
• Mount the fairlead (rollers if the winch is ed with steel wire rope, or aluminium
hawse if the winch is ed with un-sheathed synthec rope) to the upstand of the
mounng plate using supplied bolts, nuts and washers.
• It must be understood that the fairlead acts as a guide only, it is not designed to
withstand winch loads. It must not be used to change the direcon of the rope any
more than a few degrees in the vercal or horizontal plane.
• If you need to change the direcon of pull to a greater degree, then a suitable snatch
block or pulley must be used.
• Mount the winch to the mounng plate using supplied bolts, square nuts and
washers, ghten the mounng bolts to a torque of 60Nm (45/lb). All mounng
points should be ulised.
• The supplied bolts are the correct length for installaon on a 5-7mm plate. Other
thickness’s may require bolts of a dierent length. The required criteria are that the
bolts are at least 8.8 grade high tensile, the thread length should be suciently long
to fully engage the square nut but must not protrude to the extent that the bolt
contacts the top of the nut housing in the winch frame.

• Feed the hook end of the wire rope from the drum through rollers to the front and
aach the clevis hook. Where the thimble eye is too big or if a xed hook is used, you
may need to remove the top fairlead roller to allow the hook end to pass through.
• With a synthec rope with a spliced-on hook you may need to pull the rope o and
feed the rope back through the hawse fairlead from the drum end.
Connecng the Hydraulic Supply:
WARNING: the hydraulic supply must be ed with a suitable regulator. Do not
exceed the rated pressure or ow for the winch.
• The connecon and set up of the hydraulic supply should only be undertaken by a
hydraulic engineer or suitably competent person.
• The specicaon of the hydraulic supply is crical - it must not exceed the limitaons
of pressure or ow as to do so could cause catastrophic failure of the winch.
• Where the hydraulic pump can exceed the maximum working pressure of the winch
a suitable pressure regulator must be installed and calibrated to protect the winch
from over-pressure.
Fig 1. Basic Conguraon Schemac

Remote Control (oponal) - wireless and plug in types.
The primary remote control for your winch is the plug-in wander lead. This should be
connected as per the schemac (Fig.1).
• Please ensure that the electrical supply from the baery(s) matches the coil voltage
(12v / 24v) of the solenoid direcon valve. Where the vehicle has a 24v system
consisng of two 12v baeries wired in series, a 12v supply can be derived from a
single baery If required.
• For the inial set-up of the winch, the wander lead should be used.
• Take care when inserng the wireless remote plug into the control box socket, you
must line up the socket end with the groove in the socket.
• The wander lead will allow smaller adjustments than the oponal wireless remote, so
should always be used when the load is close the winch or for ne adjustment.
SPOOLING THE ROPE
• Your winch may be supplied with the rope already loaded onto the drum or
separately to facilitate easier installaon.
• We recommend the use of an assistant when spooling the rope.
• Spooling should be undertaken on a large open and level area.
• First, lay out the rope in front of the vehicle ensuring there are no twists or kinks.
• With the winch clutch handle in the ‘disengaged’ posion, rotate the drum to a
convenient posion so that the rope holes in the drum are at the front.
• Feed the drum end of the rope through the fairlead UNDER the drum and back
through the rope hole so that the end of the rope is ush with the surface of the
drum.
• Secure the rope end using the Allen head screw.
• Aach the hook end to a suitable anchor point and posion the vehicle so there is at
least 2m of slack on the rope. Apply the vehicle hand brake.
• Holding the rope with gloved hands, at least 5m back from the winch apply as much
pressure as you can by leaning your body weight against the rope and walking
towards the winch whilst powering it in unl you take up the slack on the rope.
Ensure that each wrap lays ghtly next to the other unl the rope tensions against
the anchor point unl there least 4 wraps around the drum.
• The rope must be wound onto the drum from the boom.
• Power the winch in to pull the vehicle towards the anchor point applying the brakes
as required to maintain tension on the rope.
• During the operaon, regularly stop the winch, apply the handbrake to maintain
tension and check the rope is spooling on evenly and neatly as this will minimise the
possibility of damage to the rope under heavy loading.
• If you have an assistant, they should remain in the vehicle to operate the brake,
whilst you maintain control of the winch from outside the vehicle and using the wired
remote.

• When there is approx. 3m of rope le to be spooled in, using the hand saver to hold
the hook, reverse the winch slightly to allow the hook to be released.
• Maintaining tension on the rope, pulse the remote to take in the remaining rope and
then anchor the hook onto a suitable mounng point on the vehicle.
• When wire rope is new it is greasy and springy and can easily unwind on the drum if
tension is ever released.
• If the outer wraps of a wire rope do ‘unwind’ then you must pull the whole rope out
and re-spool under tension. Failure to observe this could result in the failure of the
drum xing.
WINCH OPERATION
(This describes using the winch on a vehicle for self-recovery. Modify the procedure as
required where you are using the winch to recover a second vehicle)
• Ensure vehicle is secure by applying parking brake or chocking wheels.
• The gearbox handle has two posions ‘engaged’ and ‘disengaged’. For free spool
the gearbox should be disengaged. For power operaon, the gearbox must be fully
‘engaged’.
• Power out (for a short distance) or free-spool the cable out and connect the hook to
a suitable anchor point.
• Re-check all cable rigging before commencing.
• Plug in the winch hand controller. Feed the hand controller around the front of the
vehicle and through the driver’s window.
• Operate the winch whilst guiding the path of the winch with the vehicle steering as
necessary.
• You must ensure that the cable winds evenly onto the drum. Acute angle winching
can result in rope bunching on the drum and excessive lateral loading resulng in
damage to the drum anges and cross-bars.
• When the operaon has been completed inspect the rope, if it has not spooled
ghtly and evenly it should be pulled out and re-spooled correctly under tension for
next use.
• Do not exceed the maximum rated load of your winch.
• We recommend the use of a snatch block and double line technique for any loads
exceeding 50% of winch rang. Always anchor hook back to suitable chassis xing,
not the winch mounng plate.
• A minimum of 4 ght wraps on the drum must be maintained to prevent failure of
drum xing. Do not pull wire rope out past the red marking.
• The clutch must be fully engaged for any powered winching operaon. Do not
aempt to disengage the clutch under load.
• Do not aempt to re-engage clutch while the winch is running.
• Never use vehicle tracon to assist the winch in any way.

MAINTAINING YOUR WINCH
• The winch should be operated at least once a month: power out approx. 10m of
cable, free spool 5m, then power back in under minimum 100kg load.
• Regularly check all xing bolts and the crossbar xings are secure.
• All moving parts are permanently lubricated with grease and with normal use do not
need greasing for the life of the winch.
• Clean your winch aer use, use only low-pressure water and a brush to rinse o any
dirt.
• Once dry you should use a light spray oil to coat the winch and wire rope before
installing the winch cover.
• The winch should not be immersed in dirty water.
• Replace any damaged components before next use.
CARE OF THE ROPE - Wire Rope
Wire Ropes Direcve ISO 4309:2004/2010 details the guideline for the care and
maintenance of wire rope and provides the criteria by which rope should be replaced. A
summary of these follows below
• 10 strands or more broken within a 25mm length of the rope
• Visible signs of stretching (reduced diameter along part of length) or is 10% less than
its original diameter at any point along its length.
• Excessive corrosion.
• Deformed twisted, kinked or bent.
• Faulty or broken hook or hook safety catch.
• Never use the hook to link back to the rope
• Always ensure that the rope spools ghtly and neatly back onto the drum.
• Dress the rope and hook with light oil to inhibit corrosion.
• Keep the winch covered when not in use.
CARE OF THE ROPE - Synthec Rope
• Do not allow the rope to contact sharp or abrasive objects.
• Avoid immersion in dirty water.
• Do not expose to strong detergents, fuels, oils or an-freeze soluons.
• Aer use, pull out the rope, wash, dry and carefully re-spool onto the drum.
• The rst 2-3m from the hook end is the most exposed and so vulnerable to damage.
The use of a protecve rope protector is recommended.
• Keep winch covered when not in use.
• Replace rope if there is any signicant bre damage

Parts diagram

Winch Parts List
Item No. Descripon QTY
1 Hexagon bolt M5 X 16 10
2Spring washer 10
3 Gearbox end cover 1
4 Hexagon bolt M8 X 20 6
5Bearing 1
6Spring washer 4
7Clutch gear 1
8Transmission sha 1
9 Planetary gear assembly 1 1
10 Plasc washer 1
11 Planetary gear assembly 2 1
12 Hexagon bolt M6 X 15 1
13 Clutch handle 1
14 Clutch handle localizer housing 1
15 Spring 1
16 Clutch handle localizer 1
17 Gearbox 1
18 Paper washer 2
19 Gearbox base 1
20 Spring washer 10
21 Screw M6X16 10
22 Sliding bearing 2
23 Hexagon connector 1
24 Drivesha 1
25 Hoop 14.8mm X 11.9mm X 1mm 1
26 Drum 2
27 Tie bar 2
28 Brake 1
29 Motor base 1
30 Motor ring base 1
31 Hydraulic motor 1
32 Spring washer 2
33 Hexagon bolt M12 X 45 2

Technical Specicaons 10,000lb Hydraulic Winch
Single Line Rated Pull 10,000lb (6,804kg)
Cable 25m of 9.1mm Galvanized Wire Rope
Hook ⅜” Clevis Hook. Zinc Plated. Safety Catch.
Fairlead 4-way Roller (wire rope)
Hawse (synthec rope)
Weight (GW) 56kg (123lb)
Layer Rated Line pull (lb) Pull per layer (kg) Line speed m/min
1 10000 4550 4.94
2 9150 4159 5.4
3 8440 3840 5.86
4 7280 3550 6.32
Single Line Rated Pull 15,000lb (6,804kg)
Cable 25m of 12mm Galvanized Wire Rope
Hook ½” Clevis Hook. Zinc Plated. Safety Catch.
Fairlead 4-way Roller (wire rope)
Hawse (synthec rope)
Weight (GW) 62kg (136lb)
Layer Rated Line pull (lb) Pull per layer (kg) Line speed m/min
1 15000 6780 4.81
2 12100 5470 5.96
3 10100 4570 7.12
4 8800 3980 8.27
Technical Specicaons 15,000lb Hydraulic Winch
Single Line Rated Pull 20,000lb (6,804kg)
Cable 25m of 14mm of Galvanized Wire Rope
Hook ½” Clevis Hook. Zinc Plated. Safety Catch.
Fairlead 4-way Roller (wire rope)
Hawse (synthec rope)
Weight (GW) 55kg (121lb)
Layer Rated Line pull (lb) Pull per layer (kg) Line speed m/min
1 20000 9072 4.24
2 17860 8118 4.75
3 16130 7332 5.26
4 14710 6686 5.77
Technical Specicaons 20,000lb Hydraulic Winch

Technical Specicaons
Common to 10,000lb, 15,000lb and 20,000lb Hydraulic Winches
Motor Hydraulic
Control Not Supplied
Gear Reducon Rao 32:1
Gear Train 3 Stage Planetary
Clutch Sliding Ring Gear
Braking Acon Automac
Drum Size Diameter 88mm Length 222mm
Drum Finish Black, painted.
Flow (Max) 60 l/min
Pressure Hose Connecons 18mm/1.5mm
Pressure (Max) 10.8Mpa (108 Bar)
Weight (GW) 56kg (123lb)
Overall Dimensions (LxWxH) 548 x 196 x 249mm
Mounng Bolt paern 10.00”±0.015” x 4.50”±0.010” (254 x 114.3mm)
No Load Line Speed 6.5m/min (21.3 /min)
Winch Finish Original Orange Powder Coated
Warranty
• WINCHMAX LTD provides a limited lifeme warranty for all its products
• It is the owner’s responsibility to remove and return any defecve item to
WINCHMAX for replacement or repair.
• In the case of failure, consequenal damage or loss is not covered.
• Failure to install and operate the winch in accordance with these instrucons and
general good pracce will invalidate the warranty.
• The warranty does not cover accidental damage, misuse or where the product has
been tampered with in any way.
• The warranty does not cover wearing parts such as the rope or brake.
• Please refer to the WINCHMAX website for full terms and condions.

WINCHMAX LTD
info@winchmax.co.uk www.winchmax.co.uk
The Powerhouse, Earsham Hall, Bungay, Suolk, NR3452AN. Tel +44(0)1986899266
Registered in England No. 4083040
Table of contents
Other Winchmax Winch manuals
Popular Winch manuals by other brands

Warn
Warn 60272 Instalation instruction

Ramsey Winch
Ramsey Winch HD-P50000 Operating, Service and Maintenance Manual

Warn
Warn 12-A-1D Series installation instructions

DINAMIC OIL
DINAMIC OIL S20 instruction manual

Warn
Warn 90250 User's installation guide

TUNGSTEN
TUNGSTEN T Series Installation and operator's manual