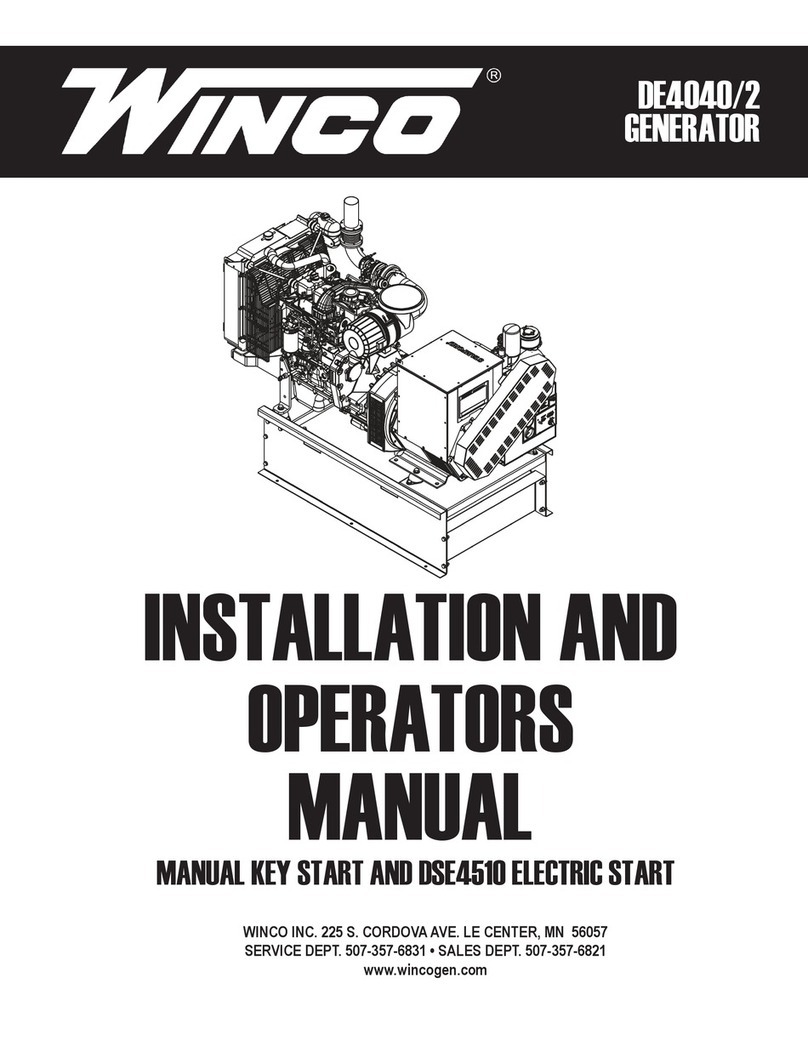
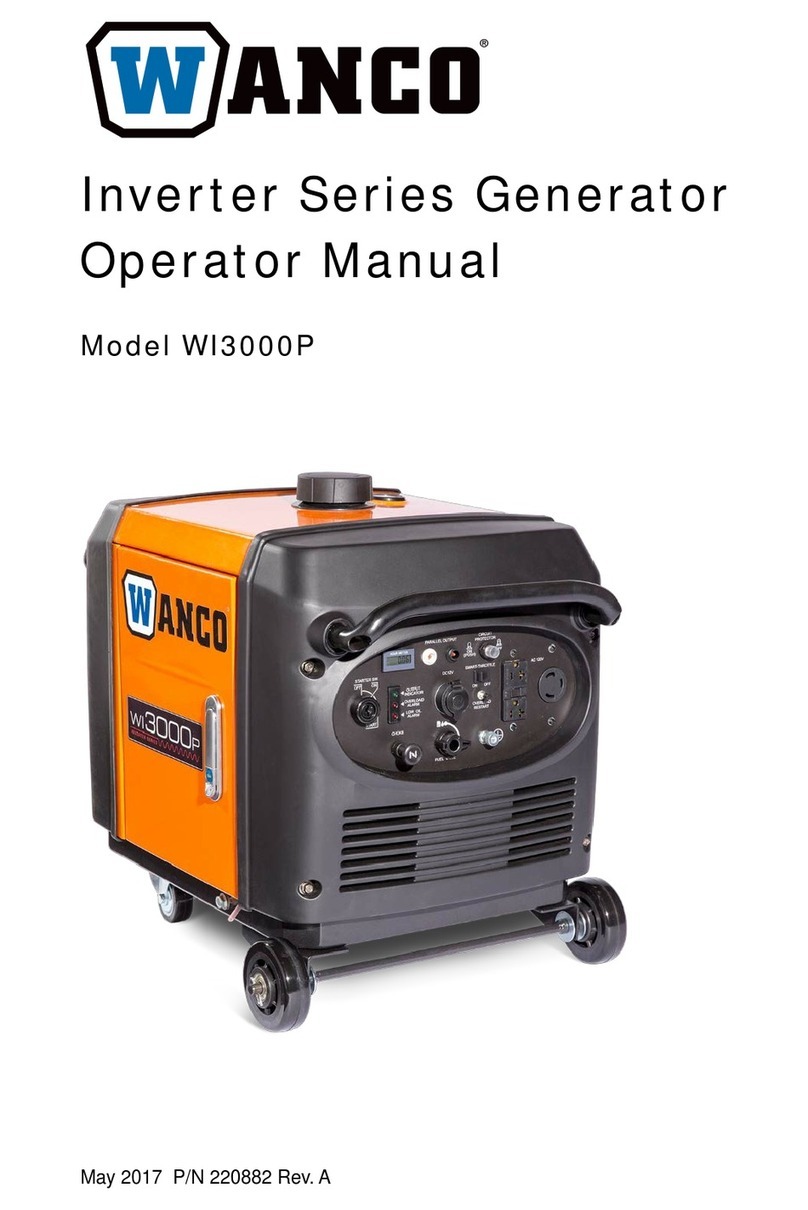
Winco DE30F4-XX/4 Setup guide

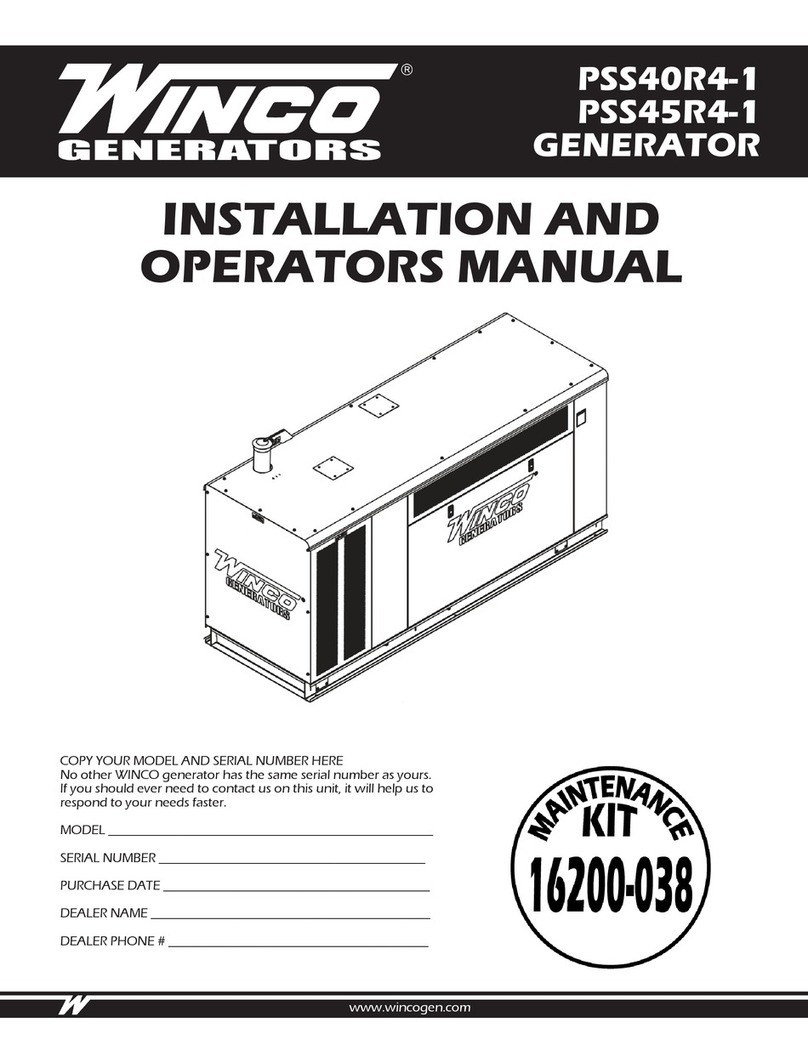
INSTALLATION AND
OPERATORS MANUAL
DE30F4-XX/4
GENERATOR
www.wincogen.com

2
OPM-158/D
TABLE OF CONTENTS
SAVE THESE INSTRUCTIONS 3
SAFETY INFORMATION 4
SAFETY DEFINITIONS
SPECIFICATIONS 5
DE30F4 5
INTRODUCTION 6
TESTING POLICY
Rated output of generator is based on engineering tests
of typical units, and is subject to, and limited by, the
temperature, altitude, fuel, and other conditions specified
by the manufacturer of applicable engines.
PRODUCT DESCRIPTION
PREPARING THE UNIT 7
START-UP CHECK LIST
UNPACKING
LIFTING THE GENERATOR SET
INSTALLATION 8
GENERAL INFORMATION
ENGINE GENERATOR SET MOUNTING
VENTILATION REQUIREMENTS
EXHAUST INSTALLATION
FUEL INSTALLATION
INSTALLING THE FUEL LINE
ELECTRICAL CONNECTIONS
GENERATOR CIRCUIT BREAKER
LOAD BALANCING
GROUNDING
TRANSFER SWITCH
DC WIRING
INSTALLING THE BATTERY 13
SERVICING BATTERIES
BATTERY CHARGER
& BLOCK HEATER
STARTING PROCEDURE 15
LUBRICATION
COOLANT
PRE-START CHECK LIST
MANUAL START PANEL
DSE7310 MKII
CONTROL POWER
OPERATING CONDITIONS 19
NORMAL OPERATION
HARSH ENVIRONMENTS OPERATIONS
COLD WEATHER OPERATIONS
MAINTENANCE 20
CHANGING THE OIL
CHANGING OIL FILTER
REFILLING COOLANT
CHANGING AIR FILTER
CHECKING WATER IN PRE-FILTER
CLEANING RADIATOR
REPLACING BLOW-BY FILTER
STORAGE
MAINTENANCE SCHEDULE
TROUBLE SHOOTING TABLES 22
ENGINE CODES 23
WIRING SIZE TABLE 29
ENGINE HARNESS 30
PANEL WIRING DIAGRAM 31
DSE7310 WIRING DIAGRAM 32
GENERATOR CONNECTIONS 33
CA EMISSION CONTROL STATEMENT 35
US ENVIRONMENTAL STATEMENT 36
REVALIDATION OF WARRANTY 37
LIMITED WARRANTY 38

3OPM-158/D
SAVE THESE INSTRUCTIONS
This manual contains important instructions that should
be followed during installation and maintenance of the
generator. Read and understand all instructions in the
manual before starting and operating the generator.
USING THIS MANUAL
Congratulations on your choice of a WINCO generator.
You have selected a high-quality, precision-engineered
generator designed and tested to give you years of
satisfactory service.
To get the best performance from your new generator, it is
important that you carefully read and follow the operating
instructions in this manual.
Should you experience a problem please follow the
“Troubleshooting Tables” near the end of this manual.
The warranty listed in the manual describes what you can
expect from WINCO should you need service assistance in
the future.
COPY YOUR MODEL AND SERIAL NUMBER HERE
No other WINCO generator has the same serial number as
yours. If you should ever need to contact us on this unit, it
will help us to respond to your needs faster.
MODEL _____________________________________________
SERIAL NUMBER _____________________________________
PURCHASE DATE ____________________________________
DEALER NAME ______________________________________
DEALER PHONE # ____________________________________

4
OPM-158/D
SAFETY INFORMATION
IMPORTANT SAFETY INSTRUCTIONS
This engine generator set has been designed and
manufactured to allow safe, reliable performance. Poor
maintenance, improper or careless use can result in
potentially deadly hazards; from electrical shock, exhaust
gas asphyxiation, or fire. Please read all safety instructions
carefully before installation or use. Keep these instructions
handy for future reference. Take special note and follow all
warnings on the unit labels and in the manuals.
CALIFORNIA PROPOSITION 65
WARNING: This product contains crude oil,
gasoline, diesel fuel and other petroleum
products, Antifreeze to which can expose you
to chemicals including toluene and benzene,
Ethylene glycol (ingested) which are known to the
State of California to cause cancer, birth defects or other
reproductive harm and developmental issues.
For more information go to www.P65Warning.ca.gov.
SAFETY DEFINITIONS
DANGER
Indicates an imminently hazardous situation
which, if not avoided, will result in death or
serious injury.
WARNING
Indicates a potentially hazardous situation
which, if not avoided, could result in death
or serious injury.
CAUTION
Indicates a potentially hazardous situation
which, if not avoided, may result in minor or
moderate injury. It may also be used to alert
against unsafe practices.
DANGER: ELECTRICAL SHOCK
The output voltage present in this equipment can cause
fatal electric shock. This equipment must be operated by a
responsible person.
A. Do not allow anyone to operate the generator
without proper instruction.
B. Guard against electric shock.
C. Avoid contact with live terminals or receptacles.
D. Use extreme care if operating this unit in rain or
snow.
E. Use only three-pronged grounded receptacles and
extension cords.
F. Be sure the unit is properly grounded, installation
must meet the national electrical code.
DANGER: DEADLY EXHAUST GAS
Exhaust fumes from any gasoline engine contain carbon
monoxide, an invisible, odorless and deadly gas that must
be mixed with fresh air.
A. Operate only in well ventilated areas.
B. Never operate indoors including attached garages
C. Never operate the unit in such a way as to allow
exhaust gases to seep back into closed rooms (i.e.
through windows, walls, floors).
DANGER: FIRE HAZARD
Gasoline and other fuels present a hazard of possible
explosion and/or fire.
A. Do not refuel when the engine is running or hot.
B. Keep fuel containers out of reach of children.
C. Do not smoke or use open flame near the generator
set or fuel tank.
D. Keep a fire extinguisher nearby and know its proper
use. Fire extinguishers rated ABC by NFPA are
appropriate.
E. Store fuel only in an approved container, and only in
a well ventilated area.
F. Follow local codes for closeness to combustible
material.
CAUTION: NOISE HAZARD
Excessive noise is not only tiring, but continual exposure
can lead to loss of hearing.
A. Use hearing protection when working around this
equipment for long periods of time.
B. Keep your neighbors in mind when using this
equipment.
CAUTION
Keep the generator and surrounding area clean.
A. Remove all grease, ice, snow or materials that create
slippery conditions around the unit.
B. Remove any rags or other materials that could create
a potential fire hazard.
C. Carefully clean up any gas or oil spills before starting
the unit.
D. Do Not use the generator area as a storage closet.
CAUTION
All service, including the installation or replacement of
service parts, should be performed only by a qualified
technician.
A. Use only factory approved repair parts.
B. Do not work on this equipment when fatigued.
C. Never remove the protective guards, covers, or
receptacle panels while the engine is running.
D. Use extreme caution when working on electrical
components. High output voltage from this
equipment can cause serious injury or death.
E. Always avoid hot mufflers, exhaust manifolds, and
engine parts. They can cause severe burns instantly.
F. The use of the engine-generator set must comply
with all national, state, and local codes.
5OPM-158/D
SPECIFICATIONS
DE30F4
STANDBY PRIME
VOLTS PF WATTS KVA AMPS WATTS KVA AMPS
120/240 1-PH 1.0 30,000 30.0 125 30,000 30.0 125
120/208 3-PH 0.8 30,000 37.5 104 30,000 37.5 104
120/240 3-PH 0.8 30,000 37.5 90 30,000 37.5 90
277/480 3-PH 0.8 30,000 37.5 45 30,000 37.5 45
346/600 3-PH 0.8 30,000 37.5 36 30,000 37.5 36
ENGINE
Model FPT F5 C
Starting System 12 Volt
Fuel Consumption (full load) 3.90 Gal/hr
Fuel ASTM D-975 - 2D*
Oil Type See Lubrication section in this manual
Oil Capacity 10 Quarts
Cooling System 50/50 mix
*See engine manual for additional fuel types and specifications
GENERATOR RESISTANCE (all value at 22°C)
Model Stamford S1L2-K1
Winding Group 711
Rotor 0.965 Ω
Stator 0.177 Ω per phase series star connected
Exciter Rotor 0.112 Ω per phase
Exciter Stator 15.5 Ω

6
OPM-158/D
INTRODUCTION
TESTING POLICY
Before any generator is shipped from the factory, it is fully
checked for performance. The generator is loaded to its
full capacity, and the voltage, current, and frequency are
carefully checked.
Rated output of generator is based on engineering tests
of typical units, and is subject to, and limited by, the
temperature, altitude, fuel, and other conditions specified
by the manufacturer of applicable engines.
PRODUCT DESCRIPTION
The engine-generator set consists of a multi-cylinder, liquid-
cooled engine nominally operating at 1800 RPM. This
generator set meets current EPA regulations for standby
or prime power use. The generator frequency regulation
is maintained by the engine electronic governor to within
+/- 0.5 Hertz. The generator is connected to the engine
flywheel via flexible drive disks. The generator set is skid
mounted with isolation mounts between the engine and
base.
NOTICE:
A Customer supplied 12 Volt battery is required to complete
the installation. Battery requirements are listed later under
the battery installation section.
The generator ships with an advanced DSE7310 digital
controller. The DSE7310 will electronically display useful
engine and generator performance information. The
controller starts and stops the generator and monitors
critical operating parameters and will shut the generator
down to protect the engine from damage.
GENERATOR SET:
Every WINCO generator set has its own unique identity
data plate. This data plate identifies the complete unit
model number, the system serial number, and has links to
the individual components that form the generator set in
our factory records. Several of the major components also
have their own individual data plates providing additional
information to document build data for warranty and
replacements parts. Be sure to have the main WINCO unit
data plate information recorded inside the front cover
of this manual for future reference and for identification
whenever requesting field or factory assistance.
Primary fields needed for assistance are complete model
number and serial number.
ENGINE:
This manual covers specific operation of the combined
engine generator set. The basic engine information
provided in this manual is not suitable for all operating
conditions. Refer to the engine operators manual for more
detailed operation and maintenance information.
CAUTION: EQUIPMENT DAMAGE
Be sure to check the engine oil level frequently as specified
in the engine manual.
The engine manufacturer has established an excellent
worldwide engine service organization; engine service is
available from a nearby authorized dealer or distributor.
Go to the WINCO website for a list of engine dealers
(wincogen.com) or contact the WINCO Service Department.
The rated power of each engine-generator is limited by
the temperature, altitude, and all other ambient conditions
specified by the engine manufacturer.
Derates
Above Sea Level
> 3,280 FT
> 9,842 FT
3% EVERY 1,640 FT
6% EVERY 1,640 FT
Ambient Temperature
>104°F 2% per 9°F
Units should not be operated in ambient temperature
greater than 125° Fahrenheit.
GENERATOR:
The nameplate includes a standby and prime/continuous
rating. The standby rating is the maximum amount of
power the generator set can produce. For prime power
applications the load should be equal to or less than the
prime power rating and the load is assumed to be variable.
It is acceptable to occasionally reach the standby rating
during prime operation to start motors or other temporary
surges.
WINCO generator sets use a brushless, AVR (Auto-Voltage
Regulator) controlled broad-range generator ends. The
generator converts rotational mechanical energy into
electrical energy. These WINCO units are equipped
with generators manufactured by Cummins Generator
Technologies. Each generator ‘end’ has its own data tag. A
unique serial number is on the data plate and the data label
is affixed to the main frame on the generator on the left
side.

7OPM-158/D
PREPARING THE UNIT
START-UP CHECK LIST
A Start-Up Completion & Warranty Validation Form was
sent along with this manual. This must be completed and
returned to WINCO Inc. within 180 days of the factory
invoice date. If this form is not returned, the Warranty may
be voided.
UNPACKING
1. As you receive your unit, it is critical to check it for any
damage. If any damage is noted, it is always easiest to
refuse the shipment and let WINCO take care of the
freight claim. If you sign for the unit, the transfer of the
ownership requires that you file the freight claim
2. Before proceeding with the preparations of your new
generator for operation, take a couple of minutes to
ensure the unit you have received is the correct model
and review the specification pages in this manual to
ensure that this unit meets your job requirements.
CAUTION: EQUIPMENT DAMAGE
These units are shipped with oil and a 50/50 mix of
coolant. Be sure to check all fluid levels before operating.
See engine manufacturer’s instruction manual for
recommended oil requirements before initial starting.
Once generator set is on-site:
1. Carefully remove the crate.
2. After inspecting the engine-generator for external,
physical damage, locate and check the following items
packed with the unit:
a. Installation and Operator’s Manual.
b. Engine manufacturer’s instruction manual.
c. Start-up and warranty validation form.
d. Battery hold-down brackets & hardware.
e. Unit components or accessory items shipped loose
for on-site installation.
f. Optional accessories.
3. Remove main frame hold-down bolts.
4. Unit can now be lifted from shipping rails.
LIFTING THE GENERATOR SET
NOTICE: PERSONAL INJURY
To prevent injury to persons or equipment, observe the
following guidelines when lifting the generator.
CAUTION
Do not attempt to lift the generator set by the means of
the lifting eyes on the engine or generator end. These
lifting points are only for the use during the manufacturing
process and are designed for lifting of the individual
generator set components and not the complete unit.
WARNING
NEVER attempt to lift the fuel tank filled with fuel. Sloshing
of the fuel can cause a shift in the balance of the fuel tank,
making for a DANGEROUS, unbalanced lifting load. DO
NOT PLACE FUEL IN THE TANK PRIOR TO LIFTING.
This generator set is equipped with integrated fork pockets
to allow the generator to be lifted from both sides and the
rear.
Always use forklifts of a proper rating and with long
enough forks to move the generator. As the distance from
the forklift mast increases the lifting capacity for the forklift
decreases. When lifting from the side the forks should
extend the entire width of the unit through the opposite
side frame rail.
CAUTION
When using forklift, take precaution to avoid fuel tank
fittings.
CAUTION: EQUIPMENT DAMAGE
It is possible to lift the generator from the radiator side. It
requires especially long forks and care should be taken to
ensure that no contact is made with the radiator. Pushing
the radiator will cause damage that is not covered under
warranty.
8” 8”9”
17” 11.9”

8
OPM-158/D
INSTALLATION
The max ambient temperature is 122°F. This unit should be
installed in a well ventilated area, ensuring the exhaust air
cannot be recirculated back into the engine.
CAUTION
This unit will get hot while it is running and for some time
afterward.
WARNING: PERSONAL INJURY
Before proceeding with the installation, be sure the engine
control is in the “stop” position and the emergency stop
depressed. Also, be sure the generator MLCB (main line
circuit breaker) in is the “off” position and the unit starting
battery is disconnected.
GENERAL INFORMATION
This series of engine-generator sets are designed and built
as open power units, meaning no weather protection has
been provided. These units must be installed inside of an
enclosure that will provide proper protection from the
elements.
The WINCO installation manual OPM-112 contains
additional information on indoor installations and
is available electronically through our website or by
requesting a copy from the factory.
Before beginning the installation process, recheck the
voltage, phase, and amperage rating of the generator
set. Be certain it can handle the intended load and are
compatible with the intended loads. Plans for installation
should be prepared with proper attention to mechanical
and electrical engineering detail to assure a satisfactory
system installation. The installation must comply with all
national, state, and local codes.
The information in this manual is offered only as a guide to
finalizing your installation plans and does not substitute for
sound engineering judgment for the specific application.
ENGINE GENERATOR SET MOUNTING
The unit’s main frame must be bolted securely to a solid
base. The engine-generator is mounted on channels which
are attached with special shock mounts to the main frame.
This allows the engine-generator free movement without
affecting the base or surrounding equipment.
WARNING: EQUIPMENT DAMAGE
Never mount these engine-generator sets to a wooden
base/structure. Over time, the wood will deteriorate and
the unit mountings will come loose. These units must be
mounted to a steel or concrete base.
VENTILATION REQUIREMENTS
WARNING: EQUIPMENT DAMAGE
It is the installer’s responsibility to ensure that there is
sufficient cooling air available to prevent the engine
and generator from over heating. Damage caused by
overheating is not covered by warranty.
Providing proper air movement during your installation
planning is essential. You will need to provide a fresh air
inlet as well as a hot air outlet (to the outside of protection
housing) for proper engine performance. These engine-
generator sets are equipped with unit mount radiators and
the engine is equipped with a pusher type fan. The hot
air from the face of the radiator must be ducted out of the
enclosure to ensure proper cooling. Failing to do so will
allow the hot air to recirculate around the radiator causing
the engine to overheat, resulting in an engine shutdown
and damage. If louvers are used in front of the hot air duct
to protect the unit from outside weather, the louvers should
be 1½ times as large as the area of the radiator face to
prevent back pressure.
When installing, ensure that the radiator is at least 0.75”
from a solid surface such as a wall or duct. The radiator
is mounted on rubber vibration isolators that allow it to
move. Placing the duct flange too close to a wall can result
in contact that will damage the radiator resulting in costly
repairs.
Foam or other seals should be used to form a tight
lip forcing all of the air from the engine fan out of the
enclosure. In addition to a hot air discharge, you must plan
a fresh air intake opposite the radiator discharge.
WARNING: EQUIPMENT DAMAGE
Failure to seal the radiator output will result in hot air
recirculation that will result in equipment overheating and
damage.
Their fresh air inlets should be 1½ to 2 times larger than the
radiator face. The extra air inlet area is required to minimize
restriction and to provide combustion air for the engine.
Do not block fresh air intakes with other equipment as this
will result in insufficient air flow to the engine for cooling.
Installing them opposite the hot air discharge will allow a
sweeping flow of cooling air across the engine, preventing
hot spots.
RADIATOR
DISCHARGE
FOAM SEAL
AIR INLET
DUCT
EXHAUST
THIMBLE

9OPM-158/D
EXHAUST INSTALLATION
WARNING: PERSONAL INJURY
Improper exhaust installation will allow dangerous gases
to seep into enclosed spaces causing a hazard to your
health and/or death.
All exhaust must be piped out of the enclosure. When
selecting a location to exhaust fumes make sure that the
potential for contact with people is controlled. Exhaust can
enter buildings through windows, ventilation systems and
other openings if proper precautions are not followed.
The exhaust must be isolated from the vibration of the
engine. If the exhaust is connected in a rigid system it will
result in damage to the engine. The generator comes
equipped with an engine mounted flex pipe to aid your
installation. Ensure proper alignment with the generator.
The flex can be eliminated if it is pushed to one side to make
a connection.
The most direct path possible should be used to get to the
outside of the enclosure. Each bend restricts the pipe and
increases back pressure. It may be necessary to increase the
exhaust pipe diameter in some applications.
The exhaust pipe is very hot. When passing through the
structure it is critical that a thimble or other appropriate
technique is used to dissipate the heat and prevent the
structure from catching on fire.
Water in the exhaust pipe and especially the Diesel
Oxidation Catalyst (DOC) will cause damage to the engine.
It is preferable to exhaust out the side of the enclosures.
Slope the pipe slightly downward away from the engine
to cause any water in the exhaust to run away from the
engine. Do not exhaust near intake. Once outside the
enclosure a rain cap or other technique must be used to
keep water out of the exhaust. In mobile applications make
sure the rain flap faces to the rear of the vehicle so that it is
not blown open during transportation.
In many applications the DOC works as the muffler. If it is
desired to decrease engine noise further adding a muffler to
the exhaust system is possible. The muffler cannot increase
back pressure to more than 0.725 psi.
FUEL INSTALLATION
The fuel supply should be as close to the engine as
possible. This will reduce the installation cost of fuel runs
and minimize line losses. The diesel fuel supply should be
no more than 3 feet below the fuel inlet pump. If your
fuel supply is lower than 3 feet, you may have to install an
additional lift pump to bring the fuel up to the mechanical
fuel pump on the engine.
The information in this manual is offered to assist you in
providing the proper fuel for your engine. However, this
information is only provided to inform you of the engine’s
requirements and assist in making you aware of the
decisions you must make. In no case should the instructions
or information provided be interpreted to conflict with any
local, state, or national codes. If in doubt, always consult
your local fire marshal or fuel supplier.
INSTALLING THE FUEL LINE
Engine-generator sets are properly adjusted before they
leave the factory. Connecting a fuel supply with adequate
supply volume is critical to reliable operation. Diesel units
with optional base mounted fuel tanks are pre-plumbed to
the mechanical fuel pump on the engine.
Open skid mounted diesel units are often supplied with
capped inlet and return lines. The use of a suitable customer
supplied flexible fuel lines is essential between the engine
and fuel supply to provide a vibration break between your
fuel supply and the engine.
WARNING: FIRE DANGER
Connecting rigid fuel line (i.e. steel or copper line) directly
to the inlet fuel filter or fuel pump may cause the fuel line
to crack during operation creating a serious fire hazard.
ELECTRICAL CONNECTIONS
NOTICE: CLASS 1 WIRING METHODS ARE TO BE USED FOR
ALL FIELD WIRING CONNECTIONS TO TERMINALS OF A
CLASS 2 CIRCUIT
NOTE: The symbol always indicates ground where
shown. All wiring must be completed in accordance with
the National Electric Code as well as any state and local
codes.
You must pay particular attention to wire size requirement
for the amperage of service you are dealing with. The table
below provides you guidance on wire sizing based on
both wire type and amperage. Wire amperages have been
derated for 40° C ambient temperatures operation.
GENERATOR CIRCUIT BREAKER
This unit DOES NOT come with a circuit breaker. The circuit
breaker will provide overload protection for the generator.
The following table gives you the recommended circuit
breaker size specifications. See actual breaker for wire
capabilities and torque specifications and restrictions.
Watts Voltage Phase CB AMP
30,000 120/240 1125-150
30,000 120/208 3100-130
30,000 120/240 3 90-110
30,000 277/480 335-45
The wire must be properly sized between the generator
and the load. Use the table 310-16 of the National Electrical
Fuel Inlet
Connection
Fuel Return
Line
Connection

10
OPM-158/D
Code ANSI/NFPA 70. to properly size the wire to meet or
exceed the amperage rating of the circuit breaker installed.
Lug size 10mm
CUSTOMER CONNECTIONS
ULine 1
VLine 2
WLine 3
NNeutral
Ground
The DSE 7310 controller uses current transformers (CT) to
monitor the amount of load on each leg of the generator. If
the wires are routed through the CT the wrong direction it
will result in a negative current readings on the controllers.
This can be corrected by swapping the wires on the CT
terminals in the generator end. Zip tie the wires to the CT
walls after installation in order to prevent wire movement.
WARNING: PERSONAL DANGER
These units are shipped with a NEUTRAL TO GROUND
BOND INSTALLED. If your system already has a neutral
to ground bond, then you must run a separate ground
lead to that location and UNBOND THE JUMPER IN THE
CONNECTION PANEL. For additional information, refer to
the current National Electrical Code on grounding.
WARNING: EQUIPMENT DAMAGE
When installing a three phase 240 Volt system, be sure
you know which lead is high voltage ‘wild’ leg (208 Volt to
neutral). The generator normally carries the high voltage
on the G2 lead.
LOAD BALANCING
The following diagram represents this generator when
configured in single phase. A and B represent the 120V
output of this generator. Up to half of the rated capacity
can be drawn from the L1 to N or L2 to N. This generator’s
N
W
V
U
full capacity can be drawn from C by connecting the load at
240V from L1 to L2. Remember that power from C equally
reduces the amount of power available at both A and B
and vice versa.
The following diagram represents the generator when
configured in 3-phase. A, B, and C represent the L to N
voltage output of this generator. Up to a third of the
rated capacity can be drawn from L1, L2, or L3 to N.
This generator’s full capacity can be drawn from D by
connecting a 3-phase load to all three legs. Remember that
power taken from D equally reduces the amount of power
available to both A, B, and C and Vice versa.
When connecting loads to the generator, make sure you
balance the amount of load on each leg. Equipment, like
motors,evenly load on each leg (two leg for 1-ph and three
legs for 3-ph) and do not require any special considerations
for load balancing. When applying 1-ph loads to 3-ph
systems, care must be taken to ensure that each leg is
equally balanced. A sign of unbalanced loads may be
trouble with volatge regulation. The generator’s nameplate
current ratings are calculated using a 0.8 power factor
(PF). Many loads are applied at 1.0 PF, reducing the total
amperage available. Use the following formula to calculate
the current required for your loads.
WARNING: EQUIPMENT DAMAGE
Unbalanced loads can lead to overloading of individual
winding groups and high voltage swings. This may result
in equipment damge if the unbalance is left uncorrected.
GROUNDING
Proper grounding of your generator is application
dependent. Carefully evaluate your planned use of your
generator to understand which grounding you require.
If you are not sure what to do, contact a competent
professional to assist you. The NFPA 70 250:34-35 are good
technical references.
120 VOLTS
240 VOLTS
L1 - (HOT)
L2 - (HOT)
NEUTRAL
A
B
C
D
L1 (HOT)
NEUTRAL
L2 (HOT)L3 (HOT)
C
B
A
Watts
Amps = (1.732 x V x PF)

11 OPM-158/D
VEHICLE-MOUNTED GENERATOR
Your WINCO generator ships with a bonded neutral.
When mounted to a vehicle to safely distribute power it is
necessary that the generator frame is bonded to the vehicle
frame. The generator should only supply equipment that
is cord and plug connected through customer installed
receptacles mounted on the generator or the vehicle.
PERMANENTLY INSTALLED GENERATORS
This WINCO portable generator ships with a bonded
neutral. NFPA 70 refers to this as a “separately derived
system.” When connecting it to a building a transfer
switch specifically designed for GFCI and bonded neutral
generators is required or the ground or the neutral to
ground bond must be broken and the panel relabeled.
TRANSFER SWITCH
NOTICE
For full service switching of the entire load, the ATS must
be ‘SE’ (Service Entrance) rated or must have a properly
rated fusible disconnect installed before the ATS to protect
the contacts.
WARNING: FIRE HAZARD
All wiring must be done by a licensed electrician, and must
conform to the National Electrical Code and comply with
all the local codes and regulations. Check with the local
authorities before proceeding.
INSTALLATION NOTES:
Because of many different types of service, feeder and
distribution equipment, no specific wiring instructions
can be provided. It is recommended that only copper
wire be used. In all cases it is essential that while the load
is connected to the generator, there can be absolutely
no feedback from the generator to the power line or the
power line to the generator. When properly installed, the
normal ATS Control and safety system will eliminate all
paths and feedback.
To wire the automatic transfer switch into existing wiring,
first determine which circuits will be on the emergency
load circuit. If the entire load is transferred, the transfer
switch can be wired directly after the meter and the service
entrance, providing the service entrance ampere rating is
within the transfer switch’s rated capability.
If only specific circuits are to be powered under emergency
power failure conditions, an additional distribution panel
designated “emergency distribution panel” must be
installed.
All selected emergency circuits are removed from main
distribution panels and installed in the emergency
distribution panel. The ATS is then installed between
the main panel and the emergency distribution panel.
Suggested circuits: freezer, refrigerator, furnace, emergency
lights, sump pump, emergency outlet circuits, etc. Total
running load must not exceed generator rating.
DC WIRING
All communication and DC wiring should be run in separate
conduit from AC wiring. To install the wires, reference
the following picture. Use a small flat head screwdriver to
push the release spring inside the square hole (A). While
the release is being pushed, insert the wire into the larger
circular hole (B). Remove the screwdriver to secure the wire
into place.
REMOTE START
The DSE7310 is able to start the generator when it receives
a remote signal from any dry contact. This makes the system
compatible with a wide range of control mechanisms
including two-wire start automatic transfer switches. When
the contact closes the controller will automatically start.
When the contact is opened the generator will go through
a cool-down cycle and turn off. Connect the remote start
leads to the Remote Start + and Remote Start - terminal
blocks in the door behind the DSE 7310 controller.
E STOPS
In some applications additional emergency stops may be
desired or necessary. The controller has terminals designed
allowing the addition of multiple remote emergency stops.
E-stops must be normally closed to work properly in this
system. The e-stop circuit supplies power to fuel solenoid
and the starter circuit. Opening any switch in the series
prevents the engine from cranking or from receiving fuel to
run.
To wire additional emergency stop switches first remove
the orange jumper between the two Emergency Stop
AB
SCR (DSENET)
4A (DSENET)
4B (DSENET)
Battery Charge Fail
Emergency Stop
Emergency Stop
Remote Start +
Remote Start -
Ground
Ground
Battery +
Battery -
Two-Wire Start Hook-Ups
SCR (DSENET)
4A (DSENET)
4B (DSENET)
Battery Charge Fail
Emergency Stop
Emergency Stop
Remote Start +
Remote Start -
Ground
Ground
Battery +
Battery -
E-Stops

12
OPM-158/D
terminal blocks. Failure to remove the jumper will prevent
the remote switches from working properly. Add wires
between the terminal block to the new switch(s). The
switches must be wired in series for proper function. Test
each e-stop after wiring to ensure they function properly.
SERIAL COMMUNICATION
DSE provides a series of remote accessories that can help
provide useful information to operators. These accessories
communicate over the DSE Net. Terminal blocks are wired
to the distribution panel to aid in installation. Follow the
instructions included with each accessory.
The generator controller can communicate with a variety
of controls and monitoring systems, including RS232 and
RS485. The ports are wired onto the back of the DSE7310.
In order to finalize communication the program will need
to be adjusted using the free DSE configuration software to
enable the commutation. Contact Winco service for a list of
register values.

13 OPM-158/D
INSTALLING THE BATTERY
CAUTION
In the following battery installation procedure, check to be
sure the engine control is in the “stop” position. This should
be your last step before initial start-up.
A customer supplied 12 Volt battery is required to complete
the installation. Installation of the highest CCA rated battery,
within the correct BCI group, will increase cold weather
starting performance.
BATTERY REQUIREMENTS
Model Voltage BCI Group Min. CCA
Rating
DE30F4 12 24 650
WARNING: EQUIPMENT DAMAGE
This unit is12 Volt and is negative ground. Permanent
damage will occur if they are connected to a 24 Volt
system or a positive ground system. If you are using the
truck batteries to start these units, you may have to disable
the charging system to keep it from interfering with the
vehicle charging system.
Installation and servicing of batteries must only be
preformed or supervised by personnel knowledgeable of
batteries and the required precautions. Keep unauthorized
personnel away from batteries.
When installing or replacing batteries, use the proper
group/size starting battery. The battery should be a
maintenance-free lead acid design. Deep cycle batteries will
not work for this application.
CAUTION: PERSONAL DANGER
NEVER dispose a battery in a fire. The battery is capable of
exploding. DO NOT open or mutilate the battery. Released
electrolyte is known to be harmful to the skin and eyes and
to be very toxic.
These engine-generator sets are all NEGATIVE ground. Be
very careful not to connect the battery in reverse polarity,
as this may short circuit the battery charging system on the
engine.
CAUTION
A battery presents a risk of electrical shock and high
short circuit current. The following precautions must be
observed when working with batteries:
1. Remove watches, rings, and other metal objects.
2. Use tools with insulated handles.
3. Check both the battery cable ends and the battery
posts to be sure they are free of corrosion.
4. Always connect the battery positive cable first and
then connect the battery negative cable. When
removing the battery cables from the battery, reverse
the procedure, disconnect the negative first and then
the positive cable.
5. Be sure all connections are tight and coat the
terminals and cable ends with dialectic grease.
WARNING
The electrolyte is diluted sulfuric acid that is harmful to the
skin and eyes. It is electrically conductive and corrosive.
The following precautions must always be taken.
1. Always wear full eye protection and protective
clothing.
2. Where electrolyte contacts skin, wash off immediately
with water.
3. If electrolyte contacts the eyes, flush thoroughly and
immediately with water and seek immediate medical
attention
4. Spilled electrolyte is to be washed down with an acid
neutralizing agent. A common practice is to use a
solution of one pound of bicarbonate of soda (baking
soda) to one gallon of water. The bicarbonate of soda
solution is to be added until the evidence of reaction
(foaming) has ceased. The resulting liquid is to be
flushed with water and the area dried.
DANGER: EXPLOSIVE FIRE RISK
1. Never smoke when near batteries.
2. Do not cause a flame or spark in the battery area.
3. Always discharge static electricity from your body
before touching batteries by first touching a ground
metal surface.
SERVICING BATTERIES
Batteries used on these units may, over time, lose water.
This is especially true if you are using a trickle charger to
maintain your battery. When refilling the battery with
water, use only distilled water. Tap water will shorten the
service life of the battery.
Never fill the battery above the fill line. Over filling above
the upper level line may cause the electrolyte to overflow,
resulting in corrosion to the engine or nearby parts.
Immediately wash off any spilled electrolyte following the
procedure above.
NOTE: Always make sure that a new battery is fully charged
before installing it on a generator set. Failure to do so
can cause damage to the engine control module in the
generator set.
All connections must be clean and tight. Check the
electrolyte in the battery periodically to be sure it is
above the plates. Never allow the battery to remain in a
discharged condition.
BATTERY CHARGER
& BLOCK HEATER
BATTERY CHARGER
A three-stage, on-board marine battery charger is provided
standard on this unit. The charger is a 1.5 amp dual use
maintainer and charger designed to keep your batteries
fully charged by maintaining them automatically.

14
OPM-158/D
Make sure all DC battery connections are tight and clean.
Follow battery manufacturer’s recommendations.
This charger is mounted under the customer connection
on the control side of the generator. The charger will
need to be plugged to a customer’s power source, using
a customer supplied heavy duty, UL approved extension
cord. The receptacle is to be powered by a GFCI circuit and
installed in accordance to the US National Electric Code. It is
suggested that this circuit be fused to 20 Amps.
Low/Charge Mode:
The illuminated blue power LED and red low/charging LED.
This indicates the Low/Charge mode is in process. When
completed the RED Low/Charge LED will turn off.
Auto Maintain Mode:
The illuminated Green auto maintain LED. This indicates
your 12volt battery is fully charged. During short or long
term storage periods, Auto Maintain (Energy Saver) mode
will monitor and auto maintain a battery only when needed
to maintain a full state of charge. This feature significantly
reduces AC Power consumption, lowers operating costs
and maximizes reserve power performance.
BLOCK HEATER
The block heater on this unit is a 1500 watt heater and
can use the same 20 Amp GFCI fused circuit. This circuit
will terminate on the 120 Volt terminal block mount in the
customer connection cabinet. The engine block heater
installed on this unit should also be plugged into this
receptacle. The block heater is thermostatically controlled
when plugged in will maintain the engine coolant
temperature between 100 and 120 degrees F.

15 OPM-158/D
STARTING PROCEDURE
CAUTION
For the first 10 seconds of operation all of the oil, coolant,
and electrical shutdowns are disabled. This is enough time
to cause catastrophic damage to the equipment if the
pre-start checklist is not properly completed and proper
maintenance isn’t consistently followed.
LUBRICATION
Before starting the engine, check the oil level in the
crankcase. If it is low, refill to the full mark with the proper
weight/grade of oil as recommended by the engine
manufacturer’s maintenance instructions. The necessity of
using the correct oil, and keeping the crankcase full, cannot
be over emphasized. Failure to use the proper oil and keep
the crankcase properly filled will cause excessive engine
wear and shorten its useful life.
WINCO recommends our 5W-40 fully synthetic heavy duty
engine oil to give you maximum cold weather protection
while maintaining excellent performance in warmer
weather. We have partnered with a national lubrication oil
manufacturer to give you access to Winco private branded
premium oil available at comparable prices to conventional
oils. See your dealer for additional information.
A. Installation of engine coolant heating system with heater
on the crankcase is recommended
NOTE: Cold start capabilities are strongly correlated with
the quality of the diesel.
Qty of oil
SAE
Grade Base Stock
International
specifications
Sulfur
Content In
The Fuel
WINCO
Broad Range 5W-40 Synthetic API CJ-4
ACEA E6/E9 < 15 ppm
Premium 10W-40 Semi-
Synthetic
API CJ-4
ACEA E6/E9 < 15 ppm
Cold Climate 5W-30 Synthetic API CJ-4
ACEA E6/E9 <15 ppm
Not
Authorized Monograde
3
CAUTION: PERSONAL INJURY
Only check oil when the engine is not running and is at a
low temperature in order to avoid the risk of burns.
1. Remove the dipstick (1) and ensure the oil level is
between the Min and Max limits.
2. If it is difficult to assess the level of the oil, clean the
dipstick (1) using a clean cloth and then put it back into
its seat (2). Remove the dipstick (1) again and check the
level.
3. If level is low, unscrew the plug (3) and refill with
suitable oil using the previous table.
COOLANT
Before starting the engine, check the coolant level in
the radiator. If it is low, refer to Refilling Coolant in the
Maintenance section of this manual. The radiator should be
filled to about 1 inch below the filler neck. For additional
information on engine coolant requirements, see engine
manufacturer’s maintenance instructions.
PRE-START CHECK LIST
There is a Pre-Start & Warranty Form that must be filled out
by an Authorized WINCO Service Center. After completing
the checklist, the engine-generator set is ready for initial
start-up.
WARNING: EQUIPMENT DAMAGE
Before attempting to start this unit, complete your pre-start
checklist and ensure the generator mainline circuit breaker
(if installed) is in the proper position prior to starting.
Starting this unit without it properly connected can cause
serious personal injury or equipment damage.
DO NOT jump start these engine-generator sets. Starting
these units on a low battery or jump starting them will
cause damage to the engine control module.

16
OPM-158/D
MANUAL START PANEL
(Standard)
This generator comes standard with a manual start control
panel. The battery is wired to the E-Stop first. The unit will
not start if the E-Stop is pushed in (the off position)
There are glow plugs installed and controlled by the
engine’s ECU. If the coolant temperature falls beneath a
set temperature, the engine will automatically engage the
glow plugs.
A. E-STOP
Pushed In - Off
Pulled Out - On
The unit will not start if the E-Stop is pushed in the off
position.
B. RUN/STOP ROCKER SWITCH
Run - Engages the engine.
Stop - Turns unit off.
C. START ROCKER SWITCH
Start - Hold till engine starts
D. DISPLAY VOLTAGE SWITCH
Move the switch to the line you want to view on the
voltmeter.
E. HOUR METER
The hour meter will start when the run/stop rocker
switch is in the RUN position.
Note: If left in the RUN position for a long period of time,
it will time-out after an hour of no use. This will add an
hour to the hour meter.
F. WARNING ICON GAUGE
UPPER LEFT - POSITION #1
EGR (Exhaust Gas Recirculation)
Inducement Level
UPPER RIGHT - POSITION #2
PMCAT & HEST
Particulate Matter Catalyst or High Exhaust
System Temperature
LOWER LEFT - POSITION #3
Engine Diagnosis Code
LOWER RIGHT - POSITION #4
Low Fuel Level
A
E F G
B C D
H
!
Low fuel lamp will be steady when fuel level has reached
20% or less. It will flash when the fuel level is 5% or less.
The engine will shut down if the fuel level is at 5% or less.
In the event that the upper left and upper right icons are
flashing, contact your local Service Center for repair.
H. FORCED REGEN BUTTON
Hold to force a manual regen. The button will have to
remained pressed until the regen has completed. A
forced regen should only be performed by a service
technician.
STARTING
Move the rocker switch to the RUN position. The engine
lights will light up on the icon gauge. The engine light will
still be present until the engine has started. Hold down the
START switch until engine starts. Wait five seconds for the
engine to reach speed before proceeding.
Note: The ECU may override the start command if the start
switch is held for too long.
STOPPING
To turn off the unit, move the rocker switch to STOP.
WARNING: EQUIPMENT DAMAGE
Always make sure the generator runs under no load for
five minutes before stopping to allow the engine and
components to cool down. Don’t use the E-Stop to shut
down the generator unless there is an emergency.
RESISTOR
There is a resister installed inside the harness. If a fuel tank
is installed in the field, remove the resistor and connect a
one watt fuel sender with a range from 33 to 240 ohms. For
units that came assembled with a fuel tank, the resister can
be found in side the panel, loose.

17 OPM-158/D
DSE7310 MKII
(Optional)
CAUTION
If the DSE7310 is being replaced with a manual start panel,
the voltage on the regulator will need to be adjusted.
STOP/RESET - This button places the module
into its Stop/Reset mode. This will clear any
alarm conditions for which the triggering
criteria have been removed. The fuel supply
de-energizes and the engine comes to a
standstill. Should a remote start signal be
present while operating in this mode, a
remote start WILL NOT occur.
MANUAL MODE - This button places the
module into its Manual Mode. Once in
Manual Mode, the model responds to the
Start button to start the generator and run it
off load.
START - Pressing this button from STOP/RESET
will start the engine and run the load.
AUTO MODE - This button places the
module into its Auto Mode. This mode allows
the module to control the function of the
generator automatically.
ALARM/LAMP TEST - This button silences the
audible alarm in the controller, deactivates
the Audible Alarm output (if configured) and
illuminates all of the LEDs on the module’s
face as a lamp test function.
MENU NAVIGATION - Used for navigating the
instrumentation, event log, and configuration
screens.
A small rocker switch is located on the
underside of the engine control cabinet.
On gaseous models, the engine timing is
controlled by the ECU on the engine and you
need to tell it what fuel you want to operate
on; LP or NG.
On diesel models, this switch has been
disconnected and will do nothing.
PROTECTIONS
When an alarm is present, the common alarm LED, if
configured, will illuminate. The LCD display will show an
icon to indicate the failure.
WARNINGS
Warnings are non-critical alarm conditions. They do not
affect the operation of the generator system, they
serve to draw the operator’s attention to an undesirable
condition. Warning alarms are self-resetting when the
fault condition is removed. The icon will appear steady in
the display.
SHUTDOWN
Shutdowns are critical alarm conditions that stop the
engine and draw the operator’s attention to an
undesirable condition. Shutdown alarms are latching.
The fault must be removed and the STOP/RESET button
pressed to reset the module. The icon will be flashing in
the display.
AUTO MODE
To activate the automatic start mode you will just need to
depress the AUTO button, the LED indicator beside the
button confirms that the unit is in automatic mode.
To test the Automatic Transfer Switch, follow the instruction
on the operator’s manual that came with the transfer
switch. If you get a fault during the initial start up or prior
to start up, it is most likely a false warning light. Simply reset
the ATS to start over.
Once you have completed testing of the ATS, be sure you
ALWAYS leave the system in the standby mode,unless
servicing the unit. For standby operation, press the AUTO
button on the front of the control. The green light should
light up next to the AUTO button.
NOTE: For setting the exerciser circuit, for all ATS, see the
operator’s manual shipped with the ATS.
MANUAL MODE
1. Press and release the MANUAL MODE button. The small
LED light next to it should come on.
Note: There is no start delay in this mode of operation.
2. Press and release the green START ENGINE button. The
DSE 7310 will send two signals to the engine. The first
signal wire #21 will engage the fuel solenoid, the second
wire, #22, will engage the starter on the engine. At this
point the DSE 7310 will start the cranking cycle (10
seconds on and 10 seconds off).
Note: Wire #91 is energized to turn on the glow plugs for
15 seconds first and then the starter and fuel solenoid are
engaged.
If the engine fails to start during this cranking period, the
starter motor is disengaged and goes into a rest mode
after which a second attempt is made to start the engine.
Should this sequence continue through 3 cranking cycles
the start sequence will be stopped and the display will
show ‘FAILED TO START’.
3. During manual operation, the load will not normally be
applied to the generator. But caution must be used, if the
line power should fail or be turned off the transfer switch
during manual operation the load may be applied to the
generator.

18
OPM-158/D
With the engine running smoothly check the no load
voltage and frequency on the digital display. The voltage
should match the nameplate and a frequency of 59.5 to
60.5 hertz (Hz).
If you have the proper voltage at the generator the next
step is to check the voltage at the generator terminals
in the Automatic Transfer Switch. The voltage between
the G1 and the G3 terminals should be the same as it
was on the generator front panel. The voltage should
also be checked between the hot terminals (G1 and G3)
and the G-N to be certain of a balanced voltage output
and a solid neutral connection. The voltage between G1
and G-N should be about 120 volts AC (277 on 480
units). The same approximate voltage should be found
between terminals G3 and G-N (120 volts AC).
On three phase panels the G2 voltage level should also
be checked. ON 240 VOLT (DELTA) SYSTEMS BE SURE
YOU KNOW WHERE THE HIGH VOLTAGE “WILD” LEG IS.
IT MUST BE IN THE SAME LOCATION ON THE LINE SIDE
AS IT IS ON THE GENERATOR SIDE. (i.e. if it’s on L-3 on
the line side it must be on G-3 on the generator side. Also
on three phase systems make sure that the rotation is the
same on the generator as it is on your line power. Failure
to insure proper rotation will cause three phase motors to
spin backwards possibly damaging them.
NOTICE: If for any reason during the check out procedure
the voltage and frequency are not correct, depress the
STOP/RESET button and correct the trouble before
proceeding.
4. Stopping - There are two ways to stop the unit when it is
in the manual mode. Pressing the STOP/RESET button will
stop the unit immediately. Pressing the AUTO mode
button will stop the unit but only after the cool down
timers have timed out and there is no remote start signal
being sent to the unit.
WARNING: EQUIPMENT DAMAGE
Always make sure the generator runs under no load for
five minutes before stopping to allow the engine and
components to cool down. Don’t use the E-Stop to shut
down the generator unless there is an emergency.
CONTROL POWER
The DSE7310 controller consumes small amounts of battery
power when it is in use. The controller comes with a power
switch that disconnects battery power when it is not in use.
The switch is designed with a safety relay that prevents it
from removing power to the controller while the generator
is operating. If the switch is turned off while the engine is
running it will continue operating until the engine shuts
down and then the controller will power down.
This switch should be used when the generator is not
going to be used over the course of several days and the
generator is not connected to a battery charger.
A solar charger kit is the easiest way to always maintain the
battery during storage in mobile applications. The supplied
battery charger can be plugged in to an extension cord on
mobile applications.

19 OPM-158/D
OPERATING CONDITIONS
NORMAL OPERATION
This generator set is designed to be operated under load
and the accumulation of operating hours without load can
cause unburned fuel from the combustion chamber to build
up in the exhaust system. This is called wet stacking and can
result in fouled injectors and carbon buildup in the exhaust
pipes, turbo and exhaust valves.
The Diesel Oxidation Catalyst (DOC) on the engine has to
reach target temperatures during operation for the fuel
to burn completely. The generator set should be given a
minimum average load of at least 25% to achieve these
conditions and avoid damage from wet stacking.
If the engine is cold at start up run it for 2-5 minutes and
then load the generator. Idling longer than this is more
likely to damage the engine than extend its life
If the generator application is for emergency standby the
generator should be exercised at least monthly ideally
under load. Load banking the generator at least annually
will help keep the engine in good condition.
HARSH ENVIRONMENTS
OPERATIONS
Some applications require the generator to operate in
harsh environments. One of the most common hazards are
extremely dusty conditions. In harsh conditions it is often
necessary to take additional steps to keep the equipment
clean and operating at its peak. Maintenance intervals on
lubricant and filter changes may need to be shortened. An
oil quality testing program can also provide early warnings
or oil degradation. Efforts may need to be made to reduce
the amount of dust and debris entering the housing and
generator components.
COLD WEATHER OPERATIONS
The minimum natural starting temperature with glow plugs
is -5°F. The minimum starting temperature with glow plugs
and block heater is -13°F.
The degree of fluidity of the diesel oil can may be reduced
at low temperatures due to the separation of the paraffin.
This results in the filters becoming clogged.
The ASTM D975 or EN590 specifications distinguish
different classes of diesel fuel, identifying the characteristics
of those that are best adapted to low temperatures.
Oil companies must respect these standards, which provide
for the distribution of fuels adapted to the climatic and
geographical conditions in various countries.
This generator-engine set needs load and should not idle
for long periods of time.
If the generator set will be run in extremely cold
environments it may be beneficial to provide means to
reduce air circulation to increase the temperature of the
enclosure.
Inspect the CV filters and hoses regularly during cold
operation looking for signs of freezing. If the line freezes it
will cause pressure to build in the crankcase and may cause
an engine seal failure. An optional CV hose heater kit is
available to install and is recommended for units operating
in temperatures below 14°F. If the engine operates below
optimal temperatures for long periods of time damage may
occur.

20
OPM-158/D
MAINTENANCE
CHANGING THE OIL
WINCO recommends our 5W-40 fully synthetic heavy duty
engine oil to give you maximum cold weather protection
while maintaining excellent performance in warmer
weather. We have partnered with a national lubrication oil
manufacturer to give you access to Winco private branded
premium oil available at comparable prices to conventional
oils. See your dealer for additional information.
CAUTION: PERSONAL INJURY
Only change oil when the engine is not running and is at
a low temperature in order to avoid the risk of burns.
1. Place a drip pan or suitable container for catching the
oil below the drain valve attached to the sump (5).
WINCO has supplied a valve to hook a customer
supplied 5/8” hose to conveniently run the oil to the
drip pan.
2. Remove the dip stick (2) and remove the engine
lubricant oil filter plug (1).
3. Drain the oil by removing the plug (4) from the oil
sump (5).
4. Once the sump (5) has fully drained, close the valve.
5. Top-up through the filler pipe (6) using lubricant oil
with the suitable oil table in the LUBRICATION section
of this manual..
6. Use the dip stick (2) to ensure the level of oil does not
exceed the “MAX” limit.
7. Insert the dipstick and close the lubricant filler cap (1).
8. Dispose of oil in accordance to local codes. DO NOT
dispose or allow oil to seep into the ground or sewer
systems, doing so will cause environmental damage.
CHANGING OIL FILTER
The filter must be replaced when the lubricant oil is
changed. Only use filters with a filtering degree equal to the
original filter.
CAUTION: PERSONAL INJURY
Only change oil when the engine is not running and is at
a low temperature in order to avoid the risk of burns.
1. Use an oil filter wrench to unscrew and remove the oil
filter (1) from the filter mount (3) and recover the
gasket (2)
2. Replace the oil filter (1) and gasket (2).
3. Carefully clean the surfaces of the support that are in
contact of the gasket (2).
4. Moisten the gasket (2) with a thin layer of oil and place
it in its seat on the oil filter (1).
5. Manually tighten the new oil filter on the mount (3)
until it is fit up against the gasket (2).
6. Using the oil filter wrench, further tighten the oil filter.
REFILLING COOLANT
CAUTION: PERSONAL INJURY
Only proceed when the engine is not running and is at a
low temperature in order to avoid the risk of burns.
1. Remove the cap (1) on the radiator.
2. With the engine cold, make sure the level of coolant in
the radiator is above the minimum level.
3. Refill if necessary.
CHANGING AIR FILTER
Do NOT remove filter
while engine is running.
1. Remove the air filter cover after having released the
two quick closing hook.
2. Remove the filter. During this operation, take care
to ensure that no dust enters the sleeve.
3. Position the filter in its seat.
4. Replace the cover of the air filter and lock it in place
using the two quick release hooks.
Table of contents
Other Winco Portable Generator manuals

Winco
Winco PSS50LS User manual

Winco
Winco 50PTOC4-03/1 Setup guide

Winco
Winco EC6010KE-03/B Setup guide

Winco
Winco HPS9000VE/E Administrator Guide

Winco
Winco PSS150/B Setup guide

Winco
Winco W75PTOS-4 Administrator Guide

Winco
Winco DP5000-03/A Setup guide

Winco
Winco W3000H/D Administrator Guide

Winco
Winco DP5000/T Setup guide

Winco
Winco 35-75 PTO Specifications

Winco
Winco PSS60/D Setup guide

Winco
Winco UL2FS2MP-1 Setup guide

Winco
Winco W10PTOS/A User manual

Winco
Winco WL12000HE-04/A Administrator Guide

Winco
Winco PSS150/A Setup guide

Winco
Winco PSS8B2W Administrator Guide

Winco
Winco PSS60F4 Series Setup guide

Winco
Winco DL5000H/C Setup guide

Winco
Winco WT3000H Setup guide

Winco
Winco 25PTOS-3 Setup guide