Wine Master Hygromaster User manual

1
R
Notice d’installation et d’utilisation
(à conserver précieusement)
Hygromaster
®
INDICATIONS PORTEES SUR LA PLAQUE SIGNALETIQUE PLACEE SUR L'APPAREIL :
o Modèle : ………………………………..
o N° de série : …………………………..
o Date d'achat : ………………………...
IMPORTANT :
Il est conseillé de relever le numéro de série et de le
noter ci-dessus. Celui-ci sera nécessaire pour toute
demande ultérieure de pièces détachées et de garantie.
Réf notice :
Juillet 2010

2
Contents
1. AUTOMATIC CONTROL OF HYGROMETRY 3
2. INSTALLATION OF THE HYGROMASTER 4
2.1 Hygromaster installation
2.2 Public water system installation
3. STARTUP 8
4. USE 9
5. MAINTENANCE 9
6. PRESERVATION OF WINE 9
7. WARRANTY 10

3
Datas
Dimensions 258x140x166
weight 3 kg
Average power consumption for humidification 75 w
Voltage 230V-240V
Average intensity for humidification 0.63 A
Frequency 50/60 Hz
Capacity of humidification: 18,2 g Water/hour at 12°C
Length of power cord 1.5 M
1. AUTOMATIC CONTROL OF HYGROMETRY
Your Fondis cellar air-conditioner controls hygrometry in a natural way. This is then
maintained between 65 % and 85 % of relative humidity. The excess runs towards a
draining overflow.
Since it depends on the external hygrometry, which strongly varies according to the
region, the season, the weather, the hygrometry cannot be completely kept at a set
value.
THE HYGROMASTER® will assume its full relevance in winter when the temperatures are
low and the relative hygrometry is very low.
In this case, it will be necessary to provide additional moisture thanks to
HYGROMASTER®. Since it is a steam generator, it will produce completely clean
moisture.
IMPORTANT: the control of hygrometry and the good operation of the air-
conditioner require:
- complete insulation of the cellar (walls, floor, ceiling, door) with a tight insulating
material.
- perfect continuity of the insulation (no gaps, nor thermal bridges).
- no other ventilation than that of the air-conditioner
- Lack of heat source (fridge, heating pipe, ...).

4
2. INSTALLATION OF THE HYGROMASTER
2.1 Hygromaster installation
Your HYGROMASTER® can be suspended on a wall using screws in the holes intended for
this purpose or simply placed on the ground or on a stable shelf preferably more than a
meter away from the air-conditioner.
However, avoid placing your HYGROMASTER® on a wooden support which would absorb
the moisture and could become deformed.
In any case, it is essential that the HYGROMASTER® is level (horizontal).
Connection of the water inlet with the public water system or with a tank containing a
few litres for gravity feed will be performed using a male hose connector, 1/4” cylindrical
thread.
-The direct connection to the water network is forbidden, use the
supplied water container
-Please fulfill exclusively Hygromaster using demineralized water to
avoid any failure related to the scaling of the device.
-Interdication of electric components under the Hygromaster.
-The HYGROMASTER® must be connected to a standard 230V, 16A,
50Hz earth socket.

5
2.2 Public water system installation
The water tank kit is composed of :
1. A reservoir with a capacity of 20 liters.
2. A tap screw which is connected to a hose Ø 16 mm and a female coupling.
3. A hose Ø 8 mm length 3m connected to a quick buck.
4. A sleeve screw ¼ inch 5. A rubber gasket
1
2
3 4 et 5

6
¾Slide the rubber seal on the thread 1 of 2 sleeve
¾Screw the sleeve and attached to the connector on the back of the device as shown
in the figure
¾Set the tank upright.
¾Loosen the large cap (Filling).
¾Fill the water reservoir at about ¾ of its capacity.
¾To avoid foaming do not use rainwater.
¾Turn the valve handle clockwise to close the flow of water.
¾Screw all tap, hose and female connector on the tank upright.
2
1

7
Connection to the water tank of Hygromaster
1. Place the tank in horizontal position.
2. Connect the quick buck in the female connector.
3. Cut the hose Ø 8mm to the desired length and then connect it on the sleeve of
hygromaster.
4. Turn the tap handle to the left.
5. Loosen the small cap tank half a turn to create anair inlet.
Slide the rubber seal
on the thread 1 of 2
sleeve
1 5
1 2
3

8
3. STARTUP
-Once the connections are made, place the switch on "0".
-Close the lid and connect the water inlet.
-Then power up.
Leave the lid closed when the switch is on position I.
Switch position I: humidification
-HYGROMASTER® fills up.
-The lid must be kept closed during this phase.
-Adjust the set-point to the required range (between 60% and 80%).
-If necessary the HYGROMASTER® will humidify the air.
Switch position I:
humidification
Mains connection
Humidity set-point
adjustment

9
4. USE
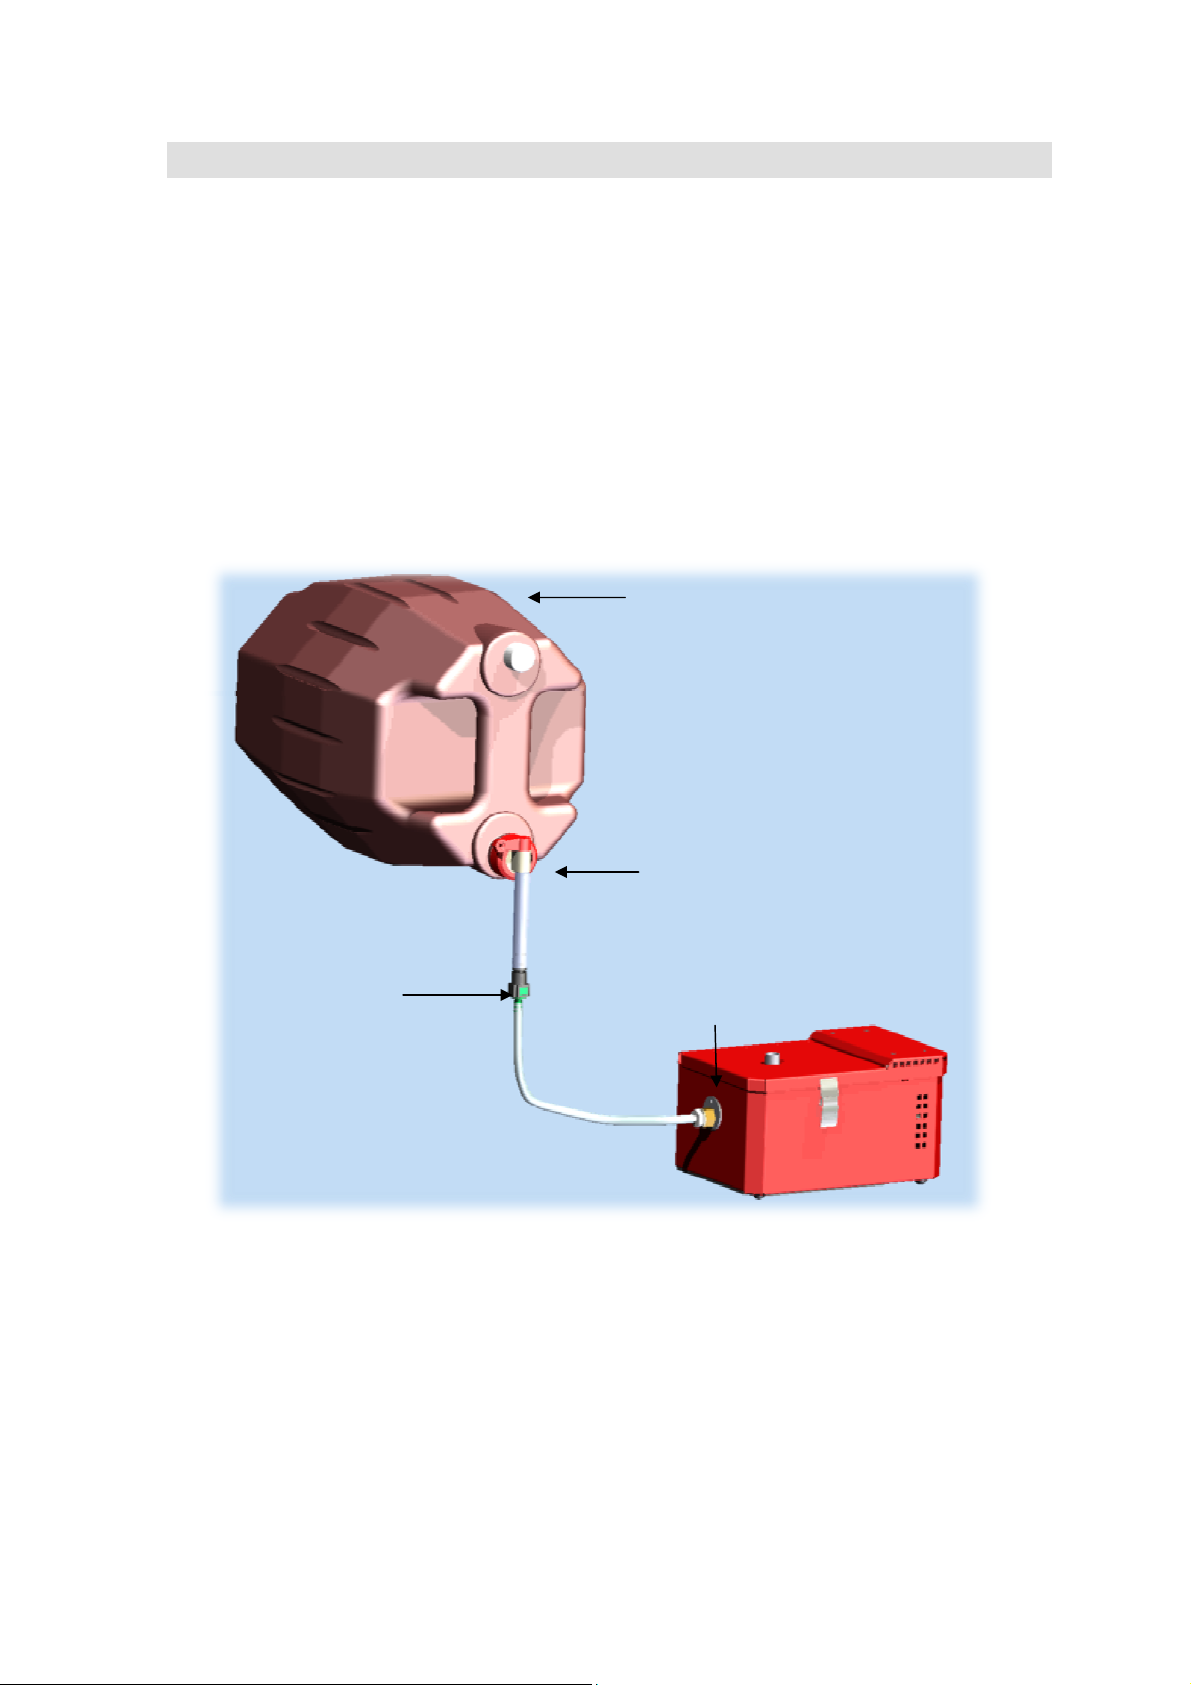
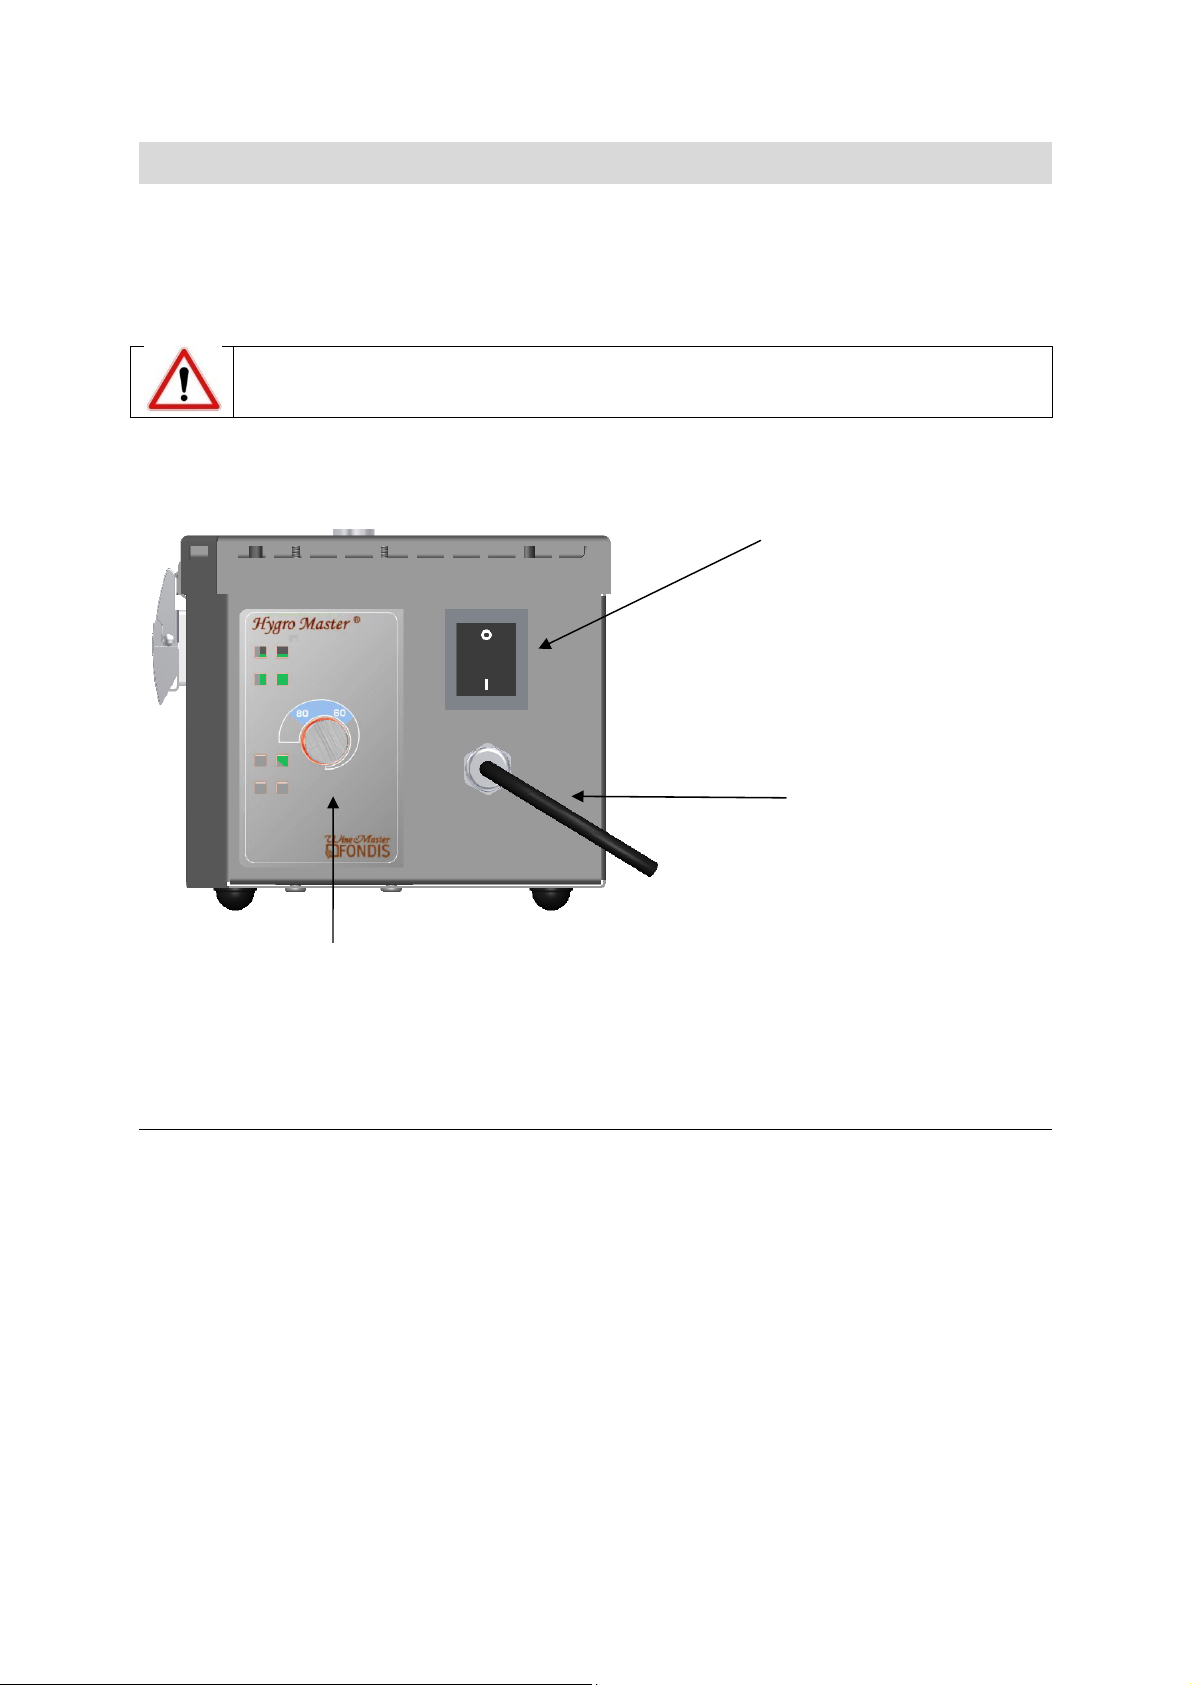
-In winter switch HYGROMASTER® to the humidification position. (I)
-Check and fill the water tank regularly.
-In summer, stop humidification to prevent the disruption of refrigeration and the
excessive production of condensate
5. MAINTENANCE
Attention with the risks of burns in particular on sheets around the vat
In case of questions, do not hesitate to contact your retailer or the Fondis Customer
6. PRESERVATION OF WINE
Its preservation and ageing require an environment that satisfies certain conditions.
More than temperature itself, it is the stability of the cellar temperature which is
important for the good preservation of wine.
The ideal temperature of a wine cellar is approximately 12 degrees. Above twenty-five
degrees, young white wines run the risk of a secondary fermentation. On the contrary,
for certain red wines, their ageing will be accelerated..
The central heating pipes, the proximity of a boiler, parasite air entries, refrigerators,
freezers, are the worst enemies of wine.
A good cellar must neither be too dry, nor too humid. The action of dry air is insidious: it
dries out the corks, causes significant evaporation of the wine through the corks and
makes the bottle leak. An excess of moisture will increase the development of moulds on
barrels and corks. The ideal level of hygrometry is between 60 % and 80%, it can rise to
90 % without damage to the wine. The cellar must be closed, without vibration. The
racks or shelves are insulated from any source of vibration, they rest on the ground
rather than fixed on a wall, more sensitive to vibrations. The ageing of wine occurs away
from light. The cellar must thus be dark and the duration of lighting limited. If these
conditions are satisfied, wine will keep for a long time. The cellar will provide good
maturation and optimum ageing. Wine is not as fragile as it is often believed, it must
primarily be protected from its main enemies: abrupt temperature variations, light.

10
Problems and solutions
Problems Solutions
Hygrometry set-point not achieved
-Insulation or tightness lack
-Lack of water
-make sure there are no drying factors (central
heating pipes, proximity of a boiler, refrigerators,
freezers, wine cooling cabinets... which are also
to proscribe in an air-conditioned wine cellar)
overflow
-Please fulfill exclusively Hygromaster using
demineralized water to avoid any failure
related to the scaling of the device
-The direct connection to the water network is
forbidden, use the supplied water container
7. WARRANTY
The warranty application is conditionned by the presentation of the invoice of purshace or
for lack of its copy.
The European Community attaching a great importance to the environment and the waste
processing, set up Directive 2002/96/CE relating to the Electric and Electronic Component
Waste.
In accordance with this standard, the presence of the logo "barred dustbin" is obligatory.
This logo means that this product cannot be to in no case thrown in the household
refuse.
It must be given to a suitable collection point for the treatment, valorization,
recycling of Electric and Electronic Components.
Acting like that you make a gesture for the environment and you contribute to the
safeguarding of the natural resources as well as to the protection of human health.
Table of contents
Other Wine Master Kitchen Appliance manuals
Popular Kitchen Appliance manuals by other brands

Indesit
Indesit MK 64 R IX Installation & use

EFBE-SCHOTT
EFBE-SCHOTT SM 900 operating instructions

Groen
Groen HY-PLUS-SE Operator's manual

SALZBURGER GETREIDEMÜHLE
SALZBURGER GETREIDEMÜHLE MT 5 Owner's manual and user's guide

Emeril Lagasse
Emeril Lagasse Blender & Beyond HB2248S owner's manual

Dutchess
Dutchess 270C instruction manual