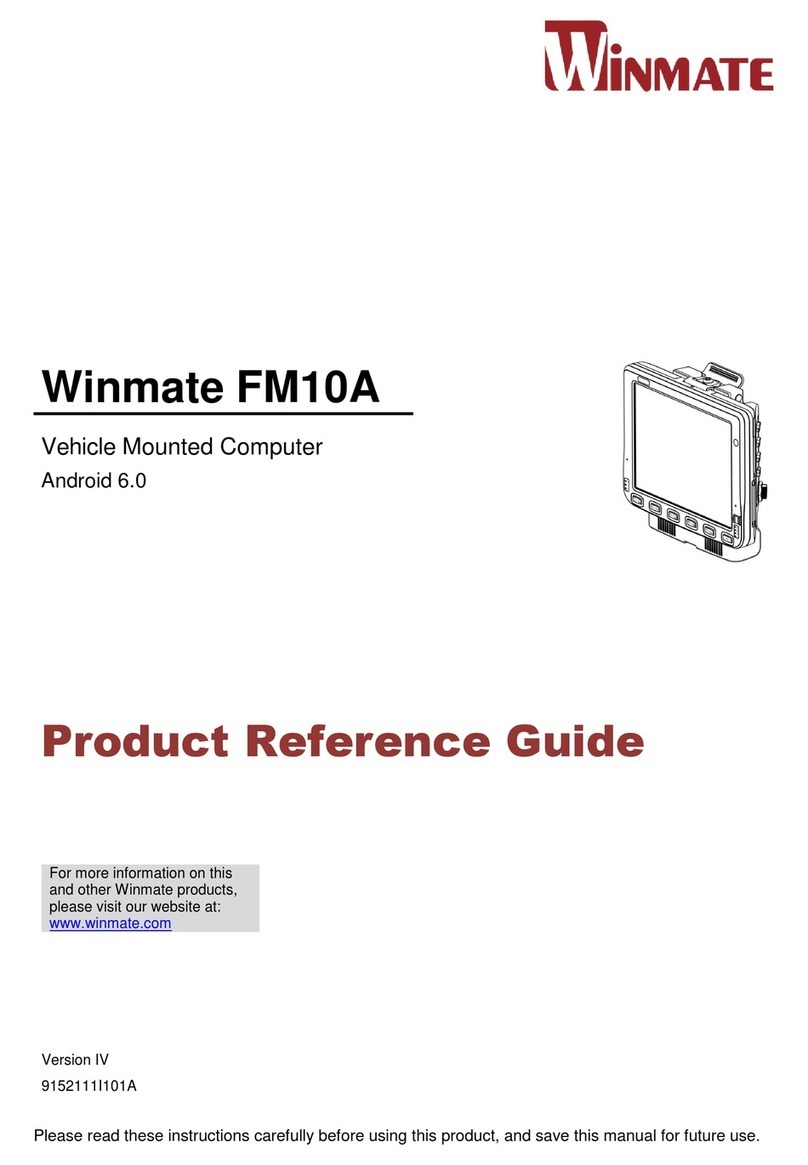
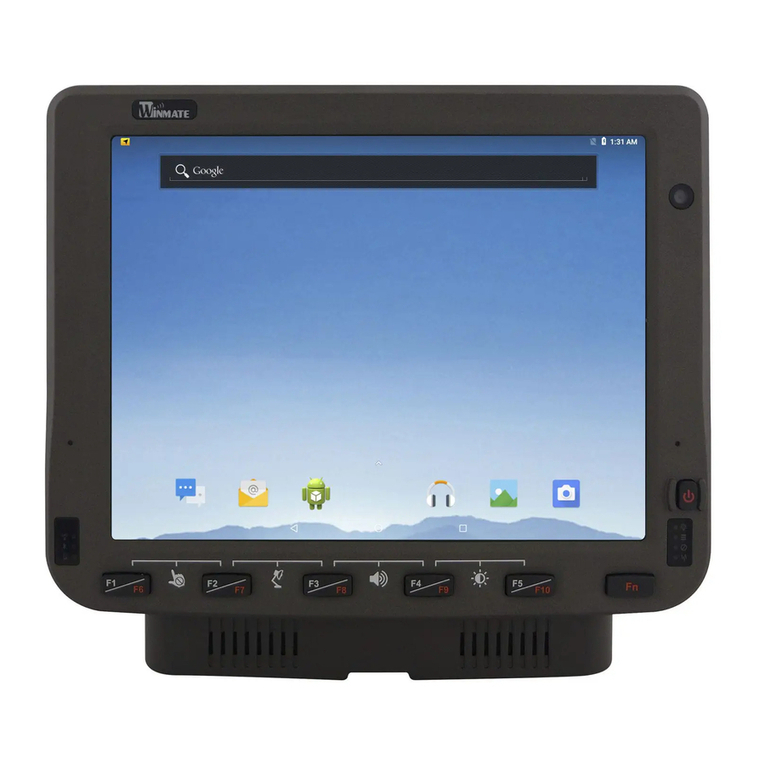
Winmate FM10 Installation and operation manual

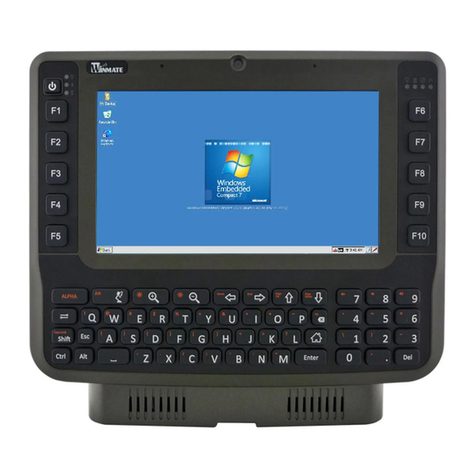
Winmate FM10
Vehicle Mounted Computer
Microsoft®Windows®7 Professional for Embedded System
Product Reference Guide

FM10 Product Reference Guide
ii
Copyright © 2015 Winmate Communication Inc. All rights reserved.
No part of this manual may be reproduce, copied, translated, or transmitted in any form or any means, electronic or
mechanical, for any purpose, without the written permission of Winmate Communication Inc.
Trademarks
All product names, trademarks or logos mentioned herein are the properties of their respective owners.
Microsoft, Windows, and the Windows logo are either registered trademarks or trademarks of Microsoft Corporation
in the United States and/or other countries. Microsoft products are licensed to OEMs by Microsoft Licensing, Inc., a
wholly owned subsidiary of Microsoft Corporation.
The Bluetooth® word mark and logos are registered trademarks owned by Bluetooth SIG, Inc.
All other brand and product names are trademarks or registered trademarks of their respective owners.
Note
• Display images shown may vary slightly from actual display. Information in this manual is subject to change without
notice.
Disclaimer
Winmate Communication Inc. reserves the right to make any product changes without notice, including circuits
and/or software described or contained in this manual in order to improve design and/or performance. Winmate
Communication Inc. assumes no responsibility or liability for the use of the described product(s), conveys no
license or title under any patent, copyright, or masks work rights to these products, and makes no representations
or warranties that these products are free from patent, copyright, or mask work right infringement, unless otherwise
specied. Applications that are described in this guide are for illustration purposes only. Winmate Communication
Inc. makes no representation or warranty that such application will be suitable for the specied use without further
testing or modication.
Warranty
Winmate Communication Inc. warrants that each of its products is free from material and workmanship defect for a
period of one year starting from the invoice date. If the customer discovers a defect, Winmate Communication Inc.
will, at its option, repair or replace the defective product at no charge to the customer, provided it is returned during
the warranty period, with transportation charges prepaid. The returned product must be properly packaged in its
original packaging to obtain warranty service.

FM10 Product Reference Guide
iii
CONTENTS
Chapter 1: Introduction..................................................................................... 1-1
Package Contents.............................................................................................................1-2
Optional Accessories..............................................................................................................................1-2
About This Guide ..............................................................................................................1-3
Components......................................................................................................................1-3
Front View ..............................................................................................................................................1-3
Rear View with Vehicle Dock .................................................................................................................1-4
Sides View .............................................................................................................................................1-5
Top and Bottom View .............................................................................................................................1-6
Chapter 2: Hardware ......................................................................................... 2-1
System Hardware .............................................................................................................2-1
Central Processing Unit .........................................................................................................................2-1
Input / Output Components....................................................................................................................2-1
System Memory .....................................................................................................................................2-1
Audio Interface.......................................................................................................................................2-2
Card Slots ..............................................................................................................................................2-2
802.11 a/b/g/n/ac ...................................................................................................................................2-2
WWAN....................................................................................................................................................2-2
Power................................................................................................................................2-3
Vehicle DC Power Supply ................................................................................................................................. 2-3
External AC Power Supply.....................................................................................................................2-3
UPS Battery ...........................................................................................................................................2-4
Backup Battery.......................................................................................................................................2-4
Power Management Modes ...................................................................................................................2-4
Ignition Control ......................................................................................................................................2-5
Power Controls ................................................................................................................2-6
Power Switch .........................................................................................................................................2-6
Power Button..........................................................................................................................................2-6
External Connectors .........................................................................................................2-7
Serial Connector (COM).........................................................................................................................2-7
USB Connector ......................................................................................................................................2-8
CANbus / Audio Connector ....................................................................................................................2-9
CANbus Cable .......................................................................................................................................2-9
Audio Cable..........................................................................................................................................2-11
LAN Connector (PSE)..........................................................................................................................2-12
Power Connector ............................................................................................................2-12
Power Connector .................................................................................................................................2-13
Antenna Connections......................................................................................................2-14

FM10 Product Reference Guide
iv
Internal WI-FI Antenna .........................................................................................................................2-14
External / Vehicle Remote Antenna......................................................................................................2-14
Keyboard Options ...........................................................................................................2-15
Integrated Keypad................................................................................................................................2-15
USB Keyboard / Mouse........................................................................................................................2-15
LED Function ..................................................................................................................2-16
Connection and UPS battery LEDs......................................................................................................2-16
Display ............................................................................................................................2-17
Touch Screen .......................................................................................................................................2-17
Display Backlight Control .....................................................................................................................2-17
Chapter 3: Software........................................................................................... 3-1
Introduction .......................................................................................................................3-1
Operating System .............................................................................................................3-1
Windows 7 Professional for Embedded System...............................................................3-1
Setting up Windows for the First Time ..............................................................................3-2
Setting up Windows 7 Professional for Embedded System..............................................3-2
Creating a user name and password .....................................................................................................3-2
License Agreement ................................................................................................................................3-2
Protecting your computer.......................................................................................................................3-2
Choosing your computer’s network........................................................................................................3-3
Completing Windows 7 Professional for Embedded System Setup.......................................................3-4
Setting up Windows 7 Professional for Embedded System..............................................3-5
Control Panel ....................................................................................................................3-9
Using the Touch Screen.........................................................................................................................3-9
Calibrating the screen ..........................................................................................................................3-10
Display ............................................................................................................................3-12
Power Options ................................................................................................................3-12
Select a Power Plan.............................................................................................................................3-12
Region and Language.....................................................................................................3-12
Sounds............................................................................................................................3-13
KeyMap Introduction.......................................................................................................3-14
Touch Lock......................................................................................................................3-14
Turn On/Off the Reading Lamp.......................................................................................3-14
Volume Adjustment .........................................................................................................3-15
Brightness.......................................................................................................................3-15
Power management.............................................................................................................................3-15
Display and Keypad Backlight Brightness............................................................................................3-15
Function Key Form to access F6~F24............................................................................3-16
Bluetooth.........................................................................................................................3-17
Opening My Bluetooth..........................................................................................................................3-17

FM10 Product Reference Guide
v
Bluetooth Barcode Reader Setup ........................................................................................................3-17
The FM10 with Label............................................................................................................................3-18
The FM10 without Label.......................................................................................................................3-18
Adding and Pairing a Bluetooth Device................................................................................................3-18
WiFi.................................................................................................................................3-18
External Wi Antenna...........................................................................................................................3-19
Connecting to a Wireless network........................................................................................................3-19
WWAN ............................................................................................................................3-20
Connecting to 3G network....................................................................................................................3-21
Connecting to 4G network....................................................................................................................3-23
Using Camera Features..................................................................................................3-24
Opening the Camera............................................................................................................................3-24
The Camera Screen.............................................................................................................................3-24
Shooting Photos...................................................................................................................................3-24
Recording Videos.................................................................................................................................3-25
Camera Settings ..................................................................................................................................3-26
Using Recovery Wizard to Restore Computer................................................................3-27
Chapter 4 - Installation...................................................................................... 4-1
Installing a SIM Card.........................................................................................................4-1
Installing a Micro SD Card ................................................................................................4-1
Installing a Stylus with the holder......................................................................................4-2
Installing the device .........................................................................................................4-3
Vehicle Mount Installation ......................................................................................................................4-3
Docking the device.................................................................................................................................4-3
Un-docking the device............................................................................................................................4-3
Installing the device on a forklift using RAM Mount ..........................................................4-4
Components of RAM Mounts kits...........................................................................................................4-4
RAM Mounts assembly ..........................................................................................................................4-4
Keyboard Mounting Installation..............................................................................................................4-5
Connecting the power cable...................................................................................................................4-7
Power cable routing ...............................................................................................................................4-9
Appendix A - Regulatory Information..............................................................A-1
Important Information............................................................................................................................ A-2
Safety Information................................................................................................................................. A-2
Informations de sécurité ....................................................................................................................... A-3
About the Adapter ................................................................................................................................. A-4
FCC Regulations................................................................................................................................... A-5
CE Notice (European Union)................................................................................................................. A-6
RF Exposure Information (SAR) ........................................................................................................... A-6
IC Regulations....................................................................................................................................... A-6
Important Note ...................................................................................................................................... A-7
1-1
Chapter 1 -
1
In the warehouse environment, the ability to mount mobile devices and computers to forklifts, trucks, tuggers, and
inventory pickers, is essential. From inventory management to order fulllment, asset tracking, and shipping and
receiving, the warehouse oor is complex ecosystem that requires high-efciency technology to keep it running
smoothly.
The FM10 Vehicle Computer runs on a 1.9GHz Intel Atom E3845 of the full Windows version. The tablet features
GFG resistive touch screen with 1024 x 768 pixel resolution. The FM10 Vehicle Computer delivers exibility and
mobility in a vehicle mounted computer form factor. FM10 is designed to easily be removed from the dock with a
latch on the top of theFM10 vehicle docking. Since the dock remains attached to the vehicle, this device can easily
be moved or switched from one vehicle to another vehicle.
The integrated keyboard and physical function keys will appeal to those who prefer the usability of a full keyboard,
but in a vehicle mounted computer form factor. For wireless connectivity the tablet comes equipped with Bluetooth
4.0 and comprehensive 802.11a/b/g/n dual band WiFi, and WWAN.
This vehicle-mount computer is built to endure the rigors of the warehouse, and designed to t seamlessly into
forklifts and other warehouse vehicles
Note
• Please contact our technical support for information on the latest rmware upgrade for your tablet.
Introduction

FM10 Product Reference Guide
1-2
Package Contents
Before using this Vehicle Mounted Computer, please make sure that all the items listed below are present in your
package:
Device - FM10 Dock + latch locking
key
5 m Power Cable with
fuse kit
0.3 m USB Cable Stylus kit + Screw
98P010A000J7 98D000A00003 98K000A0005V 9484098080K0 98K000A0005T
Cable Clamp Kit WiFi Antenna x 2 User Manual Driver CD
98K000A0005W 39700010000J 9152111I100J 9171111I101R
Optional Accessories
2 m DC Jack Power
Cable
1.2 m Power Adapter
cable
3.2 m Adapter with
power cable
1.8 m RS232 Cable 0.3 m Audio Cable
94J0086020K0 922D120W12V2 98K000A0005U 94G3094090K2 94E215R060K0
1.8 m CAN BUS Y
Cable
2 m IP65 LAN Cable 4G/LTE antenna 2 dB WWAN antenna Fuse Kit
94E2150090K0 94I0080080KF 39700030002H 391000M20200 94JL01L01000
Mounting Kit for
keyboard
Device Mounting Kit Spare Key for Vehicle
Dock
Keyboard UHF Fixed Reader
98K000A0005X 98K000A0005Y 9B000000007N 9B000000007R 9B000000007Z

FM10 Product Reference Guide
1-3
About This Guide
ThisFM10 Product Reference Guide provides instruction for the system administrator to follow when conguring
and using this Vehicle Computers. This Product Reference Guide has been developed for a FM10 with Microsoft®
Windows®7 Professional for Embedded System operating system.
Components
Front View
8 1
5
2
3
6
4
7
9
10
No Item Description
110.4” Touch Screen Displays and act as one of the inputs for the device
2Power Button Press and hold the button for 3 second to turn on the device
Power Indicator Power Indicator
3 Microphone For voice communication and voice recording
4 Digital Microphone For voice communication and voice recording
5 Camera 2 Megapixel Camera
6Light Sensor and
LED indicators
s Light Sensor
HDD Indicators
Blanking Indicators
Heater Indicators

FM10 Product Reference Guide
1-4
7 LED indicators
WiFi Indicators
Bluetooth Indicators
UPS Battery Indicators
8Label Space to print the label or company logo
9 Function button Programmable Function key that can be congured by using the HotTab Utility
10 Speaker Emit Sound
Rear View with Vehicle Dock
3
4
1
2
No Item Description
1 VESA Mount Hole VESA 75, 100, and RAM Mount
2Release Latch Press to release the device and the docking
3Kensington Lock Connect to a security lock, protecting your device from being stolen
4 Power switch Set the switch to on (I) to provide the supply power to the device and it will
automatically connect to the ignition system of the vehicle

FM10 Product Reference Guide
1-5
Sides View With Vehicle Dock
No Item Description
1 COM 11 and COM 12 Port Connect a peripheral device such as a printer or scanner with serial port
2USB 2.0 x 2 Connect USB peripheral devices such as USB Flash drive, mouse, keyboard,
printer, etc.
3CAN Bus/ Audio Connect to a vehicle, allowing access to wide range of vehicle data
4 Service Window To protect I/O ports
5LAN port with PSE function Connect to a local area network (LAN) using an Ethernet cable and provide
PSE function for POE with 48V
6Wide Range Power Input Connect a 10-60V DC IN wide range power input
7WWAN Antenna connector Connect a WWAN external antenna and allow the device to be remotely
mounted on the vehicle
8GPS Antenna connector Connect a GPS external antenna and allow the device to be remotely mounted
on the vehicle
9WiFi Antenna connector Connect a WiFi external antenna and allow the device to be remotely mounted
on the vehicle
9
8
7
6
1
2
3
4
5

FM10 Product Reference Guide
1-6
Top and Bottom View
No Item Description
1Lock Lock the tablet in place
2Reading Light Use to provide illumination in dark environment
1
2

2-1
Chapter 2 -
2
System Hardware
Central Processing Unit
The CPU is a 1.91GHz Intel Atom E3845 processor, and the operating system of this device is Windows 7
Professional for Embedded Systeem
Input / Output Components
The FM10 device supports the following I/O components:
• SIM Card Slot
• Micro SD Card Slot
• USB 3.0
• DC In power input Jack
The Vehicle dock of this FM10 device supports the following I/O components :
• COM Port
• USB 2.0
• CAN Bus/ Audio Connector
• LAN port
• Wide Range Power Input
System Memory
The main system memory is 4GB SODIMM DDR3L-1600 (up to 8GB)
Hardware

FM10 Product Reference Guide
2-2
Audio Interface
Your device is equipped with two speakers which are located on the bottom part of the vehicle dock. A microphone is
also available for voice communication and voice recording.
As an alternative, you can use a headset adapter cable provides a connection for headset operation. When headset
is plugged into the adapter cable, the main speakers or internal microphone will be disabled.
Card Slots
Your device has a memory card slot which accepts an SD memory card. The memory card is hot swappable.
802.11 a/b/g/n/ac
Your device has an 802.11 a/b/g/n/ac network card that can be use with internal or external antennas.
WWAN
Using a SIM card for network connection, your device supports WWAN. (Wireless Wide Area Networking)

FM10 Product Reference Guide
2-3
Power
Vehicle DC Power Supply
The Power input voltage range for the vehicle dock is between 10 to 60V DC, without the need to perform any
manual operation within the vehicle dock.
This dock provides conditioned power output for the device. By using a specied DC to DC adapter, the input voltage
of 100-240 V DC nominal can be accepted.
External AC Power Supply (optional)
If the DC power is not available, you can use an optional external UPS (Universal Input Power Supply) to convert AC
power to an appropriate DC level.
Using an external UPS and adapter cable, the AC to DC power input for the device is transferred to the vehicle dock.
To perform the connection, simply plug one end of the adapter cable to the dock and then plug the other end of the
adapter cable to the DC output cable from adapter. For Details, refer to the connection diagram shown below:
2
1
3 4
No Item
1 AC Input Cable
2 DC Output Cable
3 To DC Output Cable
4 To FM10

FM10 Product Reference Guide
2-4
UPS Battery
Your device has an UPS battery. This UPS battery is automatically charged when the device is placed on a powered
dock. The charging time takes approximately 3 hours.
When running on the UPS battery power, the power timeouts maybe different than when vehicle power is applied.
Using the UPS battery power, it allows the device to continue operation even when the device is not mounted in a
dock. The UPS battery is designed to supply power to your device for a minimum of 30 minutes.
Note
• During full loading operations without external power attached, the device will use UPS battery to
operate.
Note
• If the UPS battery power becomes critically low, the device will automatically hibernate to prevent
damage to the UPS battery.
• To turn on the device using the UPS battery power, make sure the UPS battery has at least 10% charge.
If you cannot turn the device, charge the UPS battery immediately.
• The internal UPS battery status LED and the UPS battery control panel can be used to monitor the status
of the UPS battery.
Backup Battery
Your device has a backup battery to maintain time, date, and CMOS setup information for a minimum of 2 years.
This back up battery should only be replaced by service personnel.
Power Management Modes
The FM10 has four power modes
• Full On
• Standby / Sleep
• Hibernate
• Off
• Full On Mode
When the FM10 is attached to either vehicle power or an external power supply or is operating from the UPS
battery. and the power button is pressed, the device is in the On mode. In this mode, the keypad, touch screen and
any attached peripherals will function normally. The display remains On until the display, standby or hibernate timer
expires.
When the device is in On mode, the power LED indicators is off.

FM10 Product Reference Guide
2-5
• Standby / Sleep Mode
When the Standby / Sleep timer expires without a primary event occurring, the device transitions to standby /
Sleep mode. Pressing the power button to wake up the device back to On mode.
When the device is in Standby / Sleep mode, the power LED indicator is red.
• Hibernate Mode
When the device is in Hibernate Mode, all LEDs are off. Pressing the power button to wake up the device back to
On mode.
When the device is in Hibernate mode, the power LED indicator is red.
• Off Mode
By default, the FM10 turns off if the user turns off the device through the system or presses the power button for 8
seconds with a critical shut down. The FM10 will also be off when there is no connection to a power source or the
UPS battery is depleted. However the internal RTC will keep maintaining the date and time while the device is off.
When the device is off, the power LED indicator is red.
Ignition Control
The ignition on/off delay is to prevent the computer to be instantly shut down when the vehicle ignition is turned off.
It allows the computer running for about 1 to 120 seconds (using customized software) once the ignition has been
turned on/off. Winmate Vehicle Mount Computer supporting this ignition function. To access the Ignition Software AP,
tap . When the device is removed from dock, the Ignition Software AP will be disabled, shown as .
• Software support
Winmate provides Ignition Software AP to control the timing of delay. Users are able to select 1 to 120 seconds for
each period of timing delay. To setup the timing delay please follows these steps:
On Delay: Default 10 seconds. When the system is powered on via ignition key, the system will delay 10 seconds
to power on.
Off Delay: Default 10 seconds. When the system is powered off via ignition key, the system will delay 10 seconds
to shut down.
Hard Off Delay: Default 30 seconds. When the system is powered off via ignition key, the device will cut off power
after 30 seconds.

FM10 Product Reference Guide
2-6
Power Controls
Power Switch
There is a power switch located on the rear side of the vehicle
dock, When the dock is connected to external power and the power
switch is on, the dock delivers power to the FM10 so the device
can be powered on
Power Button
The Power button is located at lower right of the FM10 If the FM10
is OFF, pressing the power button will start the power up sequence.
Note
• The FM10 need to be docked in a powered vehicle dock
or UPS battery has a sufcient charge to power the
device.
• If no external power is available and the UPS battery
does not have enough charge, pressing the power button
cause no action

FM10 Product Reference Guide
2-7
External Connectors
Power OFF the FM10before connecting a cable to any ports. Most of the external connectors for the FM10 are
located on the vehicle dock
• COM11 connects to a device such as printer or scanner
• COM12 connects to a device such as printer or scanner
• USB connects to USB devices such as USB ash drive,
mouse, keyboard, printer etc. this USB also accept a dongle
cable with a USB host port and a USB Client port
• CAN bus / Audio allows direct linking into vehicle, enable
access to wide range of vehicle data and Audio connects to a
stereo headset, external speakers or audio recording device
• LAN port supports Power over Ethernet (PoE) as a Power
sourcing equipment (PSE)
Serial Connector (COM)
Pin Signal Description
1 DCD Data Carrier Detect – Input
2 RXD Receive Data – Input
3 TXD Transmit Data – Output
4 DTR Data Terminal Ready – Output
5 GND Signal / Power Ground
6 DSR Data Set Ready – Input
7RTS Request to send – Output
8 CTS Clear to send – Input
9 +5 VDC or RI Bar Code Scanner Power – 500mA Max
Shell C GND Chassis Ground
COM11
COM12
CANbus/Audio
USB
LAN

FM10 Product Reference Guide
2-8
USB Connector
Pin Symbols Color
CN1-1 USBVCC1 Red
CN1-2 USB1_DM White
CN1-3 USB1_DP Green
CN1-4 GND Black
CN1 Shell
CN1-6 USBVCC2 Red
CN1-7 USB2_DM White
CN1-8 USB2_DP Green
CN1-9 GND Black
CN1 Shell
Pin Signal Description
CN2-1 USBVCC1 Red
CN2-2 USB1_DM White
CN2-3 USB1_DP Green
CN2-4 Ground Black
CN3-1 USBVCC2 Red
CN3-2 USB2_DM White
CN3-3 USB2_DP Green
CN3-4 Ground Black

FM10 Product Reference Guide
2-9
CANbus / Audio Connector
The CANbus/Audio connector is a D-15 male connector located on the rear side of the Vehicle Dock. The connector
supports a headset adapter cable or a CANbus cable. The FM10 does not support connecting audio and CANbus
simultaneously.
CANbus Cable
Receptacle J1939 Female Socket J1939 Male
Pin Signal Color
1 CAN_GND CAN Ground
2 CAN_V+ Option CAN external Power Supply
3 CAN_H CAN_H bus line dominant high
4 CAN_L CAN_L bus line dominant low
5 CAN_SHLD
6 Not used
7 Not used
8 Not used
9 Not used
Other manuals for FM10
3
Table of contents
Other Winmate Automobile Accessories manuals

Winmate
Winmate FM07A User manual

Winmate
Winmate G-WIN User manual

Winmate
Winmate FM10A User manual

Winmate
Winmate FM10 User manual

Winmate
Winmate FM07 User manual

Winmate
Winmate FM08 User manual

Winmate
Winmate FM10Q Installation and operation manual

Winmate
Winmate FM10Q User manual

Winmate
Winmate FM07 User manual

Winmate
Winmate FM08 User manual
Popular Automobile Accessories manuals by other brands

FABBRI PORTATUTTO
FABBRI PORTATUTTO 74044 Assembly instructions

ClipperCreek
ClipperCreek HCS user manual

rough country
rough country JEEP 2017-19 WK2 installation instructions

ATD Tools
ATD Tools ATD-5200 owner's manual

LedGlow
LedGlow Advanced Million Color installation instructions

Cruz
Cruz 923-107 Assembly instructions