Winradio WR-3700 series User manual

WR-3700 series
User’s Guide

WR-3700 Series User’s Guide
2
Introduction
Designed for government, military, security, surveillance and industrial applications,
WiNRADiO Spectrum Monitor puts advanced radio receiver technology directly on a
personal computer platform to create a high-performance PC-based spectrum surveillance
and monitoring system.
This synergy of advanced radio and computing technology provides the WiNRADiO
Spectrum Monitor with many unique features which are hard to find on the usual stand-alone
communications radio receiver. These features include a rich variety of flexible tuning and
scanning options, versatile memory and database facilities, the ability to digitally process the
received signal, as well as the ability to interact with other programs running on the same
PC. All this is controlled through an innovative user interface, unparalleled in sophistication
and ease of use.
The internal version (WR-3700i-DSP) conserves valuable desk-top space, and avoid the
need for external cables and power supplies. It also have the advantage of not requiring any
additional interface ports, as all communication with the PC is via the internal PC bus. A
dedicated DSP (Digital Signal Processor) is used for real-time audio compression and
playback, and can be expanded to include other real-time signal processing functions tailored
to the user's particular requirements. Multi-channel operation is simple to achieve, as up to
eight WiNRADiO internal receivers can be used simultaneously in the one PC.
The external version (WR-3700e) can be controlled through an RS-232 serial interface, or
the optional plug-and-play PCMCIA interface. The PCMCIA interface allows quick and
simple connection to any laptop PC, providing complete portability for vehicle or field use.
The external versions can be powered by the plug-pack (supplied), or from the optional WR-
PPS battery pack with inbuilt charger. The external model also include a direct discriminator
output, for optimum reception of packet and other digitally modulated signals.
The informative control panel displayed by the WiNRADiO Spectrum Monitor includes a
number of ground-breaking features, designed to empower the user with a multitude of
tuning and scanning capabilities especially tailored for surveillance applications. One of the
most significant features is VisiTune™, a patented feature allowing the operator to
graphically tune within a dynamically-changing spectrum screen representing the actual
situation on the monitored band.
Add to this the fact that WiNRADiO Spectrum Monitor features an automatic task scheduler
which can be programmed for unsupervised operation, search for specific types of signals
and even make decisions based on the specified circumstances, and you will find that
WiNRADiO Spectrum Monitor represents an invaluable tool, making radio surveillance
easier and much more efficient and reliable.
Registration Information
To be informed about any new products or software upgrades, please register using the Web
site closest to your location:
North America www.winradio.com/home/register.htm
Europewww.winradio.co.uk/home/register.htm
Australia/Asia www.winradio.net.au/home/register.htm
Comments and suggestions are welcome, and can also be made from these sites.
Be sure to visit out Web site from time to time, and watch for new software upgrades and
options as they become available.

WR-3700 Series User’s Guide
3
Installation
The WiNRADiO internal version package contains the following items:
•WiNRADiO receiver card
The WiNRADiO external version package contains the following items:
•WiNRADiO receiver unit
•RS-232 cable
•Power adaptor
•PC Card Adaptor option (if ordered)
•Portable Power Source option (if ordered)
Both packages include the following items:
•WiNRADiO software installation disk
•Indoor test antenna
•This User’s Guide
•The manufacturer’s warranty information
•Any software option (such as the WiNRADiO Digital Suite or Database Manager), if
ordered
Note that you must supply your own antenna for optimum reception.
In order for your WiNRADiO receiver to function, your IBM PC compatible computer must
meet the minimum system requirements specified below.
System Requirements
Minimum Recommended
Processor: 386 Pentium or higher
RAM: 4 MB 16 MB or more
Display VGA SVGA: at least 800x600, 256 colours
OS: Windows 3.1 Windows 95, 98 or NT 4
Spare serial port or PCMCIA socket for the external model, or a spare ISA slot for the
internal model.
3700i Hardware Installation
1. If your computer is on, shut down the computer first, turn it off and disconnect the
power cord.
2. Remove the computer cover.
3. If other expansion cards are fitted, check their address assignments. If necessary, change
any of the jumpers on the WiNRADiO receiver card to avoid conflicts. (The default I/O
port 180, IRQ 10 and DMA 0 should normally work, however if you need to change any
jumpers, see the following section about ‘Jumper Settings’.)
4. Choose an empty 16-bit expansion slot, preferably with an empty slot immediately to
the right (assuming you are facing the computer front).
5. Important: Before inserting the WiNRADiO card, touch the computer metalwork with
your hand (to drain any static charge from your body), and also touch the metal bracket
on the WiNRADiO card.

WR-3700 Series User’s Guide
4
6. Carefully insert the card into the vacant slot, and push until it is firmly seated. Screw the
metal bracket at the end of the card to the computer case (this must be done to minimise
ground-conducted interference).
7. Replace the computer case and reconnect the power cord.
8. Plug a speaker or headphones into the audio jack at the rear of the card. Alternatively, if
you have a sound card and wish to route WiNRADiO through it, you can plug an audio
‘patch’ cable from the audio jack to the ‘Line In’ jack on your sound card. Note that a
3.5mm stereo plug must be used, otherwise you will hear no audio from the receiver. A
suitable patch cable is included with the WiNRADiO Digital Suite option.
9. Connect the antenna to the BNC jack at the rear of the card and extend the antenna up
and as far away from the computer as possible.
10. If you have a plug-and-play computer, you may have to configure the BIOS under
'PNP/PCI CONFIGURATION' to set the appropriate IRQ and DMA to 'Legacy ISA'
instead of 'PCI/ISA PnP' to avoid conflicts with any plug-and-play devices in your
computer. You should also make sure that any PCI IRQs are not the same as
WiNRADiO's.
Jumper Settings
The WiNRADiO receiver card is provided with jumpers which select the desired I/O port
address. The jumper may need to be changed from the factory default settings to avoid
conflicts with other cards already installed in the computer.
There are eight possible I/O addresses which the WiNRADiO card can use: 180, 188, 190,
198, 1A0, 1A8, 1B0 and 1B8 (all specified in hexadecimal). There are also 8 different IRQs:
3, 5, 7, 9, 10, 11, 12 and 15, and 2 DMA channels: 0 and 3. The factory default is I/O port
180, IRQ 12 and DMA 0.
If more than one WiNRADiO card is to be installed in the computer (up to 8 depending on
available address lines), each card must be assigned a unique I/O address and IRQ. The
DMA channels can be shared, all eight are able to run on one DMA channel, but it is
recommended to evenly distribute the card’s DMA settings across the two channels if
possible.
Some of the WiNRADiO IRQs can be used by other devices, for example: IRQ 3 is normally
used for COM2, 5 for a sound card, 7 for an EPP or ECP printer port, 9 for a video card, 10
for a network card, 11 for a SCSI card, 12 for a PS/2 mouse port and 15 for the secondary
IDE port. If you wish to use any of these interrupts, make sure that either these devices don’t
exist, or disable them.

WR-3700 Series User’s Guide
5
3700e Hardware Installation
1. First install the software (see below).
2. Connect the supplied power adaptor to the +12V DC power socket on the rear of the
unit, and switch the unit on.
3. Connect the supplied RS-232 (or optional PC Card Adaptor) cable between the
computer and the WiNRADiO unit.
4. Connect the antenna to the BNC connector at the rear of the unit, and extend the antenna
up and as far away as possible.
Software Installation
1. Insert the WiNRADiO installation disk into your floppy drive.
2. If you are using Windows 95, 98 or NT 4, click on the ‘Run’ command in the ‘Start’
menu. If you are using Windows 3.1x or NT 3.5x, Click on the ‘Run’ command in the
‘File’ menu in Program Manager or File Manager.
3. Type A:\INSTALL (or B:\INSTALL if your floppy drive is B).
4. After the Welcome dialog box and Licence agreement, you will be prompted to enter a
directory to install the WiNRADiO software. You can either choose to accept the
default, or you may enter your own.
5. The installation will then proceed to install the necessary files onto your hard disk. You
will then be asked whether you want to add an icon to Windows. If you accept, you will
then be asked which program group to add the icon to.
6. If this is the first installation in Windows 3.1x, 95 or 98, you will then be asked to
restart Windows. The WiNRADiO receiver will not work until Windows has been
restarted. In Windows NT, a hardware configuration utility will pop up allowing you to
specify the hardware settings for the software (see the next section ‘I/O Configuration’
for more details).
WiNRADiO software is periodically upgraded. Check out the newest software version on our
Web site at www.winradio.com. If you wish to be automatically notified of upgrades and
other WiNRADiO related information, please register with our user database by sending an
e-mail message with subject heading REGISTER to support@winradio.com.

WR-3700 Series User’s Guide
6
I/O Configuration
To inform the software of the hardware configuration, a Control
Panel applet is used. Open Control Panel and double-click on the
WiNRADiO icon. A dialog box will appear, which allows you to
specify the hardware configuration for the software.
Windows 3.1, 95 and 98
As can be seen, up to 8 internal cards can be configured, and for
each card installed, a suitable I/O address must be nominated.
In most situations, you can use the ‘Auto Detect’ feature, which will allow the software to
find all the internal cards and the IRQ and DMA settings for each. Only rare circumstances
stop the auto-detection from working.
If there are any problems with the settings (such as an address conflict), you will be notified
of the problem.
After you click on OK and any setting has been changed, you will be prompted to restart
Windows for the new settings to take effect.
Windows NT
Up to 9 receivers (internal and external) can be configured,
and for each receiver installed, its location must be
nominated.
In most situations you can use the ‘Auto Detect’ feature,
which will allow the software to find all internal I/O ports,
serial ports (must be switched on) and PC Card slots a
receiver is connected to. Note it will not detect the IRQ or
DMA settings for the internal receivers but will detect the
presence of the DSP.
An optional fifth field is provided that allows you to specify a name to be associated with the
receiver. The name will appear in the title of the main window instead of the traditional
‘WiNRADiO Spectrum Monitor #’ title.
After you click on OK, the new settings take immediate effect.
Uninstalling WiNRADiO
In Windows 95, 98 and NT 4, start up Control Panel and double-click on the ‘Add/Remove
Programs’ icon. Select ‘WiNRADiO’ from the list and click on the ‘Add/Remove’ button.
In Windows 3.1x and NT 3.5x, double-click on the ‘Uninstall WiNRADiO’ icon in the
program group that contains the WiNRADiO icon.
All software and changes to any configuration files will be removed from your hard disk.

WR-3700 Series User’s Guide
7
Troubleshooting
Installation Problems
If you try to start-up your WiNRADiO receiver for the first time and you are presented with
a dialog box stating that the WiNRADiO receiver card could not be found, you most likely
have a configuration problem.
If you are using an internal WiNRADiO model, open the WiNRADiO configuration utility
from Control Panel by double-clicking on it. Click on ‘Auto Detect’. If no WiNRADiO card
can be found, then you probably have a hardware address conflict. Shut down the computer,
and try other jumper settings as described earlier in this chapter. Start up the computer and
try auto-detecting again.
If you are using an external WiNRADiO model, make sure it is plugged in and the power is
turned on (the red LED on the front panel should be illuminated).
If you are using the WiNRADiO software and find that the Spectrum Scope is obscuring the
panel, try to reposition the main WiNRADiO control panel window by changing it from full-
screen to a window, and positioning it in the top area of the screen. Shrink the size vertically
so there is a thin border around the panel. This should make your WiNRADiO receiver
easier to use.
If you are finding that shortcut keys are not responding (including the tab and cursor keys),
try clicking on the appropriate window with the mouse to activate the window. If you have
more than one dialog box open at the same time, try closing them until only one is left open.
Sensitivity Problems
The WiNRADiO receiver is very sensitive, so low sensitivity problems are usually due to
noise induced into the antenna by the PC monitor, less commonly the PC, or some other
external source. If the noise is strong enough, it can overload the receiver which responds by
automatically reducing sensitivity using its AGC (Automatic Gain Control) mechanism. This
problem is more common on low frequencies (under 30MHz). As a result, the reception can
become noisy and the receiver appears to be ‘deaf’.
This can happen if the antenna is poorly located, for instance if it is too close to the PC
monitor, or used inside a building with steel-reinforced concrete walls. Try repositioning the
antenna, or placing ferrite cores over its shielded lead close to the receiver, to break the
transmission of interference back to the antenna.
Another remedy which is often effective is to place an RF (radio frequency) filter between
the PC mains lead and the wall power outlet, to reduce interference caused by earth loops.
If these measures fail to produce the desired noise reduction , and if you are using an internal
receiver model, try moving the receiver card to a different slot inside the PC, as far as
possible from other potentially noisy cards, especially the video card, and the power supply.
Video monitors are also major sources of interference, and there are significant differences
between brands in this respect. You can establish the noise contribution of your monitor by
switching it off. If the noise diminishes substantially, check that the monitor lead is fitted
with a ferrite suppressor bead (the rectangular or cylindrical moulding on the lead). If not, fit
a suppressor, or acquire a quieter monitor.

WR-3700 Series User’s Guide
8
Intermodulation Problems
Your WiNRADiO receiver has been designed to be very sensitive in order for it to work
with the moderately small antennas which are preferable for VHF/UHF. In areas with strong
local broadcast stations, the WiNRADiO receiver front-end may overload and, as a result,
intermodulation products may appear in the received band. By pressing the Local button on
the control panel, the interference products will disappear.
It is advisable to use the Local setting if you are operating the receiver with larger outdoor
antennas, especially on broadcast bands. For long-distance shortwave reception, a
considerable improvement can be obtained by using a tuned antenna and preselector.

WR-3700 Series User’s Guide
9
Using WiNRADiO
When you first start WiNRADiO, you are presented with a radio receiver interface. The
image below shows the main parts of the control panel.
The following few sections document each of the parts in detail.
Basic Controls
Frequency Readout
The frequency readout shows the current receiver frequency.
Below this is another display which shows one of the following:
the callsign and/or a comment relating to the current tuned
frequency, taken from the frequency memory (entered by the user), or the description of the
current band. The band description is user-definable under ‘Auto-stepping’ in the Configure
menu.
To enter a frequency, simply type the desired frequency using the keyboard. As soon as you
press a number or the decimal point, the frequency readout will enter the edit mode, allowing
you to enter the frequency. The old frequency is automatically overwritten. If you want to
edit the existing frequency, click on the readout with the left mouse button to highlight the
current frequency, position the cursor as desired, reclick the left mouse button, make the
desired changes, then press the Enter key. To change the frequency unit (kHz, MHz or GHz),
press K, Mor Grespectively while the display is highlighted or in edit mode.
To tune the receiver to the new frequency, press the Enter key. To cancel and return the
previous display, press the Escape key.
In each mode, the frequency readout only displays the most significant digits which affect
tuning and reception. The display resolution is as follows: 1 Hz in CW, LSB and USB, 10
Hz in FMN, 100 Hz in AM and 1 kHz in FMW.
In FMW, the lowest tunable frequency is 30 MHz. If you attempt to tune to a frequency
below 30 MHz, the receiver will automatically change the mode to AM, and disable the
FMW button.
Tuning Knob
The tuning knob adjusts the frequency by the smallest suitable increment for
the current mode. In LSB, USB and CW it is 10 Hz; AM is 100 Hz; FMN is
500 Hz, and FMW is 50 kHz.
To use the knob, position the mouse cursor over the top half of the knob, and
the cursor will look like this: . To decrease the frequency, click the left

WR-3700 Series User’s Guide
10
mouse button. To increase the frequency, click the right mouse button. On the bottom half,
the cursor will flip vertically . The mouse buttons will now operate in reverse, with the
left increasing and the right decreasing the frequency.
To tune the receiver from the keyboard, press the up/down cursor keys to increase and
decrease the frequency respectively.
For faster tuning, use the Shift or Ctrl keys simultaneously with the mouse or keyboard
tuning commands to multiply the frequency step by 10 or 100 times respectively.
To reduce the step size to 1 Hz for more accurate tuning of LSB, USB or CW, use the Alt
key simultaneously with the mouse or keyboard tuning commands.
Modes
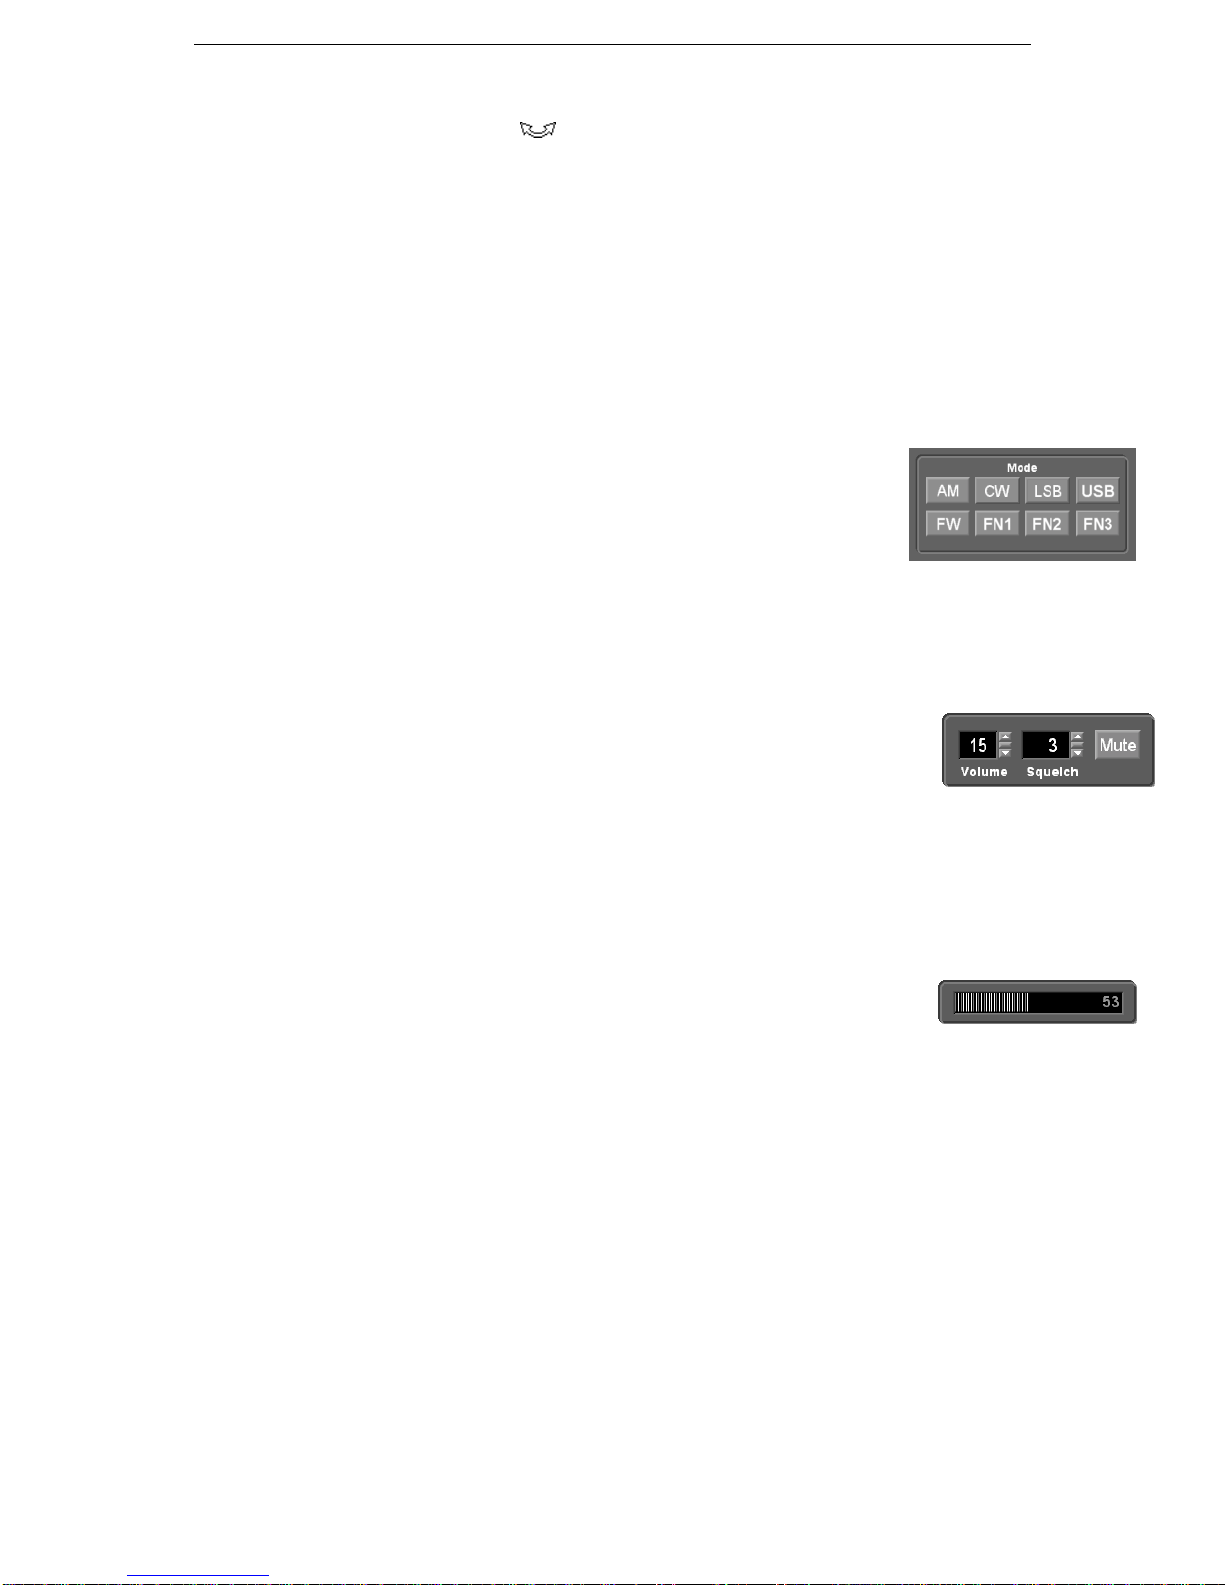
WiNRADiO WR-3700 series supports eight different reception modes (CW, LSB, USB,
AM, FMN, FMN2, FMN3 and FMW).
These modes are abbreviations of Continuous Wave (CW), Lower Side
Band (LSB), Upper Side Band (USB), Amplitude Modulation (AM),
Frequency Modulation Narrow-band (FN) and FM Wide-band (FW). FN1
bandwidth is 6.5kHz,FN2 15kHz and FN3 is 50 kHz.
To select the desired mode, click on the appropriate mode button or use the
keyboard shortcuts: Afor AM, Wfor FMW, Nfor FMN, Cfor CW, Lfor LSB, and Ufor
USB.
Volume
The volume control is located on the right hand side of the panel. The volume
can range from 0 (no sound) to 31 (full volume).
There are several ways to adjust the volume. Using the mouse, you can increase
or decrease it by clicking on the up/down volume control arrows respectively, or you can
click on the scroll button between the two arrows and drag the volume up or down.
Using the keyboard, you can press Vand enter the volume, or you can use the left and right
cursor keys to decrease and increase the volume respectively.
Signal Level Meter
The signal level meter, located under the volume control, shows the received
signal strength. It represents the strength by a bar graph, and shows the
equivalent numerical strength on the right side of the display.
The value represents the approximate signal level in dB above the receiver noise floor.
The signal level is also used to control squelch and scanning.
Squelch
The squelch controls the audio output and scanner threshold.
In normal operation, if the signal level drops below the squelch threshold, the audio output is
muted after a time delay specified under ‘Configure - General Options’. If the signal rises
above the squelch threshold, the audio is restored immediately.
The squelch indicator, at the bottom of the panel, shows whether the current signal level is
above or below the squelch threshold. If it is above the threshold, the display is green,
otherwise it is red.
The squelch threshold also controls scanning. When scanning, the receiver will pause or stop
if it receives a signal above the squelch threshold, otherwise it will continue scanning until
such a signal is found.

WR-3700 Series User’s Guide
11
If you wish, you can have different squelch thresholds for normal reception and scanning. To
activate this feature, go to Configure - General Options and select Separate squelch for
scanning. The receiver will then accept different squelch thresholds on the front panel, and
in the ‘Scanner - Setup’ dialog box (described later).
Attenuator
The attenuator controls the level of the RF signal entering the receiver front-end. If
a signal is too strong, it may overload the receiver and cause distortion. To combat
this problem, the RF signal can be attenuated by 18 dB by clicking on the Local
button or by pressing the Okey.
If the attenuator is active and the signals are too weak, click the DX button or press
the Dkey to turn the attenuator off.
Stepping
Four stepping modes are available: fixed, auto, memory, and duplex. To select
between fixed, auto and memory stepping, click on the Select button or press the T
key until the desired stepping mode appears. Duplex stepping is activated
separately, as described below.
To step through frequencies, click on the up/down buttons located next to the
frequency readout, or press the Page Up/Page Down keys to step up/down
respectively.
The stepping modes are described below in more detail.
Fixed Stepping
Where stations operate on fixed channels (e.g. AM or FM broadcast band, mobile radio,
CB), it is usually more convenient to change the frequency in steps corresponding to the
channel separation.
You can specify the desired step size for each mode from a minimum equal to the frequency
resolution of the display, up to a maximum of 10 MHz. To enter the step size, either click on
the step display with the mouse, or press the F key; then enter the desired step size and press
Enter (or Escape to cancel the entry). Note that LSB/USB share the same step size.
If you change the mode, the step size will be changed to the size previously entered for that
mode.
Note that all modes retain the frequency to the nearest 1 Hz even though the extra digits
might not be visible. For example if you change from LSB to FMW and back, the actual
frequency is not rounded off, but remains the same. This ensures that accidental mode
changes do not cause the exact current frequency to be lost.
Auto-Stepping
Auto-stepping is an enhanced form of fixed stepping, in which the step size depends on the
receiver frequency. This facility can also automatically set the mode and squelch threshold
according to frequency.

WR-3700 Series User’s Guide
12
Before this feature can be used, it is necessary to set up one or more stepping ranges. To do
this, first select Auto-stepping from the Configure menu. A dialog box will appear,
allowing you to establish the auto-stepping ranges.
To add a range, click on the Add button. Another dialog box will appear, allowing you to
specify the lower and upper frequency limits, the desired step size for that range, the mode,
squelch level, and a text description. The mode, squelch level and description are optional.
You can also edit, delete and move the ranges in the list. If ranges overlap, those at the top of
the list will have higher priority over those lower in the list. You can move ranges higher or
lower in the list by clicking on them and dragging them to the desired location.
If the receiver is not in a specified range, it will default to the fixed step size. If you enter a
different value in the step display, it will change to that step. If the receiver is subsequently
tuned to a defined auto-step range, the step size for that range will be automatically recalled
and will replace the fixed step.
Whenever the receiver is tuned to a defined auto-step range, the display below the main
frequency readout will show the text description for that range regardless of whether auto-
stepping is active or not. If the current frequency coincides with a frequency previously
stored in memory (see below), the memory comment will take precedence over the text
description.
Memory Stepping
Memory stepping allows the user to step directly between frequencies previously stored in a
memory file. In this mode, the callsign of the current memory entry is shown in the step
display.
If the user types in a frequency which does not correspond to a memory frequency, the
receiver will tune to this frequency without problem. If the user then steps the frequency up
or down, the receiver will find the memory frequency closest to the current frequency in the
same direction, and tune to it.
At least one frequency must be stored in memory for memory stepping to work. If the
memory is empty, memory stepping will not function.
Duplex Stepping
Duplex stepping simplifies listening to full duplex
transmissions, which usually have widely different transmit
and receive frequencies. It can also be used to step between
other widely spaced transmissions, which have the same mode.
To set the frequency separation, select Duplex Separation
from the Configure menu. Any separation can be entered, up
to the maximum tuning range of the receiver.
To step up or down by an amount equal to this separation, press the Home or End keys
respectively. If the user attempts to step outside the frequency limits of the receiver, the
command will be ignored.
Memory
WiNRADiO has the ability to store up to 1000 frequencies in a memory file, and the
total number of memory files is limited only by hard disk capacity.
Each entry is assigned the following: a number from 0 to 999, the frequency, mode,
group number(s), callsign and comment.
If the receiver is tuned to a frequency stored in the memory, the associated callsign
and comment is displayed in the area below the main frequency readout.

WR-3700 Series User’s Guide
13
Storing a Frequency into Memory
To store the current frequency you are tuned to into one of the
1000 memory locations in WiNRADiO, you can either click on
the Sbutton in the Memory panel, or press Son the keyboard.
A dialog box will pop up, and present you with a range of
options you can fill in. At the top of the dialog box is the
frequency you are storing (this cannot be edited). The next line is
the next available memory number that is empty (starting with
zero). You can change this to a memory number that you want
(including ones that already are in use).
The next option is the group assignment. You can assign a
frequency to one or more of 16 different groups. You can set up
frequency groups to suit your particular areas of interest, to
distinguish certain types of stations from others.
Another attribute you can store with a frequency is a callsign. You can store up to 9
characters in the callsign.
A hotkey (function keys F2 to F12) can be associated with a frequency, so that when you
press the key, that frequency is instantly recalled. If a hotkey is being used by another
frequency, it will be shown as ‘(used)’, but you can override the previous assignment with a
new one if you wish.
A comment can also be included with a frequency. The size of the comment is limited by the
width of the text entry line. When the receiver is tuned to this frequency, the text display
below the frequency readout will show the frequency’s callsign and comment entered here.
The mode can also be stored, which will be set automatically when the frequency is recalled.
Finally, one other attribute that can be set is whether the memory number is to be excluded
from a memory scan or not. By default the number is not locked out, but can be locked out
by checking Scan lockout.
Recalling a Frequency from Memory
There are several ways to recall a frequency from memory:
•Use a hotkey;
•Type a number into the memory number display;
•Type a number while holding down the Control key;
•Use the memory recall/view dialog box;
•Use memory stepping.
Hotkey
The quickest way to recall a frequency is to assign a function hotkey to it when you initially
store the frequency. Any function key from F2 to F12 can be used. Note that F1 cannot be
used, as it is reserved for help.
If desired, existing memories can be edited to add a function hotkey (see below).
To recall a frequency using a hotkey, simply press the appropriate function key (F2 to F12),
and it will be recalled instantly. This assumes that a frequency has previously been assigned
to that key, of course.

WR-3700 Series User’s Guide
14
Control-Number
To recall any memory, hold down the Control key down while typing the number of the
memory. Alternatively you can click on the memory display, enter the number, and then
press Enter to recall it.
Memory Recall/View
The final alternative is to click on the Rbutton or press
the Rkey, upon which a memory recall dialog box will
pop up allowing you to view and recall any frequency
from a list. You can limit the list to a subset of
frequencies by specifying a search string, group number
or selected modes. Then click on Find, upon which only
those frequencies which match the search criteria will be
shown.
To tune the receiver to a list entry and keep the memory
viewer open, single-click on it with the left mouse button.
To tune the receiver and close the viewer, double click on it. To tune the receiver to the
frequency it was tuned to before opening the memory viewer, click on Previous.
Editing Memory
To edit an existing memory entry, first click on the Rbutton or press the Rkey.
Select the memory to edit from the list, then click on Edit.
You are able to modify every setting, including the frequency, except for the
actual memory number.
To edit the next memory entry, click on the Next button.
Saving and Loading Memory Files
WiNRADiO stores 1000 frequencies in each memory file. You can choose which file is
currently active, and you can also save the file under a different name.
When you start your WiNRADiO receiver for the first time, it creates a memory file called
winradio.wrm. Every time you close your WiNRADiO session, the memory is automatically
saved to the active file. To perform an immediate save, select File - Memory file - Save.
To open another memory file, select File - Memory file - Open. Before the new file is
opened, and if the current memory file has been modified during the current session, you
will be asked if you want to save the changes or not. Next, a dialog box will appear which
allows you to open a different memory file (or reopen the same one discarding any changes
since it was last opened). The selected file will now become the active memory file.
To rename the current active file and save it under a different name, select Save as from the
same submenu. A similar dialog box will appear, where you can specify the new filename
and/or path.
New Memory File
To clear all frequencies and start a new file, select File – Memory file – New. Before the
new file is opened, and if the current memory file has been modified during the current
session, you will be asked if you want to save the changes or not. A dialog box will then
appear, prompting you to enter the name of the new file.

WR-3700 Series User’s Guide
15
Scanning
WiNRADiO provides a variety of scanning functions and options, to
allow you to optimise the way you search for stations.
The scanner steps through frequencies until it finds a transmission that
has a signal strength greater than the squelch value.
The following sections describe the available scanning methods and
associated options.
Immediate Scanning
Immediate scanning is the quickest and simplest way to search for stations. To
activate this, first set the desired stepping mode and step size if necessary, then click
on the immediate scan up or scan down button. The receiver will then start scanning
up or down from the current frequency, according to the selected step size.
If the receivers encounters a signal which has the same or higher strength than the
current squelch threshold, it will either pause or stop, depending on the selected
scanning options.
To access immediate scanning from the keyboard, use the Insert or Delete keys to scan up
or down respectively. To cancel immediate scanning, press the Escape key.
Frequency Range Scanning
Frequency Range scanning provides an extension to
immediate scanning in 'Fixed Step' mode. It allows
you to specify a number of ranges of frequencies to
scan. You can enter the start and end frequencies,
the step size, mode and squelch setting for the range
to scan. You can add this range to a list from which
you can pick the ranges you want to scan. Each
range can also have an associated description.
Click on the Start Scan button to start scanning
from the first selected range, or click on Close button to exit the dialog box (it will
remember your settings and ranges). If you have already performed a range scan and have
not changed the range selection, you can resume the range scan from where it was stopped
by clicking on Resume previous scan.
When scanning in this mode and the scanner reaches the end of the current range, it either
goes to the next range selected, or loops back to the start of the first range selected.
The range list allows you to add, edit and remove ranges, and you can click on one or more
ranges to select them for scanning.
Any ranges with descriptions can be selected in the 'Spectrum Scope' for a sweep to be
performed on the associated range.
Memory Scan
Memory scanning provides an extension to immediate
scanning in ‘Memory Step’ mode. In addition to the
basic stepping through the memory frequencies, it
allows you to specify a subset of memory frequencies to
scan by selecting a range of memory numbers, modes
and one or more groups.
To start the memory scanner, click on the Memory
button or press the Mkey. The memory scan dialog box
will appear.

WR-3700 Series User’s Guide
16
Select the range of memory numbers to scan, mode and group restrictions. Click on the Scan
button to start scanning, or click on the Close button to exit the dialog box (your settings will
be remembered).
When the scanner reaches the end of the memory range, it loops back to the start of the range
and starts again.
A feature provided with memory scanning allows you to assign ‘priority’ memory number.
When this is used, the priority memory number is scanned after a certain number of
memories is scanned. How many frequencies are scanned before the priority frequency is
specified by the Scanning interval.
Scanner Options
There are several options that can be set for the scanner to suit your needs. You can specify
how the scanner operates when it pauses at a signal and how fast it scans.
When the scanner finds a signal, it has two basic options: pause or stop. If ‘pause’ is
specified, you can force the scanner to continue, stop, exclude or wait.
If you leave it waiting, there are four different options to allow it to continue automatically:
•When the signal disappears (drops below the squelch level)
•After a fixed period of time (regardless of the signal level)
•When the signal disappears during a fixed period of time or after the fixed period of
time (whichever comes first)
•After a signal disappears for at least a fixed period of time.
The fixed period of time is specified by the ‘Delay time’.
The scan rate specifies the maximum number of frequencies per second the scanner will
check, but could be slower than specified if you have other programs running.
When the scanner stops or pauses at a signal, you can set it up to perform certain tasks:
•Write the frequency to memory
•Store the settings into the log
•Start recording the audio to a sound file
•Alert the operator
To write the frequency to memory, select Write to
memory and specify the range of memory numbers
that the scanner can write to. You can also assign a
group number that the frequency will be associated
with. Check the Confirm box to confirm each
frequency before it is written.
To store the current settings (frequency, mode, date,
time and signal strength) to the log, select Store to
log.
The audio signal can be recorded when a
transmission is found by selecting Record audio, specifying a file name to record to and
specifying the sampling rate and bits per sample.
The file name can also include a #d, #t, and/or #f to specify the date, time and frequency
respectively. If you need a # in the file name, enter ## (double-hash). The date and time will
be represented as a six digit number. The date order depends on your country settings in
Windows (will be typically DDMMYY or MMDDYY), and the time is HHMMSS (24
hour). The frequency will be represented by a number in kHz with no leading zeros, spaces
or decimal places.

WR-3700 Series User’s Guide
17
The WiNRADiO scanner can also alert the operator by means other than the scanner dialog
box. The operator can be alerted by an audible beep and/or by sending data on a parallel
port, typically for remote notification.
WiNRADiO can have two separate squelch settings: one for audio and one for scanning.
This option is specified under ‘General Options’ in the ‘Configure’ menu. If this feature is
enabled, another control is visible at the bottom of the dialog box. It allows you to specify
the scanner squelch while the audio squelch remains controlled from the main panel.
Exclusions
To avoid the scanner stopping at unwanted
frequencies, your WiNRADiO software can
maintain a frequency exclusion list. The
exclusion list contains a list of frequency
ranges which are skipped by the scanner.
During a scan, you have the option of adding
frequencies to the exclusion list by clicking
on the Exclude button (this option is enabled
by checking Enable excluding while
scanning at the bottom of the ‘Scanning
Exclusions’ dialog box). The range that is
excluded depends on the mode. In CW, LSB
and USB modes, the default range excluded is ±999 Hz, AM is
±1.999 kHz, FMN is ±6.249 kHz and FMW is ±49.999 kHz of the current receiver
frequency. If you want to change any of these default values after they have been added,
select the exclusion from the list and click on the Edit button.
You can also manually add exclusions by clicking on the Add button, edit or delete existing
ranges. There is no priority system, if the frequency is within any range in the list, it will be
ignored by the scanner.
Miscellaneous
Mute
The Mute button controls the audio output of your WiNRADiO receiver. If it is on, the
output is muted (switched off). To activate (or deactivate) the mute control, click on it or
press Ctrl+U.
Passband Tuning (IF Shift)
In CW, LSB and USB modes, a control is enabled at the top-left corner of the
panel to allow you to adjust the passband tuning of the receiver. This controls
the quality of the audio reception of an SSB transmission. The IF can be shifted
up to 3000 Hz above or below the normal location.
To use the control, click on the display and enter the frequency in Hz. To set
the frequency from the keyboard, press Ior Ctrl+B and enter the frequency. To quickly reset
the display to 0, press the Reset button or the ‘star’ key on the numeric keypad.
Indicators
The three LED-like indicators indicate various states of your WiNRADiO
receiever.
The squelch indicator, ‘Sqlch’, is green when the squelch is inactive (the
audio output is open), and red when it is active or about to activate
(depending on the ‘Squelch delay’ time specified under ‘Configure - General Options’).

WR-3700 Series User’s Guide
18
The ‘PLL’ indicator shows the lock status of the receiver’s Phase Lock Loop. When
operating normally, the indicator is green. If something goes wrong, it will turn red
indicating that the receiver cannot tune into a specific frequency.
The ‘Power’ indicator indicates that the receiver is powered up.
Power Switch
The power switch controls the radio receiver’s power. When it is off, the actual receiver
circuitry is powered down.
Date and Time Displays
The date and time displays show the current local time and UTC
standard time. The actual format of the displays is controlled by
‘Regional Settings’ in the Control Panel (or ‘International’ in
Windows 3.1 and NT 3.5) and to a lesser degree in the ‘Date and
Time’ dialog activated from the ‘Configure’ menu.
The time difference between the local time and UTC is set
under ‘Date/Time’ in the Control Panel in Windows 95 and
NT, while in Windows 3.1 you have to manually specify it
in the ‘Date and Time’ configuration dialog box. If the
default provided is incorrect and you wish to override the
default, select Override default time zone and enter the
difference.
If you are in a country with 12-hour time, you can specify
whether to show the local time in 12 or 24-hour format and
whether to show UTC in 24-hour format.
If you are in a country with 24-hour time, you have no
option to show the time in the 12-hour format.
Window Properties
There are several features that allow the customisation of
your WiNRADiO interface. These include:
•size of the window
•position of the panel in the window if the window is
smaller than the panel
•background colour
•whether it is always on top of all other windows
•whether the title and menu bars are hidden for a smaller window
The first two are basic Windows features. The window that contains the receiver panel can
be positioned anywhere in the Windows desktop and can be sized to be as big or as small as
you want. When the window is smaller than the actual panel, scroll bars will appear to allow
you to access hidden parts of the panel as shown here.

WR-3700 Series User’s Guide
19
Background Colour
To adjust the background colour, select Background Colour from the View menu. A dialog
box will appear that allows you to specify the colour you want for your background.
You can select one of several predefined colours, visually select a colour using the colour
box (hue v saturation) and the ‘luminance’, or enter the colour specifying actual RGB or
HSL values.
Click on Apply to see the colour before closing the dialog box.
Always On Top
This facility allows the WiNRADiO window to remain always visible, even when using
other programs (such as a word processor). To enable the WiNRADiO window to do this,
select Always on top from the View menu. A check mark will appear next to this menu
command. To undo this option, select the menu command again, and the check mark will be
removed and WiNRADiO will act like other normal windows.
Hide Title Bar
The ability to hide the title bar and menu allows you to reduce the overall
size of the window. To activate this feature, select Hide title bar in the
View menu.
This feature is especially useful in conjunction with the ‘Always On Top’
feature to allow a small window to sit on top of all windows. For example,
you could just show the current frequency as shown here.
To access the menu commands, click on the little button that is visible in
the top-left corner of the window. To move the window around the screen, click-and-drag on
any inactive part of the WiNRADiO panel or background. To show the title bar and menu,
select the Hide title bar command in the View menu.
General Options
Other configurable options for WiNRADiO have been grouped
into a common dialog box called ‘General Options’ which is
accessed from the ‘Configure’ menu.
The Frequency readout offset specifies a value that is added to the
displayed frequency. It is useful if you are receiving a transmission
through a down-converter (to receive frequencies higher than
upper limit of the receiver).
The other options are self-explanatory, if you need more explanation about a particular
feature, refer to the on-line help.

WR-3700 Series User’s Guide
20
Spectrum Scope
The ‘Spectrum Scope’ is a utility to display and store the signal level across a frequency
range. After a frequency sweep has been performed, you can tune to any frequency on the
display. To tune to a frequency or peak on the display, click on it. You can hold down the
mouse button and drag the cursor across the display quickly tuning to any frequency on the
display (this facility will be described in greater detail under chapter heading ‘VisiTune’).
You can even configure it to tune another receiver card into the selected frequency. Double-
clicking finds and tunes to the closest peak.
Mathematical functions can be applied to the sweeps to help find transmissions you are after.
Every sweep is recorded and can be saved to a file to be viewed at a later time and different
analytical functions applied to the data. Markers can also be added to the sweep, and the
sweeps can be printed.
Spectrum Sweeping
To perform a spectrum sweep, you have two methods of specifying the frequency range.
You can either specify it by the start and stop frequencies, or by the centre frequency and the
width of the sweep. To specify a sweep method, see the following section on ‘Options’.
Next, you specify the step size depending on the resolution and speed you want. The
resolution bandwidth (RBW) also has an effect on the step size. For a slower, higher detail
sweep, select a small step size, and in contrast, for a quick, coarse sweep, select a large step
size. For example, if you are using the 17 kHz RBW, step sizes below 10 kHz are not useful;
all signals would be captured at 10 kHz. A 5 kHz step is suitable for a fairly detailed sweep
using an RBW of 6 kHz. If you select a step size larger than the RBW, it is possible that
signals will be missed that are located between two stepped frequencies.
Once you have specified the parameters, click on the Sweep button to perform a sweep.
Every time you change any parameter (except the resolution bandwidth), any previous
sweeps will be cleared when you start a new sweep. The bandwidth can be changed at any
time, even in the middle of a sweep. Up to 200 sweeps will be stored. If more than 200
sweeps are performed with the same parameters, then every successive sweep will delete the
earliest sweep recorded.
To stop a sweep prematurely, click on the Stop button (which is the ‘Sweep’ button with a
different caption). If you stop, clicking on the sweep button again will start a new sweep
from the start (but the previous sweep will be preserved until a parameter is changed).
Alternatively, you can click on the Pause button to pause the sweeping and click on it again
to let the scope resume from the frequency it was paused at.
This manual suits for next models
2
Table of contents
Other Winradio Receiver manuals
Popular Receiver manuals by other brands

Becker
Becker CASCADE PRO specification

SY Electronics
SY Electronics XSQ Technology Skew62 Quick installation guide

TechniSat
TechniSat HDFS owner's manual

Extron electronics
Extron electronics XTP T HDMI user guide

Sharp
Sharp FV-DB1E Bedienungsanleitung

Harman Consumer Group
Harman Consumer Group AVR75/85 Technical manual