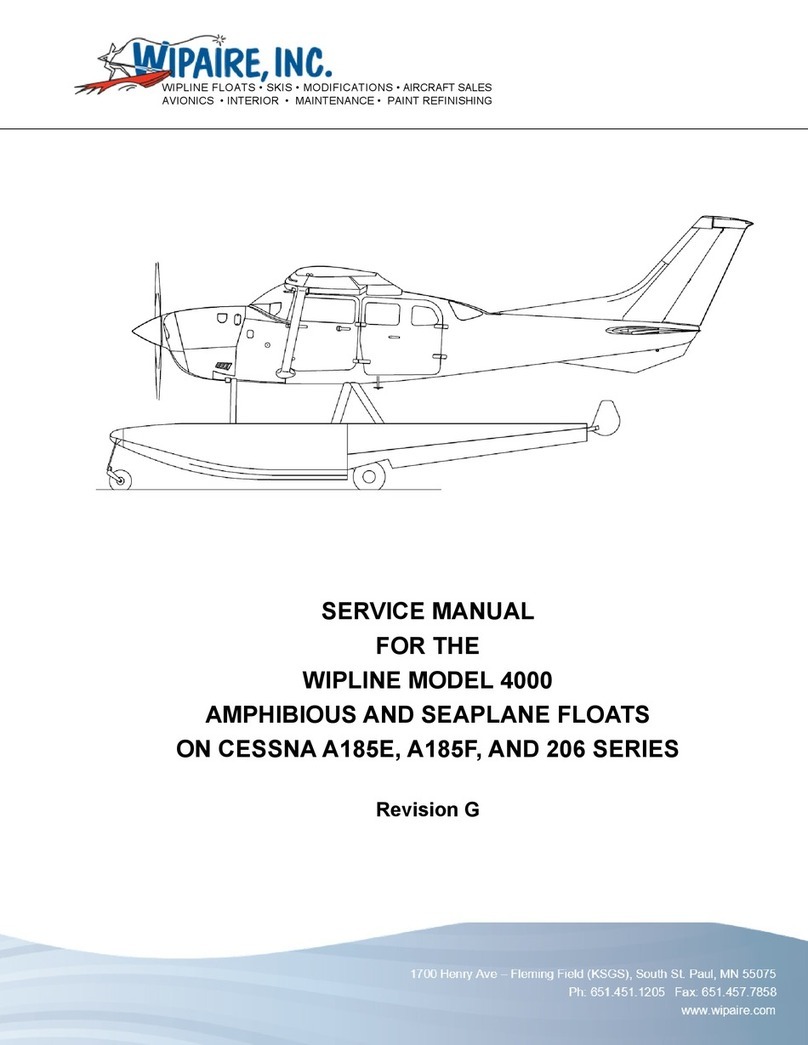
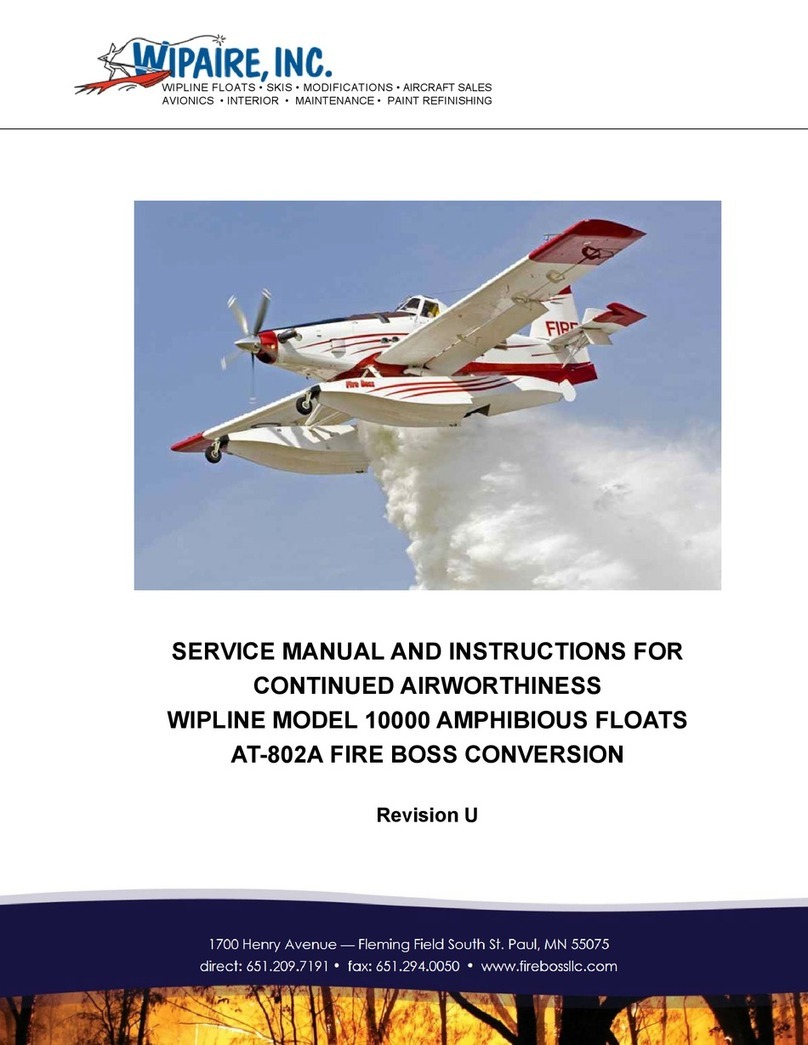
Wipaire AT-802 User manual

SERVICE MANUAL & ICA
10000 AMPHIBIAN FLOATS ON AIR TRACTOR AT-802
P/N 1003546 Revision W Page 1
SERVICE MANUAL AND INSTRUCTIONS FOR
CONTINUED AIRWORTHINESS
WIPLINE MODEL 10000 AMPHIBIOUS FLOATS
AT-802 FIRE BOSS CONVERSION
Revision W
WIPLINE FLOATS • SKIS • MODIFICATIONS • AIRCRAFT SALES
AVIONICS • INTERIOR • MAINTENANCE • PAINT REFINISHING

SERVICE MANUAL & ICA
10000 AMPHIBIAN FLOATS ON AIR TRACTOR AT-802
Page 2 Revision W P/N 1003546
THIS PAGE INTENTIONALLY LEFT BLANK

SERVICE MANUAL & ICA
10000 AMPHIBIAN FLOATS ON AIR TRACTOR AT-802
P/N 1003546 Revision W Page 3
LOG OF REVISIONS
Rev Pages Description Date
A-L 18, 84,
86
For previous revision changes, reference Service Manual for 10000
Amphibian Floats on Air Tractor AT-802 - Fire Boss Conversion Revision L
part number 1003546.
1/23/2020
M
19,
98-102,
104-105,
107-109
Updated Nose Box Track tolerance from .070" to .050". Added info about
hardware replacement. Added Section 14.4 checklist for hardware retorque
and replacement. Updated Inspection Time Checklist with details about
Aft Pylon Drag Strut Bolt, Nose Gear Spring, Service Letter 170, and
Nose Gear Tracks. Added details about Nose Gear Springs in Inspection
Checklist. Added Figure 14.1.
6/30/2020
N
11-14,
18, 84,
86, 101
Added Sections 1.3 through 1.7. Added information about corrosion limits.
Removed content in Chapters 12 and13 and replaced with note about
SRM. Removed Comet Industries 6P-730A. Added item 21 in Retorque and
Replacement Checklist.
2/3/2021
R
48-50,
53-54,
90
Updated Section 4.2. and Section 4.4. Updated Figure 4.2A. Added Figure
4.2B and 4.2C. Added Section 4.7 Asymmetric Scoop Reporting and
instructions. Added Aeroshell 64 as an approved Wheel Bearing grease for
nose pivot block only.
9/22/2021
T 7 Added note about 1011959 in Introduction for Commercial Parts List. 5/10/2022
U15, 24-
25, 94
Added note about Baldwin lter in section 1.8 and the Inspection Checklist.
Updated instructions in Shock Strut Servicing section. Updated Shock Strut
Servicing instruction step 5 and removed note.
11/3/2022
V 23 Added note to Section 2.4. 4/7/2023
W 7, 106 Added note to introduction about parts manual. Updated weighing
procedures in Section 15.1. 7/12/2023
View most current revision of this ICA at www.wipaire.com.

SERVICE MANUAL & ICA
10000 AMPHIBIAN FLOATS ON AIR TRACTOR AT-802
Page 4 Revision W P/N 1003546
THIS PAGE INTENTIONALLY LEFT BLANK

SERVICE MANUAL & ICA
10000 AMPHIBIAN FLOATS ON AIR TRACTOR AT-802
P/N 1003546 Revision W Page 5
TABLE OF CONTENTS
INTRODUCTION...............................................................................................................................................7
CHAPTER 1 GENERAL INFORMATION .........................................................................................................9
CHAPTER 2 MAIN GEAR AND NOSE GEAR OPERATION, REMOVAL AND SERVICE .........................21
CHAPTER 3 HYDRAULIC PUMP SYSTEM, DISASSEMBLY AND SERVICE ...........................................41
CHAPTER 4 SCOOP SYSTEM OPERATION, REMOVAL, AND SERVICE................................................47
CHAPTER 5 FOAM DELIVERY SYSTEM OPERATION, REMOVAL AND SERVICE................................55
CHAPTER 6 FLOAT BILGE SYSTEM OPERATION, REMOVAL, AND SERVICE .....................................59
CHAPTER 7 VENT AND OVERFILL PROTECTION SYSTEM....................................................................61
CHAPTER 8 FLOAT STEERING AND RETRACT SYSTEM........................................................................63
CHAPTER 9 AIRCRAFT WING AND CONTROL SURFACE MODIFICATIONS ........................................67
CHAPTER 10 AUXILIARY INSTRUMENT PANEL........................................................................................69
CHAPTER 11 ELECTRICAL ...........................................................................................................................73
CHAPTER 12 REPAIRING FLOAT HULL SHEET METAL, BULKHEADS, & OTHER SHEET METAL.....85
CHAPTER 13 REPAIRING FLOAT HULL EXTRUSIONS (KEEL, CHINE, ETC.) .......................................87
CHAPTER 14 CONTINUED AIRWORTHINESS ...........................................................................................89
CHAPTER 15 WEIGHT AND BALANCE......................................................................................................105

SERVICE MANUAL & ICA
10000 AMPHIBIAN FLOATS ON AIR TRACTOR AT-802
Page 6 Revision W P/N 1003546
LIST OF FIGURES
FIGURE 1.1 JACK CRADLE RECOMMENDED MODIFICATION ........................................................12
FIGURE 1.2 JACKING LOCATION..........................................................................................................12
FIGURE 1.3 FLOAT SECURING LOCATIONS.......................................................................................13
FIGURE 1.4 FLOAT SECURING LOCATIONS OVERVIEW .................................................................14
FIGURE 2.1 SCHEMATIC - HYDRAULIC SYSTEM ..............................................................................31
FIGURE 2.2 SCHEMATIC - ELECTRICAL SYSTEM.............................................................................32
FIGURE 2.3 LAYOUT – MAIN GEAR ......................................................................................................33
FIGURE 2.4 CARRIAGE ASSEMBLY – MAIN GEAR ............................................................................34
FIGURE 2.5 ASSEMBLY – MAIN GEAR SHOCK STRUT .....................................................................35
FIGURE 2.6 ASSEMBLY – MAIN GEAR ASSEMBLY ............................................................................36
FIGURE 2.7 ASSEMBLY – MAIN GEAR DRAG LINK............................................................................37
FIGURE 2.8 ASSEMBLY – MAIN GEAR WHEEL AND BRAKE ............................................................38
FIGURE 2.9 ASSEMBLY – NOSE GEAR BOX AND RETRACTION ....................................................39
FIGURE 2.10 ASSEMBLY – NOSE GEAR LOWER END ......................................................................40
FIGURE 4.1A ASSEMBLY – SCOOPING SYSTEM - COMPLETE .......................................................51
FIGURE 4.1B ASSEMBLY – SCOOPING SYSTEM...............................................................................52
FIGURE 4.2A ASSEMBLY – CYLINDER PROBE JACK........................................................................53
FIGURE 4.2B – PROBE UP POSITION ADJUSTMENT........................................................................54
FIGURE 4.2C – PROBE DOWN POSITION ADJUSTMENT.................................................................54
FIGURE 5.1 SCHEMATIC – PLUMBING – FOAM SYSTEM.................................................................57
FIGURE 8.1 WATER RUDDER STEERING AND RETRACTION SYSTEM ........................................65
FIGURE 10.1 INSTRUMENT PANEL ......................................................................................................70
FIGURE 10.2 INSTRUMENT PANEL (CIRCUIT BREAKER) ................................................................71
FIGURE 11.1 SCHEMATIC – AUXILIARY INSTRUMENT PANEL........................................................75
FIGURE 11.2 SCHEMATIC – CIRCUIT BREAKER PANEL...................................................................76
FIGURE 11.3 SCHEMATIC – ELECTRICAL RETRACT ........................................................................77
FIGURE 11.4 INSTALLATION – FOAM TANKS / PUMPS .....................................................................78
FIGURE 11.5 SCHEMATIC – INSTALLATION – BILGE PUMPS .........................................................79
FIGURE 11.6 SCHEMATIC – INSTALLATION – SCOOP / FILL SYSTEMS.........................................80
FIGURE 11.7 SCHEMATIC – INSTALLATION – PROBE POSITION ..................................................81
FIGURE 11.8 SCHEMATIC – INSTALLATION – PDR 60 AUDIO .........................................................82
FIGURE 11.9 SCHEMATIC – INSTALLATION – ITT / EXCESS POWER LIGHT ...............................83
FIGURE 11.10 SCHEMATIC – INSTALLATION – WATER IN FLOAT SENSORS ..............................84
FIGURE 14.1 EXAMPLE NOSE SPRING CRACK MEASUREMENTS (NOT TO SCALE) .................99

SERVICE MANUAL & ICA
10000 AMPHIBIAN FLOATS ON AIR TRACTOR AT-802
P/N 1003546 Revision W Page 7
This manual describes the general servicing and maintenance for the Model 10000 oat, on the Air Tractor AT-802
aircraft. Includes hull, landing gear, and scooping systems. For services and repairs not covered by this manual
contact Wipaire Customer Service.
When performing standard repairs for Wipline Aluminum Floats, please refer to the “Structural Repair Manual For
Wipline Aluminum Floats” part number 1008274. It is available free of charge online at www.wipaire.com.
The service products referred to throughout this manual are described by their trade name and may be purchased
from the Wipaire Parts Department.
Reference Wipaire document number 1011959 for a list of commercial parts applicable to STC SA01795CH.
Note: For approved design data parts, reference 10000 oat parts manual 1002179 for Air Tractor AT-802.
To contact Wipaire for technical support or parts sales, call, write or email:
Wipaire, Inc.
Customer Service
1700 Henry Avenue – Fleming Field
South St. Paul, MN 55075
Phone: (651) 306-0459
Fax: (651) 306-0666
Website: www.wipaire.com
Email: [email protected]
INTRODUCTION

SERVICE MANUAL & ICA
10000 AMPHIBIAN FLOATS ON AIR TRACTOR AT-802
Page 8 Revision W P/N 1003546
THIS PAGE INTENTIONALLY LEFT BLANK

SERVICE MANUAL & ICA
10000 AMPHIBIAN FLOATS ON AIR TRACTOR AT-802
P/N 1003546 Revision W Page 9
CHAPTER 1 GENERAL INFORMATION
CONTENTS
1.1 AIRPLANE .................................................................................................................................................10
1.2 FLOATS......................................................................................................................................................10
1.3 TOWING.....................................................................................................................................................11
1.4 HOISTING..................................................................................................................................................11
1.5 LEVELING .................................................................................................................................................12
1.6 JACKING PROCEDURES........................................................................................................................12
1.7 JACK REMOVAL .......................................................................................................................................14
1.8 AMPHIBIAN LANDING GEAR SYSTEM .................................................................................................14
1.8.1 LANDING GEAR HANDLE ....................................................................................................................15
1.8.2 INDICATOR LIGHTS..............................................................................................................................15
1.8.3 LANDING GEAR OPERATION .............................................................................................................15
1.8.4 EMERGENCY PUMP HANDLE.............................................................................................................16
1.9 SCOOP SYSTEM......................................................................................................................................16
1.10 FOAM SYSTEM.......................................................................................................................................16
1.11 VENT AND OVERFLOW PROTECTION ...............................................................................................17
1.12 HARD AND OVERGROSS LANDING AND DAMAGE INVESTIGATION ...........................................17
1.13 CLEANING...............................................................................................................................................18
1.14 CORROSION...........................................................................................................................................18
1.15 MEANS FOR LEVELING ........................................................................................................................19

SERVICE MANUAL & ICA
10000 AMPHIBIAN FLOATS ON AIR TRACTOR AT-802
Page 10 Revision W P/N 1003546
CHAPTER 1 - GENERAL
1.1 AIRPLANE
The airframe of the Fire Boss is adapted from the Air Tractor AT-802 agricultural airplane. It is an all-metal, low
cantilever wing design. It is powered by a Pratt and Whitney PT6A-67F turboprop engine of 1600 SHP. The
airframe is detailed in Air Tractor publications.
To create this re suppression version of the airplane, a number of changes to the landplane were incorporated:
1. Amphibious oats with hydraulically actuated water scoops are installed.
2. The Air Tractor Fire Retardant Delivery System (FRDS) is utilized.
3. The Air Tractor foam system and controls are utilized.
4. Additional foam tanks in the oats supplement the standard rewall tank.
5. Changes to the hopper venting system are incorporated.
6. A new upper instrument panel is added to contain some of the scoop related and system controls and
indicators.
7. A bilge pumping system and a water in oats warning system are incorporated.
These changes will be briey discussed in the following paragraphs.
1.2 FLOATS
The model 10000 amphibious oat is an all aluminum constructed oat with (12) watertight compartments of
approximately 10,000 pounds buoyancy. As a part of the oat installation, the following additional changes are
made to the landplane:
1. The hydraulic landing gear retraction system components and cockpit controls are added.
2. The cockpit landing gear controls and emergency hand pump and system are added.
3. The oat water rudder retraction system and cockpit controls are added. The water rudders are locked center
when retracted for improved directional stability. The 2-Place model has electric water rudder retracts.
4. A ventral n is added for improved directional stability.
5. Two auxiliary nlets are added to each side of the horizontal stabilizer for improved directional stability. Four
total per aircraft.
6. The vertical n is sealed to the fuselage/stabilizer top for improved directional stability.
7. The open fuselage structure near the landplane tail-wheel mount is faired over for improved directional stability.

SERVICE MANUAL & ICA
10000 AMPHIBIAN FLOATS ON AIR TRACTOR AT-802
P/N 1003546 Revision W Page 11
8. Pump-out cups on oat top deck are placed between each oat watertight compartment to pump out any water
in oats before ight.
9. Vortex generators are added to the wing upper surface leading edges for improved longitudinal controllability.
10. Vortex generators are added to the horizontal stabilizer upper surface leading edges for improved longitudinal
controllability and stall speed reduction.
11. Vortex generators are added to the aft area of the canopy for improved stall controllability and stall speed
reduction.
12. Flow energizers are added to the wing.
13. The elevator trim/servo tabs incorporate a 1-inch chord extension for improved longitudinal controllability.
1.3 TOWING
When towing the amphibian aircraft, 2 lugs are provided on the lower forward side of the nose spring.
On land, a rigid “V” frame can be fabricated to attach to these lugs for towing the aircraft with a tractor. Lake & Air
Training and Pilot Shop has this tow bar available for purchase.
On water, a rope bridle arrangement can used to tow the aircraft from the lugs described above.
1.4 HOISTING
Hoisting the aircraft can be performed using a lifting rig that attaches to the aircraft with lifting rings that are
installed at the wing attach points. If the lifting rings are not installed, reference applicable aircraft maintenance/
service manual for additional hoisting specications. Lake & Air Training and Pilot Shop has this hoisting rig
available for purchase. Contact Wipaire Customer Service for additional guidance in removal or installation of
oats.
CAUTION!
Make sure nothing is under or above the airplane or oats when hoisting the aircraft
1. Raise aircraft high enough to place oat cradle under oats as shown in Figure 1.4.
2. Lower aircraft onto oat cradle as shown in Figure 1.4.
3. Place fore and aft supports as shown in Figure 1.3 and Figure 1.4.

SERVICE MANUAL & ICA
10000 AMPHIBIAN FLOATS ON AIR TRACTOR AT-802
Page 12 Revision W P/N 1003546
1.5 LEVELING
See applicable aircraft maintenance/service manual.
1.6 JACKING PROCEDURES
CAUTION!
Make sure nothing is under or above the airplane or oats when jacking the aircraft.
1. Turn o fuel.
2. Place weighted bags above the nose gear (approximately 100 lbs. on each oat to start, more may be
added as needed).
3. Position 1 person at each fore and aft of each oat, and 3 people at the jacking location of one oat.
4. Modify jack saddle of a 3 ton minimum jack by welding as shown in Figure 1.1.
(X = WIDTH OF CRADLE)
FIGURE 1.1 JACK CRADLE RECOMMENDED MODIFICATION
NOTE: This is not required and Wipaire does not have the parts for modication. It is recommended a similar
modication be performed to the jack saddle to prevent the slippage of the cradle.
1. Center cradle on saddle and position so cradle is as far aft on the main keel as possible without interfering
with main gear as it decompresses as shown in Figure 1.2.
NOTE: If desired to prevent possible cosmetic damage to oat, use material to separate cradle and oat.
FIGURE 1.2 JACKING LOCATION

SERVICE MANUAL & ICA
10000 AMPHIBIAN FLOATS ON AIR TRACTOR AT-802
P/N 1003546 Revision W Page 13
1. Jack one side at a time, taking care to check the balance of the aircraft and adding more weight to the front
if needed.
2. Two people, both outboard, lift the fore and aft cradle stands up to the cradle as a 3rd person release the
pressure slowly, allowing the cradle and stands to gently contact the ground.
3. Repeat previous procedure to the other oat.
NOTE: A smaller jack may be needed to slightly lift the oat into a high enough position for the main jack.
4. Secure oats with fore and aft supports as shown in Figure 1.3 and Figure 1.4.
FIGURE 1.3 FLOAT SECURING LOCATIONS
ALTERNATE JACKING METHOD IF WIPAIRE
JACKING FIXTURE IS NOT AVAILABLE
(8000A model shown for reference only)

SERVICE MANUAL & ICA
10000 AMPHIBIAN FLOATS ON AIR TRACTOR AT-802
Page 14 Revision W P/N 1003546
Aft Cradle
Stand
Fore Cradle
Stand Cradle
Fore
Support
Aft
Support
(8000A MODEL SHOWN FOR REFERENCE ONLY)
FIGURE 1.4 FLOAT SECURING LOCATIONS OVERVIEW
1.7 JACK REMOVAL
Make sure nothing is under or above the airplane or oats when removing the jacks from the aircraft
1. Turn o fuel.
2. Verify landing gear is in the down and locked position.
3. Verify weighted bags are still located above the nose gear.
4. Position 1 person at each fore and aft of each oat, and 1 person at the jacking location of one oat.
5. Remove all fore and aft supports as shown in Figure 1.3 and Figure 1.4.
6. Using modied jack saddle as shown in Figure 1.1, center jack saddle in center of cradle on 1 of the oats,
7. Lift aircraft to clear fore and aft cradle stands and remove fore and aft cradle stands of lifted oat.
8. Slowly lower oat to the ground, remove jack from under oat, and remove cradle from jack saddle.
9. Repeat previous procedure to the other oat.
10. Remove weighted bags from oats.
1.8 AMPHIBIAN LANDING GEAR SYSTEM
The landing gear incorporated within the amphibious oats on this airplane is retractable, quadricycle type with
two swiveling nose (or bow) wheels and four (4) (two (2) sets of dual) main wheels. Air-oil shock struts on the two
main landing gear assemblies provide shock absorption.
The main landing gear has dual 8:50 x 10 8-ply tires and the nose landing gear has one 6:00 x 6 8-ply tire. The
gear system is hydraulically actuated and driven by two hydraulic pumps. Brakes are hydraulic and have a caliper
on each main wheel for a total of four brakes.
Steering on land is accomplished by dierential braking. The nose wheels are full castering.
Landing gear extension and retraction is accomplished by two (2) electrically-driven hydraulic pumps and four
(4) hydraulic actuators (one (1) for each gear). The hydraulic pumps are located in fuselage aft of cockpit and the
hydraulic actuators are located adjacent to each gear. Hydraulic system uid level should be checked periodically
by viewing the sight glass for uid level in the upper one-third of the range. If uid is low, ll with MIL-H-5606 or
equivalent. Filter screens are installed on each pickup tube inside of hydraulic reservoirs and there are also 3
external 10 micron lters as well. Clean lter screens and elements every 100 hours.

SERVICE MANUAL & ICA
10000 AMPHIBIAN FLOATS ON AIR TRACTOR AT-802
P/N 1003546 Revision W Page 15
1.8.1 LANDING GEAR HANDLE
The landing gear handle controls a hydraulic selector valve within the control unit on the left-hand side of cockpit
by fuel shut-o handle and has two (2) positions (UP and DOWN LAND) which give a mechanical indication of
the gear position selected. From either position, the handle must be pulled out to clear a detent before it can be
repositioned.
Per Service Letter 103, a Spin-on Type lter assembly with a Baldwin Filter has been incorporated to facilitate
additional ltering of the hydraulic system. Replace Baldwin lter if pop out gage (if equipped) has been released
indicating bypass has been activated due to clogged lter or at time of annual inspection.
Landing gear operation is initiated by movement of the landing gear handle. When the handle is repositioned,
hydraulic pressure in the system will drop and pressure switches will automatically turn on the hydraulic
pump motors to maintain operating pressure in the system. When the gear cycle is completed, the pump will
automatically shut o. If the pressure in the system drops to a preset value, the pressure switches turn the pump
motors back on and build up the pressure to the limit again. Eight (8) position-indicator lights four (4) gear UP and
four (4) gear DOWN are provided to show landing gear position. Two (2) additional indicator lights show when the
landing gear pump motors are operating.
1.8.2 INDICATOR LIGHTS
Ten (10) indicator lights are mounted on the landing gear control unit adjacent to the landing gear handle. Four (4)
blue indicator lights, labeled NOSE and MAIN (left-hand lights for the left oat and right-hand lights for the right
oat), show by their illumination that the landing gear is up and locked. The four (4) green indicator lights, labeled
NOSE and MAIN (left-hand lights for the let oat and right-hand lights for the right oat), are illuminated when the
landing gear is down and locked. Neither set of lights is illuminated when the landing gear is in transit. Two (2) red
indicator lights, labeled PUMP ON 1 and 2 illuminate when current is supplied to the landing gear motors.
If the motors continue running during ight or on and o repeatedly, the motors should be shut o by pulling
AMPHIBIAN PUMP 1 AND AMPHIBIAN PUMP 2 circuit breakers. Continual running of the motors can result
in premature motor failure. Prior to landing, the circuit breakers should be pushed in to reactivate the circuits.
Troubleshoot hydraulic problem per section 3.1.
1.8.3 LANDING GEAR OPERATION
To retract or extend the landing gear, pull out on the landing gear handle and move it to the desired position.
When the handle is positioned, pressure on the hydraulic system reduces to where the hydraulic motors
automatically turn on.
The motors power the hydraulic pumps and actuate the gear actuator for each gear. During operation of the
landing gear motors the PUMP ON 1 and 2 indicator lights are illuminated. When the gear cycle is completed,
pressure builds up in the hydraulic system and automatically shuts o the hydraulic motors. Each gear operates
independently of the other, and therefore, the position lights illuminate at various times.

SERVICE MANUAL & ICA
10000 AMPHIBIAN FLOATS ON AIR TRACTOR AT-802
Page 16 Revision W P/N 1003546
1.8.4 EMERGENCY PUMP HANDLE
An emergency hand pump is located on the oor to the left side of the seat for use in the event the normal
hydraulic system fails. This hand pump may be used to retract or extend the land gear. Prior to utilizing the
emergency hand pump, pull the AMPHIB PUMP 1 and 2 circuit breakers to deactivate the electric hydraulic
pumps. Select UP and DOWN using the normal landing gear selector handle. Pump the attached handle back
and forth (approximately 400 cycles). When a gear reaches the selected position, its indicator light will illuminate.
After all four (4) gears are in the selected position there is a noted increase in resistance of hand pump operation.
1.9 SCOOP SYSTEM
The Wipaire 802 Fire Boss has two water scoops, one in each oat. The scoops are three inches in diameter and
are hydraulically operated by the 1000 psi oat hydraulic system. The hydraulic system has an accumulator to
enhance the speed of scoop deployment and retraction. The scoops complete down or up cycle in approximately
one second. A trigger switch located on the front of the control stick grip controls the scoops. Pulling in the top
of the trigger switch puts the scoops down. Releasing the trigger switch puts the scoops back up (pulling on the
bottom of the trigger switch operates the smoke system; see Air Tractor Flight Manual).
The scoop system master switch is located on the glare shield panel and has three positions, auto, o, and
manual. When manual is selected, the scoops move to the down position and remain there as long as the trigger
switch is depressed; when the trigger switch is released, the probes move back to the up/stowed position.
CAUTION!!
In the manual position, it is possible to overow the hopper.
When auto is selected, the pilot may select how many gallons he wants to scoop by rotating the ll level selector
knob located to the right side of the hopper quantity and ll level readout window (hopper quantity is on the top
reading and the selected ll level is on the bottom).
When the quantity reads approximately 255 gallons the hopper empty (the scale starts at that number) with auto
selected, the scoops will go down when the rocker switch is depressed and move back up automatically when
the quantity selected is reached (with the rocker switch still depressed). If the rocker switch is released before the
quantity is reached, the scoops will move back up.
If the pilot wants to abort the scoop operation once it is initiated, simply releasing the rocker switch will put the
scoops back up, such as in an emergency or other unplanned occurrence. Scoop up and scoop down lights are
provided that indicate scoop position via a pressure switch that illuminates the lights. The scoop lights (2) can be
tested utilizing the test switch on the left side of the glare shield panel.
1.10 FOAM SYSTEM
The Wipaire 802 Fire Boss foam system consists of up to three tanks. The original 18-gallon rewall tank is
supplemented by an additional 30 U.S. gallon tank in each oat (at sta +1) of which approximately 28 U.S. gallons
is usable in the automatic mode. In the manual mode all 30 gallons are usable. A total of approximately 74 U.S.
gallons can be delivered to the hopper (in the automatic mode) utilizing the foam control panel located on the left
side of the cockpit just below the re gate computer. In the manual mode, a total of 78 gallons can be delivered
to the hopper. The oat tanks are optional and one or both can be removed depending on the type of operation.
(Tank and oor 50 lbs at +1.0 each oat).

SERVICE MANUAL & ICA
10000 AMPHIBIAN FLOATS ON AIR TRACTOR AT-802
P/N 1003546 Revision W Page 17
To use uid stored in the oat tanks, it is necessary to pump uid from the oat tank to the fuselage rewall tank.
This transfer can be accomplished manually or automatically by selecting the appropriate position with the left and
right foam control switches located on the glare shield panel. When manual “on” is selected, uid will be pumped
via the electric pump located on the top of the tank to the rewall tank.
The pump does not shut o when the tank is full. In the event of an over ow, uid would be pumped back down
to the tank.
When auto is selected, the oat tank transfer pump will come on at approximately 7 gallons of uid remaining in
the fuselage tank. It will shut o automatically when the fuselage tank is approximately 2/3 full or whenever the
selected oat tank has about 2 gallons remaining.
The left and right transfer systems can be used individually or simultaneously as desired. Whenever a foam
transfer pump is operating, the appropriate green Pump On light will illuminate (manual or auto). The Pump On
lights can be tested utilizing the test switch on the left side of the glare shield panel.
1.11 VENT AND OVERFLOW PROTECTION
The original 802-hopper vent/door has been modied to allow for a greater venting volume during scooping
operations. The original 3-inch Air Tractor vent located on the aft right side of the re gate is supplemented with
the addition of a 5-inch vent that exits at the right aft side of the rear re gate fairing. In the event of an overow
during scoop operations, a spring loaded relief valve door is located directly aft of the main drop vent door. Water
will exit the hopper to the right and forward of the cockpit windshield. The pilot can see ahead out of the left side
of the windshield during an overow condition.
The door spring needs approximately 40 pounds of pressure to open. To check this, use a hand held spring type
scale. Locate scale to the center of door on outside edge.
NOTE: Before opening the main vent door for access, the door bracing turnbuckles (located inside the hopper
just below the vent door) need to be disconnected. They are accessible with the drop vent door open (1 on each
side).
1.12 HARD AND OVERGROSS LANDING AND DAMAGE INVESTIGATION
After a thorough cleaning of the suspected damaged area, all structural parts should be carefully examined to
determine the extent of damage. Frequently the force causing the initial damage is transmitted from one member
to the next causing strains and distortions. Abnormal stresses incurred by shock or impact forces on a rib,
bulkhead or similar structure may be transmitted to the extremity of the structural member, resulting in secondary
damage, such as sheared or stretched rivets, elongated bolt holes or wrinkled skins or bulkheads.
Points of attachment should be examined carefully for distortion and security of fastenings in the primary and
secondary damaged areas at locations beyond the local damage. A checklist in the Continuous Airworthiness
chapter of this manual provides the details on areas requiring inspection when aircraft is suspected of exceeding
its published landing weight.

SERVICE MANUAL & ICA
10000 AMPHIBIAN FLOATS ON AIR TRACTOR AT-802
Page 18 Revision W P/N 1003546
1.13 CLEANING
The outside of the oat should be kept clean by washing with soap and water. Special card should be taken to
remove engine exhaust trails, waterline marks, and barnacle deposits. After saltwater operation, washing with
fresh water should be done daily with special attention to hard-to-reach places such as: seams, wheel well, etc.
Alternatively, water taxiing in FRESH WATER at step-speed with the water scoops in the DOWN position and the
re gates OPEN can help to ush the entire system. This method is especially recommended as a daily cleaning
for operators scooping in saltwater.
NOTE: Operators scooping saltwater are strongly cautioned – rinsing the entire aircraft & oats with fresh
water inside and outside at the end of each day is critical. Failing in this cleaning will severely shorten the life
of the oats.
The oat interior should be ushed if saltwater enters the compartments. If the oats are being stored inside,
remove inspection covers so the interior will dry out.
NOTE: The above cleaning techniques are vital for keeping corrosion to a minimum. Saltwater operations and
environment are strongly linked to corrosion and must be addressed proactively.
1.14 CORROSION
Reference the Wipaire Structural Repair Manual (SRM) for allowable corrosion/material loss limits. Corrosion is
a reaction that destroys metal by an electrochemical action that converts metal to oxide. Corrosion is accelerated
when in contact with dissimilar metals such as aluminum and steel, or any material that absorbs moisture like
wood, rubber, or dirt.
The primary means of detection of corrosion is visual. The most obvious sign is a corrosive
deposit of white powder. Other signs are discoloration of the metal surface or bubbles and
blisters under the painted surface. Light corrosion may be removed by light hand sanding
or chromic acid. Moderate and severe corrosion (blistering, aking, and pitting) may be
removed by heavy sanding or grinding, and applying chromic acid. If signicant loss of skin
material thickness will result after corrosion treatment, reinforcement or replacement of the
aected area may be necessary.
After removing the corroded area, restore area to original nish (prime and enamel). BOESHIELD T9, Corrosion
X, or ACF-50 may also be applied to stop corrosion. Refer to manufacturer’s instructions for application
instructions.
Maintaining the oat inside and outside nishes by washing after saltwater operations will help protect the oat
from corrosion. Periodically all hardware should be covered with a waterproof grease or Paralketone. Under
saltwater conditions, bolts should be removed at least once a year and grease reapplied to the shafts, heads and
nuts.
NOTE: The above cleaning techniques are vital for keeping corrosion to a minimum. Saltwater operations and
environment are strongly linked to corrosion and must be addressed proactively.

SERVICE MANUAL & ICA
10000 AMPHIBIAN FLOATS ON AIR TRACTOR AT-802
P/N 1003546 Revision W Page 19
1.15 MEANS FOR LEVELING
The airplane is leveled to “level ight attitude”. See Float Handling, Jacking, and Aircraft Towing section of this
manual. The airplane should be in this level position for aircraft weighing and other maintenance/installation items
that require the aircraft to be in level ight attitude. The airplane is in level ight attitude when the top (right next
to the side of the fuselage) of the L/H Main Gear Float Attach Fitting on airplane is at an angle of 5 degrees (tail
down) from level. To measure this angle, use an electronic level placed atop the Main Gear Float Attach Fitting on
airplane.
On aircraft equipped with the aluminum engine air scoop on the bottom of the cowling (non-ram air induction
system), there are two small screws provided on the left hand side of the engine air scoop that provide a level
reference. When a bubble level is aligned with the heads of these screws, the bubble level will indicate level when
the aircraft is level.

SERVICE MANUAL & ICA
10000 AMPHIBIAN FLOATS ON AIR TRACTOR AT-802
Page 20 Revision W P/N 1003546
THIS PAGE INTENTIONALLY LEFT BLANK
This manual suits for next models
2
Table of contents
Other Wipaire Aircraft manuals

Wipaire
Wipaire 8750 User manual

Wipaire
Wipaire WIPLINE 13000 User manual

Wipaire
Wipaire Wipline 4000 User manual

Wipaire
Wipaire WIPLINE 10000 User manual

Wipaire
Wipaire Wipline 2100 User manual

Wipaire
Wipaire Wipline 3730 User manual

Wipaire
Wipaire WIPLINE 7000 User manual

Wipaire
Wipaire 8750 User manual

Wipaire
Wipaire WIPLINE 8000 User manual