Wiratech FRM-1120W User manual

Contents
I Use ……………………………………………………………………1
II Safety Instructions ………………………………………………1
III Specifications ……………………………………………………1
IV Performance Features ………………………………………3
V Structure & Working Principle ………………………………3
VI Operation Instruction …………………………………………8
VII Circuit Diagram …………………………………………………14
VIII Breakdown Drawing of Machine Body …………………15
IX Breakdown Drawing of Conveyor …………………………20
X Breakdown Drawing of Rack …………………………………22
XI Troubleshooting …………………………………………………26
XII Spare Parts List …………………………………………………28

1
I.Use
This sealer is suitable for sealing all kinds of plastic films, which is widely used in fields of
food, medicine, chemicals, daily use and vegetable seeds etc. It is the best sealing
equipment for packing batch products from factories and shops.
II.Safety Instructions
1. Make sure that the adopted power supply is correct (the machine adopts AC
220V/50HZ. The wire whose color alternating between yellow and green is leakage
protection ground wire, which can not be removed, and the power line should be
prevented from pressing, please tidy away when it is not in use.
2. After power being connected, do not touch any electric device.
3. When machine is operating, do not touch any transmission parts, which may cause
injury.
4. When machine is operating, do not touch both heating blocks and ink roller heating
block.
5. Do not operate the machine in corrosive environment.
6. Do not change any parts of the machine at discretion.
7. Keep the machine clean both inside and outside, and clear dirt from sealing belt in
time.
8. Fill and exchange oil in worm-gear case regularly. Meanwhile, remember to oil the
gear and sprocket (YP7408 semiliquid gear oil).
9. Cut off the power supply when the machine is not in use.
10. Keep this operation manual with care for easy reference.
III.Specifications
Model
Parameter
Item
FRM-1120W
Solid-ink coding
continuous band
sealer
FRS-1120W
Color ribbon
printing
continuous
band sealer
FRM-1120L
Solid-ink coding
continuous
band sealer
FRM-1120LD
Solid-ink coding
continuous
band sealer
FRM-1370AL/M
Solid-ink coding
continuous
band sealer with
two sets of
heating blocks
Voltage AC 220/50 110/60
Motor power 100W 230W 550W
Sealing power 300×2W 300×4W
Printing power 40×2W 50×2W 40×2W
Sealing speed 0~10m/min 8m/min
Sealing width 8、10mm
Temperature
control range 0~300(℃)(Stepless adjustable)
Printing type Solid ink Color ribbon Solid ink

2
Distance from
sealing center
to conveyor
table
20~80(mm) 100~500(mm) 100~700(mm) 270~530(mm)
Size of
conveyor table
1120×205mm 1400×250mm 2022×300mm
Thickness of
film(monolayer)
≤0.12mm
Conveyor
loading for
single package
≤2.5kg ≤5kg ≤20kg
Overall loading
of conveyor
≤7.5kg ≤15kg ≤60kg
External
dimension
(LxWxH)
1100×610×1030mm
1100×570×1160mm
1450×680×1480mm 1950×550×
1300mm
Net weight 85kg 100kg 105kg 125kg
Model
Parameter
Item
FR-1370L
Continuous band
sealer with two
sets of heating
blocks
FR-1370LD
Continuous band
sealer with two
sets of heating
blocks
FR-1370L/T
Continuous band
sealer with two
sets of heating
blocks
FR-1370AL/L
Heavy-duty continuous
band sealer with two sets
of heating blocks
Voltage AC 220/50 110/60
Motor power 230W 750W
Sealing power 300×4W
Sealing speed 0~10m/min 8m/min
Sealing width 8、10mm
Temperature control
Range
0~300(℃)(Stepless adjustable)
Distance for sealing
center to conveyor
100-500mm 100-700mm 450-490mm
Adjustable distance
from machine head to
floor
1300mm
Size of conveyor
table
1400×250mm 2400×350mm
Thickness of film
( monolayer)
≤0.12mm ≤0.18mm
Single package
loading of conveyor
≤5kg ≤10kg ≤20kg
Overall loading of
conveyor
≤15kg ≤30kg ≤60kg

3
External
dimension(LxWxH)
1450×680×
1480mm
2190×550×
1210mm
1125×620×
1680mm
2430×740×1780mm
Net weight 100kg 110kg 60kg 120kg
Note: Since 2006, we have changed the name of model FR-1100 into model FR-1120, with their spare parts
and worn parts universal.
IV.Performance Features
1. Two series derivate from FR-1120 series: one is FRM-1120 series, among this series, both
vertical sealer and horizontal sealer are equipped with solid-ink roller coding mechanism,
further, model FRS-1120W can also choose to be equipped with color ribbon printing
mechanism. The other is FR-1370 series, all of which belong to vertical sealer with two sets of
heating blocks, suit for sealing thick plastic bags.
The instructions concerning printing mechanism has nothing to do with the sealer without
printing mechanism. And model FRM-1370AL/M is a customized order, which is equipped
with two heating blocks and solid coding mechanism.
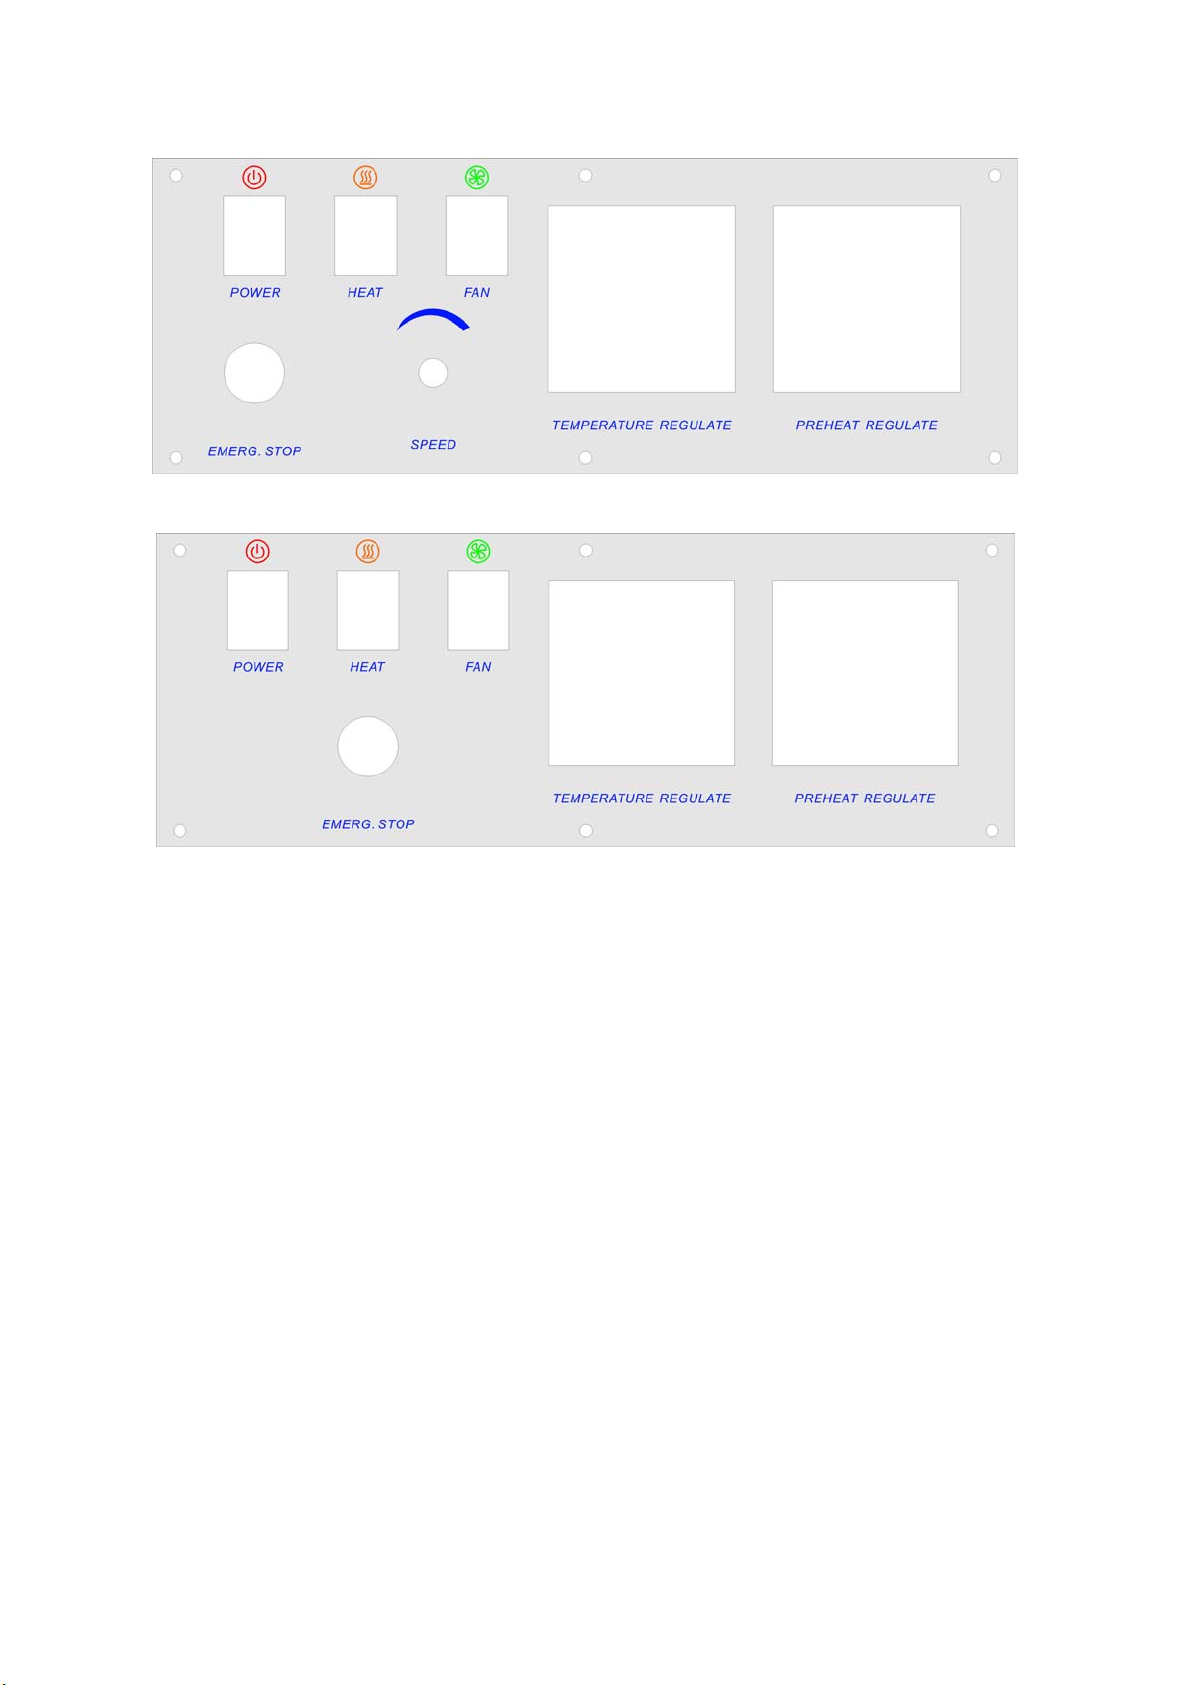
2 This sealer, adopting electronic thermostat control unit and stepless speed-adjusting
transmission mechanism (Transmission speed of FR-1370AL/M and FR-1370AL/L is
unadjustable), can seal various plastic film bags in different materials and can also be
equipped with varied packaging production lines. The machine has no limitation on sealing
length, which is characterized by high efficiency in continuous sealing, reliable sealing quality,
rational structure and convenient operation etc.
3. FRM-1120 series can use solid-ink roller to print desired colored label while sealing, with the
characteristics of high definition, instant print and instant dry and strong adhesion; For letters
in R type arrange, the machine can print two lines in font size two (18PT) and three lines in
font size five (10.5PT), and 20 types can be arranged in each line. Special order for T arrange
or multi-line types is available.
V.Structure & Working principle
1.This machine is made up of rack, speed-adjusting mechanism, sealing temperature
control system, transmission and conveying system, and printing assembly etc..(see
diagram 1~diagram 8)
2.After the power supply being connected, electrothermal elements produce heat that
rapidly raise the temperature of both upper and lower heat blocks. And use the
temperature controller and speed-adjusting mechanism to adjust the temperature that
needed, the plastic packing bag is transmitted by conveyor belt, and its sealing part will
be conveyed into the middle of two working sealing belts, then it is clamped by the two
sealing belt and conveyed into the heating area, sealing part is pressed by two heating
blocks and impressing wheels there, which could make the plastic film fuse and stick
together. After this, the sealing part will be conveyed into the cooling area for cooling,
and then to be pressed by embossing wheel for making stripe or netted pattern, at last,
colored label on the sealing part will be coded by printing wheel.
3.The transmission of sealing and printing is started by motor, which drives sealing belts,
guiding belts and conveyor belt to work synchronously, as well as make printing

4
mechanism work intermittently.
4.Power of vertical sealer makes sealer head run through vertical shaft.
FRM-1120W Solid–ink coding continuous band sealer
Diagram 1
1.pedestal; 2. lock handle; 3. slide block for bracket; 4. guiding belt; 5. conveyor belt; 6.
conveyor table 7.silicone wheel 8. guiding wheel 9. printing wheel 10. solid ink roller 11. heating
block of ink roller 12. housing case 13. embossing wheel. 14. control panel 15. driving wheel
16.cooling block 17. adjusting knob 18. pressing wheel 19. heating block 20. sealing belt 21.
driven wheel 22. cam shaft 23. feed opening 24.worktable 25. adjusting knob for conveyor table
26. lifting handwheel of conveyor table 27. lifting handwheel of complete appliance 28. castor

5
FRS-1120W Color ribbon printing continuous band sealer
Diagram 2
FRM-1120L Solid-ink coding continuous band sealer
Diagram 3
1. foot plate; 2. bolt for foot plate; 3. bracket for foot plate; 4. gear case; 5.conveyor table;
6.conveyor belt 7. stay bar for stop pole 8. stay bar support 9. stop pole 10. upright post 11.
safety cover 12. adjusting knob 13. housing case 14. control panel 15. bracket for lead-in
guide pulley 16. lead-in guide pulley 17.upright shaft 18. adjusting seat for conveyor belt
19.adjusting knob 20.lifting handwheel for conveyor table 21. chassis 22. castor
FRM-1120LD Solid-ink coding continuous band sealer

6
Diagram 4
FR-1370LD Continuous band sealer with two sets of heating blocks
Diagram 5

7
FR-1370L/T Continuous band sealer with two sets of heating blocks
Diagram 6
FR-1370AL/L Continuous band sealer with two sets of heating blocks
Diagram 7

8
FRM-1370AL/M Continuous band sealer with two sets of heating blocks
Diagram 8
VI.Operation Instruction
1. Control Panel (See diagram 9)
FRM-1120W、FRM-1120L、FRM-1120LD
FR-1370AL/M

9
FR-1370L、FR-1370LD、FR-1370L/T
FR-1370AL/L
Diagram 9
1. Prepare the machine for use
1)This machine is equipped with three crust grounded socket, please check if it is well
connected so as to ensure safe operation.
2)First-time use or too long intermission will moisten the electronic heating elements, so
several minutes’ low-temperature preheating is necessary before the normal operation.
3)Adjust the conveyor table’s height and horizontal location to get required sealing position.
4)According to the external size from sealing line to bag opening, regulate the position of
feed opening.
5)According to the thickness of material that to be sealed, adjust the clearance between
both heating and cooling blocks to be the thickness of thickness of packing bag in one
layer, which must guarantee the firmness of sealing and high definition of embossing, and
ensure suitable length extended from two ends of sealing part.
6)The transverse adjustment for horizontal machine’s conveyor table, loosen two screws (1)
at the bottom of the conveyor table. Move out the conveyor table to the suitable position,
then fasten the screws.(see diagram 10)

10
Diagram 10
7), Ways of exchanging and adjusting the sealing belt:
a, Remove the safety cover, after heating blocks being cooled, lift the knobs of heating and
cooling blocks, printing wheel and pressing wheel’ spring, lift each part and remove guide
belt to prepare for removing sealing belt.
b, Rotate and adjust cam shaft counterclockwise to make cam push and move the driven
wheel seat (adjusting block), then remove the sealing belt.
c, Replace with a new sealing and install the guiding belt back.
d, Put the driven wheel, heating and cooling blocks, and pressing wheel to the original
position, meanwhile rotate cam clockwise to make it return to original position as well.
e, Connect the power supply and test the machine, if irregular sealing appears on the belt,
you can make adjustment through adjusting screws on the driven wheel seat (adjusting
block).
f, Install the safety cover.
8),The selection of the type arrange way: The type in longitude arrange belongs R arrange,
while types in axial arrange belongs T arrange. (see diagram 11)
T arrange R arrange
Diagram 11

11
9). Exchanging words on printing wheel (see diagram12):
Rotate the holding latch on the printing wheel cover by an angle to take the traverse pin out
of the groove from the end cover of printing wheel shaft, the printing wheel cover will bounce
by itself and types can be exchanged after removing its cover, then press the silicone bar on
it and install printing wheel cover. At last, insert the traverse pin back into the groove, and
rotate by an angle for fastening.
1. holding latch 2. end cover of printing wheel shaft 3.tranverse pin 4. type 5. fixed pin 6.
fastening screw for printing wheel 7. printing wheel
Diagram 12
10). The adjustment of the clearance between ink roller and types:
Adjust the adjusting screw (5) for the ink roller’s swing pole, rotate the printing wheel,
and make the types’ surface touch the ink roller’s (1 )surface slightly. When you use your
hand to touch printing wheel, if the ink roller can be easily be driven, it should be ok.
(see diagram 13)
1. ink roller 2. heating block of ink roller 3. swing pole 4.adjusting strut 5. adjusting screw
Diagram 13

12
11). Adjustment of the pressure between printing wheel and silicone wheel:
When the printing work is not in process, the types on the printing wheel must not touch
the silicone wheel, and they only touch each other when the printing work is in process.
Loosen the screw (4) in the front of the silicone wheel, then rotate the eccentric sleeve
(3), so as to make the types’ surface slightly touch the silicone wheel’s (2)surface. If the
machine is used to print relatively thicker packing bag, the screw should be loosened
accordingly as the pressure can’t be too much, fasten the screw (4)after making
adjustment.(see diagram 14)
1. printing wheel 2.silicone wheel 3. eccentric sleeve 4.screw
Diagram 14
12). Temperature adjustment for printing wheel and ink roller:
All the knobs of this machine are set to 0 position before leaving factory. Users need to
make adjustment by themselves. For a new ink roller, during previous time of use, the
temperature should be relatively lower, after a period time of use, the temperature can be
raised to higher degree, which can make the deep-seated ink ooze and prolong the ink
roller’s life-span. When the ink roller reaches the working temperature, use a piece of
white paper to touch ink surface, as long as it can stick a little ink, it should be ok. The
temperature can’t be too high or too low.
The ink roller that suits for this machine specified in following table, including colors of
white, yellow, red, blue, green, brown and black. If the packing bag needs steam cooking
after printing,you should choose the ink rollers of moderate temperature or high
temperature, in this situation, the temperature must be set in higher degree accordingly
while using.

13
Model Outer dia.(mm)Height(mm)
Low temperature series
120-150℃
(NO:935)
Φ36 16
Φ36 32
Φ36 40
Moderate temperature series
135-165℃
(NO:932)
Φ36 16
Φ36 32
Φ36 40
High temperature series
150-175℃
(NO:930)
Φ36 16
Φ36 32
Φ36 40
13), Adjustment of coding position:
Considering length of bag opening, the user can locate the coding position by adjusting
coding position switch.
14), Adjustment of line number for printing label:
Arrange types within range stipulated in IV Performance Features in this manual, then
use the provided silicone bar to fix the types in required axial position.
3. Starting procedure
(1), Connect the power supply and startup switch, indicating light will light, then adjust the
speed-adjusting knob and all transmission parts will start to run synchronously.
(2), Micro-adjust the knob of embossing wheel to make that wheel swivel, after getting a
proper pressure, fix limiting screw.
(3), Once turn the heating switch on, the green light of the electronic temperature controller
will light. According to the material and thickness of the packing bag, adjust the
temperature controller to the temperature required, then set the position of heating knob
of ink roller. Once the heating blocks and ink roller heating block begin to preheat, the
machine needs to be started meanwhile and kept running at low speed.
(4), That whether it is necessary to turn on the fan for cooling depends on the material and
thickness of packing bag.
(5), Flatten and align sealing opening, then deliver the bag by aligning the bag opening with
the feed opening, when the bag opening is gripped by the sealing belts, which makes the
bag move forward automatically, at that moment, please do not push it in or pull it out by
force, otherwise irregular sealing or breakdown will happen.
(6), If it is found that there is dirt attached to the sealing belt or the heating block, you need
to stop the sealer and clear it.
4. Stop operation
In order to prolong the using life-span of the sealer, please remember, before shutting down

14
the machine, you should return the temperature regulating knob to 0 position first, then turn
on the fan, at this time, the temperature on the indicator begins to fall and the sealing belt
should still be in state of running. About several minutes’ later, when the temperature drops
below 80℃, only can you turn off the fan and main power supply.
VII Circuit Diagram
Diagram 15
K1. switch/on-off K2. switch/start K3. switch/fan K4. switch/heat seal
K5. switch/printer W1. sealing speed regulator W2. temperature of ink roller
W3. coding position R1,R2 heating pipe for sealing R3,R4. heating pipe of ink roller
MD. speed-adjusting motor DF. Fan AP1-speed-adjusting PCB AP2.
temperature-adjusting PC board of ink roller AP3.main control PC board AP4. sealing
temperature controller YC1.electromagnetic clutch YC2. eletromagnetic stopper SQ1.
thermocouple SQ2. groove sensor SQ3. photoelectric sensor TCL. control transformer

15
VIII Breakdown Drawing of Machine Body
FRM-1120L
Diagram16

16
Code Name Quantity Remark
16-1 bottom board 1
16-2 small pulley shaft 2
16-3 small pulley 2
16-4 bearing (626) 2 GB/T276-1994
16-5 circlip for hole 2 GB/T893.1-1986
16-6 flat washer 2 GB/97.1-2002
16-7 screw 2 GB/T818-2000
16-8 guiding belt (678×4.5×3.5) (65°) 1
16-9 guiding belt (678×4.5×3.5) (65°) 1
16-10 embossing wheel shaft 1
16-11 bearing (6201) 1 GB/T276-1994
16-12 embossing wheel 1
16-13 circlip for hole 1 GB/T893.1-1986
16-14 flat washer 1 GB/T97.1-2002
16-15 screw 1 GB/T818-2000
16-16 silicone wheel shaft 1
16-17 silicone wheel assembly 1
16-18 silicone wheel cover 1
16-19 driving wheel 2
16-20 flat washer 2
16-21 screw 2 GB/T818-2000
16-22 upper pressing wheel shaft 1
16-23 bearing (16002) 2 GB/T276-1994
16-24 circlip for shaft 2 GB/T894.1-1986
16-25 pressing wheel 2
16-26 circlip for hole 2 GB/T893.1-1986
16-27 upper pressing wheel shaft 1
16-28 upper driven wheel seat (adjusting block) 1
16-29 driven wheel shaft 2
16-30 driven wheel 2
16-31 bearing (6005) 2 GB/T276-1991
16-32 circlip for hole 2 GB/T893.1-1986
16-33 washer 2
16-34 lower driven wheel seat (adjusting block) 1
16-35 screw 4 GB/T818-2000
16-36 cam shaft 2
16-37 cam shaft seat 2
16-38 cam 2
16-39 screw 2 GB/T818-2000
16-40 pressing plate for adjusting block 2

17
16-41 spacing ring of pressing plate 4
16-42 screw 4 GB/T818-2000
16-43 flat washer 4 GB/T97.1-2002
16-44 screw 4 GB/T818-2000
16-45 spring 2
16-46 spring seat 1
16-47 flat washer 2 GB/97.1-2002
16-48 hexagonal nut 2 GB/T41-2000
16-49 single slide block seat 2
16-50 flat washer 8 GB/97.1-2002
16-51 screw 8 GB/T818-2000
16-52 circlip for hole 3 GB/T893.1-1986
16-53 driving wheel shaft 2
16-54 bearing (6201) 6 GB/T276-1994
16-55 spacing ring of bearing 2
16-56 bearing seat 3
16-57 screw 9 GB/T818-2000
16-58 gear 5
16-59 motor 220V/100W 1
16-60 worm-gear case assembly 1
16-61 driving sprocket 1
16-62 circlip for shaft 3 GB/T894.1-1986
16-63 bearing seat for connecting shaft 1
16-64 connecting shaft 1
16-65 slide block 2
16-66 spring seat for slide block 2
16-67 socket cap screw 5 GB/T70.1-2000
16-68 medium gear 1
16-69 bearing (6101) 1 GB/T276-1994
16-70 medium gear shaft 1
16-71 adjusting knob 2
16-72 adjusting screw for slide block 2
16-73 spring for slide block 2
16-74 adjusting double-screw bolt for slide block 2
16-75 adjusting seat for slide block 2

18
FRM-1120L
Diagram 17

19
Code Name Quantity Remark
17-1 bottom board 1
17-2 ink roller shaft 1
17-3 swing pole of ink roller 1
17-4 heating block of ink roller 1
17-5 heating pipe 110v/40w 1
17-6 printing wheel shaft 1
17-7 spring of holding latch on printing wheel 1
17-8 cover for printing wheel shaft 1
17-9 printing wheel 1
17-10 printing wheel cover 1
17-11 holding latch for printing wheel 1
17-12 printing-silicone wheel shaft 1
17-13 silicone ring 1
17-14 circlip for hole 1 GB/T893.1-1986
17-15 core of silicone wheel 1
17-16 bearing 1 GB/T276-1994
17-17 eccentric sleeve 1
17-18 upper cooling block shaft 1
17-19 upper cooling block 2
17-20 flat washer 7 GB/97.1-2002
17-21 cap nut 7 GB/923-1988
17-22 lower cooling block shaft 1
17-23 lower cooling block 1
17-24 upper heating block shaft 2
17-25 upper heating block 1
17-26 lower heating block shaft 2
17-27 lower heating block 1
17-28 feed opening 1
17-29 wind catcher 1
17-30 fan 1
17-31 support for brush 1
17-32 carbon brush holder 1
17-33 pressing plate of brush 2
17-34 groove sensor 1
17-35 electromagnetic clutch assembly 1
17-36 middle pulley 1
17-37 middle pulley shaft 1
17-38 ink roller shaft pulley 1
17-39 seat for ink roller swing pole shaft 1
This manual suits for next models
5
Table of contents
Other Wiratech Food Saver manuals