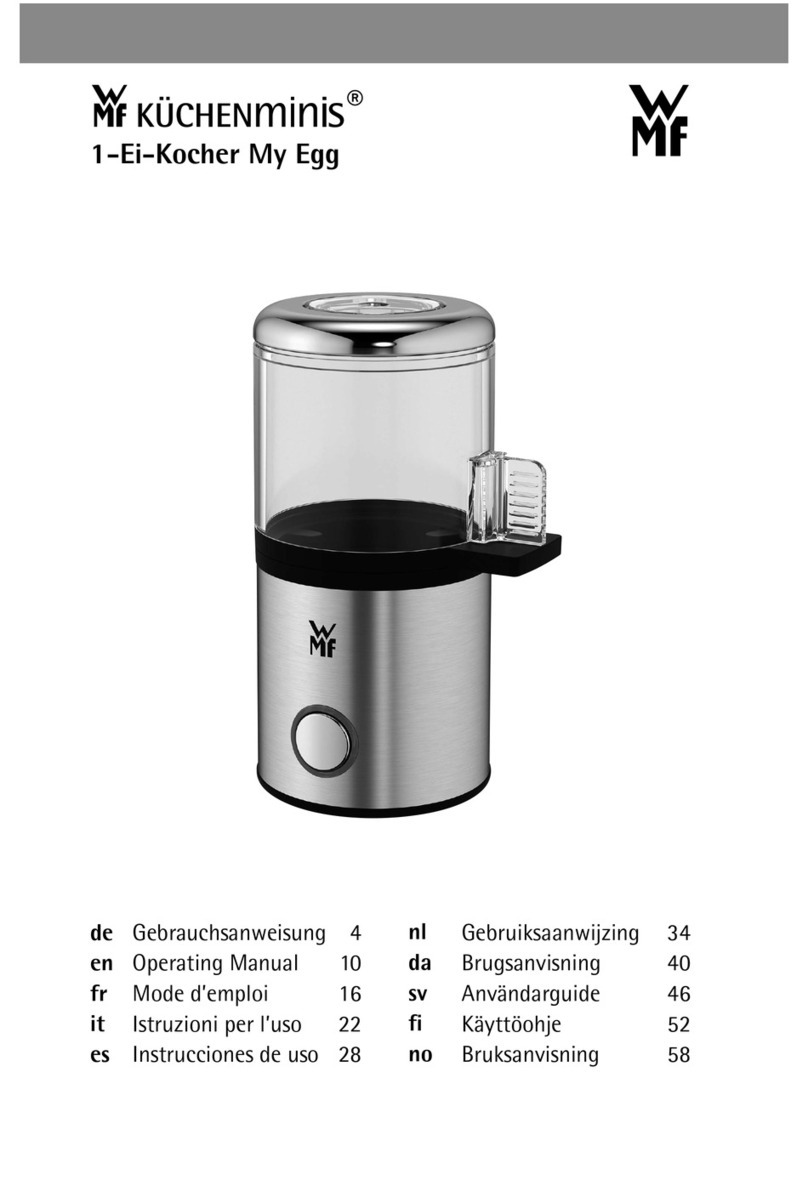
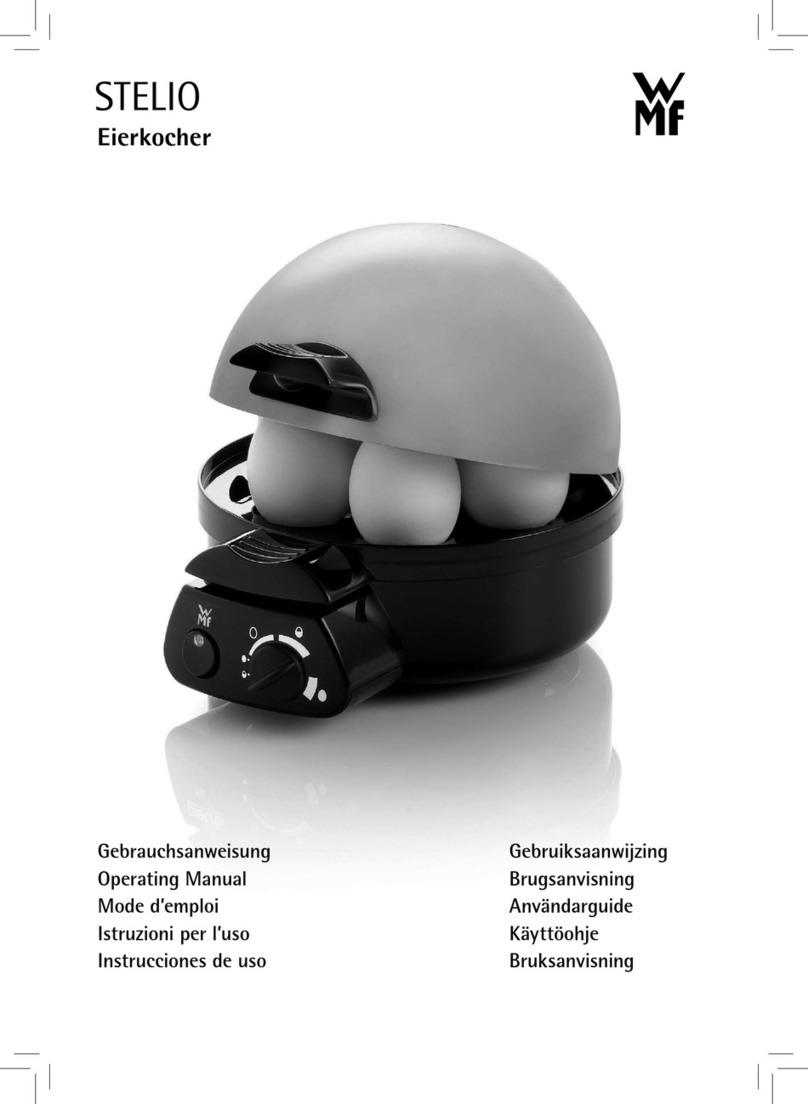
WMF 415020011 User manual

2-Eier-Kocher
Gebrauchsanweisung 4
Operating Manual 10
Mode d’emploi 16
Istruzioni per l’uso 22
Instrucciones de uso 28
Gebruiksaanwijzing 34
Brugsanvisning 40
Användarguide 46
Käyttöohje 52
Bruksanvisning 58
nl
da
sv
fi
no
de
en
fr
it
es

1b
2
3
5
6
4
1a
2

Aufbau 2-Eier-Kocher
1 a) Haube mit intgriertem Wasserdosierer
b) Integrierter Wasserdosierer
2 Grifffläche
3 Eiereinsatz
4 Eipick
5 Edelstahlheizschale
6 Ein/Aus-Taste
Set-up of the two egg boiler
1 a) Cover with integrated water measuring device
b) Integrated water measuring device
2 Gripping surface
3 Egg insert
4 Egg piercer
5 Stainless steel heating bowl
6 On/off button
Montage du cuit-œufs pour 2 œufs
1 a) Couvercle avec doseur d‘eau intégré
b) Doseur d‘eau intégré
2 Poignées
3 Support à œufs
4 Pique-œuf
5 Coque chauffante en inox
6 Touche marche/arrêt
Struttura del cuociuova per 2 uova
1 a) coperchio con dosatore d‘acqua integrato
b) dosatore d‘acqua integrato
2 superficie di presa
3 portauova
4 fora-uova
5 Vasca di cottura in acciaio inox
6 interruttore di accensione/spegnimento
Componentes del hervidor de 2
huevos
1 a) Cubierta con dosificador de agua integrado
b) Dosificador de agua integrado
2 Superficie de manejo
3 Interior para huevos
4 Alfiler
5 Bandeja calefactora de acero inoxidable
6 Tecla de encendido/apagado
Opbouw van de eierkoker voor 2
eieren
1 a) Deksel met geïntegreerde waterdosering
b) Geïntegreerde waterdosering
2 Handgrepen
3 Inzetstuk voor eieren
4 Eierprikker
5 Verwarmingsschaal van roestvrij staal
6 Aan/Uit-knop
Opbygning æggekoger til 2 æg
1 a) Låg med integreret målebæger
b) Integreret målebæger
2 Holdeflade
3 Æggeholder
4 Nål
5 Varmeskål i rustfrit stål
6 Tænd/slukknap
Konstruktion äggkokare för 2 ägg
1 a) Lock med integrerad vattendoserare
b) Integrerad vattendoserare
2 Handtag
3 Ägginsats
4 Äggpigg
5 Hölje i rostfritt stål
6 På/av-knapp
2 munan keittimen rakenne
1 a) Kupu, johon on integroituna
vedenannostelija
b) Integroitu vedenannostelija
2 Otealue
3 Munateline
4 Munanlävistin
5 Jaloteräksinen vesiallas
6 Virtapainike
Oppbygning av eggekoker for 2 egg
1 a) Deksel med integrert vanndosering
b) Integrert vanndosering
2 Gripeflate
3 Eggeinnsats
4 Nål til å stikke hull i egget med
5 Oppvarmingsskål i rustfritt stål
6 På/av-knapp

4
Gebrauchsanweisung
Wichtige Sicherheitshinweise
▪ Diese Geräte können von Kindern ab 8 Jahren sowie von
Personen mit reduzierten physischen, sensorischen oder men-
talen Fähigkeiten oder Mangel an Erfahrung und/oder Wissen
benutzt werden, wenn sie beaufsichtigt oder bezüglich des
sicheren Gebrauchs des Gerätes unterwiesen wurden und die
daraus resultierenden Gefahren verstanden haben.
Kinder dürfen nicht mit dem Gerät spielen.
Reinigung und Benutzer-Wartung dürfen nicht durch Kinder
durchgeführt werden, es sei denn, sie sind älter als 8 Jahre und
beaufsichtigt.
▪ Bewahren Sie das Gerät und seine Zuleitung außerhalb der
Reichweite von Kindern unter 8 Jahren auf.
▪ Das Gerät nicht in Wasser tauchen.
▪ Wenn die Anschlussleitung dieses Gerätes beschädigt wird,
muss sie durch den zentralen Kundendienst des Herstellers
oder eine ähnlich qualifizierte Person ersetzt werden. Durch
unsachgemäße Reparaturen können erhebliche Gefahren für
den Benutzer entstehen.
▪ Dieses Gerät ist dafür bestimmt, im Haushalt und ähnlichen
Anwendungen verwendet zu werden, wie beispielsweise:
⋅in Küchen für Mitarbeiter in Läden, Büros und anderen
gewerblichen Bereichen;
⋅in landwirtschaftlichen Anwesen;
⋅von Kunden in Hotels, Motels und anderen Wohneinrich-
tungen;
⋅in Frühstückspensionen.
Das Gerät ist nicht für den rein gewerblichen Gebrauch
bestimmt.
▪ Achtung - Vorsicht beim Umgang mit der Eieranstechnadel.
Verletzungsgefahr!

5
de
de
Vor dem Benutzen
Die Gebrauchsanweisung aufmerksam lesen. Sie enthält wichtige Hinweise
für den Gebrauch, die Sicherheit und die Wartung des Gerätes.
Sie soll sorgfältig aufbewahrt und gegebenenfalls an Nachbenutzer weiterge-
geben werden.
Beim Gebrauch die Sicherheitshinweise beachten.
Technische Daten
Nennspannung: 220-240 V~ 50-60 Hz
Leistungsaufnahme: 250 W
Schutzklasse: I
Weitere Sicherheitshinweise
▪ Gerät nur an eine vorschriftsmäßig installierte Schutzkontaktsteckdose
anschließen. Zuleitung und Stecker müssen trocken sein.
▪ Die Anschlussleitung nicht über scharfe Kanten ziehen oder einklemmen,
nicht herunterhängen lassen sowie vor Hitze und Öl schützen. Sie darf die
heiße Heizschale und die Haube nicht berühren.
▪ Den Netzstecker nicht an der Leitung oder mit nassen Händen aus der
Steckdose ziehen.
▪ Das Gerät nicht auf heiße Oberflächen wie Herdplatten oder Ähnliches
stellen und nicht in der Nähe offener Flammen betreiben.
▪ Das Gerät nicht auf wasserempfindliche Oberflächen abstellen. Wassersprit-
zer könnten diese beschädigen.
▪ Vorsicht, das Gerät wird heiß. Verbrühungsgefahr durch austretenden
Dampf. Das Gerät während des Betriebes nicht verrücken und nicht am
Netzkabel ziehen.
▪ Das Gerät nur unter Aufsicht betreiben.
▪ Das Gerät nicht in Betrieb nehmen bzw. sofort Netzstecker ziehen, wenn:
⋅Gerät oder Netzkabel beschädigt ist;
⋅das Gerät undicht ist;
⋅der Verdacht auf einen Defekt nach einem Sturz o. Ä. besteht.
In diesen Fällen das Gerät zur Reparatur geben.
▪ Der Netzstecker ist zu ziehen:
⋅bei Störungen während des Betriebes,
⋅vor jeder Reinigung und Pflege,
⋅nach dem Gebrauch.
▪ Das Gerät regelmäßig entkalken.
▪ Bei Zweckentfremdung, falscher Bedienung oder nicht fachgerechter
Reparatur wird keine Haftung für eventuelle Schäden übernommen.
Ebenso sind Garantieleistungen in solchen Fällen ausgeschlossen.
▪ Verpackungsmaterial, wie z. B. Folienbeutel gehören nicht in Kinderhände.
Verwendung
Sie können mit dem Gerät ein oder zwei Eier punktgenau zubereiten, Sie
haben dabei die Wahl zwischen weichen, mittelharten und harten Eiern. Mit
WMF COUP 2-Eier-Kocher können Sie Eier der Größe S-XL zubereiten.
6
*Im Vergleich zum WMF STELIO Eierkocher.
Geprüft durch technikzuhause.de. Die Ressourcenersparnis bezieht sich auf
Materialeinsatz und Transportvolumen. Messung der Energieersparnis beim
Kochen von 1 bzw. 2 Eiern (mittelhart).
Wasserdosierer
Der Wasserdosierer (1b) ist in der Haube (1a) integriert. Die Haube mit inte-
griertem Wasserdosierer (1a) besteht aus hochwertigem Tritan® und ist BPA-
frei. Bei den im Wasserdosierer (1b) angegebenen Wassermengen handelt es
sich um Richtwerte für 1 bzw. 2 Eier der Größe M. Abweichungen können
durch die Größe, Aufbewahrungszeit und Temperatur der Eier entstehen.
Die Symbole für die unterschiedlichen Härtegrade und Anzahl der Eier sind
am Wasserdosierer angebracht.
weiche Eier
mittelharte Eier
harte Eier
Wenn Sie größere Eier verwenden, füllen Sie etwas mehr Wasser ein, für
kleinere Eier etwas weniger.
Sollten die Eier zu weich sein, füllen Sie beim nächsten Mal etwas mehr
Wasser ein. Sind die Eier zu hart, etwas weniger Wasser einfüllen.
Eipick
Um das Aufplatzen der Eier beim Kochen zu vermeiden, können Sie die Eier
an der stumpfen Seite mit dem Eipick (4) anstechen. Dieser ist auf dem
Eiereinsatz (3) angebracht.
Inbetriebnahme
▪ Wickeln Sie das Kabel bis zur gewünschten Länge ab. Die nicht benötigte
Länge der Anschlussleitung können Sie am Boden des Eierkochers auf-
wickeln. Stellen Sie das Gerät auf eine trockene, rutschfeste und ebene,
waagerechte Unterlage auf.
Achten Sie darauf, dass das Gerät vom Strom getrennt ist.
▪ Nehmen Sie die Haube (1a) mit dem integrierten Wasserdosierer ab.
Fassen Sie die Haube (1a) immer nur an den Griffflächen (2) an.
▪ Füllen Sie nun abhängig von der Anzahl der Eier (1 oder 2) sowie des
gewünschten Härtegrades die benötigte Menge Wasser in den Wasser-
dosierer (1b). Alternativ können Sie auch den mitgelieferten Messbecher
verwenden.
▪ Geben Sie die abgemessene Wassermenge in die kalte Heizschale (5).
Achten Sie darauf, dass Sie nicht mehr Wasser in die Heizschale (5) einfül-

7
de
len, als für die gewünschte Zubereitung angegeben ist. Ansonsten besteht
die Gefahr, dass das Wasser überkocht.
▪ Legen Sie die Eier auf den Eiereinsatz (3) und setzen Sie die Haube (1a) auf
das Gerät.
▪ Stecken Sie erst jetzt den Netzstecker in die Steckdose.
▪ Schalten Sie das Gerät mit der Ein/Aus-Taste (6) ein, die Kontrollleuchte
leuchtet weiß und zeigt an, dass das Gerät in Betrieb ist.
▪ Sobald die Eier fertig sind, ertönt ein Signalton.
Das Gerät schaltet automatisch aus, die Kontrollleuchte erlischt.
Ziehen Sie den Netzstecker.
Hinweis: Sie können das Geräte jederzeit durch Drücken der Ein/Aus-Taste
(6) wieder ausschalten.
▪ Heben Sie vorsichtig die Haube (1a) ab. Fassen Sie die Haube (1)a immer nur
an den Griffflächen (2) an.
Achtung: Verbrühungsgefahr durch austretenden Dampf!
▪ Nehmen Sie den Eiereinsatz (3) heraus und schrecken Sie die Eier unter
kaltem Wasser ab, damit diese nicht nachgaren.
Zum Anrichten der Eier, können Sie auch den Eiereinsatz (3) verwenden.
Sicherheitssystem
Ein Thermostat schützt den Eierkocher bei versehentlichem Betrieb ohne
Wasser vor Überhitzung, indem er das Gerät abschaltet. Vor einer erneuten
Inbetriebnahme den Eierkocher unbedingt abkühlen lassen.
Sollte bei unsachgemäßem Gebrauch der erste Thermostat versagen, so sorgt
ein zusätzlicher Temperaturbegrenzer für einen zuverlässigen Schutz.
Reinigung und Pflege
Reinigung
Netzstecker ziehen und das Gerät abkühlen lassen. Das Gerät nicht in Wasser
tauchen, sondern mit einem feuchten Tuch, dem etwas Spülmittel beigege-
ben wird, abwischen und anschließend trockenreiben. Keine scharfen und
scheuernden Reinigungsmittelverwenden.
Die Heizschale (5) besteht aus nichtrostendem Edelstahl. Sollten sich dennoch
Rostflecken zeigen, so sind dies nur auf der Oberfläche festhaftende Ablage-
rungen. Sie sollten sofort mit einemEdelstahl-Putzmittel entfernt werden.
Eiereinsatz (3) und Haube mit integriertem Wasserdosierer (1a) bestehen aus
hochwertigem Tritan® und können in der Spülmaschine gereinigt werden.

8
Entkalken
Kalkablagerungen führen zu Energieverlusten und beeinträchtigen die
Lebensdauer des Gerätes und das Kochergebnis. Es schaltet vorzeitig ab, wenn
die Kalkschicht zu stark ist. Sie ist dann nur noch sehr schwer zu entfernen.
Entkalken Sie deshalb regelmäßig.
Wir empfehlen die Verwendung von Cromargol®. Dieses ist hochwirksam,
lebensmittelsicher, geschmacks- und geruchsneutral. Durch die spezielle
Pflegeformel mit 6 hochwertigen und schützenden Additiven ist Cromargol®
zudem sehr materialschonend.
Sie bekommen Cromargol® in der Regel dort, wo das Gerät gekauft wurde
oder im ausgewählten Fachhandel.
▪ Gerät vor der Entkalkung vom Netz trennen und abkühlen lassen.
▪ Eine halbe Portion (50 ml) Cromargol® in die Heizschale (5) einfüllen und
Gerät stehen lassen, bis der Kalkbelag am Boden entfernt ist. Dann die Heiz-
schale (5) bis über den Kalkrand an der Wandung mit kaltem Leitungswasser
auffüllen und 15 Minuten stehen lassen.
▪ Anschließend ausgießen und gründlich mit kaltem Leitungswasser ausspü-
len.
▪ Andere Entkalkungsmittel nach Herstellerangaben dosieren und anwenden.
Lösung während der Entkalkung nicht erhitzen.
Achtung, für Schäden, die durch Nichtbeachtung der Entkalkungsvorschrift
entstehen, besteht kein Garantieanspruch.

9
de
Garantie-Information
Für unsere Geräte übernehmen wir gegenüber dem Endkunden eine
24-monatige Haltbarkeitsgarantie. Sie beginnt mit dem Kauf des Gerätes
durch den Endkunden und gilt im Gebiet der Bundesrepublik Deutschland.
Ansprüche aus dieser Garantie sind unter Vorlage des Kaufbelegs direkt
gegenüber unserem zentralen Kundendienst geltend zu machen.
Von der Garantie ausgeschlossen sind Schäden durch normalen Verschleiß,
unsachgemäßen Gebrauch, Nichteinhaltung der Entkalkungsanweisung sowie
unterbliebene Pflege.
Der Endkunde besitzt zusätzlich zu den Ansprüchen aus dieser Garantie
gesetzliche Ansprüche wegen Mängeln des Gerätes gegenüber seinem direk-
ten Verkäufer/Händler, die durch diese Garantie nicht eingeschränkt werden.
Das Gerät entspricht den Europäischen Richtlinien 2006/95/EG, 2004/108/EG
und 2009/125/EG.
Dieses Produkt darf am Ende seiner Lebensdauer nicht über den normalen
Haushaltsabfall entsorgt werden, sondern muss an einem Sammelpunkt
für das Recycling von elektrischen und elektronischen Geräten abgegeben
werden.
Die Werkstoffe sind gemäß ihrer Kennzeichnung wiederverwertbar. Mit der
Wiederverwendung, der stofflichen Verwertung oder anderen Formen der
Verwertung von Altgeräten leisten Sie einen wichtigen Beitrag zum Schutze
unserer Umwelt.
Bitte erfragen Sie bei der Gemeindeverwaltung die zuständige Entsorgungs-
stelle.
Änderungen vorbehalten

10
Operating Manual
Important safety information
▪ These appliances can be used by children older than eight
years of age as well as by people with limited physical, sensory
or mental capabilities and persons lacking experience and/
or lacking knowledge, if they are supervised or have received
instructions on how to use the appliance safely and have
understood the resulting risks.
Children must not play with the appliance.
Children must not clean or maintain the appliance unless they
are older than eight years of age and are supervised.
▪ Keep the appliance and its cable out of the reach of children
under eight years of age.
▪ Do not immerse the appliance in water.
▪ If the appliance’s connection cable is damaged it must be
replaced by the manufacturer’s central customer service
department or by a similarly qualified person. Improper repairs
may result in a serious risk to users.
▪ This appliance is designed for use in households and similar
environments such as:
⋅in kitchens – for employees in shops, offices and other
commercial areas;
⋅on agricultural property;
⋅by customers in hotels, motels and other residential
facilities;
⋅in bed-and-breakfast establishments.
The appliance is not intended for purely commercial use.
▪ Caution - Be careful when handling the egg piercing pin. Risk
of injury!
Prior to use
Read the instructions for use carefully. They contain important information about the use,
safety and care of the appliance.
They should be kept in a safe place and passed on to further users if necessary.
Observe the safety information when using the appliance.

11
en
en
Technical data
Rated voltage: 220–240 V ~ 50–60 Hz
Power consumption: 250 W
Protection class: I
Additional safety instructions
▪ Only connect the appliance to earthed wall sockets that have been
installed in accordance with the regulations. The cable and plug must be
dry.
▪ Do not pull or clamp the connecting cable over sharp edges. Do not leave
it dangling and protect it from heat and oil. You must not touch the hot
heating bowl or the cover.
▪ Never pull the mains plug out of the socket by the cable or with wet
hands.
▪ Do not place the appliance on hot surfaces such as on hotplates or similar
areas, and do not operate near naked flames.
▪ Do not place the appliance on water-sensitive surfaces. Water spray may
damage them.
▪ Caution, the appliance gets hot. Risk of scalding from escaping steam. Do
not move the appliance during operation and do not pull on the mains
cable.
▪ Only operate the appliance under supervision.
▪ Stop using the appliance and/or pull out the mains plug immediately if:
⋅the appliance or mains cable is damaged;
⋅the appliance is leaking;
⋅you suspect the appliance is faulty after dropping it, for example.
In such cases, arrange for the appliance to be repaired.
▪ Pull the mains plug:
⋅if the appliance malfunctions during use;
⋅before cleaning and care;
⋅after use.
▪ Descale the appliance regularly.
▪ We accept no liability for any damages caused as a result of misuse,
incorrect operation or improper repairs.
Claims under warranty are likewise excluded in such cases.
▪ Packaging materials, such as plastic bags, must be kept out of the reach
of children.
Use
You can use the appliance to cook one or two eggs with the utmost precision,
and you can choose between soft, medium-hard or hard-boiled eggs. The
WMF COUP two egg boiler is suitable for cooking S–XL eggs.

12
* Compared to WMF STELIO egg boiler.
Confirmed by technikzuhause.de. Resource savings refer to material
usage and transportation volume. Measurement of energy savings by
cooking 1 or 2 eggs (medium).
Water measuring device
The water measuring device (1b) is integrated into the cover (1a). The
cover with integrated water measuring device (1a) is made of high-
quality Tritan® and is BPA-free. The water quantities specified on the
water measuring device (1b) are guide values for one or two medium-
sized eggs. Deviations can occur due to the size, storage time and
temperature of the eggs.
The symbols for the different levels of hardness and the number of eggs
are indicated on the water measuring device.
Soft eggs
Medium-hard eggs
Hard eggs
If you are using larger eggs add a little more water, and for smaller eggs
use a little less.
If the eggs are too soft, add a little more water next time. If the eggs are
too hard, use a little less water next time.
Egg piercer
To prevent the eggs from exploding during cooking, use the egg piercer
(4) to pierce the underside of the eggs. The egg piercer is attached to
the egg insert (3).
Starting up the appliance
▪ Unwind the cable to the required length. You can wind the remaining
non-required cable onto the base of the egg boiler. Place the
appliance on a dry, slip-resistant and even horizontal surface.
Make sure the appliance is not connected to the mains power supply.
▪ Remove the cover (1a) with the integrated water measuring device.
Always use the gripping surfaces (2) when handling the cover (1a).
▪ Depending on the number of eggs (one or two) and the desired level
of hardness, you now fill the the water measuring device (1b) with
the required water quantity. Alternatively, you can use the measuring
mug provided.
▪ Pour the measured water quantity into the cold heating bowl (5).
Make sure you do not fill the heating bowl (5) with more water than

13
en
is specified for the desired preparation. Otherwise you risk overboiling the
water.
▪ Place the eggs on the egg insert (3) and fit the cover (1a) on the
appliance.
▪ Now you can insert the mains plug into the socket.
▪ Press the On/off button (6) to turn the appliance on; the indicator light is
lit white to indicate that the appliance is in operation.
▪ Once the eggs are cooked, the appliance emits an acoustic signal.
The appliance turns off automatically and the indicator light goes out.
Pull out the mains plug.
Note: You can turn the appliance off again at any time by pressing the
On/off button (6).
▪ Carefully remove the cover (1a). Always use the gripping surfaces (2)
when handling the cover (1a).
Warning: Risk of scalding from escaping steam!
▪ Remove the egg insert (3) and rinse the eggs under cold water so that
they do not continue to cook.
You can also use the egg insert (3) to serve the eggs.
Safety system
If the egg boiler is operated accidentally without water, a thermostat
switches the appliance off to protect it from overheating. You must allow the
egg boiler to cool down before you operate it again.
Should the first thermostat malfunction due to improper use, an additional
temperature limiter provides reliable protection.
Cleaning and care
Cleaning
Remove the mains plug and allow the appliance to cool down. Do not
immerse the appliance in water, but rather clean it using a damp cloth with
a little washing-up liquid and then dry it. Do not use any harsh or abrasive
cleaning agents.
The heating bowl (5) is made of stainless steel. If rust spots do appear
however, they are only deposits that have formed on the surface. You must
remove these immediately using a stainless steel cleaning agent.
The egg insert (3) and cover with integrated water measuring device (1a) are
made of high-quality Tritan® and can be cleaned in the dishwasher.

14
Descaling
Limescale deposits lead to energy losses and have a negative effect
upon the appliance service as well as the cooking results. The appliance
switches off prematurely if the layer of limescale is too thick. The
limescale is then very difficult to remove. Therefore descale the appliance
regularly.
We recommend using Cromargol®. This product is highly effective, food
safe and is neutral in taste and smell. Thanks to its special care formula
with six high-quality and protective additives, Cromargol® is also very
gentle on materials.
You can usually purchase Cromargol® from the store where you have
purchased your appliance or from your chosen dealer.
▪ Prior to descaling, unplug the appliance from the mains and allow it
to cool down.
▪ Pour half a portion (50 ml) of Cromargol® into the heating bowl
(5) and leave the appliance to stand until the layer of limescale has
detached from the base. Then fill the heating bowl (5) with cold tap
water to cover the limescale ring on the wall and leave to stand for
15 minutes.
▪ Then pour out and thoroughly rinse with cold tap water.
▪ Measure out and use other descaling agents according to the
manufacturer’s instructions.
Do not heat the solution during descaling.
Caution: the warranty does not cover damage caused by not observing
the descaling instructions.

15
en
For UK use only
• This product is supplied with a 13 A plug conforming to BS 1363 tted to
the mains lead. If the plug is unsuitable for your socket outlets or needs to be
replaced, please note the following. If the plug is a non-rewireable one, cut
it from the mains lead and immediately dispose of it. Never insert it into a
socket outlet as there is a very great risk of an electric shock.
• The replacement of the plug at the mains lead has to be done according to
the following instructions:
Warning - This appliance must be earthed!
Important: The wires in this mains lead are coloured in accordance with the
following code:
green/yellow Earth
blue Neutral
brown Live
As the colours of the wires in the mains lead of this appliance may not cor-
respond with the coloured markings identifying the terminals in your plug,
proceed as follows:
⋅the wire which is coloured green and yellow must be connected to
the terminal which is marked with the letter E or by the earth symbol
, or coloured green or green and yellow,
⋅the wire which is coloured blue must be connected to the terminal
which is marked with the letter N or coloured black,
⋅the wire which is coloured brown must be connected to the terminal
which is marked with the letter L or coloured red.
• If a 13 A (BS 1363) plug is used it must be tted with a 3 A fuse confor-
ming to BS 1362 and be ASTA approved. If any other type of plug is used, the
appliance must be protected by a 5 A fuse either in the plug or adapter or at
the distribution board. If in doubt - consult a qualified electrician.
• Never use the plug without closing the fuse cover.
The appliance complies with the European directives 2006/95/EC, 2004/108/
EC and 2009/125/EC.
At the end of its lifetime this product must not be disposed of through the
normal domestic waste, but it should be handed to an assembly point for
the recycling of electrical and electronical appliances. You can inquire about
details at the local administration.
Subject to technical changes.

16
Mode d’emploi
Consignes de sécurité importantes
▪ Les enfants à partir de 8 ans ainsi des personnes ayant des
capacités physiques, sensorielles ou mentales restreintes ou
ayant un manque d’expérience et/ou de connaissance, peuvent
utiliser ces appareils s’ils sont surveillés et s’ils ont été instruits
pour utiliser cet appareil en toute sécurité et s’ils ont compris
les dangers pouvant résulter de l’usage de l’appareil.
Les enfants n’ont pas le droit de jouer avec cet appareil.
Les enfants n’ont pas le droit d’effectuer le nettoyage et la
maintenance sauf s’ils sont âgés de plus de 8 ans et sous
surveillance.
▪ Conservez l’appareil et son câble d’alimentation en dehors de
la portée des enfants de moins de huit ans.
▪ Ne plongez pas l’appareil dans l’eau.
▪ Si le câble d’alimentation de l’appareil est endommagé, il
doit être remplacé par le SAV central du fabricant ou par une
personne qualifiée. Des réparations non conformes peuvent
engendrer de graves dangers pour l’utilisateur.
▪ L’appareil est conçu pour un usage domestique ou pour des
applications similaires telles que:
⋅dans des cuisines pour le personnel dans des boutiques, des
bureaux ou d’autres secteurs professionnels;
⋅dans des exploitations agricoles;
⋅par des clients dans des hôtels, des motels et d’autres
établissements;
⋅dans des chambres d’hôtes.
L’appareil n’est pas conçu pour un usage purement
commercial.
▪ Attention lors de la manipulation du pique-œuf. Risque de
blessure!

17
fr
fr
Avant l‘utilisation
Lire attentivement le mode d’emploi. Il contient des consignes importantes
pour l’utilisation, la sécurité et l’entretien de l’appareil.
Il doit être conservé soigneusement et transmis en cas de remise à une tierce
personne.
Respectez les consignes de sécurité lors de l’utilisation.
Caractéristiques techniques
Tension du secteur : 220-240 V~ 50-60 Hz
Puissance : 250 W
Catégorie de protection : I
Consignes de sécurité supplémentaires
▪ Brancher l’appareil uniquement dans une prise électrique sécurisée,
installée conformément aux prescriptions. Le câble d’alimentation et la
prise doivent être secs.
▪ Ne pas tirer le cordon d’alimentation sur des bords tranchants, ne pas le
coincer, ne pas le laisser pendre et le protéger de la chaleur et de l’huile. Il
ne peut pas toucher la coque chauffante du couvercle.
▪ Ne pas débrancher l’appareil en tirant sur le câble ou avec les mains
mouillées.
▪ Ne pas poser l’appareil sur des surfaces chaudes telles que des plaques de
cuisson ou équivalent et ne pas l’utiliser à proximité d’une flamme.
▪ Ne pas déposer l’appareil sur des surfaces sensibles à l’eau. Des projections
d’eau pourraient les endommager.
▪ Attention, l’appareil chauffe. Danger d’ébouillantage par la vapeur qui
s’échappe. Ne pas déplacer l’appareil durant le fonctionnement et ne pas
tirer sur le câble d’alimentation.
▪ Faire fonctionner l’appareil uniquement sous surveillance.
▪ Ne pas mettre l’appareil en marche ou le débrancher immédiatement si :
⋅l’appareil ou le câble d’alimentation sont endommagés.
⋅l’appareil fuit;
⋅une défaillance est soupçonnée suite à une chute ou équivalent.
Dans ces cas, emporter l’appareil en réparation.
▪ Il faut débrancher la fiche secteur :
⋅en cas de dysfonctionnements durant l’utilisation,
⋅avant chaque nettoyage et entretien,
⋅après l’utilisation.
▪ Détartrer régulièrement l’appareil.
▪ Nous déclinons toute responsabilité pour des dommages éventuels
en cas d’utilisation détournée, de mauvaise utilisation, de réparation
inappropriée.
Dans de tels cas, toute intervention sous garantie est exclue.
▪ Le matériel d’emballage, comme p.ex. les sachets en plastiques ne sont pas
destinés aux enfants.
Utilisation
L’appareil vous permet de cuire à point un ou deux œufs, vous avez le choix
entre des œufs mollets, mi-durs ou durs. Grâce au cuit-œufs WMF COUP pour
deux œufs, vous pouvez préparer des œufs des tailles S à XL.

18
Doseur d’eau
Le doseur d’eau (1b) est intégré dans le couvercle (1a). Le couvercle avec
doseur d’eau (1a) intégré se compose de Tritan® et ne contient pas de
BPA. Le doseur d’eau (1b) avec indication des quantités d’eau donne des
valeurs indicatives pour un ou deux œufs de taille M. La taille, la durée de
conservation et la température peuvent entraîner des fluctuations.
Les symboles indiquant les différents degrés de dureté et le nombre
d’œufs se trouvent sur le doseur d’eau.
œufs mollets
œufs mi-durs
œufs durs
Si vous utilisez de gros œufs, rajoutez un peu d’eau et, pour les plus
petits œufs, versez-en un peu moins.
Si les œufs ne sont pas assez cuits, rajoutez un peu plus d’eau la
prochaine fois. Si les œufs sont trop durs, mettez un peu moins d’eau.
Pique-œuf
Afin d’éviter que les œufs éclatent lors de la cuisson, percez-les sur leur
côté rond avec le pique-œuf (4). Celui-ci se trouve sur le support d’œufs
(3).
Mise en service
▪ Déroulez le câble sur la longueur souhaitée. Vous pouvez enrouler
le reste du câble de dont vous n’avez pas besoin autour du fond du
cuit-œufs.
Posez l’appareil sur une surface sèche, antidérapante, plane et
horizontale.
Veillez à ce que l’appareil soit débranché du secteur.
▪ Retirez le couvercle (1a) avec doseur d’eau intégré.
Ne saisissez le couvercle (1a) qu’aux poignées (2).
▪ Remplissez maintenant la quantité d’eau souhaitée, peu importe le
nombre d’œufs (1 ou 2) ou la quantité d’eau nécessaire du doseur
d’eau (1b). Vous pouvez également utiliser le verre gradué fourni.
▪ Versez la quantité d’eau mesurée dans la coque chauffante (5).
Veillez à ne pas verser plus d’eau dans la coque chauffante (5) qu’il
n’est indiqué pour la préparation souhaitée. Sinon, l’eau risque de
déborder.
▪ Posez les œufs sur le support (3) et posez le couvercle (1a) sur
l’appareil.
▪ Branchez l’appareil seulement maintenant.
▪ Allumez l’appareil avec la touche marche / arrêt (6), la diode de
contrôle s’allume en blanc et indique que l’appareil fonctionne.
▪ Dès que les œufs sont cuits, un signal sonore retentit.
L’appareil s’éteint automatiquement, la diode de contrôle s’éteint.
Débranchez la fiche.
Remarque: Vous pouvez à tout moment à nouveau éteindre l’appareil
en appuyant sur la touche marche / arrêt (6).

19
fr
▪ Soulevez prudemment le couvercle (1a). Ne saisissez le couvercle (a1)
qu’aux poignées (2).
Attention: Danger d’ébouillantage par la vapeur qui s’échappe!
▪ Retirez le support à œufs (3) et passez les œufs sous l’eau froide pour
qu’ils ne continuent pas à cuire.
Vous pouvez aussi utiliser le support (3) pour présenter les œufs.
Système de sécurité
Un thermostat protège le cuit-œufs d’une surchauffe si l’appareil est
mis accidentellement en marche sans eau en éteignant l’appareil. Laissez
absolument refroidir le cuit-œufs avant de le remettre en service.
Si le premier thermostat devait tomber en panne lors d’une utilisation non
conforme, un limiteur thermique supplémentaire apporte une sécurité fiable.
Nettoyage et Entretien
Nettoyage
Débrancher l’appareil et le laisser refroidir. Ne pas plonger l’appareil dans
l’eau, mais l’essuyer avec un chiffon humide, imbibé d’un peu d’agent
de rinçage et le sécher ensuite. Ne pas utiliser de nettoyants corrosifs ou
abrasifs.
La coque chauffante (5) est composée d’acier inoxydable. Si toutefois des
taches de rouille devaient apparaître, il s’agit uniquement de dépôts qui
adhérent à la surface. Ils devraient être enlevés immédiatement avec un
agent nettoyant spécial pour aciers inoxydables.
Le support à œufs (3) avec couvercle et doseur d’eau intégré (1a) se compose
de Tritan®, ces éléments peuvent être nettoyés au lave-vaisselle.
Détartrer
Des dépôts calcaires peuvent causer des pertes d’énergie et influencent la
durée de vie de l’appareil, ainsi que le résultat de cuisson. L’appareil s’éteint
trop tôt si la couche calcaire est trop importante. Cette couche se laisse
alors très difficilement enlever. Détartrez pour cette raison régulièrement
votre bouilloire.
Nous vous conseillons d’utiliser Cromargol®. Il est très efficace, sans danger
pour les aliments et neutre en goût et en odeur. Grâce à la formule de soin
spéciale avec 6 additifs protecteurs de haute qualité, Cromargol® n’abîme
pas la matière.
Vous trouverez généralement du Cromargol® là où vous avez trouvé votre
appareil ou chez vos revendeurs spécialisés.
▪ Débrancher l’appareil avant le détartrage et le laisser refroidir.
▪ Verser une demi-portion (50 ml) de Cromargol® dans la coque
chauffante (5) et laisser tremper jusqu’à ce que les dépôts de calcaire
du fond soient partis. Remplir ensuite la coque chauffante (5) jusqu’au-
dessus de la limite du calcaire sur les parois avec de l’eau froide et
laisser reposer durant 15 minutes.
▪ Vider l’appareil ensuite et le rincer soigneusement avec de l’eau potable
froide.
▪ Doser et utiliser d’autres agents détartrants en suivant les instructions des
fabricants.

20
Ne pas chauffer la solution durant le processus de détartrage.
Attention, aucun droit à garantie n’est engagé pour des dommages dus
au non-respect des prescriptions du détartrage.
Cet appareil est conforme auxdirectives européennes 2006/95/CE,
2004/108/CE et 2009/125/CE.
Quand il n‘est plus utilisable (fin de vie),vous ne devez pas jeter ce
produit avecles ordures ménagères mais le remettreau point de recyclage
des appareilsélectriques et électroniques le plus proche (oudéchetterie).
Si vous avez besoin de détailssupplémentaires, vous pouvez également
vousadresser à la mairie de votre commune.
Sous réserve de changements techniques.
Table of contents
Languages:
Other WMF Egg Cooker manuals
Popular Egg Cooker manuals by other brands

Cuisinart
Cuisinart Egg Central CEC-10 Instruction/recipe booklet

Antunes
Antunes Egg Station ES-600 owner's manual

Silvercrest
Silvercrest SED 400 A1 operating instructions

Silvercrest
Silvercrest SEKH 400 A1 Operating instructions and safety instructions

Maxi-matic
Maxi-matic Elite Cuisine EGC-007 instruction manual

Silvercrest
Silvercrest 86121 operating instructions