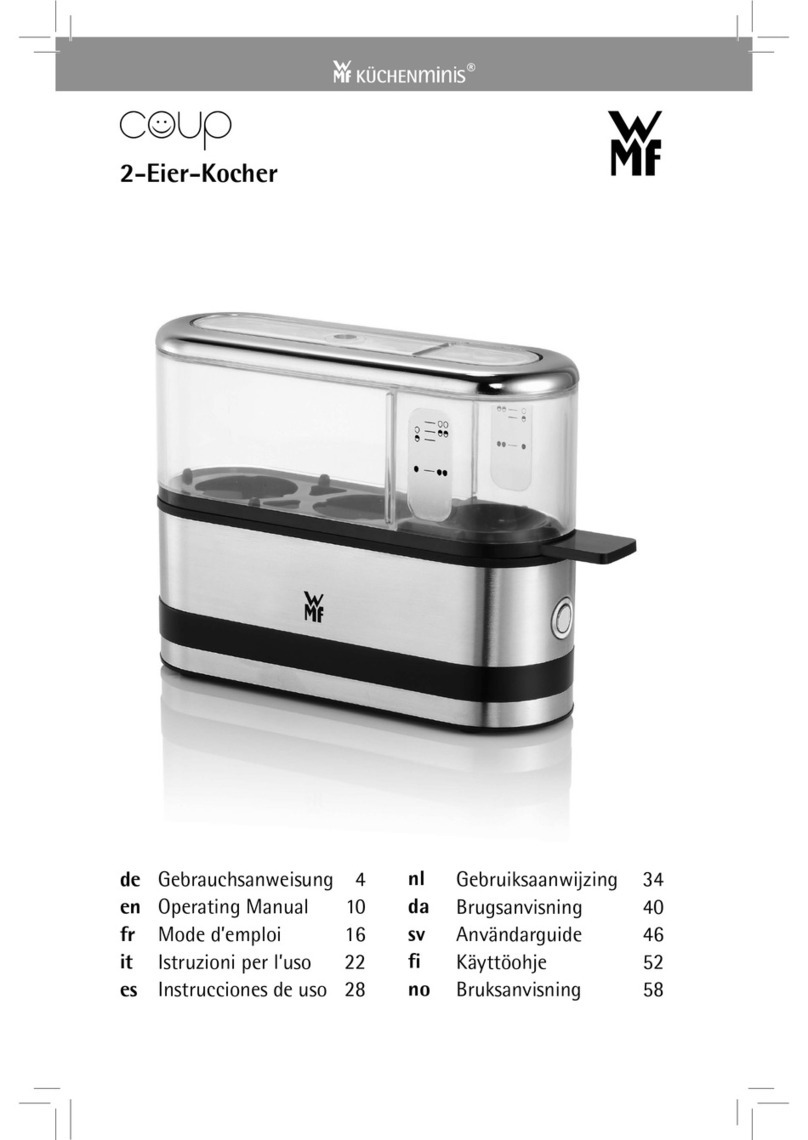
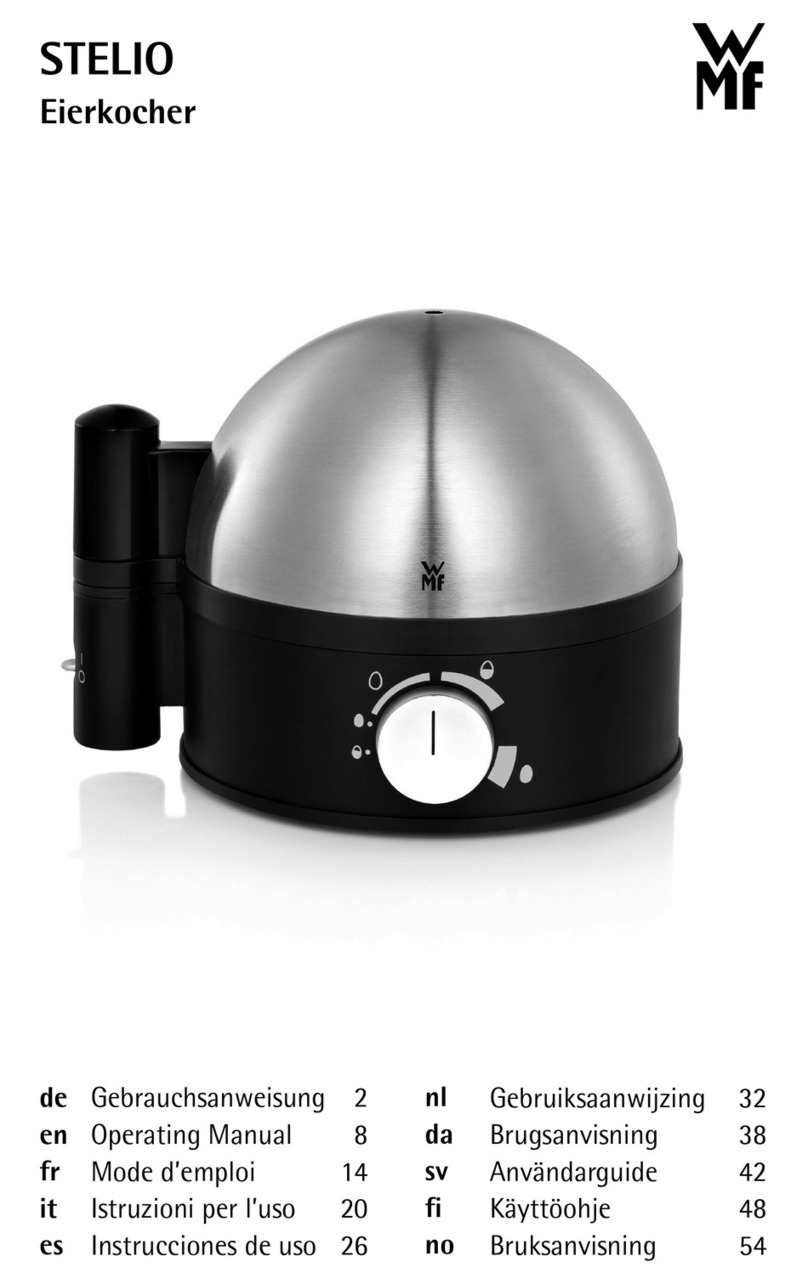
WMF STELIO User manual

Gebrauchsanweisung
Operating Manual
Mode d’emploi
Istruzioni per l’uso
Instrucciones de uso
Gebruiksaanwijzing
Brugsanvisning
Användarguide
Käyttöohje
Bruksanvisning
Eierkocher
STELIO

2
Vor dem Benutzen
Die Gebrauchsanweisung aufmerksam lesen. Sie enthält wichtige Hin-
weise für den Gebrauch, die Sicherheit und die Wartung des Gerätes.
Sie soll sorgfältig aufbewahrt und gegebenenfalls an Nachbenutzer
weitergegeben werden.
Das Gerät darf nur für den vorgesehenen Zweck, gemäß dieser
Gebrauchsanweisung, verwendet werden.
Dieses Gerät ist dafür bestimmt, im Haushalt und ähnlichen Anwen-
dungen verwendet zu werden, wie beispielsweise:
⋅in Küchen für Mitarbeiter in Läden, Büros und anderen
gewerblichen Bereichen;
⋅in landwirtschaftlichen Anwesen;
⋅von Kunden in Hotels, Motels und anderen
Wohneinrichtungen;
⋅in Frühstückspensionen.
Das Gerät ist nicht für den rein gewerblichen Gebrauch bestimmt.
Beim Gebrauch die Sicherheitshinweise beachten.
Technische Daten
Nennspannung: 230 V 50 Hz
Leistungsaufnahme: 350 W
Schutzklasse: I
Sicherheitshinweise
▪ Gerät nur an eine vorschriftsmäßig installierte Schutzkontaktsteck-
dose anschließen. Zuleitung und Stecker müssen trocken sein.
▪ Die Anschlussleitung nicht über scharfe Kanten ziehen oder
einklemmen, nicht herunterhängen lassen sowie vor Hitze und
Öl schützen. Sie darf die heiße Heizschale und die Haube nicht
berühren.
▪ Den Netzstecker nicht an der Leitung oder mit nassen Händen aus
der Steckdose ziehen.
▪ Das Gerät nicht auf heiße Oberflächen wie Herdplatten oder Ähn-
liches stellen und nicht in der Nähe offener Flammen betreiben.
▪ Das Gerät nicht auf wasserempfindliche Oberflächen abstellen.
Wasserspritzer könnten diese beschädigen.
▪ Vorsicht, das Gerät wird heiß. Verbrühungsgefahr durch austre-
tenden Dampf. Das Gerät während des Betriebes nicht verrücken
und nicht am Netzkabel ziehen.
▪ Achtung - Vorsicht beim Umgang mit der Eieranstechnadel am
Boden des Messbechers.
Verletzungsgefahr!
▪ Dieses Gerät ist nicht dafür bestimmt, durch Personen (einschließ-
lich Kinder) mit eingeschränkten physischen, sensorischen oder
geistigen Fähigkeiten oder mangels Erfahrung und/oder mangels
Wissen benutzt zu werden, es sei denn, sie werden durch eine für
ihre Sicherheit zuständige Person beaufsichtigt oder erhielten von
ihr Anweisungen, wie das Gerät zu benutzen ist.

3
DEGBFRITESNLDASVFINO
▪ Das Gerät nur unter Aufsicht betreiben.
▪ Achten Sie darauf, dass Kinder keine Gelegenheit erhalten, mit dem
Gerät zu spielen.
▪ Das Gerät nicht in Betrieb nehmen bzw. sofort Netzstecker ziehen,
wenn:
⋅Gerät oder Netzkabel beschädigt ist;
⋅das Gerät undicht ist;
⋅der Verdacht auf einen Defekt nach einem Sturz o. Ä. besteht.
In diesen Fällen das Gerät zur Reparatur geben.
▪ Der Netzstecker ist zu ziehen:
⋅bei Störungen während des Betriebes,
⋅vor jeder Reinigung und Pflege,
⋅nach dem Gebrauch.
▪ Das Gerät regelmäßig entkalken.
▪ Den Eierkocher nicht in Wasser tauchen.
▪ Bei Zweckentfremdung, falscher Bedienung oder nicht fachge-
rechter Reparatur wird keine Haftung für eventuelle Schäden
übernommen.
Ebenso sind Garantieleistungen in solchen Fällen ausgeschlossen.
▪ Das Gerät ist nicht für den gewerblichen Gebrauch bestimmt.
▪ Verpackungsmaterial, wie z. B. Folienbeutel gehören nicht in
Kinderhände.
▪ Wenn die Anschlussleitung dieses Gerätes beschädigt wird, muss sie
durch den zentralen Kundendienst des Herstellers oder eine ähnlich
qualifizierte Person ersetzt werden. Durch unsachgemäße Repara-
turen können erhebliche Gefahren für den Benutzer entstehen.
Inbetriebnahme
Das Kabel bis zur gewünschten Länge abwickeln. Der Eierkocher muss
waagerecht stehen, ansonsten könnte er vorzeitig abschalten und die
Eier wären zu weich.
Den randvoll mit kaltem Wasser gefüllten Messbecher in die Koch-
schale gießen und den Eierträger auf das Gerät setzen.
Anschließend die Haube auf das Gerät aufsetzen. Die Griffe der Haube
und des Eierträgers sollten zur leichteren Handhabung nicht über dem
Bedienpult stehen.
Härtegradeinstellung
Die Einstellung des gewünschten Härtegrades erfolgt am Drehknopf.
Die Skala ist in drei Bereiche unterteilt, die mit unterschiedlichen
Symbolen gekennzeichnet sind:
für weiche
für mittlere
für harte Eier.
Es ist zu beachten, dass immer ein randvoll gefüllter Messbecher
in die Kochschale gegossen wird. Weniger Wasser bringt zu harte
Eier.

4
Eine gewählte Einstellung bringt stets die gleiche Kochzeit.
Die Kochzeit ist im Vergleich zum herkömmlichen Kochen im
Topf etwas länger. Dies ist bedingt durch die wesentlich geringere
Leistungsaufnahme des Eierkochers.
Einstellung innerhalb eines Härtegradbereiches
Innerhalb des gewünschten Härtegradbereiches wird die Einstellung
durch Anzahl und Gewichtsklasse (S, M, L, XL) der Eier bestimmt.
Für ein kleines Ei der Gewichtsklasse S (weniger als 53g) wird die
geringste Einstellung gewählt.
Sieben kleine Eier benötigen etwa die gleiche Einstellung wie ein
großes Ei (XL, mehr als 73g).
Für sieben große Eier der Gewichtsklasse XL muss die höchste Einstel-
lung innerhalb des gewünschten Härtegradbereiches gewählt werden.
Ist der Härtegrad eingestellt, den Eierkocher am Wippschalter einschal-
ten. Die Kontrollleuchte zeigt an, dass der Kochvorgang beginnt. Wenn
der Signalton ertönt, sind die Eier fertig gekocht. Das Gerät ausschal-
ten, die Eier entnehmen und unter kaltem Wasser abschrecken, damit
sie nicht nachgaren.
Beim Abnehmen der Haube: Vorsicht vor dem heißen Dampf. Die
Haube nur am Griff anfassen und zuerst so kippen, dass der Dampf auf
der dem Griff abgewandten Seite entweichen und das Kondenswasser
über dem Gerät abtropfen kann. Da der Härtegrad einer sehr subjek-
tiven Beurteilung unterliegt, könnte es gegebenenfalls erforderlich
sein, von den oben dargestellten Anhaltspunkten abzuweichen.
Eigene Erfahrung mit dem Gerät lässt nach kurzer Zeit das für jeden
Geschmack gewünschte Ergebnis erreichen.
Gleichzeitiges Kochen von Eiern verschiedener Härtegrade
Mit einer Wasserfüllung können weiche, mittlere und harte Eier in
einem Arbeitsgang gekocht werden. Dabei möglichst gleich große Eier
verwenden.
Den Eierkocher wie gewohnt mit Wasser füllen und mit allen Eiern
bestücken. Zuerst den Härtegrad für weiche Eier wie oben beschrieben
nach Größe und Anzahl der Eier einstellen und das Gerät einschalten.
Sobald das Signal ertönt, ausschalten und die gewünschte Anzahl
weich gekochter Eier entnehmen.
Anschließend den Drehknopf auf das Symbol zurückdrehen und
Gerät erneut einschalten. Nach erneutem Signalton Gerät ausschalten
und mittelharte Eier entnehmen.

5
DEGBFRITESNLDASVFINO
Für die übrigen, hart zu kochenden Eier den Drehknopf etwas weiter
auf das Symbol
Für die übrigen, hart zu kochenden Eier den Drehknopf etwas weiter
stellen und Gerät erneut einschalten. Warten, bis
der Summer ertönt.
Werden keine mittleren Eier gewünscht, kann nach der Entnahme der
weichen Eier bei unveränderter Einstellung nochmals gekocht werden,
um harte Eier zu erreichen.
Reinigung und Pflege
Netzstecker ziehen und das Gerät abkühlen lassen. Das Gerät nicht in
Wasser tauchen, sondern miteinem feuchten Tuch, dem etwas Spülmit-
tel beigegeben wird, abwischen und anschließend trockenreiben. Keine
scharfen und scheuernden Reinigungsmittelverwenden.
Die Kochschale besteht aus nichtrostendemEdelstahl. Sollten sich den-
noch Rostflecken zeigen,so sind dies nur auf der Oberfläche festhaf-
tende Ablagerungen. Sie sollten sofort mit einemEdelstahl-Putzmittel
entfernt werden.
Entkalken
Kalkablagerungen führen zu Energieverlusten und beeinträchtigen die
Lebensdauer des Gerätes. Es schaltet vorzeitig ab, wenn die Kalk-
schicht zu stark ist. Sie ist dann nur noch sehr schwer zu entfernen.
Entkalken Sie deshalb regelmäßig. Wir empfehlen die Verwendung von
durgol®universal. Dieses ist hochwirksam und materialschonend.
Sie bekommen es dort, wo das Gerät gekauftwurde, im ausgewählten
Fachhandel oder Sie bestellen direkt bei wmf consumer electric.
Gerät vor der Entkalkung vom Netz trennen undabkühlen lassen. 1 bis
2 Tassen durgol®universal einfüllen und Gerät stehen lassen, bis der
Kalkbelag am Boden entfernt ist. Dann das Gerät bis über den Kalkrand
an der Wandung mit kaltemLeitungswasser auffüllen und 15 Minuten
stehenlassen. Anschließend ausgießen und gründlich mit kaltem Lei-
tungswasser ausspülen. Lösung während der Entkalkung nicht erhitzen.
Achtung, für Schäden, die durch Nichtbeachtung der Entkalkungsvor-
schrift entstehen, besteht kein Garantieanspruch.
Garantie-Information
Für unsere Geräte übernehmen wir gegenüber dem Endkunden eine
24-monatige Haltbarkeitsgarantie. Sie beginnt mit dem Kauf des
Gerätes durch den Endkunden und gilt im Gebiet der Bundesrepublik
Deutschland.
Ansprüche aus dieser Garantie sind unter Vorlage des Kaufbelegs direkt
gegenüber unserem zentralen Kundendienst geltend zu machen.
Von der Garantie ausgeschlossen sind Schäden durch normalen
Verschleiß, unsachgemäßen Gebrauch, Nichteinhal-tung der Entkal-
kungsanweisung sowie unterbliebene Pflege.
Der Endkunde besitzt zusätzlich zu den Ansprüchen aus dieser Garantie
gesetzliche Ansprüche wegen Mängeln des Gerätes gegenüber seinem
direkten Verkäufer/Händler, die durch diese Garantie nicht einge-
schränkt werden.
6
Das Gerät entspricht den Europäischen Richtlinien 2006/95/EG,
2004/108/EG und 2009/125/EG.
Dieses Produkt darf am Ende seiner Lebensdauer nicht über den
normalen Haushaltsabfall entsorgt werden, sondern muss an einem
Sammelpunkt für das Recycling von elektrischen und elektronischen
Geräten abgegeben werden.
Die Werkstoffe sind gemäß ihrer Kennzeichnung wiederverwertbar.
Mit der Wiederverwendung, der stofflichen Verwertung oder anderen
Formen der Verwertung von Altgeräten leisten Sie einen wichtigen
Beitrag zum Schutze unserer Umwelt.
Bitte erfragen Sie bei der Gemeindeverwaltung die zuständige Entsor-
gungsstelle.
Änderungen vorbehalten
Universal-Schnell-Entkalker
durgol® universal
durgol® universal befreit alle Gegenstände im Haushalt schnell und
einfach von Kalk. Seine Formel steht für eine effiziente und gleichzei-
tig materialschonende, lebensmittelsichere und umweltverträgliche
Entkalkung.
durgol® universal ist im ausgewählten Fachhandel oder bei wmf
consumer electric in einer 500 ml-Flasche erhältlich.

7
DEGBFRITESNLDASVFINO

8
Before Using
Read the instructions carefully. They contain important notes for the
use, safety and maintenance of the appliance.
Keep them in a safe place and transfer them to a future user.
Only use the appliance for the purpose mentioned in these instruc-
tions.
This appliance is intended for domestic use and similar applications,
such as:
⋅in staff kitchens in shops, offices and other commercial
establishments;
⋅in agricultural establishments;
⋅by guests in hotels, motels and other accommodation
facilities;
⋅in bed-and-breakfast facilities.
The appliance is not intended for purely commercial use.
Be sure to follow the safety information when using the appliance.
Technical Data
Rated voltage: 230 V 50 Hz
Power consumption: 350 watts
Protection class: I
Safety Advice
▪ Connect the appliance only to a shockproof socket that has been
installed according to regulations. The supply line and power plug
must be dry.
▪ Do not pull the connection cord over sharp edges or jam it, do not
allow it to hang down and protect it from heat and oil. It must not
touch the hot heating bowl and the lid.
▪ Do not pull out the plug by the cord or touch it with wet hands.
▪ Do not place the appliance onto hot surfaces, e.g. hot plate, etc. or
near open flames.
▪ Do not place the appliance onto surfaces sensitive to water. Water
splashes could damage them.
▪ Caution: The appliance will become hot during use. Scalding dan-
ger due to escaping steam! During use do not move the appliance
and do not pull at the cord.
▪ Attention - take care when using the needle at the bottom of the
measuring cup which is intended for piercing the eggs. Danger of
injury!
▪ This appliance is not meant to be used by persons (including child-
ren) with reduced physical, sensorial or mental capacities or in
▪ absence of the necessary experience and/or knowledge - unless
they are supervised by a person responsible for their safety and
from whom they get instructions on how to use the appliance.
▪ Do not operate the appliance unattended.
▪ Keep out of reach from children.

9
DEGBFRITESNLDASVFINO
▪ If the following happens do not use the appliance and unplug it
immediately:
⋅the appliance or the mains cable is damaged
⋅any defect after the appliance has accidently dropped or
something similar is suspected.
In these cases have the appliance repaired.
▪ Disconnect the appliance in these situations:
⋅any malfunction during operation
⋅prior to cleaning and maintenance
⋅after use.
▪ Descale the appliance regularly.
▪ Do not immerse the eggboiler in water.
▪ In the case of misuse, wrong handling or incorrect repair no
liability will be taken for possible damages. Claims under guarantee
are also excluded in such cases.
▪ The appliance is not designed for commercial purposes.
▪ Packaging material like foil bags are not designed for children.
▪ In case the cord of this appliance is damaged, it has to be replaced
by an authorised service agent of the manufacturer or a person
having similar qualifications. Substantial dangers for the user can
appear from inappropriate repairs.
Putting into operation
Unwind the cable up to the desired length. The eggboiler has to be
placed in horizontal position otherwise it might switch off early and
the eggs would be too soft. Fill the measuring cup with cold water up
to the brim and pour it into the heating plate, then put the egg tray
on the appliance. Before placing the eggs, pierce them at the dull side
by means of the egg pierce at the bottom of the cup. This prevents
eggs from bursting. Afterwards put the cover on the appliance. In rder
to have an easier handling, the handle of the cup and of the egg tray
should not be placed over the control panel.
Adjusting the boiling degree
The adjustment of the desired boiling degree is made by rotating the
control knob. The scale is subdivided into 3 areas, which are marked
with different symbols:
for soft boiled
for medium boiled and
for hard boiled eggs
Please note that always a measuring cup filled up to the brim
must be poured in the heating plate. The eggs become too hard
with less water.
With one adjusted boiling degree the boiling period is always the ame.
Due to much less power of the eggboiler compared to a conventional
boiling in a pot, the boiling time is prolonged.

10
Adjusting within the range of a boiling degree
Within the range of the desired boiling degree, the adjustment is
determined by the number and weight category (S, M, L, XL) of the
eggs.
For small eggs having the weight category S (less than 53 g), the
lowest adjustment must be chosen.
Seven small eggs need approximately the same adjustment as one big
egg (XL, more than 73 g).
For seven big eggs having weight category XL, the highest adjustment
within the selected range of the cooking degree must be chosen.
Once the boiling degree is adjusted, switch the appliance on by rocker
switch.The control lamp indicates that the boiling procedure begins.
When the buzzer sets in, the eggs are finished. Switch off the appli-
ance, take out the eggs and put them under cold water in order to
avoid fermentation. Caution when taking off the cap: hot steam. Only
touch the cap at the handle and let the condensation
drip by tilting the cap. Since the boiling degree is subject to very
personal judgement, it might be necessary to deviate from above
mentioned criterias. Personal experience with the appliance will lead
very soon to the results desired by your personal taste.
Simultaneous boiling of eggs with different boiling degrees
One water filling is enough to boil soft, medium and hard eggs in one
operation. In order to do so use eggs of the same size, if possible. Fill
the eggboiler, as usual, with water and place the eggs in it.
Adjust the boiling degree for soft eggs first, as described above,
according to weight category and number of eggs and switch on the
appliance. As soon as the buzzer sets in, switch off the appliance and
take out the desired number of soft boiled eggs.
Afterwards turn back the control knob to and switch on the
appliance again. When the buzzer sets in again, switch off the appli-
ance and take out the medium boiled eggs.
For the remaining eggs to be boiled hard, turn the control knob to the
symbol
For the remaining eggs to be boiled hard, turn the control knob to the
and switch on the appliance again. Wait until the buzzer
sets in.
In case you do not wish any medium eggs, you can maintain the
adjustment and continue the boiling in order to obtain hardboiled
eggs, after you have taken out the soft eggs.

11
DEGBFRITESNLDASVFINO
Cleaning and service
Pull the plug and cool the appliance. Do not immerse the appliance in
water, but wipe with a damp cloth to which a dishwashing agent has
been added and then wipe dry. Do not use sharp and abrasive cleaning
agents. The cooking tray is made of stainless steel. If rust spots are
seen regardless, these are initially only deposits adhering to the sur-
face. They should be removed immediately with stainless steel cleaner.
Decalcification
Calcium deposits result in energy losses and reduce the service life
of the appliance. It switches off early, if the calcium coating is too
thick. It is then difficult to remove. Decalcify the pot routinely. We
recommend using durgol® universal. It is very effective and gentle to
materials.
You may obtain it where you bought the appliance; directly from a
select dealer or you can order it directly from wmf consumer electric.
Disconnect the appliance from the socket and let cool prior to decalci-
fication. Fill in 1 to 2 cups of durgol® universal and let the appliance
stand until the calcium coating is removed from the bottom. Then fill
the appliance with cold water past the calcium edge and let stand for
15 minutes. Then pour it out and thoroughly rinse with cold water.
Do not heat the solution during decalcification. Caution, warranty
compensation does not exist for damages that occur due to noncom-
pliance.

12
For UK use only
• This product is supplied with a 13 A plug conforming to BS 1363
fitted to the mains lead. If the plug is unsuitable for your socket
outlets or needs to be replaced, please note the following. If the plug
is a non-rewireable one, cut it from the mains lead and immediately
dispose of it. Never insert it into a socket outlet as there is a very
great risk of an electric shock.
• The replacement of the plug at the mains lead has to be done
according to the following instructions:
Warning - This appliance must be earthed!
Important: The wires in this mains lead are coloured in accordance
with the following code:
green/yellow Earth
blue Neutral
brown Live
As the colours of the wires in the mains lead of this appliance may not
correspond with the coloured markings identifying the terminals in
your plug, proceed as follows:
⋅the wire which is coloured green and yellow must be con-
nected to the terminal which is marked with the letter E or by
the earth symbol , or coloured green or green and yellow,
⋅the wire which is coloured blue must be connected to the
terminal which is marked with the letter N or coloured black,
⋅the wire which is coloured brown must be connected to the
terminal which is marked with the letter L or coloured red.
• If a 13 A (BS 1363) plug is used it must be tted with a 3 A fuse
conforming to BS 1362 and be ASTA approved. If any other type of
plug is used, the appliance must be protected by a 5 A fuse either in
the plug or adapter or at the distribution board. If in doubt - consult a
qualified electrician.
• Never use the plug without closing the fuse cover.
The appliance complies with the European directives 2006/95/EC,
2004/108/EC and 2009/125/EC.
At the end of its lifetime this product must not be disposed of through
the normal domestic waste, but it should be handed to an assembly
point for the recycling of electrical and electronical appliances. You
can inquire about details at the local administration.
Subject to technical changes.

13
DEGBFRITESNLDASVFINO
Universal fast decalcifier
durgol® universal durgol® universal is a fast decalcifier which frees
all household items of lime quickly and simply. Its formula guarantees
efficient yet gentle, food-safe and environmentally-friendly decalcifi-
cation.
durgol® universal ist available at selected specialized retailers and
from wmf consumer electric in a bottle of 500 ml.

14
Avant utilisation
Lire attentivement le mode d’emploi. Il comprenddes indications
importantes pour l’utilisation, lasécurité et la maintenance de
l’appareil. Il doit êtresoigneusement conservé et remis le cas échéant
àdes utilisateurs ultérieurs.
L’appareil ne doit être utilisé que pour uneutilisation prévue confor-
mément à ce mode d’emploi.
Cet appareil est destiné à des utilisationsdomestiques et comparables
comme par exemple:
⋅dans les cuisines pour les collaborateurs dansles commerces,
les bureaux et d’autresdomaines professionnels;
⋅dans les domaines agricoles;-par les clients des hôtels, motels
et autresservices résidentiels;
⋅dans les gîtes avec petit déjeuner.
L’appareil n’est pas destiné à un usage purementcommercial.
Respecter les consignes de sécurité pourl’utilisation.
Spécifications techniques
Tension nominale: 230 V 50 Hz
Puissance absorbée: 350 W
Classe de protection: I
Indications de sécurité
▪ L’appareil ne doit être raccordé qu’à une prise decourant de sécu-
rité. Câble d’alimentation et prisedoivent être secs.
▪ Ne pas tirer le cordon surarêtes tranchantes, nepas le coincer, ne
pas le laisser pendre. Leprotéger de l’huile et de la chaleur. Il ne
doittoucher ni la plaque de cuisson chaude, ni lecouvercle.
▪ Ne pas brancher la prise ou la débrancher avecles mains mouillées.
▪ Ne pas mettre l’appareil sur des surfaceschaudes p.ex. plaques de
four etc. ou à proximitéde flammes non protegées.
▪ Ne pas poser l’appareil sur des surfacessensibles à l’eau. Les écla-
boussures d’eaupourraient les endommager.
▪ Attention, l’appareil chauffe, danger de brûluresdûes à la vapeur
qui sort. Ne pas déplacerl’appareil lors de l’utilisation et ne pas le
tirer parle cordon.
▪ Attention lors de l’utilisation du pique œufs.Risque de blessures
avec l’aiguille se trouvant àl’extrémité du gobelet.
▪ Cet appareil n’est pas prévu pour être utilisé pardes personnes
(inclus les enfants) ayant desfacultés physiques, sensorielles ou
mentalesréduites ou à défaut un manque d’expérienceet/ou de
connaissance - sauf s’ ils sont surveilléspar une personne respon-
sable de leur sécuritéou s’ils recoivent de celle-ci des instructions
surla manière d’ utiliser l’appareil.
▪ Ne jamais utiliser l’appareil sans surveillance.
▪ Bien veiller à ce que les enfants ne jouent pasavec cet appareil.
▪ Ne pas mettre l’appareil en marche ou ledébrancher si:
⋅l’appareil ou le câble est défectueux
⋅l’appareil a reçu un choc violent.

15
DEGBFRITESNLDASVFINO
Dans ces derniers cas, veuillez remettrel’appareil au service de répara-
tion.
▪ La prise doit être débranchée:
⋅lors de perturbations au moment de l’utilisation
⋅avant chaque nettoyage
⋅après utilisation.
▪ Détartrer l’appareil régulièrement.
▪ Ne pas plonger le cuit-œufs dans l’eau.
▪ En cas d’utilisations non conformes ou deréparations effectuées par
une personne nonqualifiée, notre responsabilité ne sera pasengagée
et nous n’assumerons aucundommage. Dans ces cas, la garantie ne
sera pasapplicable.
▪ L’appareil n’est pas conçu pour l’emploiprofessionnel.
▪ Les emballages comme p.ex. les sacs enplastique ne sont pas à
laisser à portée desenfants.
▪ Dans le cas où le cordon de cet appareil estendommagé, seuls le
service après-vente dufournisseur ou une personne compétente
sont àmême de le changer. Des réparations improprespeuvent
causer de graves dangers pourl’utilisateur.
Mise en service
Dérouler le cordon de l’appareil sur la longeursouhaitée. L’appareil doit
être poséhorizontalement sinon il pourrait s´éteindre avantla fin de la
cuisson des œufs.
Remplir le verre doseur d´eau froide jusqu’aubord, verser l´eau sur la
plaque de chauffe etmettre le support oeufs sur l’appareil.
Avant de placer les œufs sur le support, piquerleur côté arrondi avec
l´aiguille se trouvant sur le fond du verre doseur, côté piqué vers le
haut.Ainsi, on évite que les œufs n’ éclatent.
Placer ensuite le couvercle sur l’appareil. Pour unmaniement plus
facile, les poignées du couvercleet du support œufs doivent être
placées sur le côtéde l´appareil.
Réglage du degré de cuisson
Le bouton de réglage permet le choix du degré decuisson souhaité. Au
choix trois degrés de cuissonindiqués par des symboles:
à la coque
mollet et
dur
Le gobelet d’eau doit toujours être rempli à rasbord. Avec moins
d’eau les oeufs sont trop cuits.
Un même règlage a toujours le même temps decuisson.La durée de
cuisson dans la machine est pluslongue qu’une cuisson traditionnelle.
Ceci est dû àla faible puissance utilisée par la machine.

16
Réglage de la cuisson
Le réglage de cuisson est choisi selon le nombreet le poids (S, M, L, XL)
des oeufs.
Pour un oeuf de poids S (moins de 53 g)le réglage le plus bas est choisi.
Pour sept petits oeufs environ, le mêmeréglage que pour un oeuf de
grande taille(XL, plus de 73 g) doit être utilisé.
Pour sept grands oeufs de poids XL, leréglage le plus haut doit être
choisi dansle type de cuisson désirée.
Après avoir choisi le degré de cuisson, mettrel´appareil en marche en
appuyant surl’interrupteur.
Le témoin lumineux indique que l´ébullitioncommence. Quand le
signal sonore se met enmarche, les oeufs sont prêts. Arrêter l’appareil,
enlever les oeufs et les mettre sous l’eau froidepour éviter une
fermentation ultérieure. En ôtant le couvercle, faire attentionà la
vapeurchaude. Ne toucher le couvercle qu’à la poignée etl’incliner
de telle sorte que la vapeur s’échappe parle côté et que la conden-
sation puisse s’égoutter.Comme le degré de cuisson est choisi par
chaquepersonne selon son goût (très subjectivement), ilpourra être
nécessaire de différer des pointsmentionnés ci-dessus. L’utilisation
répétée del’appareil aidera à atteindre le résultat désiré pourson goût
personnel.
Faire cuire des oeufs avec différentsniveaux de cuisson
Avec un seul remplissage d’eau vous pouvezobtenir des degrés de
cuisson différents en uneseule opération. Pour ceci prendre des oeufs
demême taille.
Comme précédemment, mettre tous les oeufsdans l’appareil et remplir
d’eau.
Choisir premièrement le degré decuisson pour des oeufs à la coque
selonle nombre et la quantité comme décrit ci-desus et mettre
l’appareil en marche.Quand vous entendrez le signal sonore,arrêter
l´appareil et enlever le nombred’oeufs à la coque souhaité.
Ensuite, replacer le bouton sur le symbole et remettre l’appareil
enmarche. Quand vous entendrez le signalsonore de nouveau, arrêter
l’appareil etenlever les oeufs mollets.
Pour obtenir les oeufs restants durs,placer le bouton sur le symbole
etremettre l´appareil en marche. Attendreenfin jusqu´à ce que le
signal sonore sedéclenche.

17
DEGBFRITESNLDASVFINO
Si vous ne souhaitez pas d’œufs mollets, vouspouvez placer le bouton
sur la position œufs dursdirectement après enlèvement des oeufs à la
coque.
Nettoyage et soins
Débrancher l‘appareil et laisser refroidir. Ne pasplonger l‘appareil dans
l‘eau, et nettoyer avec unchiffon humide et du détergent; essuyer et
frotterpour sécher.
Ne pas utiliser de détergents agressifs.
Cuve chauffante en acier inoxydable. Cependant sides taches de rouille
devaient se présenter, ellesne seront que sur la couche superficielle.
Leséliminer immédiatement avec un produit denettoyage pour l‘acier
fin.
Détartrage
Des dépôts de calcaire entraînent des pertesénergétiques et portent
atteinte à la durée de viede l‘appareil. L‘arrêt se fait précocement, si
lacouche de calcaire est trop épaisse. Elle devientalors plus difficile à
éliminer. Par conséquent, il estnécessaire de détartrer régulièrement.
Nous recommandons l‘utilisation de durgol® universal. Il s‘agit d‘un
produit efficace etembellissant.
Vous pourrez vous le procurer la où l‘appareil a étéacheté, dans le
commerce spécialisé ou lecommander directement chez wmf consu-
mer electric.
Débrancher l‘appareil et le faire refroidir avant ledétartrage. Remplir
avec 1 à 2 tasses de durgol®express et laisser l‘appareil, jusqu‘à ce
que lacouche calcaire soit éliminée. Ensuite, remplirl‘appareil jusqu‘au
bord du calcaire au niveau de laparoi, avec de l‘eau de robinet froide et
laisserpauser. Ensuite remplir et rincer soigneusementavec de l‘eau de
robinet froide.
Ne pas chauffer la solution pendant le détartrage.
Attention, pour les dommages découlant du nonrespect de la disposi-
tion de détartrage, aucunegarantie n‘est valable.

18
Cet appareil est conforme auxdirectives européennes 2006/95/CE,
2004/108/CE et 2009/125/CE.
Quand il n‘est plus utilisable (fin de vie),vous ne devez pas jeter ce pro-
duit avecles ordures ménagères mais le remettreau point de recyclage
des appareilsélectriques et électroniques le plus proche (oudéchetterie).
Si vous avez besoin de détailssupplémentaires, vous pouvez également
vousadresser à la mairie de votre commune.
Sous réserve de changements techniques.

19
DEGBFRITESNLDASVFINO
Détartrant instantané universel
durgol®universal
durgol®universal détartre rapidementet de manière aisée tous les
objets dansla maison. Sa formule est synonymed’un détartrage
efficace et en mêmetemps hygiénique, écologiqueetprotégeant les
matériaux.
durgol®universal est vendu enbouteilles de 500 ml dans descom-
merces spécialisés sélectionnés etpar wmf consumer electric.

20
Prima dell’uso
Leggere attentamente le istruzioni perchècontengono informazioni
importanti per l’uso, lasicurezza e la manutenzione dell’apparecchio.
Conservare queste istruzioni accuratamente ed,eventualmente, passarle
ad altri utenti.L’apparecchio deve venire usato solo a scopiprevisti da
queste istruzioni.
L’apparecchio è indicato per l’uso domestico e perambiti simili di
impiego, come ad esempio:
⋅nelle cucine per dipendenti di negozi, uffici e dialtri esercizi
professionali;
⋅nelle tenute agricole;
⋅per i clienti di hotel, motel e di altre struttureabitative;
⋅nelle pensioni bed & breakfast.
La macchina non è adatta per l’uso puramenteprofessionale.
Osservare le avvertenze di sicurezza durante l‘uso.
Dati tecnici
Tensione nominale: 230 V 50 Hz
Potenza assorbita: 350 W
Grado di assorbimento: I
Avvertenze di sicurezza
▪ Collegare l‘apparecchio solamente ad una presacon rete di terra
installata secondo le normativedi riferimento. Il cavo di alimentazi-
one e la spinadevono essere asciutti.
▪ Non tirare nè incastrare il cavo elettrico in borditaglienti, non
lasciarlo penzolare e proteggerlo dafonti di calore ed olio. Non deve
toccare lavaschetta di cottura calda nè il coperchio.
▪ Non staccare la spina dalla presa di corrente nècon mani bagnate
nè tirandone il cavo.
▪ Non usare l’apparecchio vicino a piani caldi,come p.e. piastre
elettriche o a fiamme scoperte.
▪ Non appoggiare l’apparecchio su superficisensibili all’acqua poiché
gli spruzzi potrebberorovinarle.
▪ Attenzione, l’apparecchio diventa molto caldo,pericolo di scottarsi
a causa del vapore uscente.Durante l’uso non spostare l’apparecchio
nètirarlo per il cavo elettrico.
▪ Fare attenzione di non ferirsi usando il pungiuovache si trova alla
base del misurino-acqua.
▪ Il dispositivo non è destinato all‘utilizzo da parte dipersone (com-
presi bambini) dalle ridotte capacitàmotorie, sensoriali o psichiche
o prive dellanecessaria esperienza e/o conoscenza, a meno chenon
siano sorvegliate da una persona responsabiledella loro sicurezza o
ricevano da queste istruzionicirca l‘utilizzo del dispositivo stesso.
▪ Usare l’apparecchio sempre sotto sorveglianza.
▪ Prestate la massima attenzione affinchè ibambini non abbiano la
possibilità di giocare coldispositivo.
Other manuals for STELIO
12
Table of contents
Languages:
Other WMF Egg Cooker manuals