WMF LONO User manual

nl
da
sv
fi
no
de
en
fr
it
es
Kontaktgrill
Gebrauchsanweisung 4
Operating Manual 10
Mode d’emploi 16
Istruzioni per l’uso 22
Instrucciones de uso 28
Gebruiksaanwijzing 34
Brugsanvisning 40
Användarguide 46
Käyttöohje 52
Bruksanvisning 58
LONO

1
2
2
A
54
7
3
8
9
6
B
C D
F
E
G H
11

Geräteaufbau
1 Grillplatten
2 Entriegelungstaste
3 Grillplattenhalterung
4 Ein-/Ausknopf mit Kontrollleuchte
5 Temperaturregler
6 Standfuß für Tischgrillfunktion
7 Auffangschale
8 Kabelaufwicklung
9 Steckerdepot
10 Gerätebasis
11 Entriegelungstaste für Tischgrillfunktion
Appliance assembly
1 Grill plates
2 Release button for removing the grill plates
3 Grill plate holder
4 On / off switch with indicator light
5 Temperature controller
6 Stand for table grill function
7 Drip tray
8 Cord winder
9 Plug storage panel
10 Base of the appliance
11 Release button for the table grill function
Composition de l’appareil
1 Plateaux de barbecue
2 Touche de déverrouillage pour retirer les plateaux de barbecue
3 Supports pour plateaux de barbecue
4 Interrupteur marche/arrêt avec témoin
5 Régulateur de température
6 Pied d‘appui pour la fonction plancha
7 Récipient collecteur
8 Enrouleur de câble
9 Dépôt pour la fiche
10 Base de l‘appareil
11 Touche de déverrouillage pour la fonction plancha
Componenti
1 Piastre grill
2 Tasto di sbloccaggio per l‘estrazione delle piastre grill
3 Supporto delle piastre grill
4 Interruttore con spia on/off
5 Manopola di regolazione della temperatura
6 Piedino di supporto per la funzione grill da tavolo
7 Recipiente di raccolta
8 Cavo di avvolgimento
9 Vano della spina
10 Base dell‘apparecchio
11 Tasto di sbloccaggio per la funzione grill da tavolo
Ensamblaje del aparato
1 Parrillas
2 Tecla de desbloqueo para quitar las parrillas
3 Soporte para parrillas
4 Tecla de encendido/ apagado con luz de control
5 Regulador de temperatura
6 Pie para función de barbacoa de mesa
7 Bandeja receptora
8 Bobinado de cable
9 Conector
10 Base del aparato
11 Tecla de bloqueo para función de barbacoa de mesa
Samenstelling van het apparaat
1 Grillplaten
2 Ontgrendelingsknop voor het uitnemen van de grillplaten
3 Houder - Grillplaten
4 Aan/uitschakelaar met controlelampje
5 Temperatuurregelaar
6 Pootjes voor de tafelgrillfunctie
7 Opvangschaal
8 Kabelvak
9 Stekkerdepot
10 Onderkant van het apparaat
11 Ontgrendelingsknop voor de tafelgrillfunctie
Apparatets dele
1 Grillplader
2 Låseknap til grillplader
3 Grillpladeholder
4 Tænd-/slukknap med kontrollampe
5 Temperaturregulator
6 Fod til bordgrillfunktion
7 Drypskål
8 Kabelopvikling
9 Stikrum
10 Apparatets sokkel
11 Låseknap til bordgrillfunktion
Apparatens delar
1 Grillplattor
2 Upplåsningsknapp för grillplatteuttag
3 Grillplattehållare
4 På-/av-brytare med kontrollampa
5 Temperaturreglage
6 Stativ för bordsgrillfunktion
7 Upptagningsbehållare
8 Sladdvinda
9 Plats för stickpropp
10 Underdel
11 Upplåsningsknapp för bordsgrillfunktion
Laitteen osat
1 Parilalevyt
2 Avauspainike parilalevyjen poistamista varten
3 Parilalevypidike
4 Virtakytkin, merkkivalolla
5 Lämpötilansäädin
6 Tuki pöytägrillitoimintoa varten
7 Keräysastia
8 Johdon kelauspidike
9 Pistokkeen säilytyspaikka
10 Laitealusta
11 Avauspainike pöytägrillitoimintoa varten
Utstyr
1 Grillplater
2 Låseknapp for å ta ut grillplatene
3 Holder til grillplater
4 Av/på-bryter med kontrollampe
5 Temperaturbryter
6 Fot til bordgrillfunksjon
7 Oppsamlingsbeholder
8 Kabeloppvikling
9 Depot
10 Fundament
11 Låseknapp for bordgrillfunksjon

4
Gebrauchsanweisung
Wichtige Sicherheitshinweise
▪ Dieses Gerät kann von Kindern ab 8 Jahren sowie von Personen mit
reduzierten physischen, sensorischen oder mentalen Fähigkeiten
oder Mangel an Erfahrung und/oder Wissen benutzt werden, wenn
sie beaufsichtigt oder bezüglich des sicheren Gebrauchs des Gerätes
unterwiesen wurden und die daraus resultierenden Gefahren
verstanden haben.
▪ Kinder dürfen nicht mit dem Gerät spielen.
▪ Reinigung und Benutzerwartung dürfen nicht durch Kinder
durchgeführt werden, es sei denn, sie sind älter als 8 Jahre und
beaufsichtigt.
▪ Kinder jünger als 8 Jahre sind vom Gerät und der Anschlussleitung
fernzuhalten.
▪ Wenn die Anschlussleitung dieses Gerätes beschädigt wird, muss sie
durch den zentralen Kundendienst des Herstellers oder eine ähnlich
qualifizierte Person ersetzt werden, um Gefährdungen zu vermeiden.
Durch unsachgemäße Reparaturen können erhebliche Gefahren für
den Benutzer entstehen.
▪ Das Gerät nur gemäß dieser Anleitung verwenden. Unsachgemäßer
Gebrauch kann einen Stromschlag oder andere Gefahrenmomente zur
Folge haben.
▪ Das Gerät darf nicht über eine externe Zeitschaltuhr oder
Fernbedienung betrieben werden.
▪ Reinigen Sie alle Teile unmittelbar nach der Benutzung und entfernen
Sie eventuell vorhandene Speisereste sofort. Beachten Sie die
Hinweise im Kapitel „Reinigung und Pflege“.
▪ Dieses Gerät ist dafür bestimmt, im Haushalt und ähnlichen
Anwendungen verwendet zu werden, wie beispielsweise:
⋅in Küchen für Mitarbeiter in Läden, Büros und anderen
gewerblichen Bereichen;
⋅in landwirtschaftlichen Anwesen;
⋅von Kunden in Hotels, Motels und anderen Wohneinrichtungen;
⋅in Frühstückspensionen.
▪ Das Gerät ist nur für den Hausgebrauch in Innenräumen bestimmt.

5
de
de
▪ Vorsicht, Verbrennungsgefahr: Die Temperatur der berührbaren
Oberflächen kann sehr heiß werden. Auch nach dem Ausschalten des
Gerätes bleiben diese noch einige Zeit heiß.
Vor dem Benutzen
Das Gerät darf nur für den vorgesehenen Zweck, gemäß dieser Gebrauchsanweisung, verwendet
werden. Lesen Sie die Gebrauchsanweisung deshalb vor der Inbetriebnahme sorgfältig. Sie enthält
wichtige Hinweise für den Gebrauch, die Sicherheit und die Wartung des Gerätes. Bei Nichtbeachtung
übernehmen wir keine Haftung für eventuelle Schäden. Bewahren Sie die Gebrauchsanweisung
sorgfältig auf und geben Sie diese gemeinsam mit dem Gerät an Nachbesitzer weiter. Beachten Sie
auch die Garantiehinweise am Ende. Beim Gebrauch die Sicherheitshinweise beachten.
Technische Daten
Netzspannung: 220-240 V~, 50-60 Hz
Leistungsaufnahme: 1800 – 2100 Watt
Schutzklasse: I
Weitere Sicherheitshinweise
▪ Der Netzstecker ist zu ziehen:
⋅bei Störungen während des Betriebes
⋅vor jeder Reinigung
⋅nach dem Gebrauch.
▪ Gerät nur an eine vorschriftsmäßig installierte Schutzkontaktsteckdose anschließen. Zuleitung und
Stecker müssen trocken sein.
▪ Die Anschlussleitung darf heiße Geräteteile nicht berühren.
▪ Ein Verlängerungskabel nur in einwandfreiem Zustand einsetzen. Auf ausreichende Länge und
sichere Verlegung achten.
▪ Stellen Sie das Gerät auf eine ebene und feste Oberfläche.
▪ Halten Sie rund um das Gerät ausreichend Platz frei.
▪ Das Gerät muss zum Betrieb frei auf dem Tisch oder der Arbeitsplatte aufgestellt werden,
keinesfalls an der Wand oder in einer Ecke.
▪ Achtung, das Gerät nicht in der Nähe oder unterhalb von brennbaren Gegenständen (z.B. Vorhänge,
Hängeschränke) benutzen und stets beaufsichtigen.
▪ Das Gerät nicht in Betrieb nehmen bzw. sofort Netzstecker ziehen, wenn:
⋅Gerät oder Netzkabel beschädigt ist
⋅der Verdacht auf einen Defekt nach einem Sturz oder Ähnlichem besteht.
In diesen Fällen das Gerät zur Reparatur geben.
▪ Vorsicht, das Gerät wird heiß, Verbrennungsgefahr! Das Gerät nicht im heißen Zustand
transportieren.
▪ Stellen Sie sicher, dass die Auffangschale während des Grillens immer korrekt eingeschoben ist.
▪ Beim Grillen kann Fett spritzen. Deshalb den Tisch oder die Arbeitsplatte entsprechend schützen.
▪ Das Gerät nicht ohne Aufsicht betreiben.
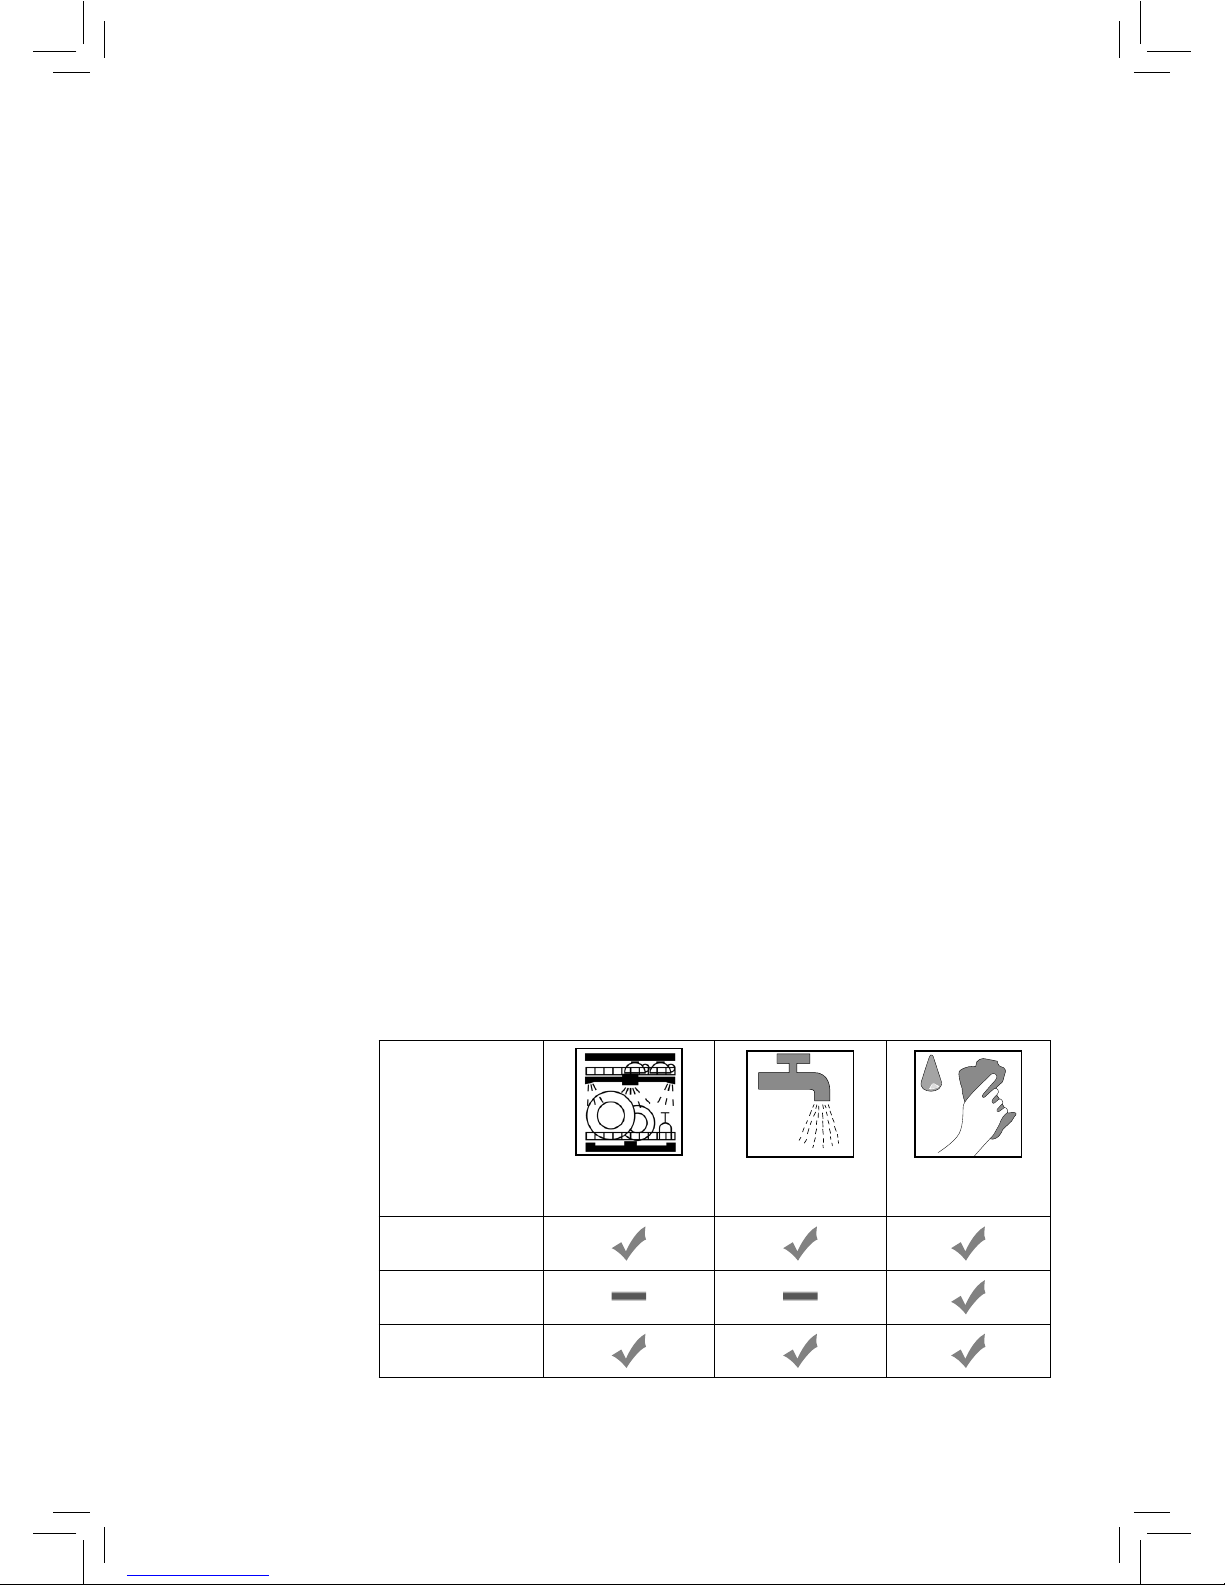
▪ Gerät zum Reinigen nicht in Wasser tauchen.
▪ Lassen Sie das Gerät nicht im halbgeöffneten Zustand stehen, sondern öffnen Sie es nur kurzzeitig
für das Auflegen oder die Entnahme des Grillgutes.
▪ Lassen Sie das Gerät vollständig abkühlen, bevor Sie die Platten entfernen, das Gerät reinigen und
wegstellen.
▪ Stellen Sie sicher, dass Sie die Grillplatten wieder korrekt einsetzen, nachdem Sie sie abgenommen
haben.

6
Verwendung
Mit dem LONO Kontaktgrill können Sie viele schmackhafte Speisen grillen. Er
eignet sich zum Grillen von Lebensmitteln wie z. B. Fleisch, Gemüse oder Fisch,
kann aber auch zur Zubereitung von Panini und Sandwiches verwendet werden.
Aufgeklappt eignet sich der Kontaktgrill auch perfekt als Tischgrill. Das Gerät ist
nicht für den halbgeöffneten Gebrauch (die oberer Grillplatte befindet sich in
vertikaler Position) geeignet. Des Weiteren müssen beide Grillplatten eingesetzt
sein, um den Kontaktgrill zu verwenden.
Aufstellen
▪ Entfernen Sie alle Verpackungsteile vom Gerät.
▪ Reinigen Sie die Oberflächen des Gerätes mit einem feuchten Tuch.
▪ Reinigen Sie die Grillplatten (1) vor dem ersten Gebrauch gründlich (siehe
Kapitel “Reinigung und Pflege”).
▪ Gerät in der Nähe einer Steckdose auf eine stabile und ebene Fläche stellen.
Grillplatten
Die Temperatur der Grillplatten (1) ist stufenlos regelbar. So können Sie
verschiedene Lebensmittel zubereiten oder fertige Speisen auf dem Grill
warmhalten.
Einsetzen
Öffnen Sie den Kontaktgrill um 180° (Abb. B), indem Sie die Entriegelungstaste
(11) drücken und gleichzeitig die obere Grillplatte bis zum Anschlag drehen.
Klappen Sie den Standfuss (6) nach unten (Abb. B). Legen Sie beide Grillplatten (1)
in einem Winkel von ca. 45° in die Grillplattenhalterungen (3) (Abb. D). Drücken
Sie anschließend die Grillplatten (1) auf Höhe der Entriegelungstasten (2) nach
unten, die Grillplatten (1) rasten hörbar ein.
Hinweis: Es müssen beide Grillplatten (1) eingesetzt sein, andernfalls funktioniert
der Kontaktgrill nicht korrekt.
Abnehmen
Lassen Sie das Gerät vollständig abkühlen. Öffnen Sie den Kontatktgrill um 180°
(Abb. B), indem Sie die Entriegelungstaste (11) drücken und gleichzeitig die obere
Grillplatte bis zum Anschlag drehen. Klappen Sie den Standfuss (6) nach unten
(Abb. B). Drücken Sie die Entriegelungstasten (2) der Grillplatten (1). Nehmen Sie
die Grillplatten (1) nach oben in einem Winkel von ca. 45° ab. (Abb. E).
Antihaftbeschichtung
Die kratzempfindliche Antihaftbeschichtung keinesfalls mit scharfen oder spitzen
Gegenständen bearbeiten. Verwenden Sie Grillbesteck aus Holz oder Kunststoff.
Bei der ersten Inbetriebnahme des neuen Gerätes kann es zu einer geringen
Geruchs- und Rauchentwicklung kommen. Dies ist technisch bedingt und kein
Grund zur Beunruhigung.
Achtung: Nach dem Gebrauch das Gerät am Ein-/Ausschalter (4) ausschalten und
den Netzstecker ziehen.

7
de
Inbetriebnahme
Kontaktgrillfunktion
Die Kontaktgrill-Position eignet sich für beidseitiges Grillen bei hoher
Temperatur wie beispielsweise für Steaks und Burger-Patties sowie für das
Zubereiten von Panini.
▪ Schieben Sie die Auffangschale (7) in die Gerätebasis (10) (Abb. F). In der
Auffangschale (7) sammeln sich abtropfendes Fett und Bratensaft.
▪ Öffnen Sie den Kontaktgrill und setzen Sie beide Grillplatten (1) in das Gerät
ein (Abb. D). Danach schließen Sie das Gerät wieder.
▪ Schließen Sie den Netzstecker an eine Steckdose an und schalten Sie das Gerät
am Ein-/Ausschalter (4) ein, die Kontrollleuchte leuchtet weiß und das Gerät
heizt auf.
▪ Lassen Sie das Gerät für ca. fünf Minuten auf der gewünschten Stufe im
geschlossenem Zustand vorheizen (siehe Kapitel „Grillzeiten“).
▪ Öffnen Sie den Kontaktgrill um 90° (Abb. A) bis zum Anschlag.
▪ Legen Sie die Lebensmittel auf die untere Grillplatte und schließen Sie den
Kontaktgrill wieder, sodass die obere Grillplatte auf dem Grillgut aufliegt.
Heben Sie dazu die obere Grillplatte bis zur benötigten Höhe an.
Tischgrillfunktion
Die Tischgrill-Position eignet sich für die Zubereitung von verschiedenem
Gemüse oder auch zum Grillen von Fleisch- oder Fischspießen.
▪ Schieben Sie die Auffangschale (7) in die Gerätebasis (10) (Abb. F).
▪ Öffnen Sie den Kontaktgrill um 180° (Abb. B), indem Sie die Entriegelungstaste
(11) drücken und gleichzeitig die obere Grillplatte bis zum Anschlag drehen.
Klappen Sie den Standfuss (6) nach unten (Abb. B). Setzen Sie beide
Grillplatten (1) in das Gerät ein (Abb. D).
▪ Schließen Sie den Netzstecker an eine Steckdose an und schalten Sie das Gerät
am Ein-/Ausschalter (4) ein, die Kontrollleuchte leuchtet weiß und das Gerät
heizt auf.
▪ Lassen Sie das Gerät für ca. fünf Minuten auf der gewünschten Stufe
vorheizen (siehe Kapitel „Grillzeiten“).
▪ Legen Sie die zu grillenden Lebensmittel gleichmäßig auf einen der beiden
Grillplatten auf.
Grillzeiten
Die Dicke des Grillguts sollte 5 cm nicht überschreiten, Fleisch sollte in maximal
3,5 cm dicke Scheiben geteilt werden. Fleisch vor dem Grillen würzen, jedoch erst
danach salzen, so verliert es weniger Saft. Würstchen vor dem Grillen anstechen,
um Fettspritzer zu vermeiden. Die Garzeit richtet sich nach Art und Dicke des
Grillgutes. Fleisch oder andere Speisen niemals auf der Grillplatte schneiden.
Grillzeiten und Temperatureinstellungen sind vom jeweiligen Grillgut und dem
eigenen Geschmack abhängig, die folgenden Werte sind daher nur Richtwerte.
Hinweis: Die angegebenen Zeiten beziehen sich auf die reine Grill-/Garzeit ohne
Aufheizzeit.

8
Grillzeit
Kontaktgrill
(Minuten)
Grillzeit
Tischgrill
(Minuten)
Grillstufe
Rindersteak 8 - 10 4-5
Schweineschnitzel 6 - 8 4 - 5
Hacksteak 6 - 8 4 - 5
Schweinekotelett 8 - 10 4-5
Lammkotelett 8 - 10 4-5
Hähnchenschnitzel 4 - 6 4 - 5
Fischfilet 4 - 6 3 - 5
Gemüse 4 - 5 5
Panini 3 - 5 3 - 5
Sandwiches 3 - 5 3 - 5
Hot Dogs 3 - 5 3 - 5
warmhalten 1 - 3
Rezepte
Italienisches Panini (4 Portionen) – für Italien-Fans
100 g Rucola
4 Tomaten
2 Pkg Mozzarella
4 Ciabatta
4 EL grünes Pesto
100 g Parmaschinken in Scheiben
1) WMF LONO Kontaktgrill auf Stufe 4 vorheizen. Rucola putzen, waschen und
trocknen. Tomaten waschen und in Scheiben schneiden. Den Mozzarella in
Scheiben schneiden
2) Ciabatta längs aufschneiden. Jeweils eine Hälfte mit grünem Pesto bestreichen
und mit Rucola, Parmaschinken, Mozzarella und Tomaten belegen. Andere
Ciabattahälfte darauflegen. Panini im heißen Kontaktgrill 3–5 Minuten auf
Grillstufe 4 grillen.

9
de
Gemüsetürmchen (4 Portionen) – für Veggies
2 Zucchini
4 Tomaten
2 Pkg Feta-Käse
1 Handvoll frisches Basilikum
1 EL Olivenöl
Salz
Pfeffer
1) WMF LONO Kontaktgrill auf Stufe 5 vorheizen. Zucchini und Tomaten
in Scheiben schneiden. Feta-Käse halbieren und in ähnlich große Scheiben
schneiden. Anschließend mit einer Zucchini-Scheibe beginnend Zucchini, Tomate
und Feta-Käse übereinander legen und mit einer Zucchini-Scheibe abschließen.
2) Türmchen mit Olivenöl bestreichen und mit Salz und Pfeffer würzen.
3) Die Gemüsetürmchen im heißen Kontaktgrill auf Stufe 5 für 4-5 Minuten
grillen. Mit Basilikum dekoriert servieren.
Marinierte Lachsfilets (4 Portionen) – für Fisch-Freunde
4 Stücke Lachsfilet
1 Bund Basilikum
1 Bund Petersilie
1 Knoblauchzehe
1 Spritzer Limettensaft
1 EL Olivenöl
Chilisalz
Pfeffer
1) Eine kleine Tasse zur Hälfte mit Olivenöl füllen. Pfeffer, Chilisalz, Basilikum,
Petersilie, Limettensaft und Knoblauch nach Geschmack hinzufügen.
2) Die Marinade mit einem Pinsel auf den Lachsfilets verteilen.
4) Tipp: Für einen intensiveren Geschmack, legen Sie die Lachsfilets in der
Marinade ein und lassen sie abgedeckt im Kühlschrank für circa 2 Stunden ziehen.
5) WMF LONO Kontaktgrill auf Stufe 5 vorheizen und marinierte Lachsfilets für
4-6 Minuten auf Stufe 4 oder 5 grillen.
Burger-Patties (4 Portionen) – für Fleisch-Liebhaber
600 g Rinderhackfleisch (idealerweise mit Fettanteil von ca. 20%)
2 EL Worcestersoße
Salz
Pfeffer
1) Mischen Sie die Worcestersoße in das Hackfleisch und würzen Sie es
anschließend mit Salz und Pfeffer.
Tipp: Da Salz dem Fleisch Wasser entziehen, sollte es frühestens 30 Minuten vor
dem Braten hinzugefügt werden.
2) Formen Sie aus dem Fleischteig gleichmäßig große Patties mit einem
Durchmesser von ca. 10 cm und einer Dicke von ca.1,5 cm.
3) WMF LONO Kontaktgrill auf Stufe 5 vorheizen und die Patties für 4-6 Minuten
grillen.

10
Reinigung und Pflege
▪ Ziehen Sie den Netzstecker und lassen Sie das Gerät abkühlen.
▪ Entfernen Sie Fett- oder sonstige Rückstände auf den Grillplatten (1) mit
einem Küchentuch.
▪ Öffnen Sie den Kontaktgrill um 180° (Abb. B), indem Sie die Entriegelungstaste
(11) drücken und gleichzeitig die obere Grillplatte bis zum Anschlag drehen.
Klappen Sie den Standfuss (6) nach unten (Abb. B).
▪ Drücken Sie die Entriegelungstasten (2) der Grillplatten (1). Nehmen Sie die
Grillplatten (1) nach oben in einem Winkel von ca. 45° ab. (Abb. E)
▪ Reinigen Sie die Grillplatten (1) in lauwarmen Wasser unter Zugabe von
Spülmittel mit einer Spülbürste.
▪ Hinweis: Kein Scheuermittel, Metallschwamm oder Backofenreiniger
verwenden.
▪ Ziehen Sie die Auffangschale (7) aus der Gerätebasis (10) (Abb. F).
▪ Reinigen Sie die Auffangschale (7) in lauwarmen Wasser unter Zugabe von
Spülmittel mit einer Spülbürste.
Hinweis: Kein Scheuermittel, Metallschwamm oder Backofenreiniger
verwenden.
Hinweis: Zur leichteren Reinigung können Sie die Grillplatten (1) und die
Auffangschale (7) in die Spülmaschine geben. Um allerdings die Lebensdauer
der Grillplatten zu erhöhen, bzw. für eine schonenden Umgang mit der
Beschichtung, empfehlen wir die Grillplatten mit der Hand zu spülen.
▪ Die Gerätebasis (10) nie in Wasser tauchen oder mit Wasser behandeln. Nur
mit einem feuchten Tuch und etwas Spülmittel abwischen und trockenreiben.
Achtung: Die elektrischen Kontakte an den Grillplatten (1) und der Gerätebasis
(10) müssen vollkommen trocken sein, bevor das Gerät wieder zusammen
gebaut wird.
▪ Setzen Sie das Gerät, nachdem es vollständig getrocknet ist, zur
Aufbewahrung wieder zusammen. Zur platzsparenden Aufbewahrung kann das
Kabel an der Unterseite (8) aufgewickelt werden (Abb. G) und anschließend
im Steckerdepot (9) fixiert werden (Abb. H). Bewahren Sie das Gerät in einer
ebenen und trockenen Umgebung auf.
spülmaschinen-
geeignet
unter fließendem
Wasser abspülbar
feucht
abwischen
Grillplatten (1)
Gehäuse
Auffangschale (7)

11
de
Das Gerät entspricht den Europäischen Richtlinien 2014/35/EG, 2014/30/EG und
2009/125/EG.
Dieses Produkt darf am Ende seiner Lebensdauer nicht über den normalen
Haushaltsabfall entsorgt werden, sondern muss an einem Sammelpunkt für das
Recycling von elektrischen und elektronischen Geräten abgegeben werden.
Die Werkstoffe sind gemäß ihrer Kennzeichnung wiederverwertbar. Mit der
Wiederverwendung, der stofflichen Verwertung oder anderen Formen der
Verwertung von Altgeräten leisten Sie einen wichtigen Beitrag zum Schutze
unserer Umwelt.
Bitte erfragen Sie bei der Gemeindeverwaltung die zuständige Entsorgungsstelle.
Änderungen vorbehalten

10
Operating Manual
Important safety information
▪ This appliance can be used by children older than eight years of age as
well as by people with limited physical, sensory or mental capabilities
and persons lacking experience and/or lacking knowledge, if they are
supervised or have received instructions on how to use the appliance
safely and have understood the resulting risks.
▪ Children must not play with the appliance.
▪ Children must not clean or maintain the appliance unless they are
older than eight years of age and are supervised.
▪ Keep the appliance and its connection cable out of reach of children
under eight years of age.
▪ If the appliance’s connection cable is damaged, it must be replaced
by the manufacturer’s central customer service department or by a
similarly qualified person in order to avoid hazards. Improper repairs
may result in a serious risk to users.
▪ Always use the appliance in accordance with these instructions.
Improper use can result in electric shocks and other hazards.
▪ The appliance must not be operated via an external timer or remote
control.
▪ Clean all parts immediately after use and remove any food residue
straight away. Follow the instructions in the “Cleaning and care”
section.
▪ This appliance is designed for use in households and similar
environments such as:
⋅Staff kitchen areas in shops, offices and other working
environments;
⋅Farm houses;
⋅By guests at hotels, motels or other residential facilities;
⋅Bed-and-breakfast establishments.
▪ The appliance is designed for indoor household use only.
▪ Caution! Risk of burns! The temperature of accessible surfaces can
become very hot. They also remain hot for some time after the
appliance has been switched off.

11
en
en
Before use
The appliance may only be used for the intended purpose according to these instructions for use.
Therefore, carefully read the instructions for use before operating the appliance. They contain
important information about the use, safety and care of the appliance. We accept no liability for any
damage caused if the instructions in this manual are not followed. Keep the instructions for use in a
safe place and pass them on to any subsequent owner together with the appliance. Please also note
the warranty information at the end. Observe the safety information when using the appliance.
Technical data
Mains voltage: 220 – 240 V~, 50 – 60 Hz
Power consumption: 1,800 – 2,400 watts
Protection class: I
Additional safety information
▪ Pull the mains plug:
⋅if malfunctions occur during use
⋅before cleaning
⋅after use.
▪ Only connect the appliance to earthed wall sockets that have been installed pursuant to
regulations. The supply cable and plug must be dry.
▪ The connection cable must not come into contact with hot appliance parts.
▪ Only use an extension cable that is in perfect condition. Make sure you use enough cable and that
it is safely routed.
▪ Place the appliance on a flat, solid surface.
▪ Make sure sufficient space is left around the appliance.
▪ To operate the appliance, it must be positioned unobstructed on a table or work surface and not up
against a wall or in a corner.
▪ Attention! Do not use the appliance near or under flammable objects (e.g. curtains, wall cupboards)
and always supervise.
▪ Stop using the appliance and/or pull the mains plug out of the socket immediately if:
⋅The appliance or power cord is damaged.
⋅You suspect that there is a defect after the appliance has fallen or following a similar incident.
In such cases, arrange for the appliance to be repaired.
▪ Caution! The appliance gets hot! Risk of burns! Do not transport the appliance when it is hot.
▪ Make sure that the drip tray is always correctly inserted during grilling.
▪ Fat can spray out when grilling, so protect the table or work surface accordingly.
▪ Do not leave the appliance unattended.
▪ Do not immerse the appliance in water to clean it.
▪ Do not leave the appliance half-open; only open it briefly to add or remove food.
▪ Allow the appliance to cool down fully before you remove the plates, clean the appliance and put
it away.
▪ Make sure that the grill plates are always repositioned correctly after they have been removed.

12
Use
You can prepare lots of delicious food on the LONO contact grill. It is ideal for
grilling food such as meat, vegetables and fish, but can also be used to prepare
paninis and sandwiches too. When opened, the contact grill is also perfect for
use as a table grill. The appliance is not suitable for use when half-open (when
the top grill plate is in a vertical position). In addition, both grill plates must be
inserted to use the contact grill.
Installation
▪ Remove all packaging from the appliance.
▪ Clean the surfaces of the appliance with a damp cloth.
▪ Clean the grill plates (1) thoroughly before using them for the first time (see
the section entitled “Cleaning and care”).
▪ Place the appliance on a stable and level surface near a socket.
Grill plates
The temperature of the grill plates (1) is continuously variable. You can use the
grill to prepare a variety of foods or to keep cooked food warm.
Inserting
Open the contact grill so that the plates are at an angle of 180° to one another
(Fig. B). To do this, press the release button (11) and, at the same time, turn the
top grill plate as far as it will go. Fold the stand (6) downwards (Fig. B). Place the
two grill plates (1) into the grill plate holders (3) at an angle of approximately
45° (Fig. D). Then push the grill plates (1) downwards at the height of the release
buttons (2); you will hear the grill plates (1) lock into place.
Note: Both grill plates (1) must be inserted, otherwise the contact grill does not
work properly.
Removing
Allow the appliance to cool down completely. Open the contact grill so that the
plates are at an angle of 180° to one another (Fig. B). To do this, press the release
button (11) and, at the same time, turn the top grill plate as far as it will go. Fold
the stand (6) downwards (Fig. B). Press the release buttons (2) on the grill plates
(1). Lift the grill plates (1) up and off at an angle of approximately 45°. (Fig. E).
Non-stick coating
Never touch the scratch-sensitive non-stick coating with sharp or pointed
objects. Use a barbecue fork and tongs made of wood or synthetic material. There
may be a little smoke and a slight odour the first time you use
your new appliance. This is for technical reasons and is perfectly normal.
Attention: After use, switch the appliance off using the on / off switch (4) and
pull the mains plug out of the socket.

13
en
Before using for the first time
Contact grill function
The contact grill position is perfect for grilling food – such as steaks and
burger patties – on both sides at a high temperature, and for preparing
paninis too.
▪ Insert the drip tray (7) into the base of the appliance (10) (Fig. F). The fat and
meat juice collect in the drip tray (7).
▪ Open the contact grill and insert the two grill plates (1) into the appliance
(Fig. D). Then close the appliance again.
▪ Insert the mains plug into a socket and switch the appliance on using the on /
off switch (4). The indicator light glows white and the appliance heats up.
▪ Leave the closed appliance to heat up to your desired level for approximately
five minutes (see the section entitled “Grilling times”).
▪ Open the contact grill as far as it will go so that the plates are at a 90° angle
(Fig. A).
▪ Place the food on the bottom grill plate and close the contact grill again so
that the top grill plate is resting on the food. To do this, raise the top grill
plate to the required height.
Table grill function
The table grill position is ideal for preparing various vegetables and even for
grilling meat or fish skewers.
▪ Insert the drip tray (7) into the base of the appliance (10) (Fig. F).
▪ Open the contact grill so that the plates are at an angle of 180° to one
another (Fig. B). To do this, press the release button (11) and, at the same time,
turn the top grill plate as far as it will go. Fold the stand (6) downwards (Fig.
B). Insert the two grill plates (1) into the appliance (Fig. D).
▪ Insert the mains plug into a socket and switch the appliance on using the on /
off switch (4). The indicator light glows white and the appliance heats up.
▪ Leave the appliance to heat up to your desired level for approximately five
minutes (see the section entitled “Grilling times”).
▪ Evenly place the food to be grilled on one of the two grill plates.
Grilling times
Food should be no more than 5 cm thick. Meat should be cut into slices no more
than 3.5 cm thick. Season meat before grilling, but add salt after grilling to help
retain the juice. Pierce sausages before you grill them to prevent fat splashes. The
cooking time depends on the type and thickness of the food. Never cut meat or
other foods on the grill plate.
Grilling times and temperature settings depend on the food being grilled and
your own particular taste; the following values are therefore only guide values.
Note: The specified times relate to the pure grilling / cooking times and do not
include the time for pre-heating the grill plates.

14
Grilling time
Contact grill
(minutes)
Grilling time
Table grill
(minutes)
Grilling level
Beef steak 8 - 10 4-5
Pork escalope 6 - 8 4 - 5
Hamburger steak 6 - 8 4 - 5
Pork chop 8 - 10 4-5
Lamb chop 8 - 10 4-5
Chicken escalope 4 - 6 4 - 5
Fish fillet 4 - 6 3 - 5
Vegetables 4 - 5 5
Paninis 3 - 5 3 - 5
Sandwiches 3 - 5 3 - 5
Hot dogs 3 - 5 3 - 5
Keeping warm 1 - 3
Recipes
Italian panini (serves four) – for Italy fans
100 g Rocket
4 Tomatoes
2 pkts. Mozzarella
4 Ciabatta
4 tbsp. Green pesto
100 g Sliced Parma ham
1) Pre-heat the WMF LONO contact grill to level 4. Clean, rinse and dry the
rocket. Wash and slice the tomatoes. Slice the mozzarella
2) Cut the ciabatta lengthways. Spread green pesto on one half and top with
rocket, Parma ham, mozzarella and tomatoes. Place the other half of the ciabatta
on top. Grill the panini in the hot contact grill for three to five minutes at grilling
level 4.
Vegetable towers (serves four) – for veggies
2 Zucchinis
4 Tomatoes
2 pkts. Feta cheese
1 Handful of fresh basil
1 tbsp. Olive oil
Salt
Pepper

15
en
1) Pre-heat the WMF LONO contact grill to level 5. Slice the zucchinis and
tomatoes. Halve the feta cheese and cut into similarly sized slices. Then, starting
with a slice of zucchini, stack the zucchini, tomatoes and feta cheese, finishing
with another slice of zucchini
2) Drizzle the towers with olive oil and season with salt and pepper.
3) Grill the vegetable towers in the hot contact grill at level 5 for four to five
minutes. Serve garnished with basil.
Marinated salmon fillets (serves four) – for fish lovers
4 pieces Salmon fillet
1 bunch Basil
1 bunch Parsley
1 Garlic clove
1 splash of lime juice
1 tbsp. Olive oil
Chilli salt
Pepper
1) Half-fill a small cup with olive oil. Add pepper, chilli salt, basil, parsley, lime
juice and garlic to taste.
2) Spread the marinade over the salmon fillet with a brush.
4) Tip: For a more intense taste. place the salmon fillet in the marinade, cover it
and leave the flavours to infuse for approximately two hours in the fridge.
5) Pre-heat the WMF LONO contact grill to level 5 and grill the marinated salmon
fillets at level 4 or 5 for four to six minutes.
Burger patties (serves four) – for meat lovers
600 g Ground beef (ideally with less than about 20% fat)
2 tbsp. Worcester sauce
Salt
Pepper
1) Mix the Worcester sauce into the mince and then season it with salt and
pepper.
Tip: Because salt dries meat out, it should be added 30 minutes before you are
going to fry the meat at the earliest.
2) Make evenly sized patties approximately 10 cm in diameter and approximately
1.5 cm thick from the mince mixture.
3) Pre-heat the WMF LONO contact grill to level 5 and grill the patties for four to
six minutes.

16
Cleaning and care
▪ Unplug the mains plug and allow the appliance to cool down.
▪ Remove fat or other residue from the grill plates (1) with a piece of kitchen
towel.
▪ Open the contact grill so that the plates are at an angle of 180° to one
another (Fig. B). To do this, press the release button (11) and, at the same time,
turn the top grill plate as far as it will go. Fold the stand (6) downwards (Fig.
B).
▪ Press the release buttons (2) on the grill plates (1). Lift the grill plates (1) up
and off at an angle of approximately 45°. (Fig. E)
▪ Clean the grill plates (1) in lukewarm water using washing-up liquid and a
washing-up brush.
▪ Note: Do not use abrasives, metal scourers or oven cleaner.
▪ Pull the drip tray (7) out of the base of the appliance (10) (Fig. F).
▪ Clean the drip tray (7) in lukewarm water using washing-up liquid and a
washing-up brush.
Note: Do not use abrasives, metal scourers or oven cleaner.
Note: For simpler cleaning, you can also wash the grill plates (1) and the drip
tray (7) in the dishwasher. But we advise washing the grill plates by hand to
increase their service life or to ensure that the coating is handled carefully.
▪ Never immerse the base of the appliance (10) in water or use water to clean it.
Simply put a little washing-up liquid on a damp cloth, wipe the appliance and
then dry it.
Attention: The electric contacts on the grill plates (1) and the base of
appliance (10) must be completely dry before the appliance can be
reassembled.
▪ Once the appliance is completely dry, you can reassemble it for storage. To
save space during storage, the cable can be wound on the underside of the
appliance (8) (Fig. G) and then fixed in the plug storage panel (9) (Fig. H).
Store the appliance on a level and dry surface.
Dishwasher safe Can be rinsed
under running
water
Wipe
with a damp
cloth
Grill plates (1)
Casing
Drip tray (7)

17
en
For UK use only
▪ This product is supplied with a 13 A plug conforming to BS 1363 fitted to the
mains lead. If the plug is unsuitable for your socket outlets or needs to be
replaced, please note the following. If the plug is a non-rewireable one, cut
it from the mains lead and immediately dispose of it. Never insert it into a
socket outlet as there is a very great risk of an electric shock.
▪ The replacement of the plug at the mains lead has to be done according to the
following instructions:
Warning - This appliance must be earthed
Important: The wires in this mains lead are coloured in accordance with the
following code:
green/yellow Earth
blue Neutral
brown Live
As the colours of the wires in the mains lead of this appliance may not
correspond with the coloured markings identifying the terminals in your plug,
proceed as follows:As the colours of the wires in the mains lead of this appliance
may not correspond with the coloured markings identifying the terminals in your
plug, proceed as follows:
⋅the wire which is coloured green and yellow must be connected to the
terminal which is marked with the letter E or by the earth symbol or
coloured green or green and yellow,
⋅the wire which is coloured blue must be connected to the terminal which
is marked the letter N or coloured black,
⋅the wire which is coloured brown must be connected to the terminal
which is marked with the letter L or coloured red.
▪ If a 13 A (BS 1363) plug is used it must be fitted with a 13 A fuse conforming
to BS 1362 and be ASTA approved. If any other type of plug is used, the
appliance must be protected by a 10 A fuse either in the plug or adapter or at
the distribution board.
If in doubt - consult a qualified electrician.
▪ Never use the plug without closing the fuse cover.
The appliance complies with European directives 2014/35/EC, 2014/30/EC and
2009/125/EC.
At the end of its life, this product must not be disposed of in normal household
waste but must instead be delivered to a collection point for recycling electric
and electronic appliances.
The materials are recyclable in accordance with their labelling. The reuse,
recycling or other use of old appliances makes an important contribution to
protecting our environment.
Please ask your local administration for the appropriate disposal point.
Subject to alterations

16
Mode d’emploi
Consignes de sécurité importantes
▪ Les enfants à partir de 8 ans ainsi que les personnes ayant des
capacités physiques, sensorielles ou mentales restreintes ou ayant
un manque d’expérience et/ou de connaissances peuvent utiliser cet
appareil sous surveillance ou s’ils ont été formés pour utiliser cet
appareil en toute sécurité et ont compris les dangers pouvant résulter
de son utilisation.
▪ Ne pas laisser les enfants jouer avec cet appareil.
▪ Ne pas laisser les enfants effectuer le nettoyage et la maintenance
sauf s’ils sont âgés de plus de 8 ans et sous surveillance.
▪ Les enfants de moins de 8 ans doivent être maintenus à l’écart de
l’appareil et de son câble de raccordement.
▪ Si le câble d’alimentation de l’appareil est endommagé, il doit être
remplacé par le SAV du fabricant ou par toute autre personne
qualifiée, afin d’éviter tout danger. Des réparations non conformes
peuvent engendrer de graves dangers pour l’utilisateur.
▪ N’utilisez l’appareil que conformément aux présentes instructions. Une
utilisation non conforme peut entraîner une électrocution ou d’autres
dangers.
▪ L’appareil ne doit pas être mis en service à l’aide d’une minuterie
externe ou d’une commande à distance.
▪ Nettoyez immédiatement toutes les pièces après utilisation et retirez
les restes d’aliments éventuellement présents. Suivez les instructions
du chapitre «Nettoyage et entretien».
▪ L’appareil est conçu pour un usage domestique ou pour des
applications similaires telles que:
⋅dans des cuisines réservées au personnel dans des boutiques, des
bureaux ou d’autres secteurs professionnels;
⋅dans des exploitations agricoles;
⋅par des clients dans des hôtels, des motels et autres établissements
résidentiels;
⋅dans des chambres d’hôtes.
▪ L’appareil est conçu pour un usage purement domestique et en
intérieur.
Other manuals for LONO
21
Table of contents
Languages:
Other WMF Grill manuals
Popular Grill manuals by other brands

TriStar
TriStar BQ-2817 instruction manual

Beef Eater
Beef Eater 77440 Assembly procedures

FLORABEST
FLORABEST FGG 9.7.A1 operating instructions

Proficook
Proficook Gasgrill PC-GG 1180 instruction manual

H.Koenig
H.Koenig ALP1800 Operation manual

Beef Eater
Beef Eater Discovery Series Assembly and operating instructions

Members Mark
Members Mark 720-0778C Assembly & operating manual

Promax
Promax TG1 Installation and operation instructions

Calflame
Calflame BBQ08873P owner's manual

Beef Eater
Beef Eater PLUS Assembly and operating instructions

FCC BBQ
FCC BBQ Signature Combo FCC-G-18045-21 instruction manual

TriStar
TriStar BQ-2816IN instruction manual