manuals.online logo
Brands
  1. Home
  2. •
  3. Brands
  4. •
  5. Wolf
  6. •
  7. Grill
  8. •
  9. Wolf Sub-Zero ICBIG15/S User manual

Wolf Sub-Zero ICBIG15/S User manual

GRILL MODULE
USE & CARE GUIDE
GUÍA DE USO Y MANTENIMIENTO
UTILISATION ET ENTRETIEN
INFORMAZIONI SU USO E MANUTENZIONE
BEDIENUNGS- UND PFLEGEANLEITUNG
3
EN G L I S H
Introducing the Wolf Grill Module 5
Safety Instructions and Precautions 6
Wolf Grill Module Features 8
Wolf Grill Module Use & Care 9
Wolf Service Information 16
E S P Ã N O L
Presentación del módulo de parrilla Wolf 18
Precauciones e instrucciones de seguridad 19
Características del módulo de parrilla Wolf 21
Uso y mantenimiento del módulo de
parrilla Wolf 22
Información de mantenimiento de Wolf 29
F R A N A I S
Présentation du gril Wolf 31
Instructions et mesures de sécurité 32
Caractéristiques du gril Wolf 34
Utilisation et entretien du gril Wolf 35
Service après-vente Wolf 42
I TA L I A N O
Presentazione del modulo grill Wolf 44
Precauzioni e istruzioni di sicurezza 45
Caratteristiche del piano grill Wolf 47
Uso e manutenzione del piano grill Wolf 48
Informazioni sull’assistenza Wolf 55
D E U T S C H
Einführung des Grillmoduls von Wolf 57
Sicherheitshinweise und
Vorsichtsmaßnahmen 58
Leistungsmerkmale des Grillmoduls
von Wolf 60
Bedienungs- und Pflegeanleitung zum
Grillmodul von Wolf 61
Serviceinformationen von Wolf 68
As you read this Use & Care Information,
take particular note of the CAUTION and
WARNING sym ols when they appear.
This information is impor tant for safe and
efficient use of the Wolf equipment.
In addition, this Use & Care Information may
signal an IMPORTANT NOTE which highlights
information that is especially important.
signals a situation where minor injury or
product damage may occur if you do not
follow instructions.
states a hazard that may cause serious
injury or death if precautions are not
followed.
WOLF®is a registered trademark of Wolf Appliance, Inc.
5
I N T R O D U C I N G T H E WOL F G RIL L M O DU LE
TH ANK YO U
Your purchase of a Wolf electric grill module
attests to the importance you place upon the
quality and performance of your cooking
equipment. We understand this importance
and have designed and built your grill module
with quality materials and workmanship to
give you years of dependable service.
We know you are eager to start cooking, but
before you do, please take some time to read
this Use & Care Information. Whether you are
a beginning cook or an expert chef, it will be
to your benefit to familiarize yourself with the
safety practices, features, operation and care
recommendations of the Wolf electric grill
module.
If service is necessary, refer to the model and
serial number of the grill module. Both
numbers are listed on the product rating plate
located on the underside of the module. Refer
to the illustration below.
IMPORTANT NOTE:
Installation and service
must be performed by a qualified installer or
service agency.
IMPORTANT NOTE:
A ventilation hood is
recommended (but not required) for use with
the Wolf electric grill module.
IMPORTANT NOTE:
To avoid electrical shock
when disconnecting the grill module, all
poles/wires must be disconnected from the
power supply box.
IMPORTANT NOTE:
The complete appliance
must be properly grounded at all times when
electrical power is applied.
CO N TA C T
I N F O R M AT I O N
We site:
wolfappliance.com
Rating plate location
Location of rating
plate under module
IMPORTANT NOTE:
This appliance can be used by
children aged from 8 years and
above and persons with reduced
physical, sensory or mental capabili-
ties or lack of experience and knowl-
edge if they have been given super-
vision or instruction concerning use
of the appliance in a safe way and
understand the hazards involved.
Children shall not play with the
appliance. Cleaning and user mainte-
nance shall not be made by children
without supervision.
6
W H AT TO DO
IMPORTANT NOTE: Read all
instructions efore using this
appliance.
Read this Use & Care Information
carefully efore using your new grill
module to reduce the risk of fire,
electric shock or injury to persons.
Make certain your unit is properly
installed and grounded y qualified
personnel.
Use sturdy, properly insulated
gloves or pot holders. Dish towels
or other substitutes can become
entangled, causing burns. Keep pot
holders dry. Wet pot holders create
steam and cause burns. Keep pot
holders away from open flames
when lifting or moving utensils.
Always properly clean and maintain
the appliance as recommended in
the Use & Care Information.
S A F E T Y I N S T R U C T I O N S A N D P R E C A U T I O N S
The appliance and its accessi le
parts ecome hot during use.
Care should e taken to avoid
touching heating elements.
Children less than 8 years of age
shall e kept away unless contin-
uously supervised.
Unattended cooking on a ho
with fat or oil can e dangerous
and may result in fire.
Never try to extinguish a fire
with water, ut switch off the
appliance and then cover flame
e.g. with a lid or a fire lanket.
Danger of fire: do not store items
on the cooking surfaces.
To eliminate the risk of urns or
fire when reaching over heated
surface units, ca inet storage
space located a ove the surface
units should e avoided. If
ca inet storage is to e provided,
the risk can e reduced y
installing a ventilation hood that
projects horizontally a minimum
of 127 mm eyond the ottom
ca inets.
7
W H AT NOT TO D O
When using the grill module, do not
touch the grill or immediate
surrounding areas. These surfaces
become extremely hot and could
cause burns. Be certain that all
controls are turned off by touching
the touch pad and that the
unit has cooled before touching or
cleaning any surfaces.
Do not use water on grease fires.
Smother fire or flame or use dry
chemical or foam-type extinguisher.
Clothing fires are potential hazards.
Do not wear long flowing sleeves
around the grill module. They are
easily caught on pan handles or
ignited by flare-ups. Highly flamma-
ble clothing, especially synthetic
fabrics, should not be worn while
cooking.
Do not use a steam cleaner on this
appliance.
Do not repair or replace any part
of the grill module unless specifi-
cally recommended in literature
accompanying this appliance. All
service is to be referred to a Wolf
authorized service center.
Do not line the drip pan or radiator
plates or cover the entire grate with
aluminum foil. Small foods, such as
vegetables, can be wrapped and
cooked in aluminum foil packets.
Do not use the grill module for
warming a room.
This appliance is for household use
only and must not be put to any
other use.
Do not heat unopened glass or
metal containers of food on the grill.
Pressure may build up and cause the
container to burst, resulting in
serious personal harm or damage to
the grill.
Flavor enhancers, such as charcoal
riquettes or wood chips, are not to
e used with this appliance.
8
W O L F GR ILL MO DUL E F E AT U R E S
GR ILL MO DUL E F E AT U R E S
Integrated design allows for use with
multiple modules or cooktop units
Stainless steel top construction with classic
stainless steel finish
Two 1400-watt individually controlled
heating elements—front and back—for
even grilling
Illuminated electronic touch controls with
graduated-control lighting
Low-profile, one-piece cast iron grilling
grate with matte porcelain finish
M O D E L I C B I G 1 5 / S
Electric Grill Module
Two 1400-watt
heating elements
Cast iron grilling grate
Illuminated electronic
touch controls
Removable grease
collection pan
Black porcelain-coated grease deflection
plates
Easy-to-clean, removable porcelain-coated
grease collection pan
Independent digital timer
Child safety lock mode
Classic stainless
steel finish Graduated-control
lighting
This appliance is certified y Star-K
to meet strict religious regulations in
conjunction with specific instructions
found on www.star-k.org.
Model ICBIG15/S
9
W O L F GR ILL MO DUL E U S E & C A R E
Grease deflection
plates
Grease collection pan
Electric element
Outer grill pan
Grill module assem ly
GR ILL MO DUL E A S S E M B LY
For proper operation, the electric grill module
must be assembled in the correct alignment.
Refer to the illustration below.
Insert the grease collection pan into the
stainless steel outer grill pan with the hole
for the receptacle facing toward the front of
the module.
Insert the two grease deflection plates into
the grease collection pan, with the handles
running front to back.
Plug the electric element into the receptacle
in the front of the module. Be sure the
element is plugged into the receptacle
completely.
Position the grilling grate with feet seated
into the dimples on the stainless steel outer
grill pan. The slots of the grate run front to
back.
A C C E S S O R I E S
Optional
accessories are
availa le through
your Wolf dealer.
Grilling grate
10
W O L F GR ILL MO DUL E U S E & C A R E
GR ILL MO DUL E O P E R AT I O N
B E F O R E U S I N G F O R T H E F I R S T T I M E
Wash the grilling grate, grease deflection
plates and grease collection pan in warm
soapy water. This removes any residual oil and
grease left on the surface from the manufac-
turing process. The electric grill module must
be reassembled in the correct alignment as
shown on page 9.
Refer to Care Recommendations on page 15.
Apply a stainless steel polish to protect the
finish and add luster.
Allow a burn-in period of approximately 10
minutes before use. During the initial period of
use, you may smell a light burning odor or see
light smoke. Both these conditions are normal
with a new grill module.
CO NTRO L O P E R AT I O N
The Wolf electric grill module operates by
automatically cycling the heating elements
between zero power and full power. As the
heat is increased on the control panel, the
element will stay at full power for longer
periods and have shorter periods of zero
power.
MODES O F O P E R AT I O N
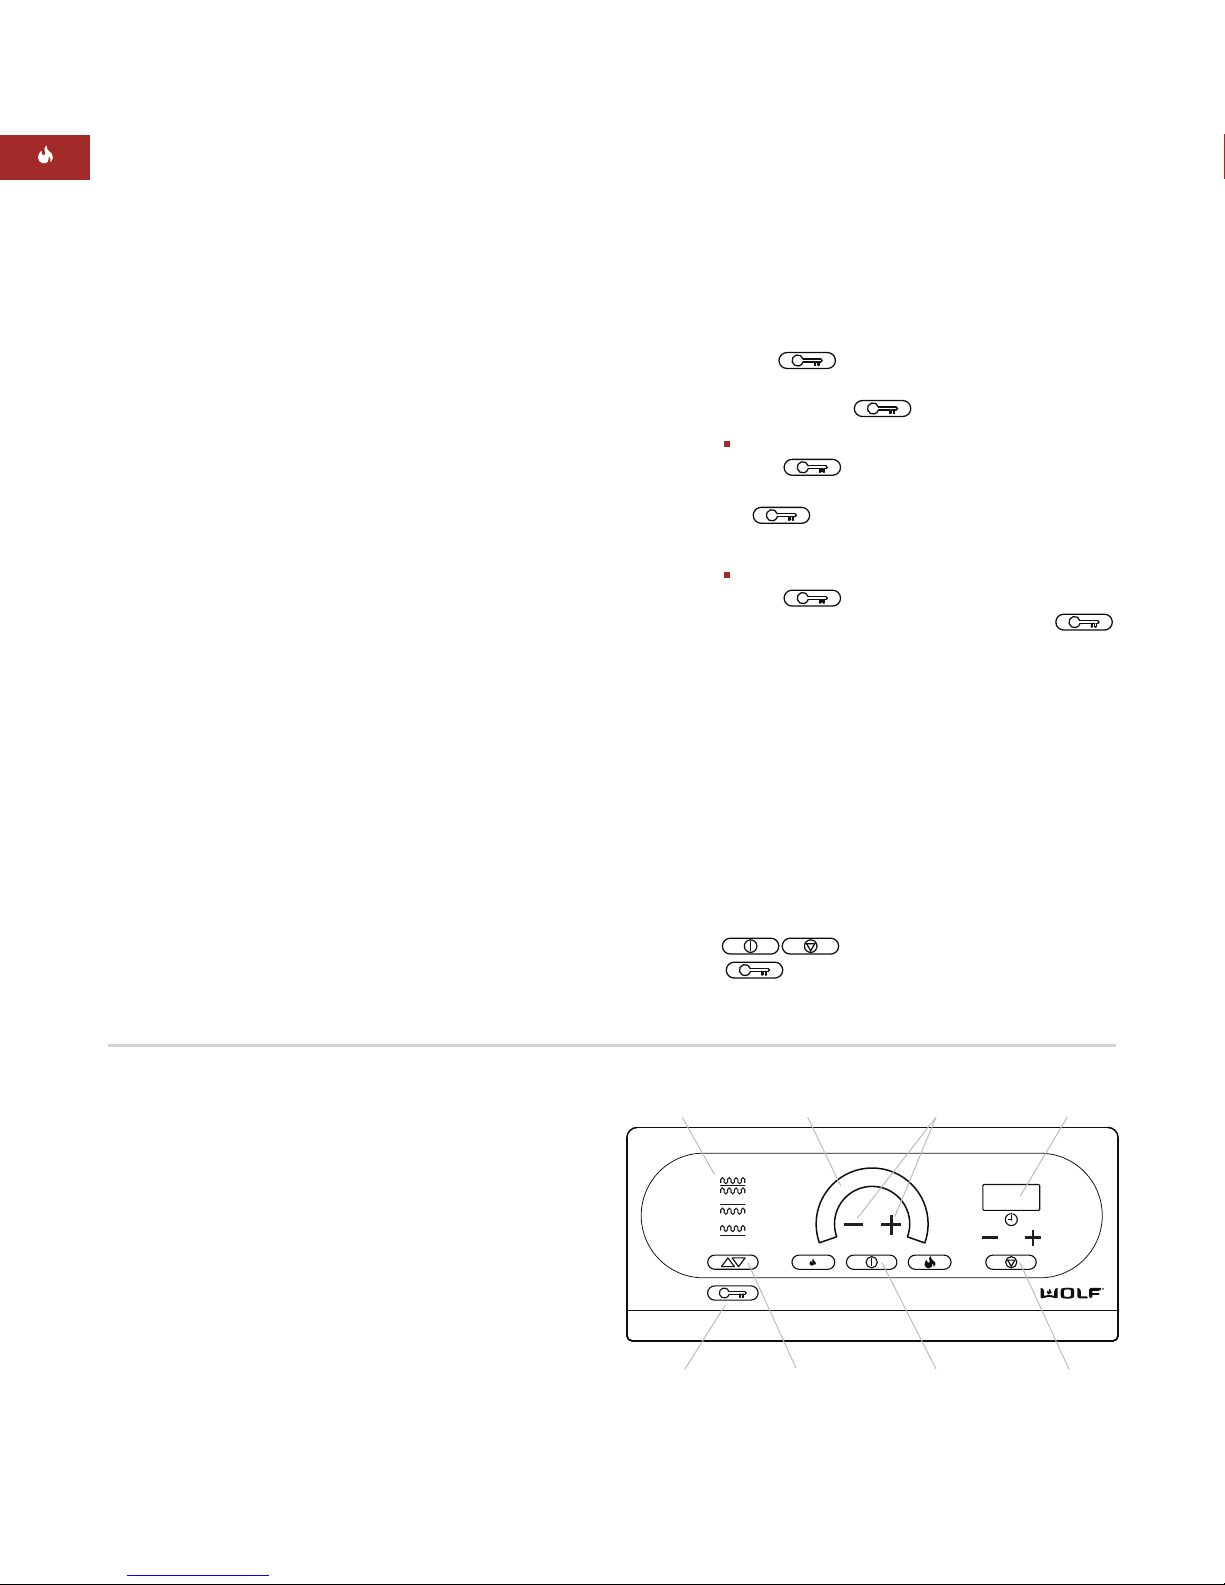
L O C K M O D E
In
Lock mode
, all touch pad operations on
the control panel are disabled and the heating
element is deenergized. A steady glowing light
in the touch pad indicates that the unit
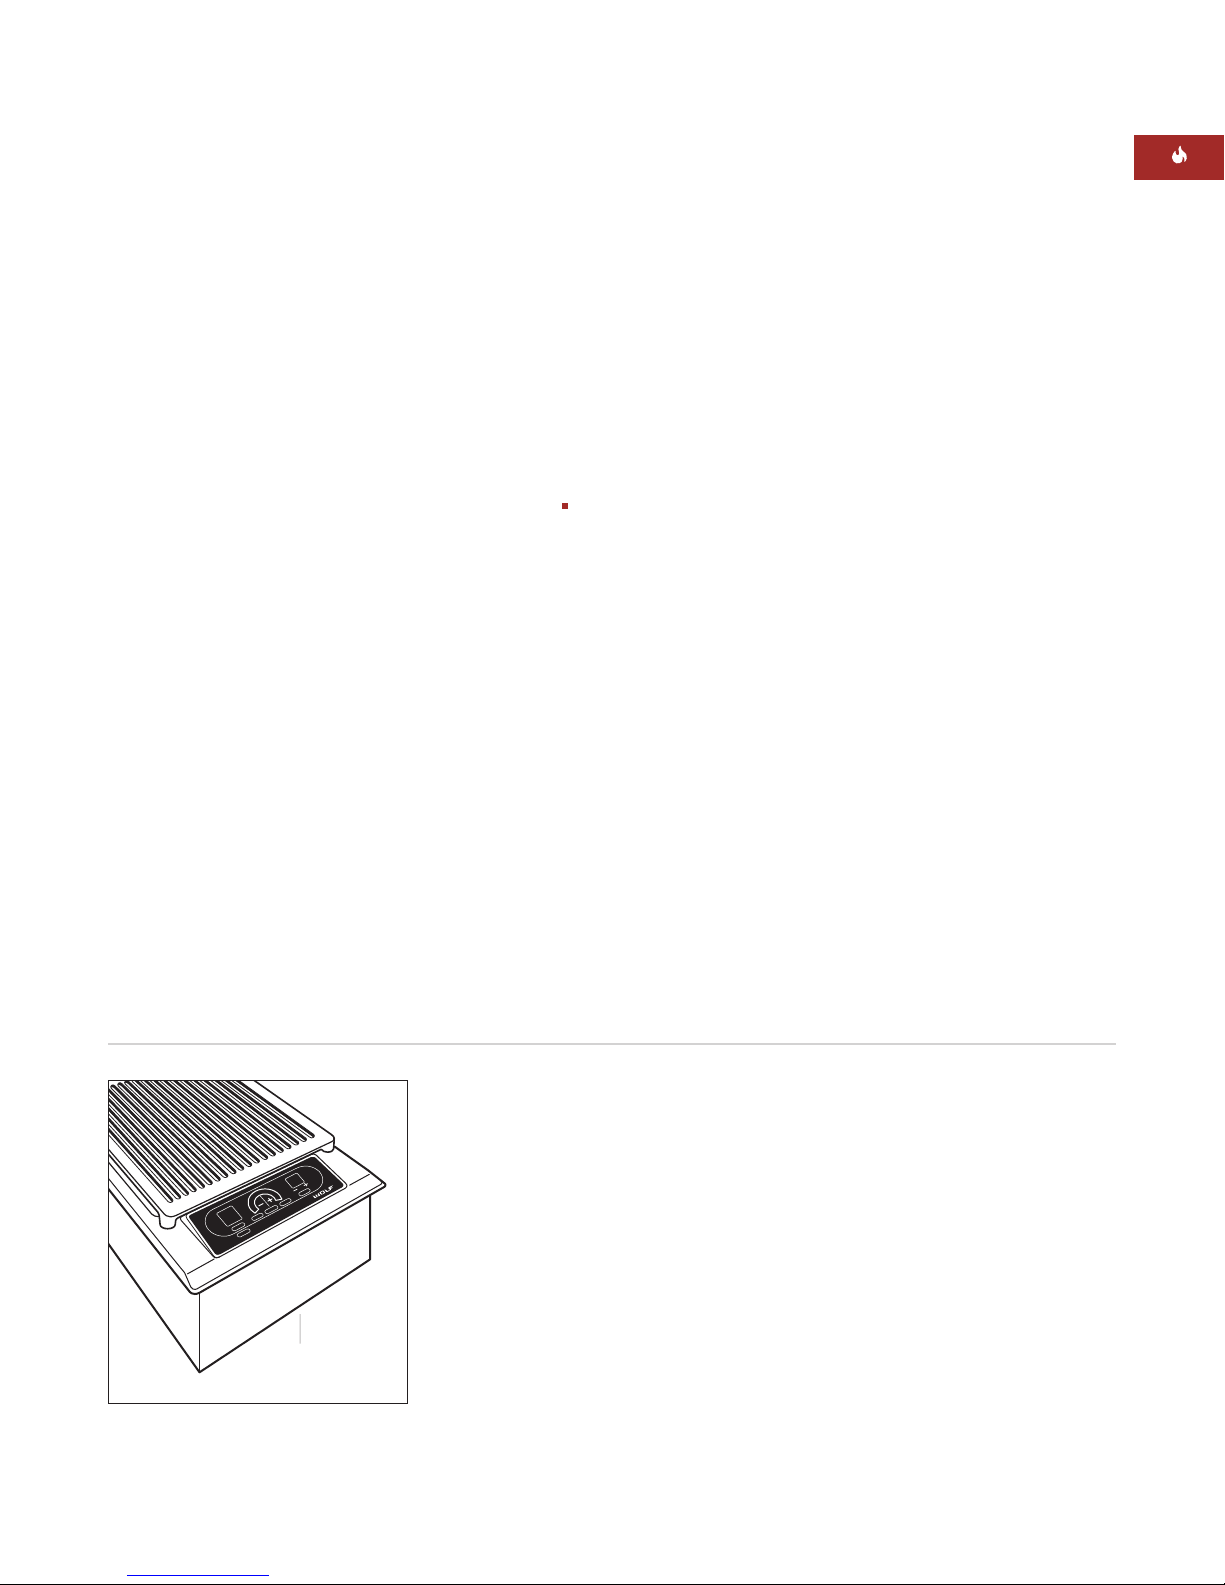
is locked. Refer to the illustration below for
location of the touch pad.
To lock the control panel, touch and hold
the symbol for 3 seconds. The unit
will beep three times and the light in the
touch pad will illuminate. The
control unit is now in
Lock mode
.
To unlock the control panel, touch and hold
the symbol for 3 seconds. The unit
will beep twice and the light in the
touch pad will go out. The control unit is
now in
Idle mode
.
IMPORTANT NOTE:
When the unit is powered
up for the first time or if there has been a
power outage, the grill module will default to
Lock mode
.
IDLE MODE
After unlocking the control panel as described
in Lock Mode, the unit enters the
Idle mode
of
operation. The valid touch pad operations are
,, ”
+
” or ”
–
” and the
Lock mode
.
LED display
indicator lights
Lock ”key”
touch pad
Power indicator
bar graph
SELECT
touch pad
Temperature
adjustment
OFF ON
touch pad
Timer LED
display
CLEAR
touch pad
Touch control panel
11
W O L F GR ILL MO DUL E U S E & C A R E
GR ILL MO DUL E O P E R AT I O N
S E T T I N G C O N T RO L S
The control panel of your electric grill module
is illuminated and features touch controls
with graduated-control lighting. Refer to the
illustration below.
To activate the grill module,
first touch the
touch pad on the touch control panel.
The power indicator bar graph will begin to
blink and show a half-power status. To
complete the activation, one of the following
must be done while the bar graph is still
blinking:
Touch the ”
+
” symbol to set the power
output at half power and complete the
activation.
Touch the ”
–
” symbol to set the power
output at half power and complete the
activation.
Touch to set the power output to
full power and complete the activation.
Touch to set the power output to
the lowest power and complete the activa-
tion.
To change the power level setting
once the
unit is activated and the bar graph lights are
no longer blinking:
Touch the ”
+
” symbol to increase the
power level by one light on the bar graph.
Touch the ”
–
” symbol to decrease the
power level by one light on the bar graph.
Touch to increase the power level
directly to full power.
Touch to decrease the power level
directly to the lowest power.
Touch o turn the unit off.
Touch controls
touch pad
”+” and ”–”
symbols
touch pad
touch pad
12
SE LEC T F E AT U R E
The Select feature allows each of the two
1400-watt elements to be operated at the same
power level or independently. With the front
element set at a different power level than the
rear element, you can grill a variety of foods at
the same time.
S E L E C T T O U C H PA D O P E R AT I O N
During normal start-up operation, the
indicator light is illuminated, meaning both the
front and rear elements are energized and set
at the same power level. Refer to the illustra-
tion below for location of the touch
pad and indicator lights.
W O L F GR ILL MO DUL E U S E & C A R E
Select touch pad
To turn the elements on individually,
touch
the touch pad to select either the front
or rear element.
When the indicator light is
illuminated, touch the touch pad
and any power level setting for the front
element.
When the indicator light is illumi-
nated, touch the touch pad and any
power level setting for the rear element.
If after five seconds no power level is entered,
the unit will return to the
Idle mode
.
Indicator
lights
touch pad
13
To change the power level setting of the
elements individually
, touch the
touch pad to select either the front or rear
element.
When the indicator light is
illuminated, adjustments can be made to
the power level of the front element.
When the indicator light is illumi-
nated, adjustments can be made to the
power level of the rear element.
The settings can be adjusted using the
and touch pads or the “
+
” and “
–
”
symbols.
Once individual power levels are set, the
and indicator lights will illuminate
alternately. To change an individual setting,
either wait until the desired indicator light is
illuminated or touch the touch pad to
select either the front or rear element.
W O L F GR ILL MO DUL E U S E & C A R E
To change individual power level settings
to the same setting,
touch the
touch pad until the indicator light is
illuminated.
Enter any power level setting within five
seconds and both elements will be set to
that power level.
If only one element is energized and no
other setting is entered, both elements will
be set to the power level of that element.
If after five seconds no power level is
entered, both elements will be set to the
lower of the two power level settings.
To turn an element off individually,
touch
the touch pad to select the element,
then touch within 5 seconds. If the
touch pad is touched after 5 seconds,
the entire unit will turn off.
To turn oth elements off,
touch the
touch pad until the indicator light is
illuminated, then touch the touch pad
within 5 seconds to turn off both elements.
14
W O L F GR ILL MO DUL E U S E & C A R E
TIMER OP E R AT I O N
The control panel of the grill module has an
independent 99-minute timer. Refer to the
illustrations below. This function can be used
with or without the unit in operation. However,
the grill must not be in
Lock mode
.
To start the timer, touch the ”
+
” or ”
–
”
symbol until the correct amount of time is
shown in the timer display. The timer will
begin its countdown after a two-second
delay.
A warning beep will sound when the timer
has one minute left and begins to count-
down in seconds starting at 59.
A signal will beep when time has expired
and will continue to beep every 30 seconds.
Touch to reset the timer.
Timer controls
Timer
display
”+” and ”–”
symbols
Clear touch pad
touch pad
15
W O L F GR ILL MO DUL E U S E & C A R E
CA RE R E C O M M E N D AT I O N S
C O M P O N E N T C A R E R E C O M M E N D AT I O N
Grill Module
Frame and Outer
Grill Pan
Stainless steel
CAUTION:
Make sure the grill module is off and all surfaces are cool before
cleaning any part of the unit.
Exterior Cleaning:
Use a soft, nonabrasive stainless steel cleaner like
Signature Polish (see side note) and apply with a soft lint-free cloth. To
bring out the natural luster, lightly wipe the surface with a water-dampened
microfiber cloth, followed with a dry microfiber cloth. All work should follow
the same grain direction as the finish. Best results are obtained by keeping
the cloth in continuous contact with the metal.
For best results, wipe up spills and spatters as they occur and immediately
after the module has cooled. If splatters are allowed to dry, they may perma-
nently damage or stain the finish.
CAUTION:
Do not use abrasive cleaners; they will permanently scratch the
surface.
Before cleaning, remove all excess grease and burned on food particles.
Wash in hot water with a mild detergent. Rinse and dry.
CAUTION: Do not immerse in water!
If food particles are burned-on, wipe
clean by hand using a damp cloth.
Before cleaning, remove all excess grease and burned-on food particles.
Wash in hot water with a mild detergent. Rinse and dry.
Use warm soapy water with a soft cloth to remove fingerprints and residual
food and water stains from the control panel. Apply cleaner to the cloth
before wiping panel. Do not use aggressive commercial cleaners, as they
may damage the assembly.
Grilling Grate
Porcelain-coated
cast iron
Radiator Plates and
Grease Collection
Pan
Porcelain-coated
steel
Control Panel
Ceran glass
Electric Element
Calrod
16
W O L F SE RVI CE I N F O R M AT I O N
The information and images are the copyright
property of Wolf Appliance, Inc., an affiliate
of Su -Zero, Inc. Neither this ook nor any
information or images contained herein may
e copied or used in whole or in part without
the express written permission of Wolf Appli-
ance, Inc., an affiliate of Su -Zero, Inc.
©Wolf Appliance, Inc. all rights reserved.
SE RVI CE I N F O R M AT I O N
When requesting information, literature,
replacement parts or service, always refer to
the model and serial number of your grill
module. Both numbers are listed on the
product rating plate located on the underside
of the module. Refer to the illustration on
page 5. Record the rating plate information
below for future reference.
Model Number
Serial Number
Installation Date
Wolf Dealer and Phone
B E F O R E C A L L I N G F O R S E RV I C E
If the grill module does not operate, refer to
the following troubleshooting steps before
calling your Wolf dealer or regional distributor:
Check to make sure the grill module is not
in
Lock mode
.
Check the household fuse or circuit breaker
to see if it has been blown or tripped.
Check that the electrical connection to the
appliance has not been disconnected. A
power outage may also have caused a
disruption in service.
Have an electrician verify that the proper
voltage is being applied to the module.
CO N TA C T
I N F O R M AT I O N
We site:
wolfappliance.com
WOLF APPLIANCE, INC.
PO BOX 44848
MADISON, WI 53744 USA
WOLFAPPLIANCE.COM
811416 REV-B 1/2013

Other manuals for Sub-Zero ICBIG15/S

6

Other Wolf Grill manuals

Wolf IG15/S Owner's manual

Wolf

Wolf IG15/S Owner's manual

Wolf OG36-LP Operating manual

Wolf

Wolf OG36-LP Operating manual

Wolf OG54NG User manual

Wolf

Wolf OG54NG User manual

Wolf Vulcan VCCB25 User manual

Wolf

Wolf Vulcan VCCB25 User manual

Wolf Sub-Zero ICBIG15/S User manual

Wolf

Wolf Sub-Zero ICBIG15/S User manual

Wolf ICBOG30 User manual

Wolf

Wolf ICBOG30 User manual

Wolf ICBIG15 User manual

Wolf

Wolf ICBIG15 User manual

Wolf IG15/S Instructions for use

Wolf

Wolf IG15/S Instructions for use

Wolf BBQ242BI User manual

Wolf

Wolf BBQ242BI User manual

Wolf OG30 User manual

Wolf

Wolf OG30 User manual

Wolf Sub-Zero ICBIG15/S User manual

Wolf

Wolf Sub-Zero ICBIG15/S User manual

Wolf Sub-Zero ICBIG15/S User manual

Wolf

Wolf Sub-Zero ICBIG15/S User manual

Wolf OG30 User manual

Wolf

Wolf OG30 User manual

Wolf OG54LP User manual

Wolf

Wolf OG54LP User manual

Wolf Outdoor Gas Grill User manual

Wolf

Wolf Outdoor Gas Grill User manual

Wolf IG15/S User manual

Wolf

Wolf IG15/S User manual

Wolf OG30-LP User manual

Wolf

Wolf OG30-LP User manual

Wolf IG15/S User manual

Wolf

Wolf IG15/S User manual

Wolf Outdoor Gas Grills User manual

Wolf

Wolf Outdoor Gas Grills User manual

Wolf OG36 User manual

Wolf

Wolf OG36 User manual

Wolf BBQ242BI User manual

Wolf

Wolf BBQ242BI User manual

Wolf IG15/S User manual

Wolf

Wolf IG15/S User manual

Wolf BBQ242 User manual

Wolf

Wolf BBQ242 User manual

Wolf Outdoor Gas Grill User manual

Wolf

Wolf Outdoor Gas Grill User manual

Popular Grill manuals by other brands

Dangrill 87910 instruction manual

Dangrill

Dangrill 87910 instruction manual

Char-Broil LUCKENBACH 04301107 Assembly instructions

Char-Broil

Char-Broil LUCKENBACH 04301107 Assembly instructions

CHEFOOK LADY 900 Use and maintenance manual

CHEFOOK

CHEFOOK LADY 900 Use and maintenance manual

Jenn-Air 720-0339 user manual

Jenn-Air

Jenn-Air 720-0339 user manual

Brinkmann CHARCOAL SMOKER CHARCOAL GRILL owner's manual

Brinkmann

Brinkmann CHARCOAL SMOKER CHARCOAL GRILL owner's manual

Miele KM 408-1 operating instructions

Miele

Miele KM 408-1 operating instructions

Costway OP3455 user manual

Costway

Costway OP3455 user manual

Taurus GALEXIA PREMIUM manual

Taurus

Taurus GALEXIA PREMIUM manual

Universal Innovations Sahara user manual

Universal Innovations

Universal Innovations Sahara user manual

Princess 102320 Instructions for use

Princess

Princess 102320 Instructions for use

Outwell Cazal instructions

Outwell

Outwell Cazal instructions

Even Embers GAS7540AS owner's manual

Even Embers

Even Embers GAS7540AS owner's manual

Napoleon PRESTIGE PRO PRO825-3 manual

Napoleon

Napoleon PRESTIGE PRO PRO825-3 manual

Gaggenau VR 421-611 Operating and assembly instructions

Gaggenau

Gaggenau VR 421-611 Operating and assembly instructions

Huntington 24025HNT Assembly manual and parts list

Huntington

Huntington 24025HNT Assembly manual and parts list

Dacor Epicure OB36 installation instructions

Dacor

Dacor Epicure OB36 installation instructions

Weber SPIRIT 320 owner's guide

Weber

Weber SPIRIT 320 owner's guide

oneConcept 10027911 manual

oneConcept

oneConcept 10027911 manual

manuals.online logo
manuals.online logoBrands
  • About & Mission
  • Contact us
  • Privacy Policy
  • Terms and Conditions

Copyright 2025 Manuals.Online. All Rights Reserved.