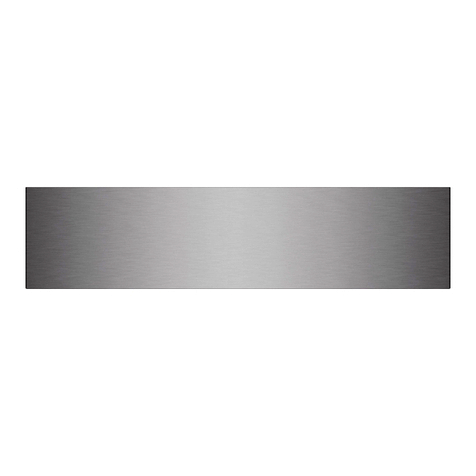
Wolf VU24S Configuration guide

SERVICE MANUAL INTRODUCTION
This service manual assists with troubleshooting and
diagnosing malfunctions, completion of repairs, and return of
the product to proper operational condition. Read the complete
instructions contained within before initiating any repairs.
This guide is intended for use by Factory Certified Service. Wolf
Appliance, Inc. recommends that repairs be performed by
Factory Certified Service companies only.
Warning and Caution product safety labels appear throughout
this manual. Product safety labels appear at the beginning of
some sections. Follow the instructions in the product safety
labels to avoid personal injury and/or product damage. The
sample safety labels explain the types of notices that appear in
this manual.
WARNING
States a hazard that may cause serious injury or
death if precautions are not followed.
CAUTION
Indicates minor injury or product damage may occur
if precautions are not followed.
IMPORTANT NOTE: Highlights especially important information.
TIP: Indicates additional, useful information.
Information and images contained herein are copyright of Wolf
Appliance, Inc. Neither this manual nor any information or
images contained herein may be copied or used in whole or in
part without the express written consent of Wolf Appliance, Inc.
©Wolf Appliance, Inc., all rights reserved.
WOLF PRODUCT RATING PLATE INFORMATION
On Under-Cabinet Hood Inserts, the rating plate is located
behind the filter on the left side.
Important information for each product is listed on the product
rating plate. Rating plates identify:
▪Model
▪Serial number
▪Electrical information, including current draw
XXXX
1555XXXX
1555XXXX
1555XXXX
MODEL DESCRIPTIONS AND SALES ACCESSORIES
For more details on individual model descriptions and a listing
of all compatible sales accessories, see the
Wolf Distributor
Price List
.
V SERIES VENTILATION MODEL KEY
Model Character Description
ICB International Designation
V V Series Ventilation
C Model Type Ceiling
I Model Type Island
U Model Type Under-Cabinet
W Model Type Wall
24, 30, 36 or 48 Width (in inches)
B Exterior: Black
G Exterior: Glass
S Exterior: Stainless Steel
W Exterior: White Glass
PRODUCT USE AND CARE AND INSTALLATION GUIDES
Product Use and Care Guides, Installation Guides, and other
product specifications are available in the
Product
Specifications and Manuals Library
.
Under-Cabinet Hood Insert
General Information
GENERAL INFORMATION
service.subzero.com
828151 REVA 1

UNIT WARRANTY
Product warranty is determined by the installation location and
the date of installation.
▪View product warranties at
http://service.subzero.com/
ClaimsAndOrderProcessing/Pages/WarrantyInfo
.
▪Warranties start on the day of product installation.
▪Search for warranty and service information by serial
number, customer last name, and address using Unit
History at
http://service.subzero.com/Tools/UnitHistory
.
Under-Cabinet Hood Insert
General Information
service.subzero.com
828151 REVA 2

UNDER-CABINET HOOD INSERT CONTROLS
The Under-Cabinet Hood Insert controls are either buttons or a
remote control.
The buttons are located on the frame on the bottom of the
hood. When pressed, the buttons push a switch on the power
board.
Under-Cabinet Button Function
Icon Function
Turns the blower on or off.
Turns the blower on to low.
Turns the blower on to
medium.
Turns the blower on to high or
boost.
Turns the lights on or off.
Under-Cabinet Hood Insert Control Operation
BLOWER: To adjust the blower speed, press , , or .
To turn on boost, press for two seconds. Boost increases
airflow by approximately 20% more than high. After 10 minutes,
the blower automatically transitions to the previous selected
speed. If boost is turned on with the blower off, it turns off after
10 minutes.
DELAY: The delay automatically turns the lights and blower
off after 15 minutes. To turn on the delay, press and hold for
two seconds.
TIP: Delay and boost cannot be turned on at the same time.
LIGHTS: Press for high or press again for low. Press again
to turn the lights off.
UNDER-CABINET HOOD INSERT REMOTE CONTROL
The remote control buttons are different than the buttons on the
unit but perform the same functions. The remote control sensor
is located on the power board next to the buttons.
Under-Cabinet Remote Control Function
Icon Function
Turns the blower on to low.
Turns the blower off.
Increases the blower speed.
Decreases the blower speed.
Turns the blower on to boost.
Turns the delay on.
Turns the lights on or off.
Under-Cabinet Hood Insert Remote Control Operation
BLOWER: To adjust the blower speed, press , , or .
To turn on boost, press . Boost increases airflow by
approximately 20% more than high. After 10 minutes, the
blower automatically transitions to the previous selected speed.
If boost is turned on with the blower off, it turns off after 10
minutes.
DELAY: The delay automatically turns the lights and blower
off after 15 minutes of use. To turn on the delay, press .
TIP: Delay and boost cannot be turned on at the same time.
LIGHTS: Press for high or press and hold for two seconds
for low. Press again to turn the lights off.
Under-Cabinet Hood Insert
Controls and Operation
CONTROLS AND OPERATION
service.subzero.com
828151 REVA 3

COMPONENT ACCESS AND REMOVAL
This section explains how to access and remove components
from a Wolf Under-Cabinet Hood Insert.
WARNING
To avoid electric shock, disconnect power to the
hood whenever servicing, accessing, or removing
components powered by electricity or components
near other electrical components. If removing a hood
from its installation, remember that the units are
heavy and must be lowered from the installation, and
may require two persons. Removing a unit from its
installation should be performed only by an
authorized service technician or installer.
CAUTION
When working on the hood or its components, be
careful when handling sheet metal parts. The edges
may be sharp.
FILTER REMOVAL
Remove the Filter
1Pull the front of the inner panel assembly downward,
disengaging it from the inner panel magnets.
2Push the plastic tab on the front end of the filter toward the
rear of the hood, and pull down.
3Pull the filter forward, and remove it from the unit.
FILTER INSTALLATION
Install the Filter
1Set the filter in the filter opening, back of the filter first.
2Push the plastic tab on the front end of the filter toward the
back of the filter.
3Rotate the filter upward into place, and release the plastic
tab.
4Lift the front of the inner panel assembly until it contacts the
panel magnets.
INNER PANEL MAGNET REMOVAL
Remove the Inner Panel Magnet
1Pull the front of the inner panel assembly downward,
disengaging it from the inner panel magnets.
2Turn the inner panel magnet counterclockwise to remove it.
INNER PANEL MAGNET INSTALLATION
Install the Inner Panel Magnet
1Turn the inner panel magnet clockwise to install it.
2Lift the front of the inner panel assembly until it contacts the
panel magnets.
Under-Cabinet Hood Insert
Component Access and Removal
service.subzero.com
828151 REVA 4

LED LIGHT REMOVAL
WARNING
Disconnect power to the unit before initiating this
repair.
Remove the LED Light Assembly
1Place masking tape around the LED light assembly to
protect the stainless steel from scratching.
2Use a flat-head screwdriver to pull the LED light assembly
away from the stainless steel panel.
3Pull the LED light assembly wire harness far enough
through the hole to access the connector.
4Disconnect the LED light assembly wire harness.
5Remove the LED light assembly from the unit.
LED LIGHT INSTALLATION
Install the LED Light Assembly
1Connect the LED light assembly wire connector.
2Push the LED light assembly into the outer panel.
INNER PANEL ASSEMBLY REMOVAL
Remove the Inner Panel Assembly
1Pull the front of the inner panel assembly downward,
disengaging it from the inner panel magnets.
2Use a Phillips screwdriver to remove the screw in each
hinge pin.
3Push the tabs on the hinge pins toward the center of the
unit, disengaging the hinge pins from the hinges.
INNER PANEL ASSEMBLY INSTALLATION
Install the Inner Panel Assembly
1Slide the tabs of the hinge pins toward the hinge, pushing
the hinge pin into the hinge.
2Use a Phillips screwdriver to install the hinge pin screws.
3Lift the front of the inner panel assembly until it contacts the
panel magnets.
OUTER PANEL REMOVAL
WARNING
Turn off the power to the product before starting this
procedure.
To remove the outer panel, first remove the filters, LED
assemblies, and the inner panel.
Remove the Filter
1Pull the front of the inner panel assembly downward,
disengaging it from the inner panel magnets.
2Push the plastic tab on the front end of the filter toward the
rear of the hood, and pull down.
Under-Cabinet Hood Insert
service.subzero.com
828151 REVA 5

3Pull the filter forward, and remove it from the unit.
Remove the LED Light Assembly
1Place masking tape around the LED light assembly to
protect the stainless steel from scratching.
2Use a flat-head screwdriver to pull the LED light assembly
away from the stainless steel panel.
3Pull the LED light assembly wire harness far enough
through the hole to access the connector.
4Disconnect the LED light assembly wire harness.
5Remove the LED light assembly from the unit.
Remove the Inner Panel Assembly
1Pull the front of the inner panel assembly downward,
disengaging it from the inner panel magnets.
2Use a Phillips screwdriver to remove the screw in each
hinge pin.
3Push the tabs on the hinge pins toward the center of the
unit, disengaging the hinge pins from the hinges.
Remove the Outer Panel
1Use a Phillips screwdriver to remove the screws from the
outer panel.
2Access the cabinet where the hood is located, and use a
Phillips screwdriver to remove the screws from the front of
the hood.
3Lower the outer panel from the unit.
4Disconnect the wire connectors from the control board.
OUTER PANEL INSTALLATION
Install the Outer Panel
TIP: The six-pin connector for the blower and power
connection goes on the tab side (left) of the power board
and button assembly.
1Connect the wire connectors to the power board and button
assembly.
2Place the outer panel onto the unit.
Under-Cabinet Hood Insert
REMOVE THE FILTER (continued)
service.subzero.com
828151 REVA 6

3Use a Phillips screwdriver to install the screws into the outer
panel.
Install the Inner Panel Assembly
1Slide the tabs of the hinge pins toward the hinge, pushing
the hinge pin into the hinge.
2Use a Phillips screwdriver to install the hinge pin screws.
3Lift the front of the inner panel assembly until it contacts the
panel magnets.
Install the LED Light Assembly
1Connect the LED light assembly wire connector.
2Push the LED light assembly into the outer panel.
Install the Filter
1Set the filter in the filter opening, back of the filter first.
2Push the plastic tab on the front end of the filter toward the
back of the filter.
3Rotate the filter upward into place, and release the plastic
tab.
4Lift the front of the inner panel assembly until it contacts the
panel magnets.
POWER BOARD AND BUTTON ASSEMBLY REMOVAL
WARNING
Turn off the power to the product before starting this
procedure.
To remove the power board and button assembly, first remove
the filters, LED assemblies, inner panel, and outer panel.
Remove the Filter
1Pull the front of the inner panel assembly downward,
disengaging it from the inner panel magnets.
2Push the plastic tab on the front end of the filter toward the
rear of the hood, and pull down.
3Pull the filter forward, and remove it from the unit.
Remove the LED Light Assembly
1Place masking tape around the LED light assembly to
protect the stainless steel from scratching.
2Use a flat-head screwdriver to pull the LED light assembly
away from the stainless steel panel.
3Pull the LED light assembly wire harness far enough
through the hole to access the connector.
4Disconnect the LED light assembly wire harness.
5Remove the LED light assembly from the unit.
Remove the Inner Panel Assembly
1Pull the front of the inner panel assembly downward,
disengaging it from the inner panel magnets.
2Use a Phillips screwdriver to remove the screw in each
hinge pin.
Under-Cabinet Hood Insert
INSTALL THE OUTER PANEL (continued)
service.subzero.com
828151 REVA 7

3Push the tabs on the hinge pins toward the center of the
unit, disengaging the hinge pins from the hinges.
Remove the Outer Panel
1Use a Phillips screwdriver to remove the screws from the
outer panel.
2Access the cabinet where the hood is located, and use a
Phillips screwdriver to remove the screws from the front of
the hood.
3Lower the outer panel from the unit.
4Disconnect the wire connectors from the control board.
Remove the Power Board and Button Assembly
1Place the outer panel face-down on a protected surface.
2Press the tab on the left side of the power board and button
assembly.
3Lift the tab side of the power board and button assembly
from the outer panel.
4Remove the power board and button assembly from the
unit.
POWER BOARD AND BUTTONS ASSEMBLY INSTALLATION
Install the Power Board and Button Assembly
1Install the right side of the power board and button
assembly into the board support.
2Align the buttons to pass through the button holes on the
outer panel.
3Push the left side of the power board and button assembly
into the board support.
Install the Outer Panel
TIP: The six-pin connector for the blower and power
connection goes on the tab side (left) of the power board
and button assembly.
1Connect the wire connectors to the power board and button
assembly.
2Place the outer panel onto the unit.
3Use a Phillips screwdriver to install the screws into the outer
panel.
Install the Inner Panel Assembly
1Slide the tabs of the hinge pins toward the hinge, pushing
the hinge pin into the hinge.
2Use a Phillips screwdriver to install the hinge pin screws.
3Lift the front of the inner panel assembly until it contacts the
panel magnets.
Under-Cabinet Hood Insert
REMOVE THE INNER PANEL ASSEMBLY (continued)
service.subzero.com
828151 REVA 8

Install the LED Light Assembly
1Connect the LED light assembly wire connector.
2Push the LED light assembly into the outer panel.
Install the Filter
1Set the filter in the filter opening, back of the filter first.
2Push the plastic tab on the front end of the filter toward the
back of the filter.
3Rotate the filter upward into place, and release the plastic
tab.
4Lift the front of the inner panel assembly until it contacts the
panel magnets.
POWER BOARD OR BUTTONS REMOVAL
WARNING
Turn off the power to the product before starting this
procedure.
To remove the power board or buttons, first remove the filters,
LED assemblies, inner panel, outer panel, and power board and
button assembly.
Remove the Filter
1Pull the front of the inner panel assembly downward,
disengaging it from the inner panel magnets.
2Push the plastic tab on the front end of the filter toward the
rear of the hood, and pull down.
3Pull the filter forward, and remove it from the unit.
Remove the LED Light Assembly
1Place masking tape around the LED light assembly to
protect the stainless steel from scratching.
2Use a flat-head screwdriver to pull the LED light assembly
away from the stainless steel panel.
3Pull the LED light assembly wire harness far enough
through the hole to access the connector.
4Disconnect the LED light assembly wire harness.
5Remove the LED light assembly from the unit.
Remove the Inner Panel Assembly
1Pull the front of the inner panel assembly downward,
disengaging it from the inner panel magnets.
2Use a Phillips screwdriver to remove the screw in each
hinge pin.
3Push the tabs on the hinge pins toward the center of the
unit, disengaging the hinge pins from the hinges.
Remove the Outer Panel
1Use a Phillips screwdriver to remove the screws from the
outer panel.
Under-Cabinet Hood Insert
service.subzero.com
828151 REVA 9

2Access the cabinet where the hood is located, and use a
Phillips screwdriver to remove the screws from the front of
the hood.
3Lower the outer panel from the unit.
4Disconnect the wire connectors from the control board.
Remove the Power Board and Button Assembly
1Place the outer panel face-down on a protected surface.
2Press the tab on the left side of the power board and button
assembly.
3Lift the tab side of the power board and button assembly
from the outer panel.
4Remove the power board and button assembly from the
unit.
Remove the Power Board or Buttons
1On the side of the power board and button assembly
opposite of the buttons, push the tabs and open the power
board and button assembly case.
2Remove the power board from the pins in the power board
and button assembly case.
3Remove the buttons from the front of the power board and
button case.
POWER BOARD OR BUTTONS INSTALLATION
Install the Power Board or Buttons
1Insert the power board into the power board and button
assembly case.
2Push together the two halves of the power board and
button assembly case.
3Install the buttons on the power board and button assembly
case.
Install the Power Board and Button Assembly
1Install the right side of the power board and button
assembly into the board support.
2Align the buttons to pass through the button holes on the
outer panel.
3Push the left side of the power board and button assembly
into the board support.
Install the Outer Panel
TIP: The six-pin connector for the blower and power
connection goes on the tab side (left) of the power board
and button assembly.
1Connect the wire connectors to the power board and button
assembly.
2Place the outer panel onto the unit.
3Use a Phillips screwdriver to install the screws into the outer
panel.
Under-Cabinet Hood Insert
REMOVE THE OUTER PANEL (continued)
service.subzero.com
828151 REVA 10

Install the Inner Panel Assembly
1Slide the tabs of the hinge pins toward the hinge, pushing
the hinge pin into the hinge.
2Use a Phillips screwdriver to install the hinge pin screws.
3Lift the front of the inner panel assembly until it contacts the
panel magnets.
Install the LED Light Assembly
1Connect the LED light assembly wire connector.
2Push the LED light assembly into the outer panel.
Install the Filter
1Set the filter in the filter opening, back of the filter first.
2Push the plastic tab on the front end of the filter toward the
back of the filter.
3Rotate the filter upward into place, and release the plastic
tab.
4Lift the front of the inner panel assembly until it contacts the
panel magnets.
INTERNAL BLOWER REMOVAL
WARNING
Turn off the power to the product before starting this
procedure.
To remove the internal blower, first remove the filter, LED
assemblies, inner panel, and outer panel.
Remove the Filter
1Pull the front of the inner panel assembly downward,
disengaging it from the inner panel magnets.
2Push the plastic tab on the front end of the filter toward the
rear of the hood, and pull down.
3Pull the filter forward, and remove it from the unit.
Remove the LED Light Assembly
1Place masking tape around the LED light assembly to
protect the stainless steel from scratching.
2Use a flat-head screwdriver to pull the LED light assembly
away from the stainless steel panel.
3Pull the LED light assembly wire harness far enough
through the hole to access the connector.
4Disconnect the LED light assembly wire harness.
5Remove the LED light assembly from the unit.
Remove the Inner Panel Assembly
1Pull the front of the inner panel assembly downward,
disengaging it from the inner panel magnets.
2Use a Phillips screwdriver to remove the screw in each
hinge pin.
Under-Cabinet Hood Insert
service.subzero.com
828151 REVA 11

3Push the tabs on the hinge pins toward the center of the
unit, disengaging the hinge pins from the hinges.
Remove the Outer Panel
1Use a Phillips screwdriver to remove the screws from the
outer panel.
2Access the cabinet where the hood is located, and use a
Phillips screwdriver to remove the screws from the front of
the hood.
3Lower the outer panel from the unit.
4Disconnect the wire connectors from the control board.
Remove the Internal Blower
1Disconnect the internal blower wire harness from the
internal blower.
2Use a Phillips screwdriver to remove the internal blower
mounting screws.
3Remove the internal blower from the unit.
INTERNAL BLOWER INSTALLATION
Install the Internal Blower
1Connect the internal blower wire harness to the internal
blower.
2Raise the internal blower into the hood.
3Use a Phillips screwdriver to install the internal blower
mounting screws.
Install the Outer Panel
TIP: The six-pin connector for the blower and power
connection goes on the tab side (left) of the power board
and button assembly.
1Connect the wire connectors to the power board and button
assembly.
2Place the outer panel onto the unit.
3Use a Phillips screwdriver to install the screws into the outer
panel.
Install the Inner Panel Assembly
1Slide the tabs of the hinge pins toward the hinge, pushing
the hinge pin into the hinge.
2Use a Phillips screwdriver to install the hinge pin screws.
3Lift the front of the inner panel assembly until it contacts the
panel magnets.
Install the LED Light Assembly
1Connect the LED light assembly wire connector.
Under-Cabinet Hood Insert
REMOVE THE INNER PANEL ASSEMBLY (continued)
service.subzero.com
828151 REVA 12

2Push the LED light assembly into the outer panel.
Install the Filter
1Set the filter in the filter opening, back of the filter first.
2Push the plastic tab on the front end of the filter toward the
back of the filter.
3Rotate the filter upward into place, and release the plastic
tab.
4Lift the front of the inner panel assembly until it contacts the
panel magnets.
TRANSFORMER REMOVAL
WARNING
Turn off the power to the product before starting this
procedure.
It is possible to remove the transformer without uninstalling the
unit, but it is very difficult. To remove the transformer, it is
recommended to first remove the filters, LED assemblies, inner
panel, and outer panel. Then, uninstall the unit.
Remove the Filter
1Pull the front of the inner panel assembly downward,
disengaging it from the inner panel magnets.
2Push the plastic tab on the front end of the filter toward the
rear of the hood, and pull down.
3Pull the filter forward, and remove it from the unit.
Remove the LED Light Assembly
1Place masking tape around the LED light assembly to
protect the stainless steel from scratching.
2Use a flat-head screwdriver to pull the LED light assembly
away from the stainless steel panel.
3Pull the LED light assembly wire harness far enough
through the hole to access the connector.
4Disconnect the LED light assembly wire harness.
5Remove the LED light assembly from the unit.
Remove the Inner Panel Assembly
1Pull the front of the inner panel assembly downward,
disengaging it from the inner panel magnets.
2Use a Phillips screwdriver to remove the screw in each
hinge pin.
3Push the tabs on the hinge pins toward the center of the
unit, disengaging the hinge pins from the hinges.
Remove the Outer Panel
1Use a Phillips screwdriver to remove the screws from the
outer panel.
2Access the cabinet where the hood is located, and use a
Phillips screwdriver to remove the screws from the front of
the hood.
3Lower the outer panel from the unit.
Under-Cabinet Hood Insert
INSTALL THE LED LIGHT ASSEMBLY (continued)
service.subzero.com
828151 REVA 13

4Disconnect the wire connectors from the control board.
Uninstall the Unit
1Turn off the power to the unit.
2Remove the unit from the installation.
Remove the Transformer
1Use a Phillips screwdriver to remove the screw from the
front of the transformer.
2Pull the transformer out of the transformer bracket far
enough to access the transformer covers.
3Use a Phillips screwdriver to remove the transformer cover
screws.
4Use a small flat-blade screwdriver to loosen the wire hold-
down screws, and remove the wires from the transformer.
5Remove the transformer from the unit.
TRANSFORMER INSTALLATION
Install the Transformer
1Insert the wires into the transformer and use a small flat-
blade screwdriver to tighten the wire hold-down screws.
2Install the transformer covers onto the transformer.
3Use a Phillips screwdriver to install the transformer cover
screws.
4Place the transformer onto the transformer bracket.
5Use a Phillips screwdriver to install the screw through the
transformer notch into the transformer bracket.
Install the Unit
Install the unit.
Install the Outer Panel
TIP: The six-pin connector for the blower and power
connection goes on the tab side (left) of the power board
and button assembly.
1Connect the wire connectors to the power board and button
assembly.
2Place the outer panel onto the unit.
3Use a Phillips screwdriver to install the screws into the outer
panel.
Install the Inner Panel Assembly
1Slide the tabs of the hinge pins toward the hinge, pushing
the hinge pin into the hinge.
2Use a Phillips screwdriver to install the hinge pin screws.
3Lift the front of the inner panel assembly until it contacts the
panel magnets.
Install the LED Light Assembly
1Connect the LED light assembly wire connector.
2Push the LED light assembly into the outer panel.
Install the Filter
1Set the filter in the filter opening, back of the filter first.
Under-Cabinet Hood Insert
REMOVE THE OUTER PANEL (continued)
service.subzero.com
828151 REVA 14

2Push the plastic tab on the front end of the filter toward the
back of the filter.
3Rotate the filter upward into place, and release the plastic
tab.
4Lift the front of the inner panel assembly until it contacts the
panel magnets.
DAMPER REMOVAL
WARNING
Turn off the power to the product before starting this
procedure.
To remove the damper first remove the filters, LED assemblies,
inner panel, and outer panel. Then, uninstall the unit.
Remove the Filter
1Pull the front of the inner panel assembly downward,
disengaging it from the inner panel magnets.
2Push the plastic tab on the front end of the filter toward the
rear of the hood, and pull down.
3Pull the filter forward, and remove it from the unit.
Remove the LED Light Assembly
1Place masking tape around the LED light assembly to
protect the stainless steel from scratching.
2Use a flat-head screwdriver to pull the LED light assembly
away from the stainless steel panel.
3Pull the LED light assembly wire harness far enough
through the hole to access the connector.
4Disconnect the LED light assembly wire harness.
5Remove the LED light assembly from the unit.
Remove the Inner Panel Assembly
1Pull the front of the inner panel assembly downward,
disengaging it from the inner panel magnets.
2Use a Phillips screwdriver to remove the screw in each
hinge pin.
3Push the tabs on the hinge pins toward the center of the
unit, disengaging the hinge pins from the hinges.
Remove the Outer Panel
1Use a Phillips screwdriver to remove the screws from the
outer panel.
2Access the cabinet where the hood is located, and use a
Phillips screwdriver to remove the screws from the front of
the hood.
3Lower the outer panel from the unit.
Under-Cabinet Hood Insert
INSTALL THE FILTER (continued)
service.subzero.com
828151 REVA 15

4Disconnect the wire connectors from the control board.
Uninstall the Unit
1Turn off the power to the unit.
2Remove the unit from the installation.
Remove the Damper
1Remove the duct sealing tape around the damper.
2Pull the damper from the round discharge.
DAMPER INSTALLATION
Install the Damper
1Place the damper on the blower discharge.
2Secure the damper with duct sealing tape.
Install the Unit
Install the unit.
Install the Outer Panel
TIP: The six-pin connector for the blower and power
connection goes on the tab side (left) of the power board
and button assembly.
1Connect the wire connectors to the power board and button
assembly.
2Place the outer panel onto the unit.
3Use a Phillips screwdriver to install the screws into the outer
panel.
Install the Inner Panel Assembly
1Slide the tabs of the hinge pins toward the hinge, pushing
the hinge pin into the hinge.
2Use a Phillips screwdriver to install the hinge pin screws.
3Lift the front of the inner panel assembly until it contacts the
panel magnets.
Install the LED Light Assembly
1Connect the LED light assembly wire connector.
2Push the LED light assembly into the outer panel.
Install the Filter
1Set the filter in the filter opening, back of the filter first.
2Push the plastic tab on the front end of the filter toward the
back of the filter.
3Rotate the filter upward into place, and release the plastic
tab.
4Lift the front of the inner panel assembly until it contacts the
panel magnets.
POWER CORD REMOVAL
WARNING
Turn off the power to the product before starting this
procedure.
To remove the power cord, first remove the filters, LED
assemblies, inner panel, and outer panel. Then, uninstall the
unit.
Under-Cabinet Hood Insert
REMOVE THE OUTER PANEL (continued)
service.subzero.com
828151 REVA 16

Remove the Filter
1Pull the front of the inner panel assembly downward,
disengaging it from the inner panel magnets.
2Push the plastic tab on the front end of the filter toward the
rear of the hood, and pull down.
3Pull the filter forward, and remove it from the unit.
Remove the LED Light Assembly
1Place masking tape around the LED light assembly to
protect the stainless steel from scratching.
2Use a flat-head screwdriver to pull the LED light assembly
away from the stainless steel panel.
3Pull the LED light assembly wire harness far enough
through the hole to access the connector.
4Disconnect the LED light assembly wire harness.
5Remove the LED light assembly from the unit.
Remove the Inner Panel Assembly
1Pull the front of the inner panel assembly downward,
disengaging it from the inner panel magnets.
2Use a Phillips screwdriver to remove the screw in each
hinge pin.
3Push the tabs on the hinge pins toward the center of the
unit, disengaging the hinge pins from the hinges.
Remove the Outer Panel
1Use a Phillips screwdriver to remove the screws from the
outer panel.
2Access the cabinet where the hood is located, and use a
Phillips screwdriver to remove the screws from the front of
the hood.
3Lower the outer panel from the unit.
4Disconnect the wire connectors from the control board.
Uninstall the Unit
1Turn off the power to the unit.
2Remove the unit from the installation.
Under-Cabinet Hood Insert
service.subzero.com
828151 REVA 17

Remove the Power Cord
1Unplug the power cord from the wire box.
2Use a Phillips screwdriver to remove the cover from the top
of the hood.
3Pull the power cord and plug cover from the unit.
4Use a Phillips screwdriver to remove the screws from the
plug cover clamp.
5Remove the power cord from the plug cover unit.
POWER CORD INSTALLATION
Install the Power Cord
1Install the power cord into the unit.
2Plug the power cord into the wire box.
3Use a Phillips screwdriver to install the plug cover onto the
hood.
4Use a Phillips screwdriver to install the plug cover clamp
onto the plug cover.
Install the Unit
Install the unit.
Install the Outer Panel
TIP: The six-pin connector for the blower and power
connection goes on the tab side (left) of the power board
and button assembly.
1Connect the wire connectors to the power board and button
assembly.
2Place the outer panel onto the unit.
3Use a Phillips screwdriver to install the screws into the outer
panel.
Install the Inner Panel Assembly
1Slide the tabs of the hinge pins toward the hinge, pushing
the hinge pin into the hinge.
2Use a Phillips screwdriver to install the hinge pin screws.
3Lift the front of the inner panel assembly until it contacts the
panel magnets.
Install the LED Light Assembly
1Connect the LED light assembly wire connector.
2Push the LED light assembly into the outer panel.
Install the Filter
1Set the filter in the filter opening, back of the filter first.
2Push the plastic tab on the front end of the filter toward the
back of the filter.
3Rotate the filter upward into place, and release the plastic
tab.
4Lift the front of the inner panel assembly until it contacts the
panel magnets.
Under-Cabinet Hood Insert
service.subzero.com
828151 REVA 18

TROUBLESHOOTING GUIDE UNDER-CABINET HOOD INSERT
This section explains how to troubleshoot various components
in a Wolf Under-Cabinet Hood Insert.
WARNING
To avoid electric shock, disconnect power to the
hood when preparing for tests. Care should be used
while performing any test with the hood energized.
WARNING
If it is necessary to remove a hood from the
installation, remember that the units are heavy and
must be lowered from the installation.
Under-Cabinet Hood Insert
Troubleshooting Guide Under-Cabinet Hood Insert
service.subzero.com
828151 REVA 19

UNDER-CABINET HOOD INSERT TROUBLESHOOTING TABLE
Symptom Possible Cause or Diagnostic Test Resolution
Remote control does not
work.
Check the batteries. If necessary, replace with two new AAA batteries.
Perform remote pairing. 1
2Press and hold for five seconds.
Control panel does not
work. TIP: The sensor for the remote control is connected to the power board and may not work.
Test the remote control operation. If the remote control works, there is a fault in the hood.
If only one button does not work, test the operation of
the hood buttons.
Replace the power board.
Check the operation of the hood lights. If the lights work, there is power to the electronic
transformer. If the hood lights do not work, see "Hood
lights do not work."
Check voltage to the button wire harness. 1Disconnect the button wire harness from the
secondary side of the electronic transformer.
2Check for 12 VDC between the pins of the
transformer.
3If there is no voltage, replace the electronic
transformer.
Check the voltage at the CN2 connector. 1Check for 12 VDC between pin 5 and pin 6 of the
CN2 connector.
2If there is 12 VDC, replace the power board.
3If there is not 12 VDC, inspect the wiring from the
electronic transformer to the CN2 connector.
4Repair or replace the wiring.
Hood lights and blower do
not turn on.
The breaker is open. Reset the breaker.
GFCI circuit is tripped. The unit should not be installed on a GFCI circuit.
Change the outlet type.
Verify the house circuit is dedicated, the correct
voltage, and sized correctly.
If necessary, contact an electrician to bring the circuit
into specification.
Check voltage at the three-pin connector at the wiring
box:
▪L1 is pin 3. N is pin 1. Ground is pin 2.
▪L1 to ground = 110 VAC to 127 VAC.
▪N to ground = 0 VAC
▪L1 to N = 110 VAC to 127 VAC.
Confirm that the L1, N, and ground are correctly
connected. Ensure the connections are tight.
Check voltage at the power board connector: Pin 3 to
pin 6 = 110 VAC to 127 VAC.
Replace or repair the connector from the electrical box
to the power board.
Blower motor runs only at
high speed.
Power board fault. Replace the power board.
Hood lights do not work. Test the operation of the LED assemblies. If only one LED assembly is out, replace the LED light
assembly.
Test the operation of the remote control and buttons. Try all button operations on the control panel and on
the remote.
▪The icon for the lights on the control panel is .
▪The icon for the lights on the remote control is .
▪If the lights operate only from the control panel or
the remote control, replace the failed part.
Under-Cabinet Hood Insert
service.subzero.com
828151 REVA 20
Table of contents
Other Wolf Indoor Furnishing manuals
Popular Indoor Furnishing manuals by other brands

ED
ED 1480WC-24-201 manual

Rowlinson Garden Products
Rowlinson Garden Products Bali SS262A Assembly instructions

Maintal
Maintal Zazou EB SH55 Assembly instructions

Wilhelm Schildmeyer
Wilhelm Schildmeyer 627155 Assembly instructions

Kettler
Kettler HUC31409C quick start guide

Allen + Roth
Allen + Roth WSWS-WU1G manual