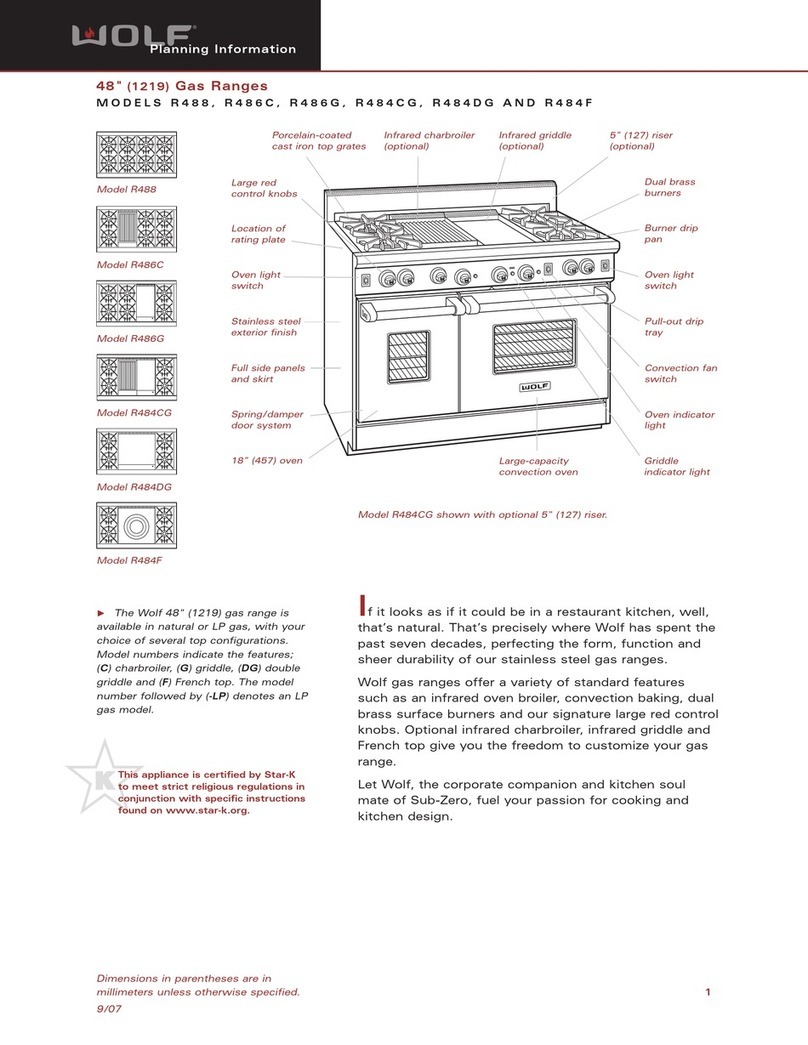
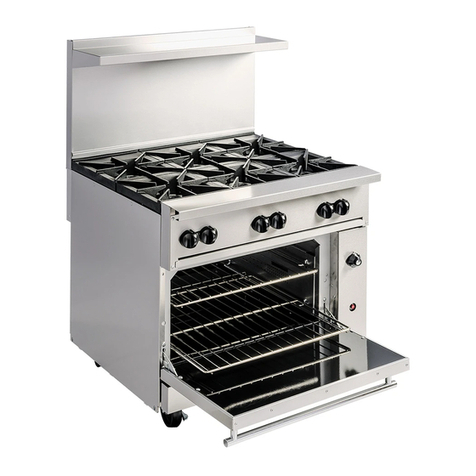
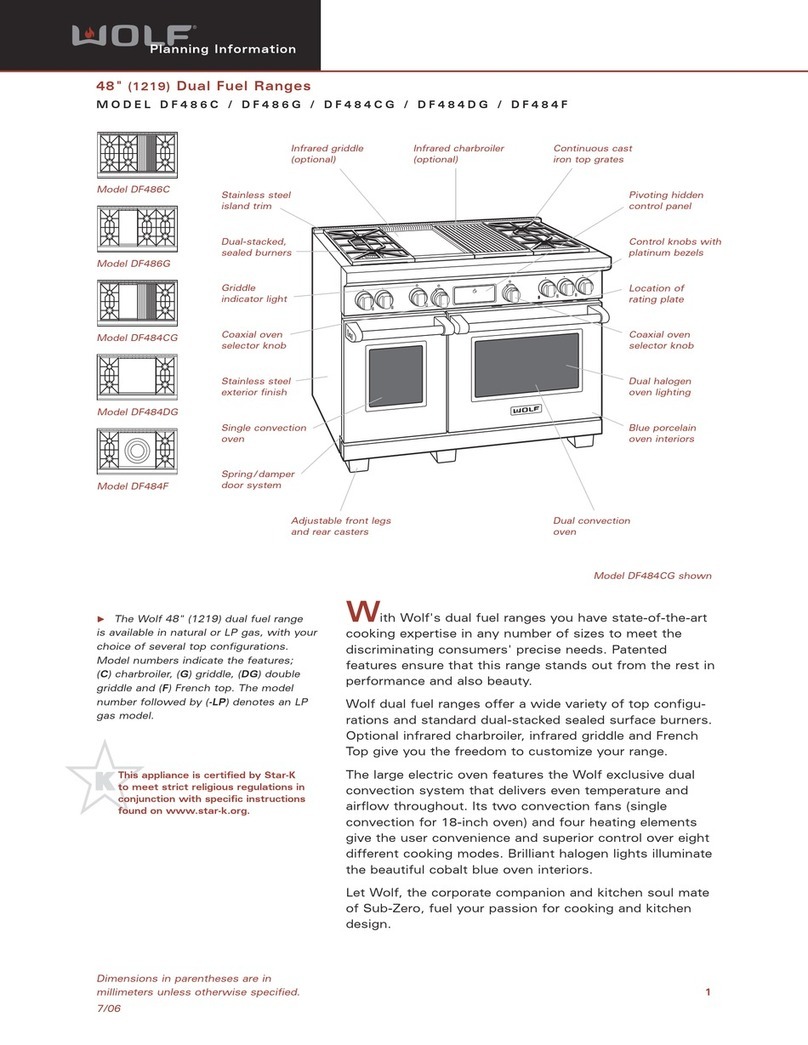
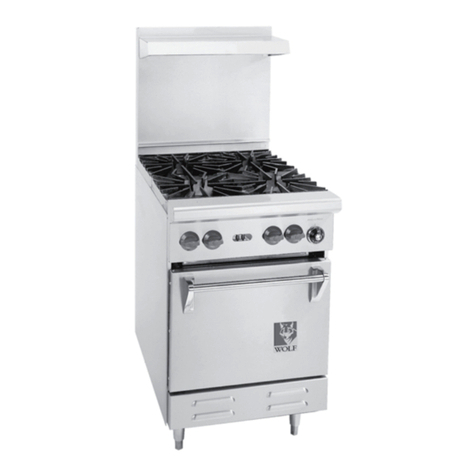
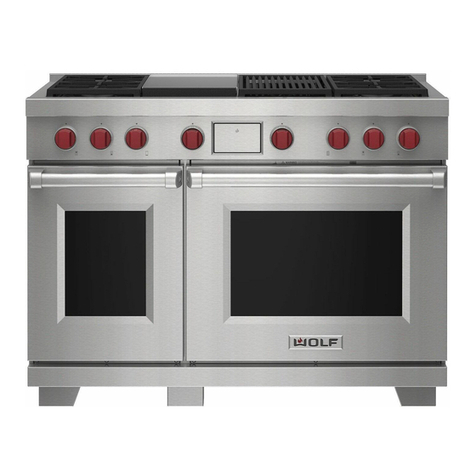
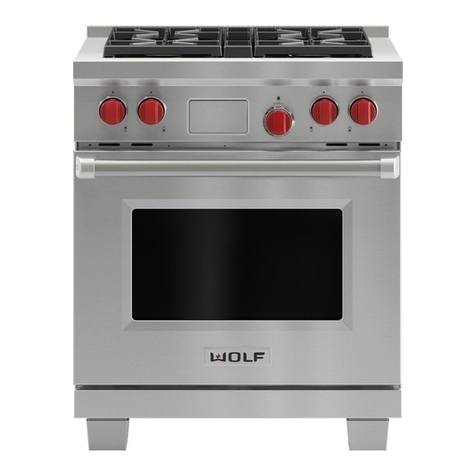
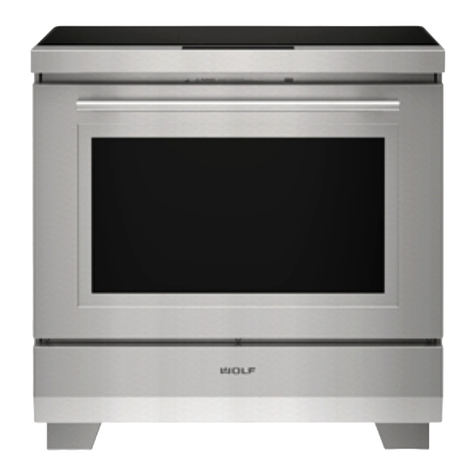
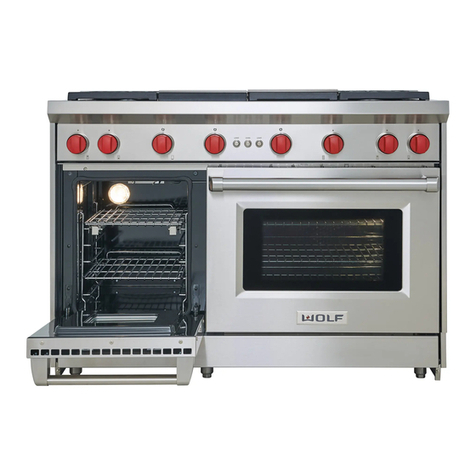
Wolf ICBIR30450-S-T User manual

Guía de uso y mantenimiento
Guide d’utilisation et d’entretien
Guida all’uso e alla manutenzione
Bedienungs- und Pflegeanleitung
Gids voor gebruik en onderhoud
使用和维护指南
Induction Range
Use and Care Guide

2 | English
Contents
3Safety Precautions
6Induction Range Features
6Oven Operation
12 Rangetop Operation
13 Care Recommendations
14 Troubleshooting
15 Wolf Warranty
Induction Range
Customer Care
The model and serial number are listed on the product
rating plate. Refer to page 6 for rating plate location. For
warranty purposes, you will also need the date of installa-
tion and name of your authorized Wolf dealer. Record this
information below for future reference.
SERVICE INFORMATION
Model Number
Serial Number
Date of Installation
Certified Service Name
Certified Service Number
Authorized Dealer
Dealer Number
Important Note
To ensure this product is installed and operated as safely
and eciently as possible, take note of the following types
of highlighted information throughout this guide:
IMPORTANT NOTE highlights information that is especially
important.
CAUTION indicates a situation where minor injury or prod-
uct damage may occur if instructions are not followed.
WARNING states a hazard that may cause serious injury or
death if precautions are not followed.

wolfappliance.com | 3
IMPORTANT INSTRUCTIONS
WARNING
A child or adult can tip this appliance and be killed.
Verify the anti-tip device has been properly installed and
engaged. Ensure the anti-tip device is re-engaged when this
appliance is moved. Refer to the illustrations below for how
to verify correct installation.
Do not operate this appliance without the anti-tip device in
place and engaged. Failure to do so can result in death or
serious burns to children or adults.
To reduce the risk of burns, do not move this appliance
while hot.
ANTI-TIP
DEVICE
38 – 48 mm
Anti-tip device location
Anti-tip device engaged
Safety Precautions
CAUTION
This appliance is for cooking purposes only. It must not be
used for other purposes such as heating a room. Doing so
may result in carbon monoxide poisoning.

4 | English
IMPORTANT INSTRUCTIONS
• Clean only those parts listed in this guide. A steam cleaner is
not to be used.
• Do not use harsh abrasive cleaners or sharp metal scrapers to
clean the oven door glass. They can scratch the surface which
may result in shattering the glass.
• Before using self-clean, remove the grill pan, oven racks, oven
rack guides, and any other utensils.
• Position oven racks in the desired locations when the oven is
cool. If a rack must be repositioned after the oven is already
hot, be sure the pot holder does not contact a hot heating
element in the oven.
• Do not touch heating elements or interior surfaces of the
oven. Heating elements may be hot even though they are dark
in color. Interior surfaces become hot enough to cause burns.
During and after use, do not touch, or let clothing or other
flammable materials contact heating elements or interior sur-
faces of the oven until they have had sucient time to cool.
Safety Precautions
WARNING
Unattended cooking with fat or oil can be dangerous and
may result in fire. Never try to extinguish a fire with water.
Switch o the appliance and cover the flame with a lid or
fire blanket.
WARNING
If the hob surface cracks, turn o the appliance to avoid the
possibility of an electric shock.
CAUTION
The cooking process has to be supervised. A short term
cooking process has to be supervised continuously.
• Do not place metal objects such as knives, forks, spoons, and
lids on the cooking surface. They can get hot.
• This appliance cannot be operated by means of an external
timer or separate remote-control system.

wolfappliance.com | 5
WARNING
Danger of fire: do not store items on the cooking surfaces.
Safety Precautions
IMPORTANT INSTRUCTIONS
WARNING
The appliance and its accessible parts become hot during
use. Care should be taken to avoid touching heating ele-
ments. Children less than 8 years of age shall be kept away
unless continuously supervised.
WARNING
This appliance can be used by children aged from 8 years
and above and persons with reduced physical, sensory, or
mental capabilities or lack of experience and knowledge if
they have been given supervision or instruction concerning
use of the appliance in a safe way and understand the haz-
ards involved. Children should not play with the appliance.
Cleaning and user maintenance should not be made by
children without supervision.

6 | English
Induction Range Features
FEATURES
1Product Rating Plate
2Touchscreen
3Convection Oven
4Rangetop Control Panel
5Induction Element
6Bridge Element
Getting Started
We know you are eager to start cooking, but before you
do, please take some time to read this use and care guide.
Whether you are an occasional cook or an expert chef, it
will be to your benefit to familiarize yourself with the safety
practices, features, operation, and care recommendations
of your Wolf Induction Range.
In induction cooking, the electricity flows through a coil to
produce a magnetic field under the glass-ceramic surface.
When an induction-compatible pan is placed on the cook-
ing surface, currents are induced in the pan and instant
heat is generated. Cookware made of magnetic materials,
such as cast iron or magnetic stainless steel, is required for
induction cooking.
To ensure all residual oil from the manufacturing process
has been removed, clean the range thoroughly with hot
water and mild detergent prior to use. Rinse and dry with a
soft cloth. Refer to Care Recommendations on page 13.
To ensure the best results, review the cooking modes and
special features on page 9.
CAUTION
Do not place cookware on the oven floor or use
aluminum foil or other material to line the oven
floor or side walls. Failure to adhere to this notice
will damage the porcelain interior and will void your
warranty.
INDUCTION ELEMENT RATING
762 mm RANGE kW
279 mm 2.6/3.7 boost
(2) 203 mm with bridge 2.1/3.7 boost
152 mm 1.4/3.7 boost
914 mm RANGE kW
279 mm 2.6/3.7 boost
(2) 203 mm with bridge 2.1/3.7 boost
914 mm Induction Range shown
1
4
6
5
3
2
Oven Operation
To insert a full-extension rack, place the two rear tabs onto
the rack guide (one tab above and one below). Refer to
the illustration below. Angle the rack slightly and slide back
until the front rack notch engages the front rack guide.
Oven Racks
OVEN RACK GUIDES
To install the rack guides in the oven, locate the mount-
ing screws on the oven side walls. Place the rack guide
mounting tabs over the top screws, pivot inward, and slide
down until fully seated. Refer to the illustration below.
OVEN RACKS
To insert a standard rack in the oven, place the rack anti-tip
lock under the side rack guide rails. Slide the rack back
and lift up to clear the rack stops. Continue to slide the
rack back until completely inside the oven. Refer to the
illustration below.
MOUNTING
TA BANTI-TIP
LOCK
RACK
STOP
Oven rack guide
Oven rack anti-tip lock
REAR TA B
Full-extension rack
Induction Range Features

wolfappliance.com | 7
Oven Operation
The touchscreen uses touch technology to select cook-
ing modes and other functions. Refer to the illustrations
below.
The oven has ten cooking modes—Bake, Roast, Broil,
Convection Roast, Convection, Gourmet, Proof, Stone,
Dehydrate, and Warm. Stone and Dehydrate require
accessories.
PRIOR TO USE
To ensure all residual oil from the manufacturing process
has been removed, each oven must go through the fol-
lowing procedure:
1 Clean the oven thoroughly with hot water and a mild
detergent. Rinse and dry with a soft cloth.
2 Turn on ventilation. Some smoke and odor is normal.
3 Touch Quick Start.
4 Touch (Convection Roast) and adjust the tempera-
ture to 260°C for one hour.
5 Touch O and allow the oven to cool with the door
closed.
Home screen
Quick start screen
Gourmet screen
Oven Operation
Oven Racks
MULTIFUNCTION RACK
To insert the multifunction rack, place the two rear tabs
onto the rack guide (one tab above and one below). Refer
to the illustration below. Angle the rack slightly and slide
back until the front rack notch engages the front rack
guide. Place the multifunction pan onto the full extension
rack. Refer to the illustration below.
For roasting meats or vegetables, use rack position 3 or
4 in convection or convection roast mode. For broiling
meats or vegetables, use rack position 5 or 6.
REAR TA BREAR TA B
Install multifunction rack
Place multifunction pan

8 | English
CLOCK
The clock is visible on the touchscreen during all cook-
ing modes. However, the unit is shipped with the standby
power feature enabled, which causes the screen to go
blank after five minutes of inactivity. To disable standby
power, refer to extended options. It is very important the
clock be set to the correct time if a timed cook feature is
used. The clock must be reset after a power outage.
Setting clock:
1 Touch (Settings), then select Time.
2 Touch 12 Hour or 24 Hour mode.
3 Use the slide bar to set time of day, select AM or PM,
then touch Set. A chime indicates the clock is set.
Time can also be adjusted by touching the time on the
touchscreen.
Oven Operation
CONTROL LOCK
The lock feature prevents unwanted control operation. The
lock feature must be reset after a power outage.
To lock or unlock:
1 Touch and hold (Lock) for 3 seconds.
OVEN LIGHT
The oven light turns on automatically when the door is
open and o when closed. To turn the light on while the
door is closed, touch (Light) on the touchscreen.
PREHEAT
During preheat, the oven is heated as quickly and evenly
as possible and is not ideal for cooking. Preheat should
be used for all cooking modes except Broil, Proof, Dehy-
drate, Warm, and some modes in Gourmet. Once preheat
is complete, a chime indicates the oven has reached set
temperature.
Oven Operation
TIMER
Each timer can be set for a maximum of 11 hours and 59
minutes. Once a time is set, the countdown is illuminated
on the touchscreen. The timer is independent from the
oven. Setting the timer does not aect cook time or stop
time.
Setting timer:
1 Touch (Timer 1) or (Timer 2).
2 Use the slide bar to set the duration, then touch Set.
A chime indicates the timer is set.
3 To cancel or edit, touch the countdown time on the
touchscreen.
4 The timer chimes with one minute remaining. The timer
chimes and flashes when complete.
5 Touch the flashing time to turn o.
EXTENDED OPTIONS
Touch (Settings) to access extended options. Use the
slide bar to scroll to the desired option and touch the
option to select. If more information is needed, touch Info.
OPTIONS
Time Select 12 hour or 24 hour.
Sabbath Turn Sabbath on or o.
Clock Select digital, analog, blank, or logo.
Standby Turn standby power on or o.
Language Select: English, Spanish, French, Italian,
German, Dutch, or Chinese.
Units °F/Imperial or °C/Metric.
Showroom For showroom use only.
Info Access helpful tips and product information.
About For service only.
Temp Oset For service only.
Calibration Adjust display calibration.
Sound Mute, 1-5 and high, medium, low.
Brightness Adjust display brightness: 0-100%.
wolfappliance.com | 9
Oven Operation
Cooking Modes
MODE ICON PRESET RANGE PROBE USES
BAKE 175°C 95–290°C •Best for single-rack cooking, primarily baked foods. Use for
standard recipes.
ROAST 175°C 95–290°C •Best for roasting less tender cuts of meat, such as chuck roasts
and stew meat that should be covered.
BROIL BR3
BR3 (High)
BR2 (Med)
BR1 (Low)
Best for broiling meats, fish, and poultry pieces up to 25 mm
thick. Use a two-piece broiler pan and always broil with the
oven door closed.
CONVECTION
ROAST
165°C 95–290°C •Gently browns exterior and seals in juices. Perfect for roasting
tender cuts of beef, lamb, pork, and poultry.
CONVECTION 165°C 95–290°C •Uniform air movement makes it possible to multi-level rack
cook with even browning.
GOURMET GOURMET — — •Gourmet provides quick and convenient meal preparations with
recommendations for cooking mode and rack position. Preset
temperature and range are dependent on food and desired
doneness.
PROOF 30°C 30–45°C Ideal for proofing or rising bread dough.
STONE 230°C 95–290°C •Baking on a ceramic stone. Great for pizza and bread. Stone
accessory required.
DEHYDRATE 60°C 45–75°C Dry a variety of fruits, vegetables, herbs, and meat strips.
Accessory racks required.
WARM 80°C 60–95°C •Designed to keep foods at serving temperature.
ECO 190°C 95–285°C •Energy saving mode designed for roasting thin cuts of meat and
delicate fish. No preheat required.
NOTE: The temperature probe can be used with all cooking modes except Broil, Proof, and Dehydrate.
Cooking Modes
GOURMET
Gourmet provides a variety of quick and convenient meal
preparations. Choose from six categories—Meat, Fish,
Baked Goods, Pizza, Vegetables, and One Dish Meals.
After a selection is made, Gourmet recommends the
proper rack position, sets the cooking mode, and automat-
ically adjusts the temperature—sometimes using multiple
modes and temperatures. The oven does not turn o
automatically when the cook time is complete.
For more information regarding Gourmet, refer to the
techniques and recipes guide included with your appliance.
Setting controls:
1 Touch Gourmet.
2 Use the touchscreen to select the desired settings.
GOURMET GUIDE
MEAT Beef* steak, tenderloin, roast,
prime rib, meatloaf, slow cook
Poultry* whole bird, fresh pieces, whole
breast
Pork* ribs, tenderloin, roast, steak,
chop, whole ham
Lamb* leg, roast, rib rack
FISH Steak*
Fillet*
Breaded
BAKED GOODS Cookies
Cake sheet, fluted, angel, pound,
cupcakes
Pie single crust, double crust
Bread quick bread, yeast loaf,
yeast rolls, biscuits
PIZZA Fresh
Par-Baked
Calzone
VEGETABLES Roasted
Sweet Potato*
Baked Potato*
ONE DISH MEALS Casserole*
Lasagna*
Quiche
*Does not require preheat.

10 | English
Temperature Probe
Use only the temperature probe shipped with this appli-
ance. Refer to the illustration below. The temperature
probe measures the internal temperature of food while
cooking. The probe can be used to monitor the tempera-
ture without setting a desired temperature and can be used
with all cooking modes except Broil, Proof, and Dehydrate.
Setting controls:
1 Preheat the oven to the desired oven temperature in
the desired mode.
2 Completely insert the probe sensor into the thickest
area of the food.
3 When preheat is complete, place food in the oven.
4 Insert the probe into the probe receptacle. Refer to the
illustration below. Close the oven door.
5 Touch (Probe).
6 Touch Set to select the preset temperature. To change
the temperature, use the slide bar to select the desired
temperature, then touch Set.
7 A chime indicates the temperature is 1°C below the set
temperature. The oven chimes and the set tempera-
ture flashes when the internal temperature reaches the
setpoint.
8 Remove, then reinsert the probe to verify the internal
temperature.
9 Touch the flashing temperature to turn o.
Temperature probe
Probe receptacle
Oven Operation
Auto Program
TIMED COOK
Timed Cook automatically turns the oven o at a specified
time. The oven begins to heat immediately and turns o
at the desired stop time. If preheat is required, the preheat
time must be accounted for when determining the cook-
ing duration. The clock must be set to the correct time to
function properly. Use in any cooking mode except Broil,
Gourmet, or Stone. The temperature probe cannot be used
during Timed Cook.
Setting controls:
1 Touch Quick Start, then select the desired cooking
mode and temperature.
2 Touch (Timed Cook), then select the desired cook-
ing duration.
3 Touch Set to start.
4 To cancel, touch the flashing duration/stop time on the
display.
5 The oven turns o automatically when the cook time is
complete.
6 Touch O to turn o.
DELAYED START
Delayed Start automatically turns the oven on and o at
specified times. The oven remains idle until the desired
start time and turns o at the desired stop time. If preheat
is required, the preheat time must be accounted for when
determining the cooking duration. The clock must be set
to the correct time to function properly. Use in any cook-
ing mode except Broil, Gourmet, or Stone. The tempera-
ture probe cannot be used during Delayed Start.
Setting controls:
1 Touch Quick Start, then select the desired cooking
mode and temperature.
2 Touch (Timed Cook), then select the desired cook-
ing duration.
3 Use the slide bar to select the desired stop time, then
touch Set.
4 To cancel, touch the flashing duration/stop time on the
display.
5 The oven turns o automatically when the cook time is
complete.
6 Touch O to turn o.
WARNING
Do not leave raw or perishable food in the oven for
more than one hour before and after cooking. Food
deterioration can occur.
CAUTION
Pull straight down when removing the probe from
the receptacle. Bending or pulling the probe at an
angle during removal may damage the probe and
oven. Do not place a rack or accessory in rack posi-
tion six when using the probe, as it interferes with
probe removal.
CAUTION
The probe and probe receptacle will be very hot.
Handle with care.

wolfappliance.com | 11
Oven Operation
Sabbath (Oven Only)
This appliance is certified by Star-K to meet strict religious
regulations in conjunction with specific instructions found
on www.star-k.org.
Bake, Roast, Proof, and Warm modes can be used in
Sabbath.
Setting controls:
1 Turn the oven light on or o.
2 Touch (Settings), then select Sabbath.
3 Touch On, then touch Set.
4 Touch Quick Start, then select the desired cooking
mode and temperature.
5 To change the temperature while in Sabbath, touch
+ or –. Each touch increases or decreases the temper-
ature by 5°C. The temperature changes randomly after
the new temperature is selected.
6 Touch O to turn o.
Clean
During Clean, the oven is heated to an extremely high
temperature to burn o food soil. The oven lights are
disabled.
Setting controls:
1 Turn on ventilation. Some smoke and odor is normal.
2 Touch Quick Start, then select (Clean).
3 Touch Start.
4 Remove the oven racks and rack guides, then touch Ok.
5 The oven door locks and remains locked until cleaning
is complete and the oven temperature is below 290°C.
6 Touch O to turn o.
Porcelain is made from natural products and, therefore,
can chip or develop fine lines and cracks due to the expan-
sion and contraction that occurs as oven temperature
fluctuates (particularly when the self-cleaning function
is employed). This can result in cosmetic imperfections,
such as a cloudy, dull or scratched appearance. Cosmetic
imperfections may be more visible in a colored oven cavity.
Oven Light
WARNING
Verify power is disconnected from the electrical box
before replacing a light bulb.
Allow the oven to cool completely, then remove the oven
racks and rack guides. To remove the light cover, gently pry
the bottom edge with a flat screwdriver. Remove the exist-
ing bulb and replace with a 40-watt halogen bulb. Refer to
the illustration below. Do not touch the new bulb with bare
hands. Wear rubber gloves or use a paper towel to hold the
bulb during installation.
To replace the light bulb located on the top of the oven
cavity, contact Wolf Factory Certified Service.
LIGHT
COVER
Light bulb replacement
DELAYED CLEAN
Setting controls:
1 Turn on ventilation. Some smoke and odor is normal.
2 Touch Quick Start, then select (Clean).
3 Touch Delayed Clean and use the slide bar to select the
desired start time, then touch Set.
4 Remove the oven racks and rack guides, then touch Ok.
5 The oven door locks and remains locked until cleaning
is complete and the oven temperature is below 290°C.
6 Touch O to turn o.
CAUTION
During Clean, exterior surfaces may get hotter than
usual. Children should be kept away.

12 | English
Rangetop Operation
CONTROL PANEL LOCK
The control panel lock feature prevents unwanted ran-
getop operation. Touch and hold for three seconds
to lock and unlock the control panel. illuminates when
the control panel is locked.
The auto-lock setting defaults to o. Auto-lock can be
enabled in the extended options menu. Refer to page 13.
Auto-lock automatically locks the control panel after 10
minutes of inactivity. Auto-lock must be turned back on
after a power outage.
CAUTION
Do not place hot cookware directly over the control
panel.
Rangetop Operation
CONTROL PANEL
The control panel features illuminated touch controls that
are invisible when the cooking surface is o. A power level
indicator for each control displays the heat setting from
to . Each control is positioned to the corresponding
induction element. Refer to the illustration below.
IMPORTANT NOTE: The unit automatically turns o and
chimes if a spillover contacts the control panel.
Indicators on the control panel illuminate to indicate spe-
cific rangetop operation. Refer to the chart below.
INDICATORS
Power
Control Panel Lock
Hot Surface
Single Element Active
Top Zone Active
Bottom Zone Active
Bridge Active
Simmer
High
Boost
SETTING POWER LEVEL USES
Melt 1 (small flame)
indicator
Melting butter and holding
chocolate and sauces.
Simmer 2–6 indicators Simmering sauces and steam-
ing rice.
Medium 6–7 indicators Making French toast and pan-
cakes and heating milk, cream
sauces, soups, and gravies.
Medium High 7-8 indicators Sauteing, browning, and
frying.
High 8–10 (large flame)
indicators
Boiling water, searing meat,
and canning.
POWER LEVEL INDICATOR
Control panel
Rangetop Operation
SINGLE ELEMENT
Setting controls:
1 Touch .
2 To activate an element, touch the zone indicator for
the desired element on the control panel. Power level
indicators for that zone scroll.
3 Touch for highest heat, for lowest heat, to
activate Boost mode, or touch the desired power level
indicator.
4 To change the heat setting while the element is on,
touch or slide to the desired power level.
5 Touch the zone indicator to turn o a single element or
touch to turn o all elements.
IMPORTANT NOTE: The control flashes for 30 seconds
and turns the element o automatically if no cookware or
incompatible cookware is placed on an element.
BOOST MODE
Boost mode boosts power on one element by diverting
power from an adjacent element. If the adjacent element
is on high, the power output is reduced. The reduction
in power is displayed on the power level indicator of the
adjacent element. illuminates when an element is in
Boost mode.
Boost mode deactivates automatically after approximately
15 minutes of continuous operation and can be reactivated
if desired.

wolfappliance.com | 13
Rangetop Operation Care Recommendations
Care Recommendations
CLEANING
Stainless steel Use a nonabrasive stainless steel cleaner and apply with a soft lint-free cloth. To bring out the natural
luster, lightly wipe the surface with a water-dampened microfiber cloth followed by a dry polishing cham-
ois. Always follow the grain of the stainless steel.
Glass-ceramic surface Allow the surface to cool. Use a spray degreaser to remove fingerprints and a non-abrasive Ceran®
cooktop cleaner for food soil. Do not allow any item that could melt to come in contact with the glass-
ceramic surface when hot. If this occurs, use the razor blade scraper provided with the range to remove.
Control panel Touch and hold (Lock) for 3 seconds to lock the control panel. Use a spray degreaser to remove finger-
prints and food soil. Spray on a cloth before wiping the panel.
IMPORTANT NOTE: Do not spray cleaners directly on the control panel.
Oven rack guides Remove and place on a flat surface near the sink. Clean with hot water and mild detergent or paste of
baking soda and water. Do not immerse in water. Towel dry.
Oven interior IMPORTANT NOTE: Remove all food spills (especially sugary, acidic, and tomato-based sauces) when
the oven interior is safe to touch. Some blemishes are permanent, but do not aect the function of the
porcelain.
Before using the self-clean feature, spray stubborn stains with a mild abrasive cleaner or spray degreaser
and scrub with a no-scratch Scotch-Brite™ pad (pink or blue). Wash the entire oven cavity with soap and
water to remove cleaning chemicals before entering self-clean mode. If residue is not cleaned from the
cavity, etching of the porcelain may occur. Once the self-clean cycle is complete, allow the oven to cool
completely and wipe out ash with a damp cloth.
Multifunction pan To clean the rack, use a mild detergent and scouring pad. Rinse and dry. To clean the pan, discard grease
and wash with hot water and mild detergent. Rinse and dry. The rack is dishwasher safe, but, do not place
the pan in the dishwasher.
Rangetop Operation
BRIDGE ELEMENT
The bridge element provides an oblong heating area for
use with a griddle, open roaster, or fish poacher.
To preheat a griddle, set the bridge element power level to
high for five minutes, then reduce for cooking.
CAUTION
A griddle, open roaster, or fish poacher should not
be used when the bridge element is o or with any
other combination of heating elements.
Setting controls:
1 Touch .
2 To activate Bridge, select the desired power level on an
element.
3 Touch between corresponding element controls
to bridge elements front-to-back. illuminates.
4 To change the power level, adjust the power level on
any active bridged element.
5 Touch the zone indicator on any active bridged element
to turn o or touch to turn o all elements.
HOT SURFACE INDICATOR
illuminates on the rangetop control panel and remains
illuminated even when the induction surface is o.
EXTENDED OPTIONS
The extended options feature allows the user to set prefer-
ences for volume, tone, and the control panel lock feature.
Setting adjustment:
1 The cooktop must be locked to enter extended options.
To lock, touch and hold for 3 seconds.
2 Touch and hold for five seconds. Power level 1
appears on the rear element control, and “Vo” appears
on the display.
3 Touch or on the front element control to adjust
volume.
4 Touch on the rear zone to adjust tone. Power level
2 appears on the rear element control, and “Fr” appears
on the display.
5 Touch or on the front element control to adjust
tone.
6 Touch on the rear zone to adjust the automatic
control panel lock. Power level 3 appears on the rear
element control, and “Lo” appears in the display.
7 Touch or on the front element control to turn the
automatic lock feature o or on.
8 Touch on the rear zone to adjust brightness. Power
level 4 appears on the rear element control, and “Br”
appears in the display.
9 Touch or on the front element control to adjust
brightness.
10 Touch to confirm settings.
11 Touch and hold for 3 seconds to return to idle.

14 | English
INDUCTION RANGETOP
Induction elements do not operate.
• Verify power is on.
• Verify electrical power to the range and home circuit
breaker is on.
• The induction rangetop is in lock mode. Touch and
hold for three seconds to unlock the control panel.
• The rangetop automatically turns o after 2 hours of
continual use (high), 6 hours (medium), and 8 hours
(simmer).
Rangetop temperature issue.
• Contact Wolf Factory Certified Service.
Controls are slow to respond.
• Verify the controls are clean and free of moisture.
• Contact Wolf Factory Certified Service.
Troubleshooting
Troubleshooting
OPERATION
Range does not operate.
• Verify power is on.
• Verify electrical power to the range and home circuit
breaker is on.
• The oven automatically turns o after 12 hours of con-
tinual use, except in Dehydration or Sabbath mode.
Clock turns o.
• The unit is in standby power mode. Refer to page 8.
OVEN
Oven temperature issue.
• Contact Wolf Factory Certified Service.
No response from the touchscreen or control panel.
• Turn the circuit breaker o for 20 seconds, then turn it
back on.
Error displayed on the touchscreen or control panel.
• Contact Wolf Factory Certified Service.
Oven “pops” or “bangs” during preheat or cool down.
• Normal with new oven cavity expansion and
contraction.
• Run the clean cycle. If it persists, contact Wolf Factory
Certified Service.
Oven door is locked.
• The oven door locks and remains locked until the clean
cycle has ended and the oven temperature is below
290°C.
SERVICE
• Maintain the quality built into your product by contact-
ing Wolf Factory Certified Service.
• When contacting service, you will need the model and
serial number of your product. Both numbers are listed
on the product rating plate. Refer to page 6 for rating
plate location.
• For warranty purposes, you will also need the date of
installation and name of your authorized Wolf dealer.
This information should be recorded on page 2 of this
guide.

wolfappliance.com | 15
Wolf Appliance International Limited Warranty
FOR RESIDENTIAL USE
FULL TWO YEAR WARRANTY*
For two years from the date of original installation, this Wolf Appliance product warranty covers all parts and labor to repair or
replace, under normal residential use, any part of the product that proves to be defective in materials or workmanship. All service
provided by Wolf Appliance under the above warranty must be performed by Wolf Factory Certified Service, unless otherwise speci-
fied by Wolf Appliance, Inc. Service will be provided during normal business hours.
LIMITED FIVE YEAR WARRANTY
For five years from the date of original installation, Wolf Appliance will repair or replace the following parts that prove to be defective
in materials or workmanship: stainless steel briquette trays, gas valves, drip pans, electronic control boards and electric heating ele-
ments. If the owner uses Wolf Factory Certified Service, the service provider will repair or replace these parts with the owner paying
for all other costs, including labor. If the owner uses non-certified service, the owner must contact Wolf Appliance, Inc. (using the
information below) to receive repaired or replacement parts. Wolf Appliance will not reimburse the owner for parts purchased from
non-certified service or other sources.
To receive parts and/or service, contact your authorized Wolf dealer, visit subzero-wolf.com/international, or email us at
*Stainless steel (doors, panels, handles, product frames and interior surfaces) are covered by a limited 60-day parts and labor warranty
for cosmetic defects.
Warranty
Sub-Zero, Sub-Zero & Design, Sub-Zero & Snowflake Design, Dual Refrigeration, The Living Kitchen, Great American Kitchens The Fine Art of Kitchen Design, Wolf, Wolf &
Design, Wolf Gourmet, W & Design, red colored knobs, Cove, and Cove & Design are registered trademarks and service marks of Sub-Zero Group, Inc. and its subsidiaries.
All other trademarks are property of their respective owners in the United States and other countries.

2 | Español
Índice
3Precauciones de seguridad
6Características de la cocina de inducción
6Funcionamiento del horno
12 Funcionamiento de la encimera
13 Recomendaciones de mantenimiento
14 Localización y solución de problemas
15 Garantía de Wolf
Cocina de inducción
Atención al cliente
La información relativa al número de serie y el modelo se
muestra en la placa de datos del producto. Consulte la
página 6 para ver la ubicación de la placa de datos. Para
cuestiones relacionadas con la garantía, también necesita
saber la fecha de instalación y el nombre de su distribuidor
autorizado de Wolf. Guarde la siguiente información para
tenerla como referencia en el futuro.
INFORMACIÓN SOBRE EL MANTENIMIENTO
Referencia del modelo
Número de serie
Fecha de instalación
Nombre del servicio certificado
Número de servicio certificado
Distribuidor autorizado
Número del distribuidor
Nota importante:
Para garantizar que este producto se instala y funciona de
la forma más eficaz y segura posible, tenga en cuenta la
información que se destaca en esta guía:
Cuando aparece NOTA IMPORTANTE, se resalta
información que resulta especialmente importante.
PRECAUCIÓN indica una situación en la que se pueden
sufrir heridas leves o provocar daños al producto si no se
siguen las instrucciones.
AVISO indica el peligro de que se produzcan heridas graves
o incluso la muerte si no se respetan las precauciones.

wolfappliance.com | 3
INSTRUCCIONES IMPORTANTES
AVISO
Es posible que un niño o un adulto vuelque la unidad y
resulte muerto.
Compruebe que el dispositivo antivuelco está instalado
y fijado correctamente. Al mover la unidad, asegúrese de
que el dispositivo antivuelco está fijado correctamente.
Consulte las siguientes ilustraciones para saber cómo
verificar que el dispositivo se ha instalado correctamente.
No utilice esta unidad sin haber colocado y fijado el
dispositivo antivuelco. Si no se siguen estas instrucciones,
podría causar graves quemaduras o incluso la muerte de
niños o adultos.
Para reducir el riesgo de quemaduras, no mueva la unidad
mientras esté caliente.
DISPOSITIVO
ANTIVUELCO
38 – 48 mm
Ubicación del dispositivo
antivuelco.
Dispositivo antivuelco
correctamente fijado.
Precauciones de seguridad
PRECAUCIÓN
Esta unidad únicamente está destinada a fines de cocción.
No debe utilizarse para otros fines como calentar una
habitación. Si lo hace, podría originar una intoxicación
por monóxido de carbono.

4 | Español
INSTRUCCIONES IMPORTANTES
• Limpie solo las piezas que se especifican en esta guía.
Tampoco debe utilizar limpiadores de vapor.
• No utilice limpiadores abrasivos ni espátulas metálicas afiladas
para limpiar el cristal de la puerta del horno. Pueden rayar la
superficie y podría provocar la rotura del cristal.
• Antes de utilizar el modo de limpieza automática, extraiga la
bandeja para asar, las rejillas, las guías de las rejillas y cualquier
otro utensilio del horno.
• Coloque las rejillas del horno en las ubicaciones que desee
cuando el horno esté frío. En el caso de que tenga que colocar
una rejilla cuando el horno ya está caliente, asegúrese de que
los elementos aislantes no toquen ningún elemento calefactor
del horno.
• No toque los elementos calefactores ni las superficies
interiores del horno. Es posible que los elementos calefactores
estén calientes aunque ya no estén rojos. Las superficies
interiores pueden calentarse lo suficiente para causar
quemaduras. Mientras esté utilizando el horno y después de
utilizarlo, no toque ni deje que la ropa ni otros materiales
inflamables toquen los elementos calefactores ni las
superficies interiores del horno hasta que haya pasado un
tiempo y se hayan enfriado lo suficiente.
Precauciones de seguridad
AVISO
Dejar la comida sin supervisión mientras cocina con grasa o
aceite puede ser peligroso e incluso provocar un incendio.
Nunca intente extinguir un incendio con agua. Apague el
aparato y cubra con cuidado la llama con una tapa o una
manta para incendios.
AVISO
Si la superficie de la encimera se agrieta, apague el aparato
para evitar la posibilidad de una descarga eléctrica.
PRECAUCIÓN
El proceso de cocción tiene que ser supervisado. Un proceso
de cocción breve debe ser supervisado de forma continua.
• No coloque objetos metálicos, como cuchillos, tenedores,
cucharas o tapaderas sobre la superficie de cocción.
Pueden calentarse.
• Este aparato no se puede operar por medio de un temporiza-
dor externo o un sistema de control remoto separado.

wolfappliance.com | 5
AVISO
Peligro de incendio: no deje elementos sobre las superficies
de cocción.
Precauciones de seguridad
INSTRUCCIONES IMPORTANTES
AVISO
El aparato y sus zonas accesibles pueden calentarse durante
su uso. Tenga cuidado de no tocar los elementos caloríficos.
Mantenga alejados a los niños menores de ocho años, salvo
que estén bajo supervisión permanente.
AVISO
Este aparato puede ser utilizado por niños de más de ocho
años y personas con discapacidades físicas, sensoriales
o mentales, o con falta de experiencia o conocimientos,
siempre y cuando cuenten con supervisión o se les haya
enseñado cómo utilizarlo de forma segura y comprendan
los peligros que supone. Los niños no deben jugar con el
aparato. Los niños no deben realizar las tareas de limpieza y
mantenimiento sin supervisión.

6 | Español
Características de la cocina de inducción
CARACTERÍSTICAS
1Placa de datos del producto
2Pantalla táctil
3Horno de convección
4Panel de mandos de la cocina
5Elemento de inducción
6Elemento puente
Primeros pasos
Sabemos que está deseando empezar a cocinar,
pero, antes de hacerlo, debe leer esta guía de uso y
mantenimiento. Tanto si es un cocinero ocasional como
si es un chef experto, le resultará útil familiarizarse
con las prácticas de seguridad, las características, el
funcionamiento y las recomendaciones de mantenimiento
de la cocina de inducción de Wolf.
En las placas de inducción, la electricidad fluye a través
de una bobina, lo que produce un campo magnético por
debajo de la superficie de cristal cerámico. Al colocar una
cazuela apta para inducción en la superficie de cocción, se
inducen las corrientes en ella y el calor se genera de manera
instantánea. Para la cocina de inducción, es necesario que
los utensilios de cocina sean de materiales magnéticos,
como hierro fundido o acero inoxidable magnético.
Para asegurarse de que no queda ningún resto de
aceite del proceso de fabricación, limpie la cocina
minuciosamente con agua caliente y un detergente
suave antes de usarla. Aclare y seque con un paño
suave. Consulte la sección «Recomendaciones de
mantenimiento» en la página 13.
Para asegurarse de que logra los mejores resultados,
consulte la sección Características especiales y modos de
cocción de la página 9.
PRECAUCIÓN
No coloque ningún utensilio de cocina sobre la
superficie del horno, ni utilice papel de aluminio u
otro material para forrar la superficie o las paredes del
horno. Si no sigue esta advertencia, la porcelana interior
del horno se dañará y la garantía quedará anulada.
DATOS DE LOS ELEMENTOS DE INDUCCIÓN
COCINA de 762 mm kW
279 mm 2,6/3,7 de máxima potencia
(2) 203 mm con puente 2,1/3,7 de máxima potencia
152 mm 1,4/3,7 de máxima potencia
COCINA de 914 mm kW
279 mm 2,6/3,7 de máxima potencia
(2) 203 mm con puente 2,1/3,7 de máxima potencia
Se muestra cocina de inducción de 914 mm
1
4
6
5
3
2
Funcionamiento del horno
Para insertar una rejilla de extracción total, coloque las dos
pestañas traseras en la guía de la rejilla (una pestaña por
arriba y otra por debajo). Observe la siguiente ilustración.
Incline ligeramente la rejilla y deslícela hacia atrás hasta
que la muesca de la rejilla frontal encaje en la guía de la
rejilla frontal.
Rejillas del horno
GUÍAS DE LA REJILLA DEL HORNO
Para instalar las guías de la rejilla en el horno, localice los
tornillos de montaje en las paredes laterales del horno.
Coloque las pestañas de montaje de las guías de la rejilla
sobre los tornillos superiores, gírelas hacia adentro y
deslícelas hasta que se introduzcan en su totalidad.
Observe la siguiente ilustración.
REJILLAS DEL HORNO
Para insertar una rejilla estándar en el horno, coloque
el bloqueo anti-vuelco de la rejilla debajo de los rieles
de las guías de rejilla laterales. Deslice la rejilla hacia
atrás y levántela para pasarla por los topes de la rejilla.
Siga deslizando la rejilla hacia atrás hasta que esté
complemente insertada dentro del horno. Observe la
siguiente ilustración.
PESTAÑA
DE MONTAJE BLOQUEO
ANTI-VUELCO
TOPE DE
LA REJILLA
Guía de la rejilla del horno
Bloqueo anti-vuelvo de la rejilla
del horno
PESTAÑA
TRASERA
Rejilla de extracción total
Características de la cocina de inducción
Other manuals for ICBIR30450-S-T
1
This manual suits for next models
1
Table of contents
Languages:
Other Wolf Range manuals

Wolf
Wolf CHALLENGER XL Series User manual

Wolf
Wolf DF486C Instructions for use

Wolf
Wolf CHALLENGER CHR-6-0 User manual

Wolf
Wolf CHR User manual

Wolf
Wolf R304 User manual

Wolf
Wolf DF366 User manual

Wolf
Wolf R484CG User manual

Wolf
Wolf C45S9 User manual

Wolf
Wolf FV361 User manual

Wolf
Wolf Rangetops User manual
Popular Range manuals by other brands

Whirlpool
Whirlpool RF3020XP Use & care guide

GE
GE JBS03 JBP15 and Owner's manual and installation instructions

Whirlpool
Whirlpool Range installation instructions

GE
GE JSP46DP Dimensions and installation information

Electrolux
Electrolux EW30ES65GS - 30" Slide-In Electric Range Use and care guide

Samsung
Samsung NX58F5500SS user manual