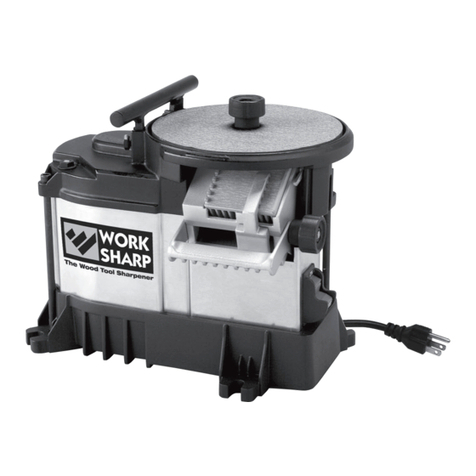
Work Sharp WS2000 User manual

WS2000
USER’S GUIDE
GUÍA DEL USUARIO
MODE D'EMPLOI
Fast, Easy,
& Versatile
Tool Sharpening
Afilado rápido,
fácil, y versátil
de herramientas
Affûtage d’outils
rapide, précis
et polyvalent

www.worksharptools.com 3
Thank You
Thank you for purchasing a WORK SHARP™WS2000. As president of this company,
I am very excited and proud to offer you this quality, innovative product. I am equally
proud of the great people at Professional Tool Manufacturing, LLC who are dedicated
to designing, marketing, and manufacturing great products. At ProTool Manufacturing,
we strive to make every sharpening experience easy, fast, and effective. I am confident
you will find the performance and precision you expect in this high quality sharpening
system. With this breakthrough approach to sharpening, you can now sharpen your tools
much faster and without the heat of a bench grinder. It will work every time.
If you have questions, suggestions, or need help with WORK SHARP™The Tool Sharp-
ener, please contact us. Our customer representatives are here to help. We support what
we build and we appreciate hearing from you!
Though we believe operating your WORK SHARP™tool will be intuitive, please read
this User’s Guide to ensure you achieve the superior results you desire. We have in-
cluded some sharpening tips you may find handy.
We also invite you to visit our website at www.worksharptools.com. There you will
find:
•Demonstrations of all operations with the sights and sounds leading to successful
tool sharpening
•Downloadable copies of this User’s Guide
•Warranty registration
•Service and contact numbers
Thank you again for buying WORK SHARP™The Tool Sharpener. Enjoy its performance,
quality, and precision.
And remember, Work Smart, Work Sharp!
Hank O’Dougherty
President, Professional Tool Manufacturing, LLC
Maker of WORK SHARP™
, Drill Doctor™
, and DAREx™
Table of Contents
Thank You and Welcome ....................................... 2
Safety Warnings and Precautions ......................... 4
Getting to Know Your Tool .................................... 9
Unpacking and Assembly .................................... 10
Sharpening Guide................................................ 11
Selecting the Right Abrasive for the Job ............. 14
Sharpening Tips .................................................. 15
Care and Maintenance......................................... 17
Troubleshooting................................................... 18
Technical Support & Warranty............................ 19
Spanish................................................................ 20
French.................................................................. 40

4 www.worksharptools.com
www.worksharptools.com 5
For your own safety, please read this
User’s Guide before operating the WORK
SHARP™WS2000.
Installation / Assembly
•Carefully unpack WORK SHARP™The
Tool Sharpener and set it on a table or
workbench. Check to see that no dam-
age has occurred in shipment. Check
all packing material to be sure that all
parts are present. See User’s Guide page
10 for part identification diagram.
•The WORK SHARP™WS2000 unit
needs to be placed on a flat stable table-
top to complete assembly.
•Connect to properly wired outlet, or elec-
trical shock may occur.
Precautions
FIRE CAN CAUSE DEATH, INJURY
AND PROPERTY DAMAGE! Reduce the
risk of death, injury or property damage
from fire. Read, understand and follow
these safety instructions. Make certain
that anyone else who uses this sharpener
or who is a bystander in the sharpening
area understands and follows these safety
instructions as well.
SHARPENING DEBRIS CAN INJURE
EYES AND BURN SKIN! Reduce the risk
of injury from sharpening debris. Read,
understand and follow these safety in-
structions.
ELECTRIC SHOCK
WARNING Electric shock can kill! Read,
understand and follow ALL safety instruc-
tions.
•
AVOID BODY CONTACT WITH
EARTHED OR GROUNDED
SURFACES
(e.g., pipes, radiators,
ranges, refrigerators).
• DO NOT ABUSE THE CORD. Never
yank the cord to disconnect it from the
socket. Keep the cord away from heat,
oil and sharp edges. Do not modify the
electrical plug provided—if it will not
fit the outlet, have the proper outlet
installed by a qualified electrician.
• USE PROPER EXTENSION CORD.
Use only 3-wire extension cords that
have 3-prong grounding plugs and 3-
pole receptacles that accept the tool’s
plug. Make sure your extension cord
is in good condition. When using an
extension cord, be sure to use one
heavy enough to carry the current
your product will draw. Please refer to
the following table for minimum cord
size requirements:
Ampere
Rating
Volts Extension Cord Length
More
than
Not
More
Than
120v 25
ft.
50
ft.
100
ft.
150
ft.
0 6 AWG
18 16 16 14
• DISCONNECT TOOLS. Always discon-
nect WORK SHARP™WS2000 when
cleaning, inspecting, and changing
accessories. When not in use, discon-
nect from the power supply. Never
touch internal parts of the sharpener
when it is turned on or plugged in.
• GROUNDING INSTRUCTIONS: In the
event of a malfunctions or breakdown,
grounding provides a path of least re-
sistance for electric current to reduce
risk of electric shock. This tool is
equipped with an electric cord having
an equipment-grounding conductor
and grounding plug. The plug must
be plugged into a matching outlet that
is properly installed and grounded in
accordance with all local codes and
ordinances. Improper connection of
the equipment-grounding conductor
can result in a risk of electric shock.
The conductor with insulation having
an outer surface that is green with or
without yellow stripes is the equip-
ment-grounding conductor. If repair
or replacement of the electric cord or
plug is necessary, do not connect the
equipment-grounding conductor to a
live terminal. Check with a qualified
electrician or service personnel if the
grounding instructions are not com-
pletely understood, or if in doubt as to
whether the tool is properly grounded.
Repair or replace damaged or worn
cord immediately.
• THIS TOOL IS INTENDED FOR USE
ON A CIRCUIT THAT HAS AN OUT-
LET THAT LOOKS LIKE THE ONE IL-
LUSTRATED IN FIGURE A. The tool
has a grounding plug that looks like
the plug illustrated in Figure A. A tem-
porary adapter, which looks like the
adapter illustrated in Figures B and C,
!IMPORTANT Safety Warnings & Instructions
18" minimum
flammable
materials
FIRE PREVENTION
Sharpening operations create hot sparks and sharpening debris:
1. The work area must be kept clean and free from all flammable material.
2. The workbench should be protected with
an appropriate heat resistant cover
to prevent fire or scorching of
surfaces.
3. Keep an approved fire
extinguisher of the proper
size and type in the work
area. Inspect it regularly
to ensure that it is in
proper working order.
Know how to use the
fire extinguisher.
4. WARNING: Never
perform sharpening op-
erations in the presence
of flammable liquids or
gases.
Fig. A
Grounding Pin
Cover of Grounded
Outlet Box

6 www.worksharptools.com
www.worksharptools.com 7
may be used to connect this plug to
a 2-pole receptacle as shown in Fig-
ure B if a properly grounded outlet is
not available. The temporary adapter
should be used only until a properly
grounded outlet can be installed by
a qualified electrician. The green-col-
ored rigid ear, lug, and the like, ex-
tending from the adaptor must be con-
nected to a permanent ground such as
a properly grounded outlet box.
PERSONAL PROTECTION
Sharpening operations can create hot
sparks and metal debris, loud noises and
dust.
• ALWAYS USE SAFETY GLASSES.
Everyday eyeglasses only have impact
resistant lenses, they are NOT safety
glasses.
• USE EAR PROTECTION DURING USE.
The WORK SHARP™WS2000 can gen-
erate in excess of 85 dB(A) noise emis-
sions under certain load conditions.
• USE FACE OR DUST MASK if working
operations create dust.
• WEAR CLOSED, NON FLAMMABLE
PROTECTIVE CLOTHING. Do not wear
loose clothing, gloves, neckties, rings,
bracelets, or other jewelry which may
get caught in moving parts. Wear pro-
tective hair covering to contain long
hair
•KEEP WORK AREA CLEAN. Cluttered
areas and work benches invite acci-
dents.
•FREQUENTLY CLEAN SHARPENING
DEBRIS FROM UNIT AND WORK
AREA.
•DO NOT USE IN DANGEROUS ENVI-
RONMENT. Do not use in damp or wet
locations, avoid exposure to rain. Keep
work area well lit. Do not use tools in
the presence of flammable liquids or
gases.
•KEEP CHILDREN AWAY. All visitors
should be kept safe distance from work
area, do not let persons not involved in
the work touch the tool or power cord.
•MAKE WORKSHOP KID PROOF with
padlocks, master switches, or by remov-
ing starter keys.
•SECURE TOOL. Use clamps or a vise to
hold tool when practical. It’s safer than
using your hand and it frees both hands
to operate the tool.
•USE THE RIGHT TOOL. Don’t force
tool or attachment to do a job for which
it was not designed. Don’t force small
tools to do the job of a heavy duty tool.
Do not use the tool for purposes not in-
tended.
•NON-SLIP FOOTWEAR IS RECOM-
MENDED.
•NEVER LEAVE TOOL RUNNING UN-
ATTENDED. Ensure tool has come to
a complete stop before leaving work
area.
•MAINTAIN TOOL WITH CARE. Keep
the WORK SHARP™WS2000 clean
for best and safest performance. Fol-
low instructions for maintenance and
changing accessories. Inspect cords
periodically and if damaged have them
repaired by an authorized service facil-
ity. Inspect extension cords periodically
and replace if damaged. Keep unit dry,
clean and free from oil and grease.
•STORE IDLE TOOLS. When not in use,
tools should be stored in a dry, locked-
up place out of the reach of children.
•AVOID UNINTENTIONAL STARTING.
Make sure switch is in the “OFF” posi-
tion before plugging in.
•STAY ALERT. Watch what you are do-
ing, use common sense and do not oper-
ate the tool when you are tired or im-
paired.
•DON’T OVERREACH. Keep proper foot-
ing and balance at all times.
•NEVER STAND ON TOOL. Serious in-
jury could occur if the tool is tipped or
if the cutting tool is unintentionally con-
tacted.
•CHECK DAMAGED PARTS. Before
use of the tool, it should be carefully
checked to determine that it will oper-
ate properly and perform its intended
function. Check for alignment of moving
parts, binding of moving parts, break-
age of parts, mounting and any other
conditions that may affect its operation.
A guard or other part that is damaged
should be properly repaired or replaced
by an authorized service center unless
otherwise indicated in the instruction
manual. Have defective switches re-
placed by an authorized service center.
Do not use the tool if the switch does
not turn it on and off.
•INSPECT GRINDING WHEELS FOR
DAMAGE. Do not use tool if grinding
wheel is damaged as injury may occur.
•WARNING. The use of any accessory
or attachment other than one recom-
mended in this user’s guide may present
a risk of personal injury.
•HAVE YOUR TOOL REPAIRED BY A
QUALIFIED PERSON. This electric tool
complies with applicable safety stan-
dards. Repairs should only be carried
out by qualified persons using original
spare parts; otherwise this may result
in considerable danger to the user.
•SAVE THESE INSTRUCTIONS AFTER
READING.
For Service Contact:
Professional Tool Manufacturing, LLC
WORK SHARP™
210 E. Hersey St.
Ashland, OR 97520
USA
Phone: 1-800-597-6170
FAX: 541-552-1377
Email: [email protected]
WARNING:
Some dust created by power sand-
ing, grinding, miscellaneous con-
struction activities, as well as
contents from the machine includ-
ing the molding, wiring, grind-
ing wheel, or any other parts may
contain chemicals known to the
State of California to cause cancer,
birth defects or other reproductive
harm and can be hazardous to your
health.
WARNING:
Work Sharp Tempered Glass
Wheel is NOT intended for use on
the WS2000 model. Use ONLY the
Edge-Vision™wheel on model
WS2000.
Grounding
Means
Cover of Grounded Outlet Box
Fig. B Fig. C
Adapter
Metal
Screw
8 www.worksharptools.com
www.worksharptools.com 9
1Getting to Know Your Tool
Tool Specs
•1⁄5horsepower induction motor
•1750 RPM max. wheel speed
•Edge-Vision™ slotted wheel—accepts slotted or solid abrasive media
•Cast aluminum top, cast aluminum chisel sharpening port with diamond plated
heat sink; Cast metal top tool rest; Impact and vibration resistant tool grade
plastic housing and base
•Air-cooling system: Heat sink and routed airflow
•Industrial grade switch with safety lockout and grounded 6' power cord
•150 mm adhesive-backed abrasives for adhering to grinding wheel
Top Knob
for securing
wheel
Wheel Direction
Indicator
Top Tool Rest for
top-side freehand
sharpening
Also accepts standard 6" PSA
abrasives with trimming
Alignment
fence keeps tool
square during
sharpening
Durable plastic
housing and
base
Edge-Vision™ Slotted Wheel
allows you to see the cutting
edge as you sharpen!
Locking power
switch
Air-cooling vent
ports for routed
air flow cooling
Edge-Vision™ underside
sharpening port
& grit exhaust port
6' grounded power cord
Air-cooling vent ports for
routed air flow cooling
Wheel direction indicator
Tool hold-down keeps tool
flat during sharpening
Chisel Port is 15/8" wide
with fixed 25° angle. Heat
sink is diamond plated to
remove burr.
Bench mounting tabs
Durable cast
aluminum top
1⁄5hp induction motor
produces 1750 rpm
max. wheel speed
WARNING:
Keep your WORK SHARP™ WS2000
and the work space clean for best
performance and safety. Do not let
sharpening debris accumulate on,
in or around the WORK SHARP™
WS2000. Accumulated fine metal
sharpening debris can be very hot
and may present a fire danger if the
machine or your workspace is not
properly cleaned and maintained.
Accumulated sharpening debris can
also degrade the life of your WORK
SHARP™WS2000 and cause pre-
mature wear on some components.
If sharpening debris has accumu-
lated, do not immediately throw it
into a trash receptacle without en-
suring the debris is completely cool
and free of heat. Improperly dispos-
ing of the accumulated sharpening
debris may present a fire risk. Do
not collect the sharpening debris
during sharpening. This increases
the risk of heat build up in the de-
bris and the potential for fire.
OFF-LOCKED OUTOFF
ON
To lock out power switch, remove the lock-out key.
The machine can now be turned off, but not on.
To turn the machine on, insert lock-out key in the
front of the power switch. Machine may now be
turned on or off.
SAFETY FEATURE:
Lock out power switch

10 www.worksharptools.com
www.worksharptools.com 11
2Unpacking and Assembling
1. Carefully remove the tool and the
accessories kit from the box.
2. The WORK SHARP™WS2000
includes:
•WORK SHARP™ WS2000 unit
•Edge-Vision™ slotted wheel
(fig. 2-1)
•Top tool rest (fig. 2-2)
•Abrasives kit including standard
and slotted adhesive-backed
abrasives (fig. 2-3)
•User’s guide
3. Remove all packing materials and
store in case you ever need to return
the unit for servicing.
4. Visually inspect your tool for poten-
tial damage incurred during ship-
ment. If there is damage, call 800-
597-6170 to speak to a Customer
Service Representative.
5. Your WORK SHARP™ WS2000’s
Edge-Vision™ slotted see-through
wheel (fig. 2-1) can be used two
ways. Use it with the Edge-Vision™
Underside Port for sharpening small
carving and lathe tools, screwdrivers,
and other general purpose grinding
tasks. You can also use it with solid
abrasive media for fast and easy top-
side sharpening of putty knives, axes,
and other bladed tools.
6. To apply the 150mm adhesive-
backed abrasive disks, a clean work
environment is critical. Peel the back-
ing film off the abrasive disk. Handle
the abrasive disk by the outer edges,
being careful not to get any contami-
nants on the adhesive backing. Flex
the paper into a “U” (fig. 2-4) shape
so the center of the abrasive is cen-
tered on the wheel. Slowly flatten out
the abrasive from the center working
toward the outer edge of the wheel.
Adhere the slotted abrasive in the
same manner outlined above. Be sure
all the slots in the abrasive properly
align with the slots in the wheel sur-
face. This will ensure proper perfor-
mance of the Edge-Vision™ slotted
wheel during use.
Fig. 2-1
Edge-VisionTM
Slotted Wheel
Fig. 2-2
Top Tool Rest
Fig. 2-3
Abrasives Kit
(standard and slotted)
Fig. 2-4
7. To install your
top tool rest,
slide the top
tool rest into
the T-slots on
the top of the
unit. Locate the
desired height,
then gently snug
the two thumb
screws. Do not
over tighten the thumbscrews, as you
can potentially stress and/or damage
the T-slots in the top casting.
8. Mount the grinding wheel to the
wheel hub and secure the wheel with
the top knob.
9. Your tool is now ready for use!
3Sharpening Guide
Read all safety warnings before operat-
ing this tool.
Chisel Sharpening
Port—For chisels and
plane blades up to 1 5/8
"
wide
STEP 1
Mount the grinding wheel onto the unit
with coarse side up.
STEP 2
Flatten tool back on topside of abrasive
wheel. Lay tool down heel first onto wheel.
After flattening tool back, flip grinding
wheel over so coarse abrasive is now face
down for bevel grinding.
Chisel Sharpening Port

12 www.worksharptools.com
www.worksharptools.com 13
STEP 3
Place tool in sharpening port under the
tool hold-down, on the right side of align-
ment fence.
STEP 4
Slide fence against left edge of tool in port
and hand tighten alignment fence knob.
STEP 5
Keeping the tool flat on the sharpening
port diamond surface; “plunge and pull”
the tool in and out of the sharpening port
to sharpen the bevel.
Only contact the wheel during “plunge” for
one-half to one second.
Repeat “plunge and pull” sharpening in
the sharpening port until a consistent
finish, or desired sharpness is achieved.
For best surface finish and sharpness, flip
wheel so fine abrasive is face down and
repeat step 5.
Edge-VisionTM
Underside Port—
For small carving tools,
screwdrivers, and general
grinding
☛ Tip
Use a permanent marker to color
the edge of your tool to be sharp-
ened.
Step 1
Mount the Edge-VisionTM slotted wheel
and turn unit around so you are facing the
underside port on backside of tool.
Step 2
Slowly bring tool into the Edge-VisionTM
underside port under the wheel.
Pull Step 3
Look down through the spinning Edge-
VisionTM wheel to see the cutting edge.
Sharpen the tool to your desired shape and
sharpness.
☛ Tip
Use a shop light to shine through
the top of the Edge-Vision™ wheel
to improve your view of the tool
being sharpened.
Topside Freehand
Sharpening (top tool rest
use optional)—For putty knives,
scrapers, axes, hatchets and
other flat-blade tools
Step 1
Mount the Edge-Vision™ wheel onto the
unit.
Step 2
Lay blade face onto the right side of grind-
ing wheel.
Step 3
Pull blade towards you keeping blade face
flat on the grinding surface.
Plunge
Step 4
Raise tool or handle to create or re-sharp-
en a beveled edge if desired.
Step 5
Repeat this step on the other side of the
blade tool being sharpened. Continue until
desired finish or sharpness is achieved.
General Purpose
Grinding
Larger work pieces are best ground using
the top side of the Edge-VisionTM wheel.
You can use either slotted or solid abrasive
media for these tasks. Smaller work pieces
are best ground using the Edge-VisionTM
wheel with slotted abrasives and the
Underside Port. This enables you to take
advantage of the Edge-Vision’s unique
ability to let you see through the wheel
and actually see the material surface as
you grind it.
Pull slowly
towards you
R
o
t
a
t
i
o
n
Edge-VisionTM Port
Use side-to-side motion

14 www.worksharptools.com
www.worksharptools.com 15
Which WORK SHARP™Port Should I Use?
Chisels &
plane blades up
to 15/8"
Carving tools,
screwdrivers,
detail
sharpening
Putty knives,
scrapers,
axes, hatchets
and other flat
blade tools
General
grinding
Sharpening Port X
Edge-VisionTM Port X X
Topside Freehand X X
4Selecting the Right Abrasive for the Job
Either solid or slotted abrasives can be
used for grinding and sharpening tasks.
•For damaged tools or heavy grinding:
Use the coarse solid abrasive for
fastest results.
•For light grinding tasks: Use the fine
solid abrasive.
•For Edge-Vision™ Grinding: Use the
coarse slotted abrasive.
•For Edge-Vision™ Sharpening: Use
the fine slotted abrasive.
About WORK SHARP™
Abrasive Technology
Finish
•Coated abrasive disks start flat and
stay flat. (Bonded abrasives used in
stones and most power systems re-
quire frequent dressing to keep the
wheel flat.)
•The grit size is engineered to provide
optimal sharpness and surface finish
at each stage of sharpening. (Users
who are interested in a “utility sharp”
edge will find exceptional edge perfor-
mance on the faster coarse grits.)
Speed
•The abrasive selection is integrated
with design of the WORK SHARP™
drive train and cooling system to pro-
vide the fastest material removal rate
while minimizing the risk of overheat-
ing tool steels.
•The sharpening port includes a dia-
mond lapping abrasive that provides
superior burr control and allows for
1-step re-sharpening.
Simplicity
•Accepts readily available standard
150 mm or 6" adhesive–backed abra-
sives with trimming. (No custom abra-
sives or expensive custom wheels
required. Coarse grits are available at
most hardware/woodworking stores.
Fine grits are readily available at any
automotive paint supply store.)
•Slotted abrasives are available through
a Work Sharp retail outlet or direct
from Work Sharp.
5Sharpening Tips
Sharpening Port Tips
When sharpening chisels and plane
blades up to 15/8
"
wide
• Choose Coarse Grit for damaged or
chipped tools
• Choose Fine Grit for re-sharpening tools
• Chisels under ½" wide should be sharp-
ened on the left side of the sharpening
port.
• Chisels wider than ½" should be sharp-
ened on the right side of the sharpening
port.
• Leave fence loose enough against chis-
el so the chisel can slide between the
fence and guide rail.
• “Plunge and pull” method in sharpen-
ing port will yield best results. Contact
wheel for only ½–1 second.
• Do not leave chisel against abrasive
wheel for longer than 1 second, or you
may risk overheating your tools.
• Keeping chisels flat on the sharpening
port diamond lapping plate will ensure
burr removal, optimum heat control and
proper bevel edge sharpening.
Edge-VisionTM Underside
Sharpening Port Tips
When using the Edge-VisionTM
slotted wheel
• Use a permanent marker to color the
edge of your tool to be sharpened. This
will help you better see the edge you are
sharpening.
• Shine a shop light or drop light onto the
top of the unit to better see through the
slotted wheel.
• Sharpen tools with the cutting edge
at the 12:00 or 2:00 position, and not
10:00. This will ensure you are sharpen-
ing your tools edge with the wheel spin-
ning away from you for optimum safety
and control.
Plunge Pull
Correct 2:00
position
Correct 12:00 position
Incorrect
10:00
position

16 www.worksharptools.com
www.worksharptools.com 17
Top Side Freehand
Sharpening Tips (top tool
rest use optional)
• Use the coarse abrasive surface for ag-
gressive grinding, or use the fine grit
abrasive surface for light grinding.
• Always place the blade face onto the
right side of grinding wheel so that the
wheel spins away from you.
• Raise tool or handle to create or re-
sharpen a beveled edge if desired.
• The top tool rest can be used to assist in
the sharpening process if desired.
• Axes and hatchets are best sharpened
using the top tool rest and a sweeping
motion to grind the bevel. With the
power switch in the “off” position, lay
the bevel onto the wheel and find the
proper grind angle. Then turn on your
machine and grind the corresponding
bevel onto each side of the axe or
hatchet.
• The height adjustability of the top tool
rest can assist in more precise bevel
grinding of your tools. Adjust the top
tool rest and blade projection to achieve
more precise bevel grinding of tools.
6Care and Maintenance
After sharpening only a few tools, sharp-
ening debris will accumulate on your
workbench and also under the grinding
wheel. Sharpening debris may promote
premature wear in the WS2000 unit and
can potentially pose a fire risk. Cleaning
the unit on a consistent basis can add
life to your machine and increase safety.
Before any maintenance or cleaning is
performed, be sure to unplug your WORK
SHARP™WS2000.
For best results, use the WORK SHARP™
replacement abrasives kits. WORK
SHARP™recommends the type of abra-
sives we provide because they create a
finish superior to oil and water stones—
without the mess.
However, if you choose, you can also use
any standard 6" adhesive backed abrasive
available at your local hardware store or
tool distributor. Trimming of standard 6"
abrasives will be required to fit the 150mm
grinding wheels. Or, you can also use a
standard 8" × 11" sheet of your preferred
sandpaper, and cut it to size. First spray
the abrasive backing with a spray tack ad-
hesive, then place the grinding wheel onto
the paper and trim to fit.
Contact the store or dealer where you pur-
chased WORK SHARP™The Tool Sharp-
ener, or contact WORK SHARP™directly
at www.worksharptools.com, to purchase
replacement abrasive kits.
Cleaning your WORK
SHARP™WS2000
With the WORK SHARP™WS2000 un-
plugged, remove the grinding wheel to
expose the top of the unit and sharpening
port. Brush away the accumulated sharp-
ening debris from the wheel and sharpen-
ing port area. Remove sharpening debris
with a small, dry brush. Dispose of the
sharpening debris in a safe and environ-
mentally approved manner.
▲ Important Safety Tip
DURING CLEAN UP, BE SURE
GRIT IS NOT HOT OR GLOW-
ING, AS IT MAY START A
FIRE!
Determining if replacing the
abrasive is required
The provided selection of abrasives with
the WORK SHARP™WS2000 is designed
to give you the best sharpening perfor-
mance available. We have included pre-
mium abrasives that will provide you with
long-lasting results. However, the abrasive
will wear out eventually. It may need to be
changed if:
• When sharpening a tool, it takes notice-
ably longer to achieve sharp results
• Abrasive is ‘loading up’ and is not able
to be cleaned
• There is a tear, wrinkle, or hole in the
abrasive
• There is a bubble or lump under the
abrasive
7Troubleshooting
Problem
Not sharpening entire Chisel bevel face
Solutions
• The bevel angle previously sharpened
onto tool is not 25°. Continue sharpen-
ing.
• Sharpening not complete yet. Use coarse
grit for fast material removal.
• Tool being sharpened is not completely
flat on the heat sink during sharpening.
• Sharpening port fence is not snug
against tool, which allows tool to skew
in port.
Problem
Excessive heat build-up
Solutions
• Plunging tool against abrasive disk too
long.
• Applying too much load pressure against
abrasive disk during sharpening.
• Abrasive needs to be cleaned or re-
placed.
• Smaller tools should be sharpened on
the left side of port using light pressure
and less sharpening time. Use slotted
media with smaller tools.
Top tool rest height
adjusts up or down
R
o
t
a
t
i
o
n
Pull slowly
towards you

18 www.worksharptools.com
www.worksharptools.com 19
Problem
Cannot get damage removed from tool
cutting edge
Solutions
•
You have not spent enough time on the
coarse grit during sharpening. Ensure all
damage at cutting edge has been removed
before proceeding to the finer grit.
•
The back of your tool is not flat. Flatten
the tool back on the topside of the grind-
ing wheel.
•
Abrasive needs to be cleaned or replaced.
Problem
Sharpening takes excessively long time
Solutions
•
Abrasive needs to be cleaned or replaced.
•
Tool being sharpened is excessively dam-
aged and should be reground or re-shaped
using the coarse abrasive.
Problem
Excessive vibration
Solutions
•
Grinding wheel is damaged. STOP IMME-
DIATELY and inspect wheel for damage.
•
WORK SHARP™unit not placed stably on
workbench or work area. Clamp to work
bench with mounting tabs for best perfor-
mance and stability.
•
If excessive vibration continues, call a
customer service agent for direction.
Problem
Tool is not sharp
Solutions
•
Back of chisel is not flat at the cutting
edge.
•
Bevel has not been sharpened all the way
to the cutting edge.
•
Burr has been created at cutting edge.
Follow repeated “plunge and pull” method
for best results in the chisel sharpening
port.
•
Marks from previous (coarser) grit have
not yet been removed.
Problem
Tool will not stay sharp
Solutions
•
The burr at the cutting edge was not re-
moved. Follow repeated “plunge and pull”
method for best results.
•
Tools made of softer steels do not hold an
edge as long and may need to be sharp-
ened more often.
Problem
Wheel stall
Solutions
•
You are pushing too hard. Apply less load
force in sharpening port.
•
Light pressure during sharpening yields
best results.
For Technical Support
1-800-418-1439
(toll-free USA and Canada only)
1-541-552-1301
Please call 6:00 AM–3:30 PM Pacic Time.
Warranty
2-year warranty on all WORK SHARP™components; excludes abrasives
Your WORK SHARP™is warranted to
be free of defects due to workmanship
or design for 2 years from the purchase
date. If your WORK SHARP™fails to
operate, or if any operating problem oc-
curs, contact WORK SHARP™Technical
Service at:
1-800-418-1439
(toll-free USA and Canada only)
1-541-552-1301
Please call 6:00 AM–3:30 PM Pacific Time.
Do not return this product to the store
where you purchased it. Do not attempt
any service or repairs other than those
suggested by a WORK SHARP™Tech-
nical Service Representative (TSR).
During the period of warranty, WORK
SHARP™will, at our discretion, repair
or replace this product free of charge
and will refund Standard Ground UPS
postage or shipping charges providing
that the following conditions are met:
1. A copy of the proof of purchase is
provided.
2. The product has been operated for
the purpose intended as described
in the operating instructions and
has not been abused or mishandled
in any way.
3. The product has not been disman-
tled and no service or repairs have
been attempted other than those
suggested by a WORK SHARP™
TSR.
4. The Return Goods Authorization
number (RGA #) (assigned by the
WORK SHARP™TSR) is written
on the shipping label.
Please make certain to package items in
such a way as to eliminate further dam-
age during shipping. Ship via a traceable
carrier and properly insure the package.
No CODs are accepted. Unapproved
shipping charges are nonrefundable.
Complete and mail back the Warranty
Registration & Customer Survey in the
WORK SHARP™box, or register online:
Professional Tool Manufacturing, LLC
WORK SHARP™
210 E. Hersey St.
Ashland, OR 97520 USA
www.worksharptools.com
Please Fill in the Following
for Your Records.
WORK SHARP™Serial Number:
_____________________
Date of Purchase:
_____ / _____ / _______
Purchased from:
_____________________

20 www.worksharptools.com
www.worksharptools.com 21
Gracias
Gracias por comprar el afilador de herramientas WORK SHARP™ WS2000. Como presi-
dente de esta compañía me siento muy entusiasmado y orgulloso de ofrecerles este
producto innovador y de alta calidad. De igual forma, estoy orgulloso del excelente
personal de Professional Tool Manufacturing, LLC que está dedicado al diseño, promo-
ción y fabricación de excelentes productos. En ProTool Manufacturing nos esforzamos
por lograr que cada experiencia de afilado sea sencilla, rápida y efectiva. Confío en que
usted encontrará en este sistema de afilado de alta calidad el desempeño y la precisión
que espera. Con este enfoque innovador en el campo del afilado podrá ahora afilar sus
herramientas de carpintería mucho más rápido y sin el calor generado por los amola-
dores de banco. Funcionará siempre.
Por favor, comuníquese con nosotros si tiene alguna inquietud, sugerencias o necesita
ayuda con su WORK SHARP™ The Tool Sharpener. Nuestros representantes de servicio
al cliente están allí para ayudarlo. Damos respaldo a los productos que elaboramos ¡y
nos encanta conocer su opinión!
Si bien consideramos que el funcionamiento de la herramienta WORK SHARP™es intuiti-
vo, le rogamos que lea esta guía del usuario para asegurarse de que obtendrá los resultados
superiores que usted desea. Hemos incluido algunos consejos para afilar que posiblemente
encuentre útiles. Por favor visite nuestra página Web www.worksharptools.com.
Allí encontrará:
•Demostraciones de todas las operaciones con todos los detalles que lo llevarán a
afilar exitosamente sus herramientas
•Versiones para descargar de esta guía del usuario
•Registro de la garantía
•Números de servicio y contacto
Una vez más le damos las gracias por comprar WORK SHARP™ The Tool Sharpener.
Disfrute su desempeño, calidad y precisión.
Y recuerde: Trabaje inteligentemente, ¡trabaje agudamente!
Hank O’Dougherty
Presidente, Professional Tool Manufacturing, LLC
Fabricantes de WORK SHARP™
, Drill Doctor™
, y DAREx™
Índice
English .................................................................. 1
Agradecimiento y bienvenida ..............................20
Advertencias y precauciones sobre seguridad..... 21
Conociendo su herramienta.................................28
Desempaque y ensamblado ................................. 29
Guía para afilar ...................................................30
Elección del abrasivo adecuado
según el trabajo .............................................. 34
Consejos para afilar............................................. 34
Cuidado y mantenimiento....................................36
Localización y solución de problemas ................. 37
Soporte técnico y garantía................................... 39
French.................................................................. 40

22 www.worksharptools.com
www.worksharptools.com 23
Por su propia seguridad le rogamos que
lea esta Guía del usuario antes de poner
a funcionar su afilador de herramientas
WORK SHARP™.
Instalación / Ensamblaje
•Desempaque con cuidado WORK
SHARP™The Tool Sharpener y colóque-
lo en una mesa o banco de trabajo.
Verifique que no hayan ocurrido daños
durante el despacho. Revise todos los
materiales del empaque para asegurarse
de que estén todas las piezas. Consulte
la Guía del usuario página 22 para ver el
diagrama de identificación de piezas.
•A fin de completar el ensamblaje, el afi-
lador de herramientas WORK SHARP™
debe colocarse en una superficie plana y
estable.
•Conecte a tomas de corriente debida-
mente instaladas; de lo contrario, pu-
eden ocurrir choques eléctricos.
Precauciones
¡UN INCENDIO PUEDE CAUSAR LA
MUERTE, LESIONES Y DAÑOS A LA
PROPIEDAD! Reduzca el riesgo de
muerte, lesiones o daños a la propiedad
por un incendio. Lea, comprenda y siga es-
tas instrucciones de seguridad. Asegúrese
de que cualquiera que utilice este afilador
o se encuentre como espectador dentro
del área donde se está afilando también
comprenda y siga estas instrucciones de
seguridad. Recuerde, que cuando se afila
se producen chispas y residuos de metal
que pueden iniciar incendios, quemar la
piel y dañar los ojos.
¡LOS DESECHOS PROVENIENTES DEL
AFILADO PUEDEN LESIONAR LOS OJOS
Y QUEMAR LA PIEL! Disminuya el riesgo
de lesiones por causa de los desechos pro-
venientes del afilado. Lea, comprenda y
siga estas instrucciones sobre seguridad.
Constate que cualquier otra persona que
use este afilador o que se encuentre en el
área donde se esté afilando comprenda y
siga también estas instrucciones sobre se-
guridad.
DESCARGA ELÉCTRICA
ADVERTENCIA ¡Una descarga eléctrica
puede ser mortal! Lea, comprenda y siga
TODAS las instrucciones sobre seguridad.
•EVITE EL CONTACTO DEL CUERPO
CON SUPERFICIES CONECTADAS A
TIERRA (es decir, tubos, radiadores,
estufas, refrigeradores).
•NO MALTRATE EL CABLE. No tire del
cable para desconectarlo del tomaco-
rriente. Mantenga el cable alejado del
calor, de aceites y bordes filosos. No
modifique el enchufe eléctrico sumi-
nistrado. Si no calza en el tomacorri-
ente haga que un electricista califica-
do instale el tomacorriente apropiado
•UTILICE UN CABLE DE EXTENSIÓN
ADECUADO. Utilice solamente cables
de extensión de 3 alambres que tengan
enchufes de 3 clavijas con conexión a
tierra y receptáculos de 3 polos que
acepten el enchufe de la herramienta.
Compruebe que el cable de extensión
se encuentre en buenas condiciones.
Cuando utilice un cable de extensión,
cerciórese de utilizar uno suficiente-
mente fuerte que permita conducir
la corriente eléctrica que utilizará
su producto. Por favor refiérase a la
siguiente tabla para los requerimien-
tos mínimos de tamaño de cable:
Capacidad
nominal
en
amperios
Voltios Longitud del cable de
extensión
Más
de
No
Más
de
120v
7,6
m
15,2
m
30,5
m
45,7
m
0 6 AWG
18 16 16 14
•DESCONECTE LAS HERRAMIEN-
TAS. Siempre desconecte el afilador
de herramientas WORK SHARP™
cuando limpie, inspeccione o cambie
accesorios. Cuando no esté en uso,
desconéctelo de la fuente de energía.
Nunca toque las partes internas del
afilador cuando esté activado o enchu-
fado.
•INSTRUCCIONES PARA LA CONE-
XIÓN A TIERRA: En caso de una falla
o avería, la conexión a tierra propor-
ciona el camino de menor resistencia
para que la corriente eléctrica dis-
minuya el riesgo de descarga eléctrica.
Esta herramienta está equipada con un
cable eléctrico que tiene un conductor
para conexión a tierra del equipo y un
enchufe a tierra. El enchufe debe co-
nectarse en un tomacorriente que esté
adecuadamente instalado y conectado
a tierra de acuerdo con la normativa
y ordenanzas locales. La inadecuada
conexión del conductor de conexión
a tierra del equipo puede represen-
tar riesgo de descarga eléctrica. El
conductor con aislamiento que tiene
una superficie exterior verde con o sin
listas amarillas es el conductor para
conexión a tierra del equipo. Si es nece-
sario realizar la reparación o el cambio
del cable eléctrico o del enchufe, no co-
necte el conductor para conexión a
!IMPORTANTE Advertencias y
precauciones sobre seguridad
Mínimo de 18 in. (45,7 cm)
materiales
inflamables
PREVENCIÓN DE INCENDIOS
El funcionamiento del afilador crea chispas calientes y desechos provenientes del afilado:
1. El área de trabajo debe mantenerse limpia y libre de todo material inflamable.
2. La mesa de trabajo debe ser protegido con una
cubierta adecuada resistente al calor
para evitar que la superficie se in
cendie o se queme.
3. Mantenga un extintor de incen
dios aprobado del tipo y
tamaño adecuado dentro del
área de trabajo. Inspec-
ciónelo con regularidad
para asegurarse de que
esté funcionando de forma
adecuada. Aprenda como
utilizar el extintor de incen-
dios.
4. ADVERTENCIA: NUNCA
opere el afilador en presencia
de líquidos o gases inflamables.

24 www.worksharptools.com
www.worksharptools.com 25
tierra del equipo a un terminal activo.
Si no comprende completamente las
instrucciones para conexión a tierra o
si tiene dudas sobre si la herramienta
está adecuadamente conectada a tie-
rra, consulte con un electricista cali-
ficado o personal de servicio. Repare
o cambie el cable dañado o gastado
inmediatamente.
•ESTA HERRAMIENTA ESTÁ DESTI-
NADA PARA USO EN UN CIRCUITO
QUE TENGA UN TOMACORRIENTE
QUE SEA SIMILAR AL QUE SE ILUS-
TRA EN LA FIGURA A. La herramien-
ta tiene un enchufe a tierra que es
similar al que se ilustra en la figura A.
En caso de que no esté a disposición
un tomacorriente con conexión a
tierra, podrá utilizarse un adaptador
temporal que se parezca al que se ilus-
tra en las figuras B y C para conectar
este enchufe a un receptáculo bipolar
como se muestra en la figura B. El
Fig. A
adaptador temporal deberá utilizarse
solamente hasta que un electricista
calificado instale un tomacorriente
adecuadamente conectado a tierra. La
orejeta rígida de color verde, lengüeta
o similar que se extiende desde el
adaptador deberá conectarse a una
tierra permanente tal como un cajetín
adecuadamente conectado a tierra.
PROTECCIÓN PERSONAL
La tarea de afilar puede crear chispas
calientes y partículas de metal, ruido es-
tridente y polvo.
•SIEMPRE USE GAFAS DE SEGURI-
DAD. Los anteojos de uso diario sola-
mente tienen lentes resistentes a im-
pactos, NO son gafas de seguridad.
•UTILICE PROTECCIÓN PARA LOS OÍ-
DOS MIENTRAS ESTÉ REALIZANDO
LA TAREA. El afilador de herramientas
WORK SHARP™WS2000 puede gene-
rar emisiones de sonido superiores a
85 dB(A) bajo ciertas condiciones de
carga.
•UTILICE UNA MÁSCARA PARA LA
CARA O PARA EL POLVO SI EL TRA-
BAJO A REALIZAR CREA POLVO.
•UTILICE ROPA PROTECTORA CE-
RRADA, INCOMBUSTIBLE. No use
ropa suelta, guantes, corbatas, anillos,
brazaletes u otro tipo de artículos o
prendas que puedan quedar atrapados
en las partes móviles. Utilice cubierta
protectora para contener el pelo largo.
•MANTENGA LIMPIA EL ÁREA DE
TRABAJO. Las áreas y bancos de tra-
bajo desordenados son una invitación a
los accidentes.
•LIMPIE CON FRECUENCIA LOS
DESECHOS PROVENIENTES DEL
AFILADO QUE SE ENCUENTREN EN
LA UNIDAD Y EN EL ÁREA DE TRA-
BAJO.
•NO UTILICE EN AMBIENTES PELI-
GROSOS. No utilice en lugares húmedos
o mojados; evite la exposición a la llu-
via. Mantenga bien iluminada el área de
trabajo. No utilice herramientas en pre-
sencia de líquidos o gases inflamables.
•HAGA QUE EL TALLER SEA A PRUE-
BA DE NIÑOS con el uso de candados,
interruptores maestros o retirando las
llaves de activación.
•MANTENGA ALEJADOS A LOS NIÑOS.
Todos los visitantes deberán mante-
nerse a una distancia prudencial del área
de trabajo. No permita que las personas
que no estén involucradas en el trabajo
toquen la herramienta o el cable.
•SUJETE SU HERRAMIENTA. Utilice
abrazaderas o prensas para sujetar su
herrmienta, cuando sea práctico. Re-
sulta más seguro que utilizar las manos
y las libera para operar la herramienta.
•UTILICE LA HERRAMIENTA ADE-
CUADA. No fuerce la herramienta o los
accesorios a realizar un trabajo para el
cual no fueron diseñados. No fuerce he-
rramientas pequeñas a realizar la labor
de herramientas para trabajo pesado.
No utilice la herramienta para fines para
los que no está destinada.
•SE RECOMIENDA EL USO DE CAL-
ZADO ANTI-RESBALANTE.
•NUNCA DEJE UNA HERRAMIENTA
DESATENDIDA CUANDO ESTÉ EN
FUNCIONAMIENTO. Compruebe que
la herramienta se haya detenido por
completo antes de retirarse del área de
trabajo.
•CUIDE Y MANTENGA LA HERRA-
MIENTA. Mantenga limpio el afilador
de herramientas de carpintería WORK
SHARP™WS2000 para lograr un de-
sempeño óptimo y más seguro. Siga
las instrucciones de mantenimiento y
cambio de accesorios. Inspeccione los
cables periódicamente y si han sufrido
daños, haga que una compañía de ser-
vicio autorizada los repare. Inspeccione
las extensiones eléctricas periódica-
mente y reemplácelas si están dañadas.
Mantenga la unidad seca, limpia y libre
de aceite y grasa.
•GUARDE LAS HERRAMIENTAS QUE
NO ESTÉ USANDO. Cuando no esté
utilizándolas, deberá guardar las herra-
mientas en un lugar seco y cerrado bajo
llave, fuera del alcance de los niños.
•EVITE ENCENDERLO ACCIDENTAL-
MENTE. Asegúrese de que el inter-
ruptor se encuentre en la posición de
apagado “OFF” antes de enchufarlo.
•ESTÉ ATENTO. Fíjese en lo que está
haciendo, utilice el sentido común y no
haga funcionar la herramienta cuando
esté cansado o fatigado.
•NO SE ESTIRE DEMASIADO. Manten-
ga los pies bien plantados y el equilibrio
en todo momento.
•NO SE PARE SOBRE LA HERRAMIEN-
TA. Pueden ocurrir serias lesiones si la
herramienta se voltea o si se toca invo-
luntariamente la herramienta de corte.
Media de
aterrizaje
Cubierta de tomacorrientes a tierra
Fig. B Fig. C
Adaptador
Tornillo
metálico
Cubierta de
tomacorrientes
a tierra
Punta
de tierra

26 www.worksharptools.com
www.worksharptools.com 27
•REVISE LAS PIEZAS DAÑADAS. An-
tes de utilizar la herramienta deberá
revisarla cuidadosamente para deter-
minar que opere ade-cuadamente y que
realice las funciones para las cuales fue
diseñada. Verifique la alineación de las
piezas móviles, la sujeción de las mis-
mas, la ruptura de piezas, el montaje
y cualquier otra condición que pueda
afectar su funcionamiento. A menos
que se indique lo contrario en el manual
de instrucciones, un centro autorizado
de servicio deberá reparar adecuada-
mente o reemplazar los protectores o
cualquier otra pieza dañada.
Haga que un centro de servicio auto-
rizado reemplace los interruptores de-
fectuosos. No utilice la herramienta si el
interruptor no la enciende o la apaga.
•INSPECCIONE LAS MUELAS PARA
AMOLAR EN BUSCA DE DAÑOS. No
utilice la herramienta si la muela de
amolar está dañada, ya que puede oca-
sionar lesiones.
•ADVERTENCIA. El uso de accesorios o
adminículos distintos a los recomenda-
dos en el manual de instrucciones pu-
ede representar un riesgo de lesiones
personales.
•HAGA QUE UN PERSONAL CALIFI-
CADO REPARE LA HERRAMIENTA.
Esta herramienta eléctrica cumple con
las normas de seguridad pertinentes.
Únicamente un personal calificado de-
berá llevar a cabo las reparaciones, uti-
lizando piezas de repuesto originales;
de lo contrario, el usuario puede quedar
expuesto a riesgos considerables.
•GUARDE ESTAS INSTRUCCIONES
DESPUÉS DE LEERLAS.
Para servicio, comuníquese con:
Professional Tool Mfg, LLC
WORK SHARP™
210 E. Hersey St.
Ashland, OR 97520
USA
Teléfono: 1-800-597-6170
FAX: 541-552-1377
ADVERTENCIA:
Algunos polvos generados por lija-
do mecánico, amolado, actividades
de construcción varias, así como
las piezas de la máquina, inclu-
yendo perfiles, cables, amoladores
y demás piezas, pueden contener
químicos reconocidos en el Estado
de California como cancerígenos,
causantes de defectos congénitos
y otros daños al sistema reproduc-
tivo y pueden ser dañinos para su
salud.
ADVERTENCIA:
La muela de vidrio templado de Work
Sharp no está destinada para uso con
el modelo WS2000. Utilice SOLA-
MENTE la muela Edge-Vision™ en
el modelo WS2000.
ADVERTENCIA:
Mantenga limpia su unidad WORK
SHARP™y el área de trabajo para
lograr un desempeño óptimo y ma-
yor seguridad. No permita que se
acumulen desechos provenientes
del afilado, sobre el afilador de he-
rramientas WORK SHARP™o alre-
dedor de la misma. La acumulación
de desechos finos provenientes del
afilado de metales, puede ocasionar
recalentamiento y representar un
riesgo de incendio si la máquina o
su área de trabajo no se encuen-
tran debidamente limpias y cui-
dadas. Los desechos acumulados
provenientes del afilado también
pueden deteriorar la vida de su uni-
dad WORK SHARP™y ocasionar
el desgaste prematuro de algunos
componentes.
Si ha ocurrido la acumulación de
residuos producto del afilado, no
los tire a la basura inmediatamente
sin antes asegurarse de que los re-
siduos estén completamente fríos
y libres de calor. La eliminación
inadecuada de desechos acumula-
dos provenientes del afilado puede
representar un riesgo de incendio.
El afilador de herramientas WORK
SHARP™ha sido diseñado para
suspender los residuos producto
del afilado por el mayor tiempo
posible y esparcirlos en el área de
trabajo, detrás de la herramienta.
Esto aumenta la probabilidad de
que los desechos provenientes del
afilado se enfríen. No recoja los
residuos durante el proceso. Esto
aumenta el riesgo de acumulación
de calor en los residuos y el riesgo
de incendio.
APAGADO-BLOQUEADOAPAGADO
ENCENDIDO
Para bloquear el interruptor de activación, retire la
clavija de bloqueo. Ahora puede apagar la máquina,
pero no encenderla.
Para activar/encender la máquina, inserte la clavija
de bloqueo al frente del interruptor de activación.
Ahora puede encender o apagar la máquina.
CARACTERÍSTICA DE
SEGURIDAD:
Interruptor de bloqueo

28 www.worksharptools.com
www.worksharptools.com 29
1Conociendo su herramienta
Perilla superior para
asegurar la muela
Indicador de
dirección de
la muela
Soporte superior de
herramientas para
afilado superior a pulso
La muela acanalada
Edge-Vision™ de 150
mm también acepta
abrasivos estándar PSA
de 6 pulgadas (15,2 cm)
La defensa de
alineación mantiene
la herramienta a
escuadra durante el
proceso de afilado
Carcasa
de plástico
duradero y base
¡La muela acanalada Edge-
Vision™ le permiten ver
el borde cortante a medida
que afila!
Bloqueo del interruptor
de activación
Ventila de
enfriamiento por
aire para flujo de
aire dirigiclo
Abertura de afilado
inferior y abertura para
evacuación de partículas
Edge-Vision™
Cable de alimentación de 6 pies
(1,8 m) con conexión a tierra
Aberturas para
enfriamiento por medio del
flujo de aire dirigido
Indicador de dirección
de la muela
El sujetador de la
herramienta la mantiene
plana durante el afilado
La abertura para cincel tiene 1-5/8” (4,1
cm) de ancho con ángulo fijo de 25º.
El disipador térmico está revestido en
diamante para eliminar los rebordes
Lengüetas para
montaje en banco
Parte superior duradera
en aluminio moldeado
Inducción de 1⁄5de caballo
de fuerza que produce 1750
RPM de velocidad máxima
de la muela
Especificaciones
de la herramienta
•Motor de inducción de 1⁄5de caballo de fuerza
•Velocidad de la muela 1750 RPM máx.
•Muela acanalada Edge-Vision™ acepta medios abrasivos acanalados o sólidos.
•Parte superior en aluminio moldeado, abertura de afilado de aluminio fundido para cincel con
disipador térmico con revestimiento en diamante; soporte superior para la herramienta en metal
moldeado; carcasa y base en plástico clasificadas para uso con herramientas, resistentes a im-
pactos y vibración
•Sistema de enfriamiento por aire: Disipador térmico y flujo de aire dirigido
•Interruptor tipo industrial con cierre de seguridad y cable de alimentación con conexión a tierra
de 6 pies (1,8 m)
•Abrasivos de 150 mm con respaldo de adhesivo para adherir a la muela para amolar
2Desempaque y ensamblado
1. Saque con cuidado la herramienta y
el juego de accesorios de la caja.
2. La WORK SHARP™ WS2000 in-
cluye:
•Unidad WS2000 WORK SHARP™
•Muela acanalada Edge-Vision™
(fig. 2-1)
•Soporte superior para herramientas
(fig. 2-2)
•Juego de abrasivos que incluye
abrasivos estándar y acanalados
con respaldo de adhesivo (fig. 2-3)
•Guía del usuario
3. Retire todos los materiales del em-
paque y guárdelos en caso de que
alguna vez necesite devolver la uni-
dad para darle servicio.
4. Inspeccione visualmente la herra-
mienta por posibles daños ocurridos
durante el despacho. Si hay daños,
llame al 800-597-6170 para hablar
con un representante de servicio al
cliente.
5. Su muela acanalada transparente
WORK SHARP™ Edge-Vision™ del
WS2000 (fig. 2-1) puede utilizarse
de dos maneras. Utilícela con el
puerto inferior Edge-Vision™ para afi-
lar pequeñas herramientas de tallar y
tornear, destornilladores y para tareas
generales de amolado. También puede
utilizarla con medios abrasivos sólidos
para un afilado superior rápida y fácil
de las espátulas para masilla, hachas
y otras herramientas de hoja.
Fig. 2-1
Muela acanalada
Edge-Vision™
Fig. 2-2
Soporte superior
para herramientas
Fig. 2-3
Juego de abrasivos
(estándar y acanalado)

30 www.worksharptools.com
www.worksharptools.com 31
PASO 5
Manteniendo la herramienta de forma pla-
na en la superficie de diamante de la aber-
tura de afilado, afile el bisel con la técnica
“inserción y retiro” en la abertura de afi-
lado. Para mejor acabado de la superficie
y filo, déle vuelta a la muela de modo que
el abrasivo fino esté orientado hacia abajo
y repita el paso 5.
Sólo haga contacto con la muela durante
la “inserción” por medio segundo. Repita
la “inserción y retiro” afilando en la aber-
tura de afilado hasta obtener un acabado
consistente o hasta que se logre el afilado
deseado.
6. Para aplicar los discos abrasivos de
150 mm con respaldo de adhesivo,
es de suma importancia disponer de
un ambiente de trabajo limpio. Des-
prenda la película protectora del disco
abrasivo. Manipule el disco abrasivo
por los bordes externos, teniendo cui-
dado de que no entre en contacto con
contaminantes del respaldo adhesivo.
Flexione el papel en forma de “U” (fig.
2-4) de modo que el centro del abra-
sivo esté en el centro de la muela.
Lentamente aplane el abrasivo desde
el centro y desplazándose hacia el
borde externo de la muela. Adhiera el
abrasivo acanalado de la misma mane-
ra en que se describió anteriormente.
Asegúrese de que los canales en el
abrasivo se alineen adecuadamente
Fig. 2-4
con los de la superficie de la muela.
Esto asegurará el funcionamiento ad-
ecuado de la muela acanalada Edge-
Vision™ durante su uso.
7. Para instalar el
soporte supe-
rior para herra-
mientas, deslice
el soporte supe-
rior para herra-
mientas en las
ranuras en T en
la parte superior
de la unidad. De-
cida a qué alto
desea tener el
soporte superior para herramientas y
luego suavemente apriete los dos tor-
nillos de ajuste manual. No apriete de-
masiado los tornillos de mano ya que
posiblemente puede tensar o dañar las
ranuras en T del marco superior.
8. Monte la muela para amolar al cubo
de la muela y asegúrela con la perilla
superior.
9. ¡Ahora su herramienta está lista
para usarse!
3Guía para afilar
PASO 2
Aplane la parte posterior de la herramienta
en la parte superior de la muela abrasiva.
Coloque primero el talón de la herramienta
sobre la muela. Después de aplanar la par-
te posterior de la herramienta, déle vuelta
a la muela para amolar de modo que el
abrasivo grueso esté ahora orientado ha-
cia abajo para amolar el bisel.
Abertura para afilar cinceles
Lea todas las advertencias de seguridad
antes de utilizar esta herramienta.
Abertura para afilar
cinceles – Para cinceles y
hojas para cepillos de hasta
1 5/8” (4,1 cm) de ancho
PASO 1
Monte la muela de modo que el abrasivo
grueso esté orientado hacia superior. para
amolar en la unidad.
PASO 3
Coloque la herramienta en la abertura de
afilado bajo el sujetador de la herramienta,
en el lado derecho de la defensa de ali-
neación.
PASO 4
Deslice la defensa contra el borde izqui-
erdo de la herramienta en la abertura y
apriete a mano la perilla de la defensa de
alineación.
Retiro
Inserción

32 www.worksharptools.com
www.worksharptools.com 33
Abertura inferior
Edge-Vision™ — Para
pequeñas herramientas
de tallar, destornilladores y
amolado general
☛ Consejo
Utilice un marcador permanente
para colorear el borde de la he-
rramienta que desea afilar.
PASO 1
Monte la muela acanalada Edge-Vision™
y gire la unidad de modo que usted se en-
cuentre orientado hacia la abertura inferior
en la parte posterior de la herramienta.
PASO 2
Lentamente vaya colocando la herramien-
ta en la abertura inferior Edge-Vision™
bajo la muela.
PASO 3
Mire a través de la muela giratoria Edge-
Vision™ para observar el borde cortante.
Afile la herramienta a su forma y al nivel
de afilado que desee.
☛ Consejo
Utilice una lámpara de taller para
que ilumine a través de la parte
superior de la muela Edge-Vision™
para poder observar mejor la he-
rramienta que está afilando.
Afilado superior a
pulso (el uso del
soporte superior
para herramientas
es opcional) – para
espátulas para masilla,
raspadores, hachas, y otras
herramientas de hoja plana
PASO 1
Monte la muela Edge-Vision™ para amo-
lar en la unidad.
PASO 2
Coloque la cara de la hoja orientada hacia
la derecha de la muela para amolar.
Hale lentamente
hacia usted
Utilice un movimiento
de lado a lado
R
o
t
a
c
i
ó
n
Abertura Edge-Vision™
PASO 3
Hale la hoja hacia usted manteniendo la
cara de la hoja de forma plana en la super-
ficie para amolar.
PASO 4
Eleve la herramienta o el mango para
crear filo o reafilar un borde biselado si lo
desea.
PASO 5
Repita este paso en el otro lado de la hoja
de la herramienta que está afilando. Con-
tinúe hasta obtener el acabado o el afilado
que desea lograr.
Tareas generales de
amolado
Las piezas más grandes se afilan mejor
utilizando el lado superior de la muela
Edge-Vision™. Puede utilizar bien sea
el medio abrasivo acanalado o sólido para
estas tareas. Las piezas más pequeñas se
afilan mejor utilizando la muela Edge-Vi-
sion™ con los abrasivos acanalados y el
puerto inferior. Esto le permite aprovechar
la característica única de Edge-Vision™
con la cual puede observar a través de la
muela y ver la superficie del material a me-
dida que lo amuela.
¿Cuál abertura WORK SHARP™debo utilizar?
Cinceles y hojas
para cepillos
hasta 1 5/8”
(4,1 cm)
Herramientas de
tallar, destorni-
lladores, afilado
minucioso
Espátulas para
masilla, raspa-
dores, hachas y
otras herramien-
tas de hoja plana
Tareas generales
de amolado
Abertura de afilado X
Abertura Edge-Vision™ X X
Afilado superior a pulso X X

34 www.worksharptools.com
www.worksharptools.com 35
• Afile las herramientas con el borde cor-
tante en la posición 12:00 ó 2:00, y no
10:00. Esto le permitirá afilar el borde
de las herramientas con la muela gi-
rando en dirección opuesta a usted para
óptima seguridad y control.
• El método de “inserción y retiro” en la
abertura de afilado brindará mejores
resultados. Haga contacto con la muela
solamente de 1/2 a 1 segundo.
• No deje el cincel contra la muela abra-
siva por más de 1 segundo ya que co-
rrerá el riesgo de sobrecalentar sus he-
rramientas.
• Mantener los cinceles de forma plana
en la placa recubierta de diamante en la
abertura de afilado asegurará el retiro
del reborde, óptimo control del calor y
afilado adecuado del borde biselado.
Consejos para la
abertura de afilado
inferior Edge-Vision™
Cuando utilice la muela acanalada
Edge-Vision™
• Utilice un marcador permanente para
colorear el borde de la herramienta que
desea afilar. Esto le ayudará a ver mejor
el borde que está afilando.
• Coloque una lámpara de taller o un re-
flector sobre la parte superior de la uni-
dad para ver mejor a través de la muela
acanalada.
4Elección del abrasivo adecuado
según el trabajo
Puede utilizar bien sea el medio abrasivo
acanalado o sólido:
•Para herramientas dañadas o amolado
de trabajo pesado: Utilice el abrasivo
sólido grueso para resultados más rápi-
dos.
•Para tareas de amolado ligero: Utilice el
abrasivo sólido fino.
Sobre la tecnología de
abrasión WORK SHARP™
Acabado
•Los discos abrasivos recubiertos co-
mienzan siendo planos y se mantienen
de esa forma.(Las muelas de molienda
se utilizan en piedra y la mayoría de los
sistemas mecánicos requieren rectifica-
do para mantener aplanada la muela.)
•El tamaño del grano está diseñado para
proporcionar un afilado y un acabado
óptimo en cada etapa del proceso. (Los
usuarios interesados en obtener un
borde “afilado para usos múltiples” en-
contrarán que los granos más gruesos
y rápidos ofrecen un desempeño excep-
cional.)
Velocidad
•La selección de abrasivos viene integra-
da al diseño de la transmisión y al siste-
ma de enfriamiento de WORK SHARP™
para proporcionar la mayor velocidad de
eliminación de material, al tiempo que
minimiza el riesgo de sobrecalentamien-
to del acero de las herramientas.
•La abertura de afilado incluye un abra-
sivo de recubrimiento de diamante que
proporciona mayor control de rebordes
y permite el reafilado en un solo paso.
Simplicidad
•Acepta abrasivos estándar con respaldo
de adhesivo de 150 mm o 6 pulgadas
(15,2 cm) disponibles en el mercado.
(No es necesario adquirir costosos adhe-
sivos o muelas especiales.) Los granos
más gruesos se encuentran disponibles
en la mayoría de las tiendas de ferre-
tería/carpintería. Los granos más finos
se encuentran fácilmente en cualquier
tienda de suministros de pintura auto-
motriz.)
•Los abrasivos acanalados están dis-
ponibles a través de un distribuidor de
Work Sharp o directamente en Work
Sharp.
5Consejos para afilar
Consejos para la
abertura de afilado
Cuando afile cinceles y hojas para
cepillos de hasta 4,1 cm de ancho
• Elija grano grueso para herramientas
dañadas o despostilladas
• Elija grano fino para reafilar herramien-
tas
Inserción Retiro
Posición
2:00 correcta
Posición 12:00:00 correcta
Posición
10:00
incorrecta
• Los cinceles de menos de 1/2” (1,3 cm)
de ancho deben afilarse en el lado izqui-
erdo de la abertura de afilado.
• Los cinceles de más de 1/2” (1,3 cm) de
ancho deben afilarse en el lado derecho
de la abertura de afilado.
• Deje la defensa lo suficientemente
suelta contra el cincel de modo que éste
pueda deslizarse entre la defensa y la
guía.
Consejos para afilado
superior a pulso (el uso
del soporte superior para
herramientas es opcional)
• Utilice la superficie abrasiva gruesa
para amolado agresivo o utilice la su-
perficie abrasiva de grano fino para
amolado leve.

36 www.worksharptools.com
www.worksharptools.com 37
• Siempre coloque la cara de la hoja en el
lado derecho de la muela para amolar
de modo que la muela gire apartada de
usted.
• Eleve la herramienta o el mango para
crear o reafilar un borde biselado si lo
desea.
• El soporte superior para herramientas
puede utilizarse para ayudar en el pro-
ceso de afilado si lo desea.
• Las hachas se afilan mejor utilizando el
soporte superior para herramientas y un
movimiento de barrido para amolar el
bisel. Con el interruptor en la posición
“OFF” (apagado), coloque el bisel en la
muela y encuentre el ángulo de amolado
adecuado. Luego active la máquina y
afile el bisel correspondiente en cada
lado del hacha.
• El ajuste del alto del soporte supe-
rior para herramientas puede ayudar a
lograr un afilado más preciso del bisel
de sus herramientas. Ajuste el soporte
superior para herramientas y la proyec-
ción de la hoja para lograr un bisel más
afilado de sus herramientas.
El alto del soporte superior
para herramientas se ajusta
hacia arriba o hacia abajo
R
o
t
a
c
i
ó
n
Hale lentamente
hacia usted
6Cuidado y mantenimiento
Después de afilar unas cuantas herramien-
tas, se pueden acumular desechos prove-
nientes del afilado en el banco de trabajo
y también bajo la muela para amolar. Los
desechos provenientes del afilado pueden
ocasionar desgaste prematuro en la unidad
WS2000 y pueden representar un riesgo
potencial de incendio. Limpiar la unidad
regularmente puede añadirle vida a la má-
quina y aumentar la seguridad. Antes de
ejecutar ninguna tarea de mantenimiento
o limpieza, asegúrese de desenchufar su
WORK SHARP™WS2000.
Para obtener mejores resultados, utilice
los juegos de abrasivos WORK SHARP™
de reemplazo. WORK SHARP™recomien-
da los tipos de abrasivos que proporciona-
mos porque producen un acabado superior
con relación a las piedras de aceite y agua,
y sin tantas complicaciones.
Sin embargo, si lo desea, puede utilizar
también cualquier abrasivo estándar PSA
de 6 pulgadas (15,2 cm) con respaldo de
adhesivo, disponible en su ferretería local
o distribuidor de herramientas. Deberá
recortar los abrasivos estándar de 6 pul-
gadas (15,2 cm), para adaptarlos a las
muelas para amolar de 150 mm. O, tam-
bién puede utilizar una lámina estándar de
8 x 11 pulgadas (20,3 x 27,9 cm) de su
lija preferida y cortarla a la medida. Rocíe
primero el reverso del abrasivo con un a-
dhesivo en aerosol y seguidamente colo-
que la muela para amolar sobre el papel y
recorte para adaptar.
Comuníquese con la tienda o el distri-
buidor donde adquirió WORK SHARP™
The Tool Sharpener, o comuníquese di-
rectamente con WORK SHARP™en www.
worksharptools.com, para adquirir juegos
de abrasivos de reemplazo.
Limpieza de su WORK
SHARP™WS2000
Con la WORK SHARP™WS2000 desen-
chufada, retire la muela para amolar para
exponer la parte superior de la unidad y la
abertura de afilado. Retire con una brocha
los desechos acumulados provenientes del
afilado que se encuentren en la muela y
en el área de la abertura de afilado. Retire
los desechos provenientes del afilado con
una brocha pequeña seca. Deshágase de
los desechos provenientes del afilado de
una forma segura y aprobada que no dañe
el ambiente.
▲ Consejo de
seguridad importante
¡ DURANTE LA LIMPIEZA,
ASEGÚRESE QUE EL GRANO
NO ESTÉ CALIENTE O RES-
PLANDECIENTE, YA QUE PUEDE
OCASIONAR UN INCENDIO!
Cómo determinar si es necesario
reemplazar el abrasivo
La selección de abrasivos suministrados
con WORK SHARP™WS2000 están dise-
ñados para proporcionarle el mejor afilado
disponible. Hemos incluido abrasivos de
primera que le proporcionarán resultados
duraderos. Sin embargo, eventualmente se
desgastarán. Tal vez deba cambiarlos si:
• Al afilar una herramienta le toma con-
siderablemente más tiempo lograr bue-
nos resultados
• El abrasivo está “cargado” y no puede
limpiarlo
• Se ha contaminado por acción de un
grano más grueso
• Hay una burbuja o una protuberancia
debajo del abrasivo
Problema
No se afila toda la cara biselada del cin-
cel
Soluciones
• El ángulo de biselado previamente afi-
lado en la herramienta no era de 25°.
Continúe afilando.
•No se ha terminado de afilar todavía.
Utilice un grano más grueso para elimi-
nar material más rápidamente.
•La herramienta que está afilando no
está totalmente plana sobre el disipador
térmico durante el proceso de afilado.
7Guía de localización de fallas
•La defensa de la abertura de afilado no
está ajustada contra la herramienta lo
cual permite que la herramienta se mue-
va en la abertura.
Problema
Acumulación excesiva de calor
Soluciones
• Se está insertando la herramienta con-
tra el disco abrasivo demasiado tiempo.
• Se está aplicando demasiada presión
contra el disco abrasivo durante el pro-
ceso de afilado.

38 www.worksharptools.com
www.worksharptools.com 39
•Debe limpiar o cambiar el abrasivo.
•Las herramientas más pequeñas de-
berán afilarse en el lado izquierdo de la
abertura, aplicando una ligera presión y
menos tiempo de afilado. Utilice el me-
dio abrasivo acanalado con herramien-
tas más pequeñas.
Problema
No se puede eliminar el daño del borde
de la herramienta
Soluciones
• No ha pasado suficiente tiempo en el
grano grueso durante el proceso de afi-
lado. Asegúrese de que todo el daño en
el borde cortante haya sido eliminado
antes de proceder con un grano más
fino.
• La parte posterior de la herramienta no
está plana. Aplane la parte posterior de
la herramienta en la parte superior de la
muela para amolar.
• Es necesario limpiar o reemplazar el
abrasivo.
Problema
El afilado toma demasiado tiempo
Soluciones
• Es necesario limpiar o reemplazar el
abrasivo.
• La herramienta que se está afilando se
encuentra excesivamente dañada y debe
remodelarse o volverse a amolar utili-
zando el abrasivo grueso.
Problema
Vibración excesiva
Soluciones
• La muela para amolar está dañada.
DETÉNGASE INMEDIATAMENTE e
inspeccione la muela para comprobar si
está dañada.
•La unidad WORK SHARP™no está
colocada firmemente sobre un banco o
área de trabajo. Sujete a un banco de
trabajo utilizando las lengüetas para
montaje para lograr un mejor desem-
peño y mayor estabilidad.
•Si la vibración excesiva continúa, co-
muníquese con un representante de
servicio al cliente para obtener instruc-
ciones.
Problema
La herramienta no está afilada
Soluciones
• La parte posterior del cincel no está de
forma plana en el borde cortante.
•No se ha afilado completamente el bisel
hasta el borde cortante.
•Se ha generado un reborde en el filo cor-
tante. Repita el método de rectificación
por “inserción y retiro” en la abertura
para afilar cinceles para obtener mejo-
res resultados.
•No se han eliminado todavía las marcas
de los granos anteriores (más gruesos).
Siga el criterio de selección de granos.
Problema
La herramienta no se mantiene afilada
Solución
•No eliminó el reborde del filo cortante.
Repita el método de rectificación por
“inserción y retiro” para obtener mejo-
res resultados.
•Las herramientas elaboradas en ace-
ros más suaves no retienen bordes por
mucho tiempo y necesitan afilarse con
mayor frecuencia.
Problema
La muela se atasca
Solución
•Está presionando mucho la herramien-
ta. Aplique menos fuerza de carga en la
abertura de afilado.
•Aplicar una presión leve mientras afila
rinde mejores resultados.
Garantîa
Garantía por 2 años en todos los componentes de WORK SHARP™; excluyendo los abrasivos
Garantizamos que su WORK SHARP™es-
tará libre de defectos debidos a mano de obra
o diseño por dos años a partir de la fecha de
compra. Si su WORK SHARP™no funciona
o tiene algún otro problema operativo, co-
muníquese con el servicio técnico de WORK
SHARP™al:
1-800-418-1439
(línea gratis en EE.UU. y
Canadá únicamente)
1-541-552-1301
Por favor llame entre las
6:00 AM–3:30 PM hora del Pacífico.
No devuelva este producto a la tienda donde
lo compró. No intente darle servicio o re-
alizar reparaciones distintas a las sugeridas
por un representante de servicio técnico de
WORK SHARP™(RST). Durante el período
de garantía WORK SHARP™reparará o re-
emplazará este producto a su discreción, sin
cargos adicionales y reembolsará los gastos
de franqueo o envío por UPS terrestre están-
dar, siempre que se cumplan las siguientes
condiciones:
1. Se proporcione copia del recibo de ven-
ta.
2. El producto se haya utilizado para los
fines para los cuales fue creado según
se describe en las instrucciones de fun-
cionamiento y no ha sido maltratado o
manipulado inadecuadamente.
3. No se ha desarmado el producto y no
se ha intentado darle servicio o realizar
reparaciones distintas a las sugeridas
por un RST de WORK SHARP™.
4. El número de autorización de devolución
de mercancía (RGA #, por sus siglas en
inglés) (asignado por el RST de WORK
SHARP™), está escrito en la etiqueta de
envío.
Por favor asegúrese de empacar los artícu-
los de modo tal que evite que se produzcan
mayores daños durante el envío. Envíe por
medio de un servicio de despacho que per-
mita el rastreo del paquete y asegúrelo de-
bidamente. No se aceptarán pagos contra
entrega. No se reembolsarán cargos de envío
no aprobados.
Complete y envíe por correo el registro de la
garantía y la encuesta del cliente en la caja
de WORK SHARP™, o regístrese en línea:
Professional Tool Manufacturing, LLC
WORK SHARP™
210 E. Hersey St.
Ashland, OR 97520 USA
www.worksharptools.com
Para soporte técnico
1-800-418-1439 (gratis en EE.UU. y Canadá solamente)
1-541-552-1301 Por favor llame de 6:00 AM a 3:30 PM Hora del Pacífico.
Por favor complete la siguiente infor-
mación y guarde para sus archivos.
Número de serial de WORK SHARP™:
_____________________
Fecha de compra:
_____ / _____ / _______
Comprado en:
_____________________
Table of contents
Languages:
Other Work Sharp Power Tools manuals

Work Sharp
Work Sharp WSKTS2 User manual

Work Sharp
Work Sharp WS3000 User manual

Work Sharp
Work Sharp Ken Onion User manual

Work Sharp
Work Sharp KNIFE & TOOL SHARPENER User manual

Work Sharp
Work Sharp WSKTS User manual

Work Sharp
Work Sharp Ken Onion WSKTS-KO User manual

Work Sharp
Work Sharp KNIFE & TOOL SHARPENER User manual

Work Sharp
Work Sharp WS3000 User manual

Work Sharp
Work Sharp Ken Onion User manual