1
2a
ASSEMBLING THE BASIC TABLE
Note: Make hardware hand-tight only
untilspecied.
Important! Make certain all components
are facing same direction. Front of
Frame bears Workplace® nameplate;
rear of Leg Section bears tapped in-
serts in outside face of vertical leg tube.
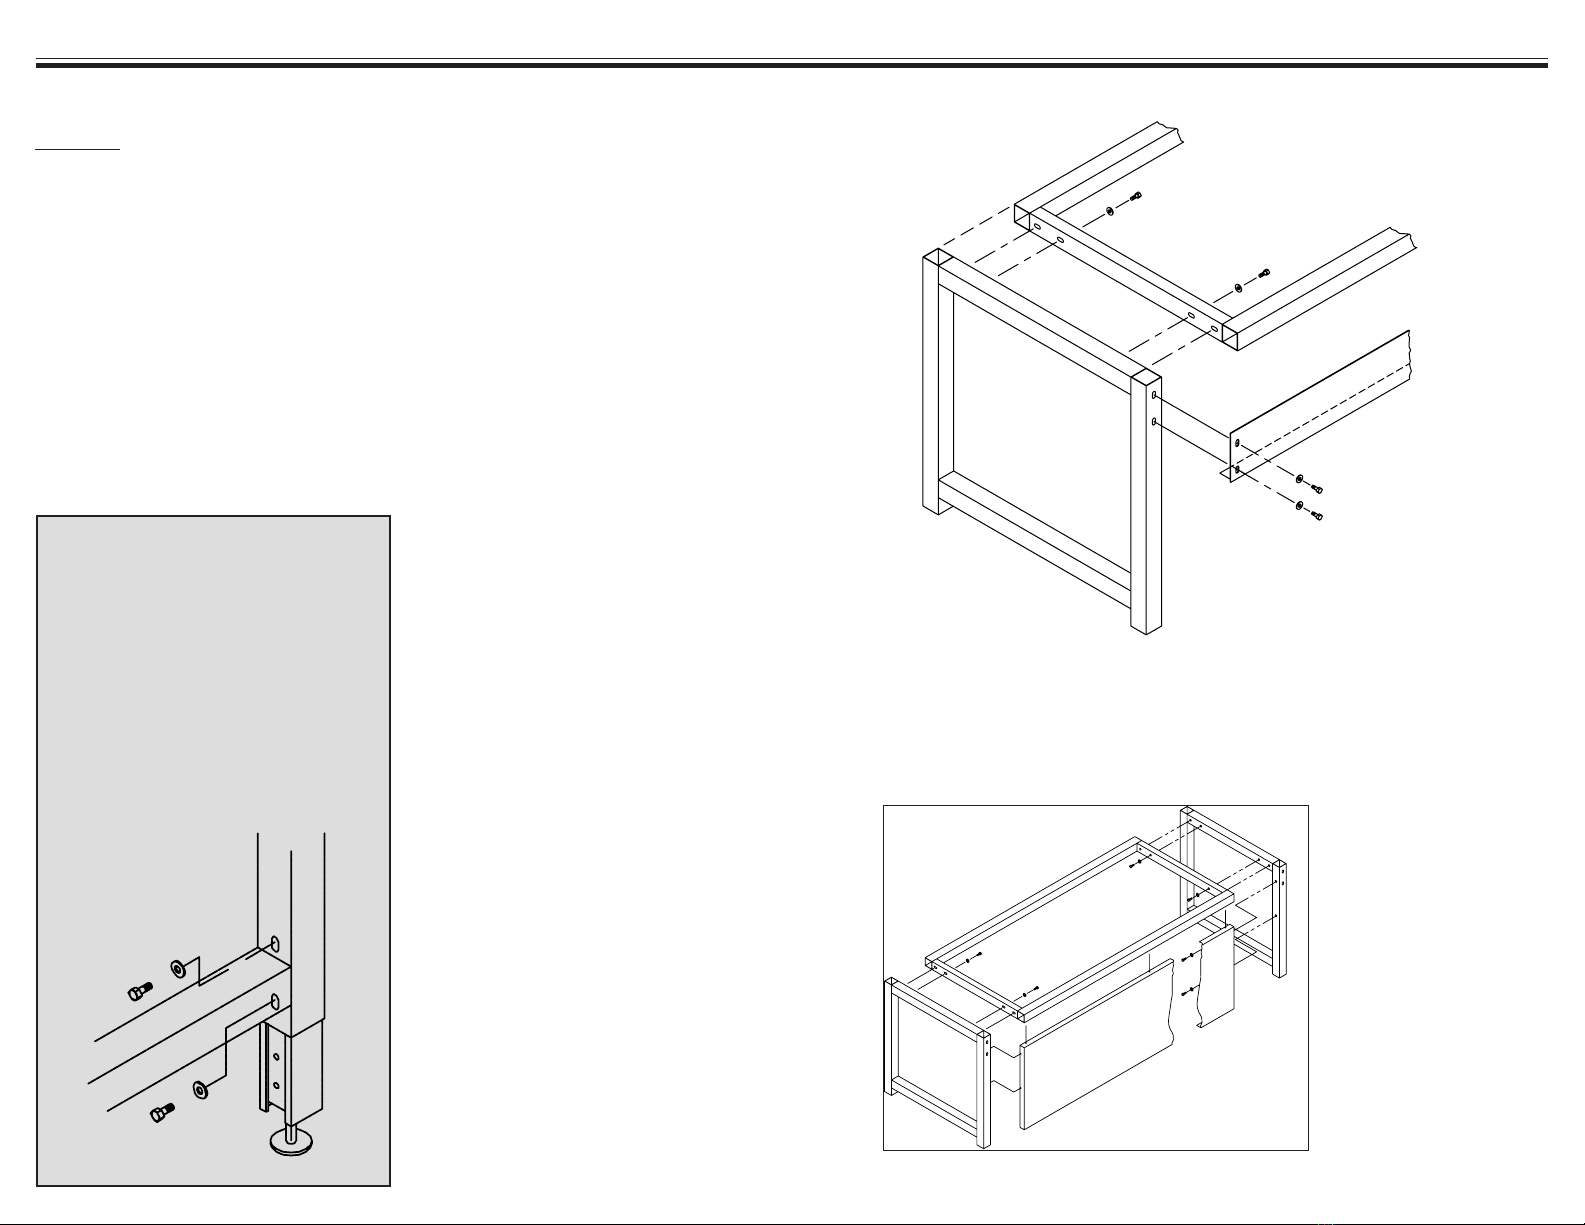
(Kit #81) Fasten FRAME to
LEG SECTIONS, engaging
tapped inserts located in top horizon-
tal crossmember of Leg Sections.
For Table with Rear Angleframe:
(Kit #21) Fasten REAR ANGLE-
FRAME to rear of Leg Sections,
engaging tapped inserts located in
23
Using the Adjustable Height Feature
Leg Sections are shipped with a preset
workheight of 30" (including 1" thick
worksurface).
To make a height adjustment, remove
hardware from above and below the
horizontal crossmember, adjust leg
extender (in 1-1/2" increments) and
replace hardware. Tighten fasteners
securely. Additional height and
levelling adjustment may be made
with the leg levellers.
LEG
SECTION
FRAME
REAR ANGLEFRAME
MODESTY PANEL
FRAME (Rear)
Leg Sections.
For Table with Modesty Panel:
(Note: It is easier to install the
Modesty Panel if the Table is set
upside-down on a protected surface.)
Align MODESTY PANEL between rear
ofLEGSECTIONSandushwith
underside of FRAME. Using supplied
#8x3/4" Hex Washer Head Tek Screws
and power drill, drive Tek screws
through pre-drilled holes in Modesty
Panel and into Leg Sections and under-
side of Frame as shown at right.
Mount Top:
See instructions on page 4.
Mount Optional Accessories:
Seespecicinstructionsheetsincluded
within.
ASSEMBLING THE BASIC TABLE
2b
(Kit #81)
a
(Kit #21)
INSTALL OPTIONAL MODESTY PANEL
b


