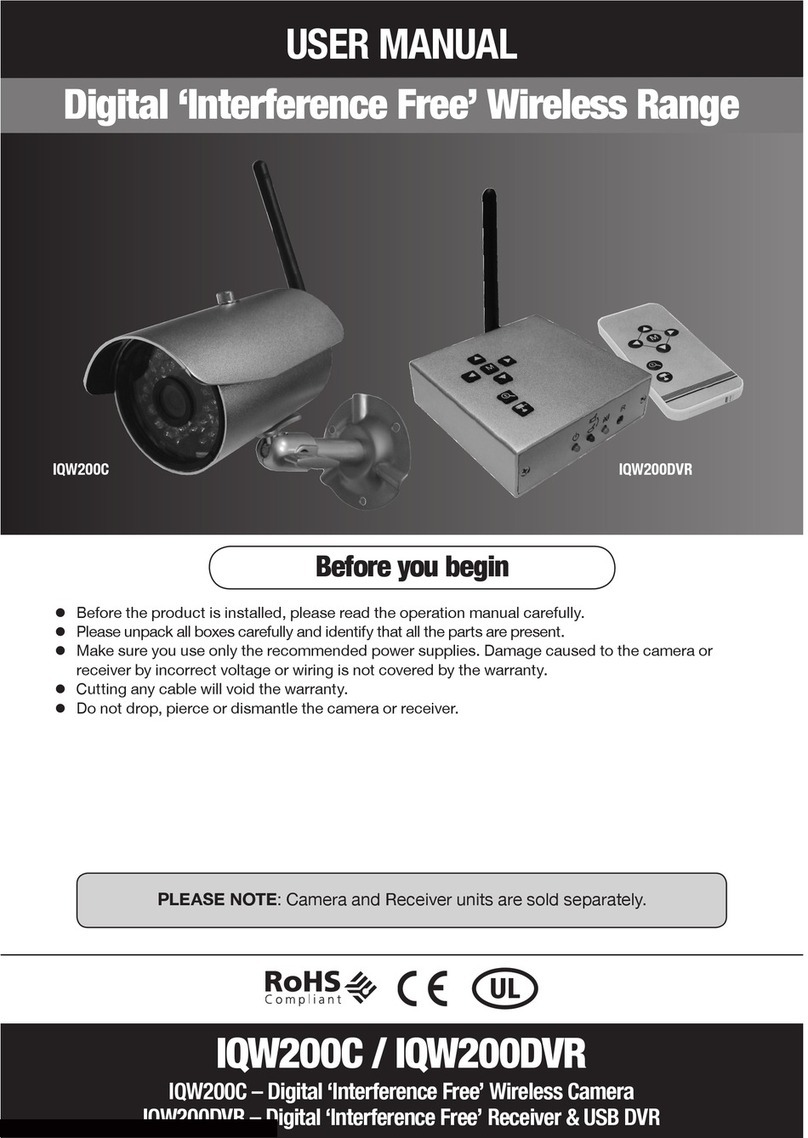
X-Vision Pro HD XC Series User manual

Professional Full HD IP Camera
& Professional HP IP NVR
IE Browser Operating
Instruction
Version 1
Thank you for purchasing from Xvision Pro HD.
Please ensure that you read and understand this Instruction Guide before operating the camera.
Please store this Instruction Guide in an easily accessible location.
HD IP
PRO
PRO
PRO PRO
PRO PRO PRO
PRO PRO PRO
PRO PRO
PRO
Cameras
PRO
NVR’s

XC Camera Camera Setup Guide
PRO
2
www.xvision.com
Contents
1. Introducon ........................................................................................... 5
2. Recap ..................................................................................................... 6
3. Preview .................................................................................................. 7
3.1 Open/Close Preview ....................................................................... 7
3.2 Full-Screen Preview ........................................................................ 7
3.3 Electronic Zoom-in ......................................................................... 7
3.4 PTZ Control ..................................................................................... 8
4. File Management .................................................................................... 11
4.1 Search ............................................................................................. 11
4.2 Review Playback Image .................................................................. 11
4.3 View Preview Image ....................................................................... 12
4.4 View Backup File ............................................................................. 12
4.5 View Images in File Management .................................................. 12
5. Parameter Sengs ................................................................................. 13
5.1 Device Parameters ......................................................................... 13
5.1.1 Device Info ...................................................................... 13
5.1.2 RS232 .............................................................................. 14
5.1.3 Decoder .......................................................................... 14
5.1.4DSTSeng...................................................................... 14
5.2 Channel Parameters ....................................................................... 15
5.2.1DisplaySengs................................................................ 15
5.2.2VideoSengs.................................................................. 15
5.2.3 Video Parameters ............................................................ 16
5.2.4 Schedule Record .............................................................. 17
5.2.5MoonDetecon............................................................ 17
5.2.6 Video Tampering ............................................................. 19
5.2.7 Video Mask ...................................................................... 20
5.3 Network Parameters ...................................................................... 20
5.3.1NetworkSengs............................................................. 20
5.3.2DDNSSengs.................................................................. 21
5.3.3NTPSengs.................................................................... 22
5.3.4EmailSengs.................................................................. 22
5.3.53GSengs...................................................................... 23
5.3.6WiFiSengs.................................................................... 24
5.3.7ManagementPlaorm.................................................... 24
5.4Alarm&Excepon......................................................................... 25
5.4.1 Alarm Input ..................................................................... 25
5.4.2 Alarm Output .................................................................. 25
5.4.3ExceponSeng............................................................. 26
5.5 User Info ......................................................................................... 27
5.5.1 User Management ........................................................... 27
5.5.2 Online User ...................................................................... 28

XC Camera Camera Setup Guide
PRO
3
www.xvision.com
Contents Connued...
5.6 System Management ...................................................................... 28
5.6.1 System Update ................................................................ 28
5.6.2 Auto Reboot .................................................................... 28
5.6.3 Stream Info ...................................................................... 29
5.6.4 HD Disk ............................................................................ 29
5.6.5 Restore ............................................................................ 29
5.6.6LocalSengs................................................................... 30
5.6 Exit ................................................................................................. 31

XC Camera Camera Setup Guide
PRO
4
www.xvision.com
Safety Precauons
1. Do not install the equipment in an environment with too much moisture, dust or smoke dust as this
may result in re or electric shock.
2. In the unlikely event that the equipment should malfuncon and emit an abnormal smell or smoke,
please immediately stop it, shut o the power and contact your supplier.
3. Please do not place this equipment near a heat source to avoid risk of re.
4. Please do not store, install and use this product in danger areas with inammable or explosive
substances.
5. Please make sure the power is turned o when installing the product.
6. Please ensure that you install the camera in an area with good venlaon.
7. When installing the camera, please make sure that it does not face any objects giving out strong lights
as this will damage the CCD of the camera.
8. Please do not use the camera in an environment where temperatures that exceed either -20°C to
+55°C.

XC Camera Camera Setup Guide
PRO
5
www.xvision.com
This guide connues from the XC/XRN Quick setup guide, please make sure you have read that before
connuing this guide.
1. Product Overview
1. Introducon
This guide is for the XC/XRN IE Browser menu.
It is recommended that the units are setup and tested before being mounted or installed.
Please note that as of February 2014 all of the XRN/XC units only support Internet Explorer and the CMS
soware.Newrmwareisininthenalbetastagestosupportallbrowsers,thiswillbeavailableon
website and will already be loaded to cameras purchased in May 2014.
Theseinstruconsareforguidanceonlydetailedinformaonisinaccordancewiththeproduct.
Theinstruconsmayincludesometechnicalinaccuraciesortypographicalerrors,thesewillbecorrectedin
future updates.
Theproductorproceduresdescribedintheinstruconsmaybechangedorupdatedatanymewithout
priornoce.Screenshotsusedintheinstruconareonlyforindicaonsandexplanaons.

XC Camera Camera Setup Guide
PRO
6
www.xvision.com
OnceyouhavesettheIPaddress,amendedourAcveXcontrolsandinstalledthem,viewedtheXCIPcam-
eraonourBrowser,youcannowgothroughallthemenuopons.
NavigatebacktoyourXC/XRNdevice,hp://192.168.1.100thatwepreviouslysetup.
Inputusername:admin(defaultseng)
Inputpassword:nopassword
Selectlanguage:
Click[Submit],asshownbelow:
1. Product Overview
2. Recap

XC Camera Camera Setup Guide
PRO
7
www.xvision.com
Nowyouwillnocethatyouhavenoimagejustablackscreen,youwillneedtopresstheOpenbuonas
described below.
Clickthefull-screeniconinthelowerrightcornertopreviewinfullscreen.Inthepreviewwindow,
rightclick(orEsckey)toexitfromfullscreendisplay.
Useyourmousetoselectthepreviewchanneltobezoomedinbyscrollingthemousewheel,asshown
below:
1. Product Overview
3. Preview
3.1 Open/Close Preview
Click to open all the sub
streams
Click to open a single device
sub stream
Click to open a single device
Clicktoopenallaached
devices
3.2 Full-screen Preview
3.3 Electronic Zoom-in

XC Camera Camera Setup Guide
PRO
8
www.xvision.com
PTZ control:8direconalkeystorotatefront-enddevices,andAUTOindicatesauto-rotaon.
Zoom in/out:Adjustthedegreeofzoomingin/out
Focus:Adjustthesizeoffocus
Aperture:Adjustthesizeofaperture
Speed:UsetheslidertoregulatethePTZspeed
Bright:Adjustthebrightnessofthescreen
Contrast:Adjustthecontrastofthescreen
Saturaon:Adjustthesaturaonofthescreen
Hue:Adjustthehueofthescreen
Thearrowisusedtorestoredefaultsengs.
Setapresetpoint]SetapresetpointbyusingdireconkeysonthePTZcontroltorotatethecameratothe
desiredlocaon,andthenselectapresetnumberfromthe“presetpoint”drop-downlistandthenpressing
buon.
[Callapresetpoint]Callapresetpointbyselecngapresetnumbertobecalledfromthe“presetpoint”
drop-downlistandpressingbuon.
3.4 PTZ Control

XC Camera Camera Setup Guide
PRO
9
www.xvision.com
[Setacruise]Selectacruisenumberfromthe“cruise”drop-downlistandpressbuon.
Thescreenwillthendisplayandclick‘cancel’aersengtoexitfromthisscreen.
Inthe“cruise”sengpage,selectpresetpoint,cruisemeandcruisespeedandthenclick“Add”buonto
addthepresetpointforthecruisepath(youcanaddseveralpresetpoints).Click“Delete”buontodelete
a preset point.
Call a Cruise -Callacruisebyselecngacruisenumberfromthe“cruise”drop-downlistandthenclicking
buon.
Delete a cruise- Deleteacruisebyselecngacruisenumberfromthe“cruise”drop-downlistandthen
clickingbuon.
Set a locus -Selectalocusnumberfromthe“Locus”drop-downlistandclick“enablelocusmemory”
buon.ThenperformPTZcontrols,andclick“disablelocusmemory”buon.Thelocusis
memorized.
Call a locus - Callalocusbyselecngalocusnumberfromthe“Locus”drop-downlistandclicking
buon.
Delete a locus -Deletealocusbyselecngalocusnumberfromthe“locus”drop-downlistandthen
clickingbuon.
Voice Intercom
Capture
Full Screen
Stop All
Voice

XC Camera Camera Setup Guide
PRO
10
www.xvision.com
Voice Intercom - Click it to enable or disable voice intercom
Capture - Captureforpreview.Clickittopopupitsstoragepathautomacally.
Full screen - Display the current preview in full screen
Stop all - Stop all current previews
Voice - Enable / disable front-end voice
Please Note:Xindicatesitisoordisabled

XC Camera Camera Setup Guide
PRO
11
www.xvision.com
Selectthestartme,andclickthebuon,thelowerpartdisplayssearchedimagesandvideos
(doubleclicktodisplayles).
Please Note:Youcanchangevideoorimagestoragepath,whichwillbedetailedlater.
ToreviewplaybackimagesundertheC:\ProgramFiles\PLAYBACKdirectory,doubleclickthele.
Please Note:ThefrontenddeviceshouldsupportSDcardstoragetoenablethisfuncon
1. Product Overview
4. File Management
4.1 Search
4.2 Review Playback Image

XC Camera Camera Setup Guide
PRO
12
www.xvision.com
4.3 View Preview Image
ToreviewpreviewimagesundertheC:\ProgramFiles\PREVIEWdirectory,doubleclickthele,asshown
below.
ToreviewplaybackvideolesundertheC:\ProgramFiles\BACKUPdirectory,doubleclickthele,asshown
below.
Please Note:ThedeviceshouldsupportSDcardstoragetoenablethisfuncon.
4.4 View Backup File
Start
Stop
Slow
Fast
Frame
Capture
Playback
Speed
Voice
Toviewlesinlemanagement,gointotheC:\ProgramFiles\FILEdirectoryanddoubleclickit.
Please Note:thedeviceshouldsupportSDcardstoragetoenablethisfuncon.
4.5 View Images in File Management

XC Camera Camera Setup Guide
PRO
13
www.xvision.com
Clickparametertodisplay[Deviceinfo],[RS232],[Decoder]and[DSTseng]opons,asshownbelow.
Theseoponscanbedierentdependingonthedeviceyouareaccessing.
Toviewandeditbasicinformaonofthedevice.
1. Product Overview
5. Parameter Sengs
5.1 Device Parameters
5.1.1 Device Info

XC Camera Camera Setup Guide
PRO
14
www.xvision.com
ThisoponallowsyoutosettheRS232parameters.
Thedecoderopon,allowsyoutosettheRS485.(CombinedwiththePTZ)
Here you can enable and set the DST parameters.
5.1.2 RS232
5.1.3 PTZ Seng
5.1.4 DST Seng

XC Camera Camera Setup Guide
PRO
15
www.xvision.com
Channel No.:ChangeachannelNo.
Channel Name:Modifythenameofaspecicchannel
Time Format:Changeameformatofaspecicchannel
Date Format:Changeadateformatofaspecicchannel
OSD locaon:Setthenameandmeofaspecicchannel
Parameter Adjustment:Adjustthebrightness,contrastandsaturaon
Copy:Copysetparameterstootherchannels
Channel No.:Changeachannelnumber(thewebcamhasonlyonechannel)
Encoding type:Normalrecord,networkrecordoreventrecord
Stream type:Complexstreamandvideostream
Resoluon:Displaysresoluontypessupportedbyfront-endNetworkcamera
Bitrate type:Constantbitrateorvariablebitrate
Max bitrate:Setdierentcoderatefordierentchannels
Frame rate:Selectdierentvaluefromthedrop-downlist.FULLisusedbydefault.
Video quality:Selectdierentvideoqualiesasrequired.“Highest”isusedbydefault.
Frame type:Selectdierentframetypes
I frame interval:SetIframeinterval
Changeof“videosengs”willdirectlychangefront-endNetworkcameraparameters.
5.2 Channel Parameters
5.2.1 Display Sengs
5.2.2 Video Sengs
Please Note

XC Camera Camera Setup Guide
PRO
16
www.xvision.com
Current Channel:Selectadierentchannelnumber
Day/night auto switch:Externallytriggered,auto,color,black/white,day/nightswitching(0-30)is
completedin3secondsbydefault.Fornon-IRwebmodels,theautooponisusedbydefault.ForIRweb
models,“externallytriggered”isusedbydefault.Ausercanselectaday/nightswitchmodeaccordingto
modelsandoperangenvironment.
Image Mode:Standard,bright,natural.Standardisusedbydefault
Auto Gain:Low,mediumandhigh.Mediumisusedbydefault.Thehighertheautogainis,thehigherthe
sensivityinlowilluminaonlevelwillbe.Howeverthenoiseislevelwillbehigher.
White Balance:Auto,indoor,outdoor.Autoisusedbydefault.Theusercanswitchmodesaccordingtoits
working scenario.
Image:Normal,level,vercal,180°.Normalisusedbydefault
Backlight Compensaon:O,BLC,HBLC.OFFisusedbydefault.ForBLC,BlackLightCompensaonis
enabled,whileforHBLC,stronglightinhibionisenabled
Shuer Mode:Auto,icker,1/30(25)-1/5000,X2-X30.Autoisusedbydefault.
Lens Aperture:Autoandmanual
Sharpness:Onando,0-100adjustable.Onisusedbydefaultwithitsvaluebeing80
3D noise reducon:Onando,0-100adjustable.ONisusedbydefaultwithitsvaluebeing25.
Thisoponisnotsupportedonalldevices.
5.2.3 Video Parameters

XC Camera Camera Setup Guide
PRO
17
www.xvision.com
Channel No.: Change a channel No.
Enable: Check Enable/Disable
All day: Ifitischecked,itisrecordedallday
Week: Selectadierentweekday
Time Secon: Setdierenttypesofrecordsin8seconsforaday
Week Copy: Can copy set parameters to other weeks
Pre-record: Setthepre-recordmetotriggereventrecord
Post-record: Setthepost-recordmetotriggereventrecord
Copy: Copy set parameters to other channels
ThedeviceshouldsupportSDcardstoragetoenablethisfuncon.
Onthe“VideoTampering”page,selectachannelnumberforwhichthemaskalarmisenabled.Checkthe
“Enable”boxandthenselecttheweektobearmed.
Armschedule:
Youcanset8seconsofarmschedule,andthencopythemtoeachweek.
5.2.4 Schedule Record
Please Note
5.2.5 Moon Detecon

XC Camera Camera Setup Guide
PRO
18
www.xvision.com
Sengsonmoondeteconarea:
1. Check“Drawing”toselecttheareatobedetected
2. Click“Clear”toclearthedesignatedareaforthecurrentchannel
3. Sensivity:thehigherthesensivityis,thebeerthemoondeteconeectis.
Linkage
1. Alarm on monitor:Viewalarminformaononthemonitor
2. Audio Warning:Thedevicegiveswarningsound
3. Upload to Centre:Viewalarminformaoninthecontrolcenter
4. Email Linkage:Aeranalarmistriggered,itwillsendanemailtothedesignatedemailaddress
5. Trigger Alarm Output:Triggerrelatedalarmdevice

XC Camera Camera Setup Guide
PRO
19
www.xvision.com
Onthe“VideoTampering”page,selectachannelnumberforwhichthemaskalarmisenabled.Checkthe
“Enable”box,andthenselecttheweektobearmed,asshownbelow:
Arm schedule
Youcanset8seconsofarmscheduleandthencopythemtoeachweek,asshownbelow:
Mask set
Check“Drawing”tosettheareagivingmaskalarmandadjustthesensivity,asshowninthefollowing
gure.
Linkage
Choosealinkagemodeifanalarmistriggered,asshownbelow.
5.2.6 Video Tampering

XC Camera Camera Setup Guide
PRO
20
www.xvision.com
OntheVideoMaskpage,selectthechannelNo.toenablemaskalarmandthencheck“Enable”.
5.2.7 Video Mask
5.3 Network Parameters
5.3.1 Network Sengs
Table of contents
Other X-Vision Security System manuals
