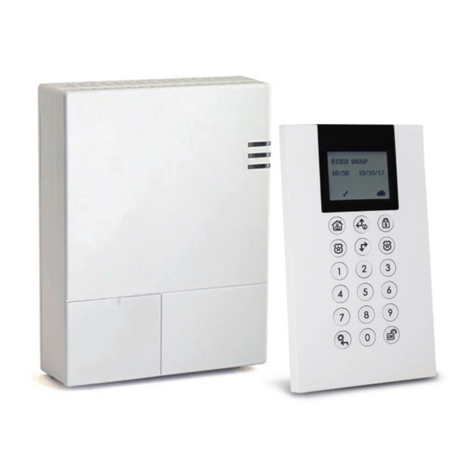
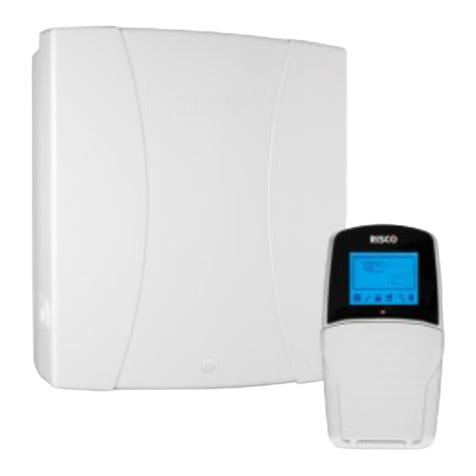
Risco LightSYS Assembly instructions

Installation and Programming Manual

Page ii
Important Notice
This guide is delivered subject to the following conditions and restrictions:
This guide contains proprietary information belonging to RISCO Group. Such
information is supplied solely for the purpose of assisting explicitly and properly
authorized users of the system.
No part of its contents may be used for any other purpose, disclosed to any person or
firm, or reproduced by any means, electronic or mechanical, without the express prior
written permission of RISCO Group.
The information contained herein is for the purpose of illustration and reference only.
Information in this document is subject to change without notice.
Corporate and individual names and data used in examples herein belong to their
respective owners.
Compliance Statement
Hereby, RISCO Group declares that the LightSYS series of central units and accessories are
designed to comply with:
EN50131-1, EN50131-3 Grade 2
EN50130-5 Enviromental class II
EN50131-6 Type A
UK: DD243:2004, PD 6662:2004, ACPO (Police)
EN50136-1-1 and EN50136-2-1 :
ATS 5 for IP/GPRS; ATS 2 for PSTN
Signaling security: - Substitution security S2
- Information security I3
All rights reserved.
2011 RISCO Group October 2011

Page iii
Table of Contents
Chapter 1 Introduction 9
What is LightSYS? .......................................................................................................9
LightSYS Architecture and Capabilities.................................................................10
LightSYS Features .....................................................................................................11
Chapter 2 Mounting and Wiring 17
LightSYS installation Steps ......................................................................................17
Choosing the mounting location ................................................................................. 17
Wall Mounting the LightSYS Box ...........................................................................18
AC adaptor and main board ........................................................................................ 18
Main Board Wiring........................................................................................................ 21
Main Board —Bus Connection.......................................................................... 21
Zone Inputs Wiring ............................................................................................. 22
Wiring Auxiliary Devices ................................................................................... 23
Wiring Internal Bell ............................................................................................. 24
Wiring Bell Tamper ............................................................................................. 24
Wiring Programmable outputs .......................................................................... 25
Back Tamper (Optional)................................................................................................ 26
Connecting a telephone line to the LightSYS............................................................. 26
Placing the Communication Modules......................................................................... 27
GSM/GPRS............................................................................................................ 27
Plug-in IP .............................................................................................................. 28
Plug-in Fast Modem 2400 ................................................................................... 29
Plugs...................................................................................................................... 29
Jumpers ................................................................................................................. 30
DIP switches......................................................................................................... 31
Connecting Backup Battery.......................................................................................... 31
Chapter 3 Installing Bus Devices 32
Bus connection........................................................................................................... 32
Setting Bus Accessory ID Numbers ........................................................................33
Installing Bus Expanders..........................................................................................34
Keypads .......................................................................................................................... 34
8 Zone Expander............................................................................................................ 34
Programmable Outputs ................................................................................................ 36
Wireless Receiver........................................................................................................... 38
3A Switching Mode Power Supply ............................................................................. 39
Digital Voice Module .................................................................................................... 44

Page iv
Sounders ......................................................................................................................... 46
ProSound .............................................................................................................. 46
Lumin8 .................................................................................................................. 47
Connecting Bus Detectors............................................................................................. 47
Single Zone Expander................................................................................................... 48
Completing the Installation.......................................................................................... 49
Chapter 4 Engineer Programming 50
Programming Methods ............................................................................................50
Configuration Software ................................................................................................ 50
PTM: Data Storing Device ............................................................................................ 50
LCD Keypad................................................................................................................... 52
Keypad Programming Key Functions .............................................................. 52
Entering Text Descriptions (Labels): ................................................................. 52
Keypad Timeout .................................................................................................. 53
Accessing Engineer Programming Menu ..............................................................53
First Time Power Up ..................................................................................................... 53
Regular operation mode ............................................................................................... 54
Identifying the Connected Devices.........................................................................54
Automatic Setting .......................................................................................................... 54
Bus Test........................................................................................................................... 55
Wireless device programming workflow ..............................................................55
Step 1: Allocate a wireless receiver.............................................................................. 55
Step 2: Calibrate the Receiver....................................................................................... 55
Step 3: Allocating Wireless Device .............................................................................. 56
Bus Detectors Programming Workflow .................................................................56
Programming bus detectors on the main bus ............................................................ 57
Step 1: Adding Bus Detector to the Main Unit ................................................ 57
Step 2: Set Bus Zone Basic Attributes................................................................ 57
Step 3: Programming the Bus Detectors Advanced Parameters.................... 57
Programming bus detectors on a bus expander ........................................................ 57
Step 1: Adding the Bus Expander to LightSYS ................................................ 58
Step 2: Adding Bus Detector .............................................................................. 58
Step 3: Set Bus Zone Basic Attributes................................................................ 59
Step 4: Programming the Bus Detectors Advanced Parameters.................... 59
Exiting Programming Mode .................................................................................... 59
Restoring Manufacturer's Programming Defaults................................................59
Using the Engineer Programming Menus .............................................................60
Engineer Programming Menu Conventions .............................................................. 60
1 System .......................................................................................................................... 61

Page v
Timers.................................................................................................................... 61
Controls................................................................................................................. 65
Labels .................................................................................................................... 80
Sounds................................................................................................................... 80
Settings.................................................................................................................. 81
Automatic Clock .................................................................................................. 83
Service Information ............................................................................................. 83
Firmware Update................................................................................................. 84
2 Zones ............................................................................................................................ 84
Parameters ............................................................................................................ 85
Zones: Parameters: One By One.............................................................. 85
Zones: Parameters: By Category ............................................................. 87
Label .................................................................................................. 87
Partition............................................................................................. 87
Type................................................................................................... 87
Sound................................................................................................. 94
Termination ...................................................................................... 95
Loop Response ................................................................................. 95
Advanced.......................................................................................... 96
Bus Zones Configuration.................................................................................... 97
Testing................................................................................................................. 105
Cross Zones ........................................................................................................ 107
Alarm confirm.................................................................................................... 109
3 Outputs ...................................................................................................................... 110
Nothing ............................................................................................................... 110
Follow System .................................................................................................... 111
Follow Partition ................................................................................................. 114
Follow Zone........................................................................................................ 118
Follow Code ....................................................................................................... 119
4 Codes.......................................................................................................................... 121
User...................................................................................................................... 122
Grand Master ..................................................................................................... 124
Engineer .............................................................................................................. 124
Sub Engineer ...................................................................................................... 125
Code Length ....................................................................................................... 125
5 Communication ........................................................................................................ 126
Method................................................................................................................ 126
PSTN......................................................................................................... 126
GSM .......................................................................................................... 128
Timers.............................................................................................. 128
Controls........................................................................................... 132

Page vi
Parameters ...................................................................................... 132
Prepay SIM ..................................................................................... 133
IP ............................................................................................................... 134
IP Config ......................................................................................... 134
Email................................................................................................ 135
Host Name...................................................................................... 135
ARC Keep alive (Polling).............................................................. 135
Radio (LRT).............................................................................................. 137
Alarm Receiving Centre.................................................................................... 138
Report Type .................................................................................... 138
Accounts ......................................................................................... 141
Communications Format .............................................................. 141
Controls........................................................................................... 142
Parameters ...................................................................................... 143
ARC Timers .................................................................................... 143
Report Split..................................................................................... 145
Report Codes .................................................................................. 147
Configuration SW .............................................................................................. 147
Follow Me ........................................................................................................... 150
Define FM ........................................................................................................... 150
Report Type .................................................................................... 150
Partition........................................................................................... 152
Events .............................................................................................. 152
Restore Events ................................................................................ 154
Remote Control .............................................................................. 155
Controls........................................................................................... 155
Parameters ...................................................................................... 156
6 Audio.......................................................................................................................... 156
Messages ............................................................................................................. 157
Local Announcements....................................................................................... 158
7 Install.......................................................................................................................... 160
Bus Device .......................................................................................................... 160
Bus Devices: Automatic Setting ............................................................ 160
Bus Devices: Manual Setting ................................................................. 161
Bus Devices: Testing............................................................................... 171
Wireless Devices ................................................................................................ 173
8 Devices ....................................................................................................................... 176
Keyfob ................................................................................................................. 177
Sounder............................................................................................................... 177
Proximity Key Reader ....................................................................................... 181
3A Power Supply............................................................................................... 181

Page vii
Chapter 5 Using the Engineer Non-Programming Menus 183
Activities Menu............................................................................................................ 183
Follow Me..................................................................................................................... 183
View Menu ................................................................................................................... 184
Clock Menu .................................................................................................................. 184
Event Log...................................................................................................................... 185
Maintenance ................................................................................................................. 185
Macro............................................................................................................................. 187
Stand Alone Keyfobs................................................................................................... 187
Appendix A Technical Specifications 188
Appendix B LightSYS Accessories 192
Appendix C Wiring 195
Appendix D Library Voice Messages 198
Appendix E Report Codes 199
Appendix F Engineer Event Log Messages 204
Appendix G Engineer Programming Maps 213
Appendix H EN 50131 and EN 50136 Compliance 222
Appendix I Remote Software Upgrade 225

Page viii
Table of Figures
Figure 1-1 LightSYS Architecture .................................................................................................... 10
Figure 1-2 LightSYS-supported Keypads ....................................................................................... 13
Figure 2-1 Box clip release .............................................................................................................. 18
Figure 2-2 Mounting screw template............................................................................................. 18
Figure 2-3 Placing the AC adapter with mains fuse.................................................................... 19
Figure 2-4 Placing the main panel ................................................................................................. 20
Figure 2-5: Main board wiring diagram........................................................................................ 21
Figure 2-6: Main board terminal block ......................................................................................... 21
Figure 2-7: Terminal block bus connectors................................................................................... 22
Figure 2-8: Wiring U01 for self-powered device ......................................................................... 25
Figure 2-9: Perforated Back Tamper Release............................................................................... 26
Figure 2-10 Placing the GSM/GPRS panel and antenna ........................................................... 28
Figure 2-11 Placing the IP modem................................................................................................. 28
Figure 2-12 Placing the Fast communication modem ................................................................ 29
Figure 2-13 Placing the battery and attaching the plug ............................................................ 29
Figure 3-1: Terminal block bus connectors................................................................................... 32
Figure 3-2: Zone Expander board and mounting diagrams...................................................... 35
Figure 3-3: Zone Expander mounting location inside the LightSYS box ................................. 36
Figure 3-4: Programmable Output Module PO4 (Showing an Example of PO4 Wiring)..... 36
Figure 3-5: Programmable Output Module E08.......................................................................... 37
Figure 3-6: Programmable Output Module X-10........................................................................ 37
Figure 3-7: Wireless Receiver .......................................................................................................... 38
Figure 3-8: SMPS –General View.................................................................................................... 39
Figure 3-9: SMPS Inside a Metal Box ............................................................................................. 40
Figure 3-10: SMPS –AC & Ground Connection........................................................................... 42
Figure 3-11: Voice Module PCB...................................................................................................... 44
Figure 3-12: Voice Module —Listen/Talk Unit Wiring............................................................... 45
Figure 3-13: ProSound Bus Wiring................................................................................................. 46

Introduction
Page 9
Chapter 1 Introduction
This chapter provides a basic introduction to the LightSYS system and its architecture and
capabilities, as described in the following sections:
What is LightSYS?, below
LightSYS Architecture and Capabilities, page 10
LightSYS Features, page 11
What is LightSYS?
LightSYS is an integrated security system with unrivalled flexibility and advanced expansion
capabilities, yet simple to install, program and maintain.
LightSYS provides monitoring and supervision for up to 32 zones. Through its 4-wire bus it
can support a variety of optional modules including: assorted keypads, proximity key
readers, zone expanders, interactive voice module, 868/433 MHz wireless expansion,
supplement power supply, programmable outputs and numerous bus detectors.
LightSYS features integrated dual-path and triple-path reporting, with integrated plug in IP
module for IP communication, plug-in GSM/GPRS modules for advanced cellular
communication all in one box, and an IP/GSM receiver package for alarm receiving centres
(ARC).
LightSYS provides a new level of remote service and installation convenience, with unique
remote diagnostic capabilities, Auto-Install™ technology and bus test which checks
communication quality of the bus and enables pinpointing intermittent wiring faults.
LightSYS can be programmed and/or controlled through the remote configuration software
installed on a PC computer with a Windows operating system.
For easy maintenance and scalability LightSYS can be upgraded locally or remotely using IP
communication.
This LightSYS Installation and Programming Manual details how to install the LightSYS
hardware and to program the LightSYS main panel, as described in the following main steps:
♦Step 1: Mounting and Wiring the Main Panel (Chapter 2)
♦Step 2: Identifying, Mounting and Wiring Keypads and Expansion Modules (Chapter 3)
♦Step 3: Programming the LightSYS (Chapters 4 and 5)
Note:
While this manual describes all of the above steps, the section on programming the main
panel comprises the bulk of the information, as it covers all the programmable functions
that can be performed using the keypad.

Introduction
Page 10
Figure 1-1 LightSYS Architecture
LightSYS Architecture and Capabilities
Feature
LightSYS
Zones
8 –32 wired, wireless or RISCO bus in any combination
Partitions
4
Groups per partition
4
Zone resistance
Fully selectable
Programmable outputs
4 onboard expandable to 14
User codes
16
Event log
500
Keypads
4 wired/wireless (one-way)
Wireless keyfobs
16 multi-functional + 200 stand-alone
Proximity key readers
8
Follow-me numbers
16
Communication
PSTN onboard
Plug-on IP module or fast modem
Plug on GSM/GPRS or integrated KP long range radio
Long range radio
Account Numbers
4
Additional inputs
Bell tamper, box tamper
Max Current
1.5 A
Sounders
4
Automatic scheduling
programs
4

Introduction
Page 11
LightSYS Features
Main Panel
The main panel is the foundation of the system's operation and has the following features:
8 basic hardwired zones
4 Programmable outputs:
o1 x relay (programmable output) (3 Amps)
o3 x 100mA opto-relays
Box tamper input (normally open)
Bell tamper input (using a 2.2KΩ end-of-line resistor)
4-wire bus with "quick connector" from the main panel.
Power for the operation of an external sounder
Offers the required type of voltage for one or more electronic sounders, bells, or
loudspeakers, respectively
Supports more than 25 zone types
4 zone terminations, including: closed-circuit (NC), open-circuit (NO), end-of-line
(EOL) resistors, and double end-of-line (DEOL) resistors
Configurable zone resistance
500 Event log on board
Zone Expansion
Support for additional 24 wired / wireless zones
Zones expansion using 8-Zone wired expander (Max 3 expanders) or Bus Zones
expander
Bus zones support (maximum 32)
Up to two wireless 868MHz or 433MHz expansion modules
4 zone terminations, including closed-circuit (NC), open-circuit (NO), end-of-line
(EOL) resistors, double end-of-line (DEOL) resistors
Configurable zone resistance
Supports more than 25 zone types
Forced setting zone capability

Introduction
Page 12
Wireless Capabilities
Up to two WL receivers per LightSYS system
The wireless expansion module includes the following features:
oUp to 32 supervised wireless zones (bus mode)
oUp to 16 multi-function keyfobs (bus mode)
oUp to 200 stand-alone keyfobs (bus and stand-alone modes)
oTwo programmable outputs (1A relays)
oRolling code technology
oSignal-jamming detection
oProgrammable supervision time
oThreshold-level calibration
oTamper detection
oTransmitter’s low battery detection
oTransmitter supervision
oNominal center frequency: 868.65 MHz or 433.92 MHz
oCan be installed inside or outside the LightSYS main enclosure
When using wireless zones, the LightSYS Wireless expansion modules respond to
different wireless detectors, such as:
oSmoke detectors
oDoor contacts/Door magnet/universal transmitter/door contact +universal
oUp to 16 rolling code 4-button keyfobs
oDouble key panic keyfob
oFlood detector
oShock detectors
oCO detectors
oGas detectors
oGlassbreak detectors
oInternal and External PIR/PET and WatchOUT detectors
Partitions/Areas
Up to 4 independent partitions/areas
Any zone can be assigned to any partition/area
Each partition/area supports both zone sharing and cross zoning
Groups
Groups are combined zones within a partition/area that are used for partial arming.
Up to four groups of zones can be defined for each partition/area.
Group arming and setting is performed by using the function keys on the keypad (A,
B, C, and D) or by SMS or keyfob. Each keypad key represents a different group of
zones.
Each zone can be assigned to any of the four groups
Users can set any of the four groups individually

Introduction
Page 13
Keypads
The LightSYS can support up to four keypads, wired or wireless (1-way) with a choice of
different styles.
Model: RP128KCC Model: 432KP Model RP128KP
Figure 1-2 LightSYS-supported Keypads
Each keypad is equipped with:
Three emergency key zones (panic, fire, and emergency)
The ability to produce a duress (ambush) code
Optional proximity tags (different part number)
Double tamper-protection
Internal buzzer
Audible feedback for keypad operations
Easy-to-use hot-key sequences for simple zone omitting
A one-key quick-set feature for both "Part set" and "Full Set"
In partitioned systems, keypads can be selectively assigned to specific partitions
Four function keys (A,B,C,D) can be programmed to carry a sequence of commands
User Codes and Authority Levels
1 engineer code
1 sub engineer code
1 Grand Master code
Up to 16 user codes
8 authority levels
Codes can be defined to 4 or 6 digits (By default 6 digits)
Each user can be assigned with a proximity tag or keyfob

Introduction
Page 14
Programmable Programmable outputs
Supports additional 10 outputs (to the 4 on the main board)
4-relay, 8-transistor or 2 relay (WL expander or 3A power supply expander)
expansion output modules
Outputs operation follows system events, codes or scheduling programs
Output can follow up to 5 zone events (All/Any definition)
X-10 Module: The LightSYS also supports the connection of an X-10 Transmitter
module to its 4-wire expansion bus. X-10 technology converts the LightSYS's
programmable output events into a protocol understood by the transmitter module.
When triggered, this module generates activation and control signals along existing
AC premises wiring to the appropriate X-10 receiver modules, placed and connected
within the premises to control lighting and appliances. X-10 transmitter modules are
available for the LightSYS, supporting either 8- or 16-premises receiver modules
Communication
On-board digital communicator
Numerous transmission formats to ARC including ADEMCO Contact ID and SIA.
Account number for each alarm receiving centre with additional backup accounts.
3 ARC link-up options using:
oPSTN report
oGSM report
oIP report
oGPRS report
oSMS report
oLong Range Radio report
Flexible split-reporting for backup
Call Save mode from which non-urgent reports can be collected over a designated
time period and then transmitted all at once (windowing), and support daily system
testing, along with reports of entry into, and exit from, the system's Engineer
Programming mode
Follow Me report: In addition to standard communication with the ARC, the
LightSYS supports a follow-me feature in which the system can report to a
homeowner at work, or to a business owner at home, that there has been an alarm at
a specific location by voice message over the phone, SMS or Email.
Advanced Digital Voice Module
The Advanced Digital Voice module provides audible information about the status of your
LightSYS system and enables any remote, touch-tone (DTMF) telephone to act as a keypad for
the system. The advanced digital voice module can be used in the following situations:

Introduction
Page 15
Upon event occurrence, such as alarm activation, the advanced digital voice module
informs you of a security situation, such as intrusion or fire, by calling you and
playing a pre-recorded event announcement. You can then acknowledge the event
and remotely operate the system.
Remotely operating the system, which includes:
oPartition arming and disarming
oZone omitting
oPO activation/deactivation
oChanging follow-me numbers
oPerforming listen and talk options
oRecording opening messages or zone descriptors
3 A Power Supply Expansion Module
Although the LightSYS's main panel provides 800mA of auxiliary power (300mA for Bell), the
use of a number of additional system modules and detectors will likely exceed this limitation.
As a result, the LightSYS supports the addition of up-to-4 remote switched power supplies
that each operate from AC power, connect to the bus and provide a total current capacity of 3
Amps.
The power supply modules have connections for powering auxiliary devices and triggering
bells, electronic sounders, or loudspeakers during an alarm. Each power supply expansion
module also supports its own standby battery and is supervised for the loss of AC, a low
battery condition, tamper input, the failure of its auxiliary output power, and the loss of
sounder loop integrity.
Scheduling
Through the use of the system's built-in clock, it is possible to automate system operations at
the same time on selected days of the week or at a specific time within the subsequent 24-
hour period or during vacation periods.
The system operations include:
Scheduling automatic setting and unsetting (of one or more partitions).
Scheduling automatic operation of programmable outputs.
Restricting users from unsetting during predefined time periods
Event Logging
The LightSYS has the capability of storing up to 500 significant events, including setting,
unsetting, omitting, alarms, faults, restorals, and resets. These events are logged in order
according to date and time, and when applicable, according to zone, partition, area, user
code, keypad, etc. When appropriate, such events can be displayed on an LCD keypad or
uploaded to the ARC via the Configuration Software.

Introduction
Page 16
Advanced Installation Tools
Auto Installation: For quick and easy installation, the system performs automatic
installation of the modules connected to the bus. The system searches for the
modules by automatically verifying their connection and operation through the bus-
scanning feature and prompts the user to approve each module connection. The auto
installation feature is performed automatically after defaulting the system or can
also be performed manually.
Self Monitoring
oThe bus test enables the system to verify the connection and the operation of the
modules connected to the bus by indicating the efficiency of each one on a 0-
100% scale. Each result is individually displayed on the LCD keypad (or via the
Configuration Software).
oA watchdog feature, which periodically (every minute) and automatically
performs a comprehensive self-test and reports when operating faults are
found.
oA maintenance mode which, when selected, performs an active self-check on
many of its components.
oOne-man walk testing capabilities, enabling an engineer or technician to check
the operation of each contact and detector which, when tripped, produce
audible feedback and are visibly logged at the keypad from which the test was
initiated.
System programming
oLocal keypad keys
oProgram transfer module: Used to store the programmed configuration of any
LightSYS without the need for power.
oLocal/Remote Configuration Software
oRemote software upgrade over IP
False Alarm Reduction
In an effort to deter false alarms, the LightSYS provides various programmable features,
including the following:
Cross zoning
Swinger shutdown
Audible/visual entry/exit delays
Fire alarm verification
Dialer delay before an alarm transmission
Cancel report option
Double knock
Soak test
Exit termination zone.

Mounting and Wiring
Page 17
Chapter 2 Mounting and Wiring
This chapter covers the installation and wiring of the LightSYS main unit. Due to its
modularity, the specific component assembly will depend on your system configuration. The
following assembly is presented in the recommended order.
LightSYS installation Steps
The following workflow illustrates the recommended method for installing the LightSYS. A
detailed description is provided in the following sections of the manual.
1. Create an installation plan.
2. Mount the LightSYS to the wall.
3. Plug in the AC adaptor and main board inside the LightSYS enclosure.
4. Wire the main panel (zones, outputs etc.).
5. Connect telephone line.
6. Plug in communication modules.
7. Allocate and connect bus expansion modules.
8. Set dipswitches and jumpers on the main board and on the various expanders.
9. Connect backup battery and AC power.
10.Perform automatic setting and complete system programming.
Choosing the mounting location
Before you mount the LightSYS, study the premises carefully in order to choose the exact
location of the unit for the best possible coverage and yet easily accessible to expanders and
accessories and prospective users of the alarm system. Among the mounting location
considerations are the following:
Centrality of location among all the transmitters.
Proximity to
oAn uninterrupted AC outlet.
oA communication (telephone/internet) outlet.
Distance from sources of interference, such as:
oDirect heat sources
oElectrical noise such as computers, televisions etc.
oLarge metal objects, which may shield the antenna.
Alarm location effectiveness for hearing part arming mode annunciation
Dryness
(In case you installed GSM / GPRS module before mounting the system into the
desired position) Ensure a good signal of the GSM network (Advisable to have a
level of at least 4 out of 5).

Mounting and Wiring
Page 18
Note:
For wiring distance and grounding placement considerations, refer to Appendix A Technical
Specifications
Wall Mounting the LightSYS Box
The LightSYS is housed in a state-of-the-art plastic enclosement, consisting of back and front
panels and featuring a plastic click-mounting for all internal components.
To prepare the wall for box mounting
1. Separate the sub-assemblies by pressing the circular locking plastic brackets
on either side to release the front cover.
Figure 2-1 Box clip release
2. Hold the mounting bracket against the wall as a template and mark the
locations for the mounting holes (4 mounting holes and an additional
optional hole for securing the tamper protection bracket item).
Figure 2-2 Mounting screw template
3. Drill the desired mounting holes and place the screw anchors.
AC adaptor and main board
The LightSYS is powered by an AC/DC Adaptor 100-240V 50/60Hz 14.4V—
1.5A.
Caution:
AC wiring should be done by a certified electrician

Mounting and Wiring
Page 19
1. Connection to AC must be permanent and connect through the mains-
fuse terminal block (see Figure 2-3):
A. Affix AC adapter as per placement struts.
B. According to the location of the electrical and communication
outlets, remove the knockouts to allow cable and wire passage
for routing through the right or left-side (default) knockout
exit.
C. Do not connect the cable to the wall power supply at this
point.
Figure 2-3 Placing the AC adapter with mains fuse
Caution:
When the main panel is powered on, mains voltage is present on the main
PCB.
To prevent risk of electric shock, disconnect all power (AC transformer
and battery) and phone cords before servicing.
Under no circumstances should mains power be connected to the PCB
other than to the main terminal block.
A readily accessible disconnect device shall be incorporated in the
building installation wiring.
For continued protection against risk of fire, replace fuses only with fuses
of the same type and rating.
2. Place the main panel on its four mounting brackets and secure it, as per
Figure 2-4
Other manuals for LightSYS
13
Table of contents
Other Risco Security System manuals

Risco
Risco Agility 3 User manual

Risco
Risco Agility 3 User manual

Risco
Risco Agility User manual

Risco
Risco Agility User manual

Risco
Risco LightSYS2 User manual

Risco
Risco lightsys 2 Instruction manual

Risco
Risco LightSYS Assembly instructions

Risco
Risco WiComm User manual

Risco
Risco Agility 3 User manual

Risco
Risco WiComm Pro User manual

Risco
Risco LightSYS User guide

Risco
Risco Pro-24 User manual

Risco
Risco SecuSafe EL4855PI User manual

Risco
Risco LightSYS User manual

Risco
Risco Agility 3 Datasheet

Risco
Risco Rokonet WisDom Assembly instructions

Risco
Risco WiComm Pro User manual

Risco
Risco Agility 3 User guide

Risco
Risco ProSYS 16 User manual

Risco
Risco LightSYS Owner's manual