manuals.online logo
Brands
  1. Home
  2. •
  3. Brands
  4. •
  5. Lorex
  6. •
  7. Security System
  8. •
  9. Lorex L19WD Series User manual

Lorex L19WD Series User manual

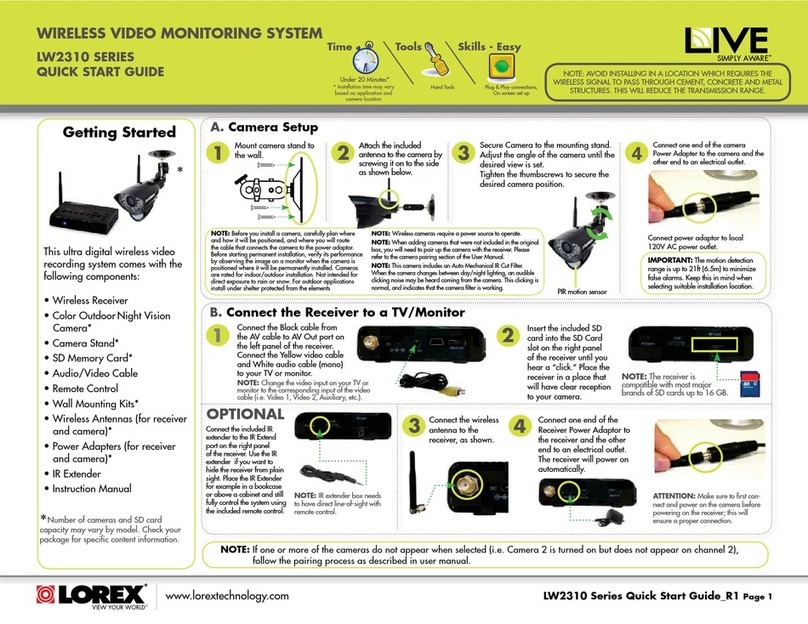
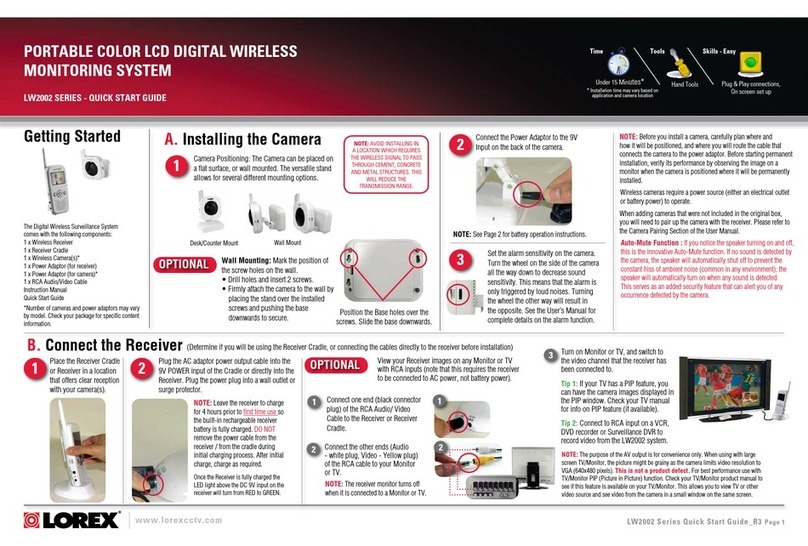
L19WD Series Quick Setup Guide - English - R1
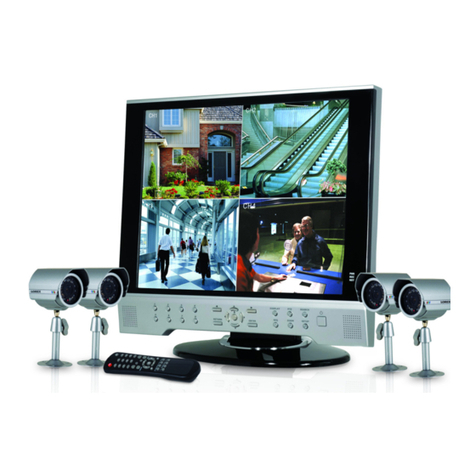
• 19” Widescreen LCD DVR
• HDD Pre-Installed*
• Mouse
• Remote Control
• Power Supply
PACKAGE CONTENTS:
ATTENTION:
• Broadband Router and Computer are required for local and
remote monitoring (not included).
• Lorex Client software is compatible with Windows XP™ and Vista™
operating systems.
• For detailed setup and software information, please refer to
your printed User’s manual (included).
• User Manual’s in additional languages, consumer guides and storage
calculator are included on your CD.
Infor mation in th is document is subject t o change without notic e. As our pro ducts ar e subject
to continuou s impr ovement, Lorex Technology I NC. and our subsidiaries reser ve the right to
modify pr oduct design, specification s and pr ices, wi thout notice and without incurr ing any
obligation. E&O E © 2008 LOREX . All right s res er ved.
L19WDSeries
Quick Setup Guide
SkillLevel
Intermediate
easy advanced
Time
under30 minutesunder15 minutes under60 minutes
HandTools Hardware
Router
HiSpeed
over60 minutes
SkillLevel
Intermediate
easy advanced
Time
under30 minutesunder15 minutes under60 minutes
HandTools Hardware
Router
HiSpeed
over60 minutes
Time: 20 Minutes Hand Tools Skills - Easy
BASIC INSTALLATION GUIDE
SETUP YOUR MONITOR FIRST
STEP 1
NAVIGATION AND CONTROLS
STEP 2
SkillLevel
Intermediate
easy advanced
Time
under30 minutesunder15 minutes under60 minutes
HandTools Hardware
Router
HiSpeed
over60 minutes
Time: 20 Minutes Skills - Easy
BASIC INSTALLATION GUIDE
1
Connect the first camera to the CH1
input. Follow the same steps to
connect the additional cameras.
SET-UP LOCAL VIEWING ON YOUR PC
STEP 3
SkillLevel
Intermediate
easy advanced
Time
under30 minutesunder15 minutes under60 minutes
HandTools Hardware
Router
HiSpeed
over60 minutes
SkillLevel
Intermediate
easy advanced
Time
under30 minutesunder15 minutes under60 minutes
HandTools Hardware
Router
HiSpeed
over60 minutes
Time: 20 Minutes Hand Tools Skills - Easy
BASIC INSTALLATION GUIDE
STEP 1
CONTINUED
LOCAL VIEWING INSTALLATION GUIDE
Time: 30 Minutes Skills - IntermediateHardware
PC/Router
SkillLevel
Intermediate
easy advanced
Time
under30 minutesunder15 minutes under60 minutes
HandTools Hardware
Router
HiSpeed
over60 minutes
SkillLevel
Intermediate
easy advanced
Time
under30 minutesunder15 minutes under60 minutes
HandTools Hardware
Router
HiSpeed
over60 minutes
* Screen size, number of cameras, accessories and hard drive capacity
may vary by model. Check your package for specific content information.
Connect DIN Cameras to the Monitor:
TIP: Test the cameras prior to selecting a permanent mounting
location by temporarily connecting the Cameras and Cables to
your System.
* Connect cameras to extension
cables by aligning the arrows.
Connect BNC Cameras to the Monitor:
If You are using BNC cameras:
1. Connect the extension cable to the
Camera.
a. Connect the Male Power connector
to the Camera.
b. Connect the BNC connector to the
Camera.
2. Connect the extension cable to the
system.
a. Connect the BNC connector to an
available BNC port on the system.
b. Connect the Female Barrel Power
connector to a power adaptor.
3. Connect the Power Adaptor to a wall outlet.
ATTENTION: The ends of the extension cable are NOT the same - one
end has a Male power connector, and the other has a Female power
connector. Before permanently running the Camera Extension Cable,
make sure that the cable has been oriented between the Camera and
the unit correctly.
Male Power Connector - The
male power connector end of the
Extension cable connects to the
Camera.
OPTIONAL
NOTE: You cannot connect BNC and
DIN cameras to the same channel
simultaneously.
Female Power Connector - The
female power connector (barrel)
end of the Extension cable
connects to the Power Adaptor.
NOTE: The arrow mark
on top of the flat side of
the camera and cable
connectors should face
UP while inserting to the
Monitor.
1a
2
Connect one end of the Ethernet
cable (for remote monitoring) to
one of the router’s (not included)
LAN ports and the other end to
Monitor’s Network Port located at
the back of the Monitor.
Connect the Ethernet Cable:
Connect the included mouse to the
PS/2 port located at the back panel
of the system.
Connect the Mouse:
3
Connect one end of the power
adaptor to the monitor and the
other end to an electrical outlet.
Note: The system automatically
powers on once connected to a
power source. By default, all
connected cameras are set to
record in Continuous Mode when
the system is first powered on.
Connect the Power Cable:
4
To enter the system menu, you will
need to login to the system.
Leave the default user as ADMIN.
Leave the password field blank and
click OK.
Login to the System:
5
Using the Mouse, move the cursor toward the
bottom of the screen to open the Function
Bar.
1. Click on the Settings icon to enter the
system Main Menu. You will be prompted
to enter the User Name and Password.
2. From the System Main Menu, click .
3. From the Configuration menu click
DATE/TIME.
4. Click +/- to change the DISPLAY FORMAT,
TIME ZONE and Date and Time for the
system. Check the DST box to enable
Daylight Savings Time.
5. Click OK to save your settings or click
DEFAULT to restore factory defaults.
6. Click to exit.
Setting the Date and Time:
6
Congratulations!
You have completed Step 1 successfully.
You can now view, record and playback
images on your system.
RECOMMENDED
FOR EASY USE AND
NAVIGATION
LEFT CLICK:
• Select options and
change values in menus,
Recording mode, and
Search mode
• Operate controls in PTZ
mode
DOUBLE-CLICK:
• Double-click ona chan-
nel in Quad orsplit-screen
view to view the channel in
full-screen.
RIGHT CLICK:
• Switch between active
camera channels in
full-screen mode,or
switch between groups
of channels in Quad or
split-screen views
This system has been designed to use
a PS/2 mouse control as its primary
methods of navigation and configuration.
Connect the included mouse to the PS/2
port located on the rear panel before
powering on the system.
Once the unit has loaded, the mouse
will be recognized by the system.
1Mouse:
Use the Navigation Icons when navigating the
system menus.
• HOME Click the Home Icon while in any
menu to return to the System Main
Menu.
• BACK Click the Back Icon to return to
the previous menu.
• EXIT Click the Exit Icon to exit menus.
2Using the Navigation Icons:
4
When using the remote control, the
Navigation Buttons are the primary way
to move through the system menus.
Using the Navigation Buttons:
The Remote Control
can also be used
as a primary mode
of navigation and
configuration.
3Remote Control: RECOMMENDED
FOR USE FROM A
DISTANCE
THIS STEP RELATES TO REMOTE VIEWING OVER THE
LAN (LOCAL AREA NETWORK) BY USING A PC LOCATED
ON THE SAME NETWORK AS THAT OF THE SYSTEM.
*Your system MUST be connected to a Router prior to powering it ON.
NOTE: The system will lease networking
information from your Router. If you wish to
set your information manually, then remove
the from DHCP option. Please consult
your Hardware Manual for further Menu
options.
Record the IP and MAC Addresses in the section below:
IP ADDRESS : . . .
MAC ADDRESS : : : : : :
(Required for DDNS registration)
If the IP Address is 127.0.0.1 it means that you are either not connected
to your local network or your system is not in DHCP detect mode.
Press the Enter button on
the monitor Front Panel OR
1. Move the mouse cursor
toward the bottom of the
screen to open the Function
Bar and click .
2. From the System Main
Menu, click
Configuration and click
System Information.
1Retrieve System Information:
192.168.1.12
Click Next and follow the
installation screens to
complete Lorex Client
Software installation.
2Install Software:
(on your local computer for local viewing):
Insert the Lorex Client Software
CD into your local computer’s CD
ROM.
SETUP YOUR MONITOR FIRST
Close the CD Menu Screen. A
Lorex Client icon will appear on
your desktop.
3Lorex Client Software:
(on your local computer for local viewing):
It’s all on the Web
For detailed setup information,
please refer to your included
User’s Manual. For additional
information, please visit our
website www.lorexcctv.com
Email Support: support@lorexcorp.com
Toll Free Technical Support:
North America: 1-888-42 LOREX (1-888-425-6739)
Mexico: 1-800-514-6739
Toll Free Technical Support - International (outside of North America):
+800-425-6739-0
(Example: From the UK, dial 00 instead of +)
Lorex International Website - ww w.lorexcctv.com
• Cameras & stands*
• 60 ft. camera extension cables*
• Ethernet cable
• Software application CD
• Quick Start Guide
SCROLL:
• To change valuesin menus
5
4
6
L19WD Series Quick Setup Guide - English - R1
SET-UP LOCAL VIEWING ON YOUR PC
STEP 3
CONTINUED
SET-UP LOCAL VIEWING ON YOUR PC SET-UP INTERNET REMOTE SECURITY
MONITORING
STEP 4
CONTINUED
SET-UP INTERNET REMOTE SECURITY
MONITORING
STEP 4
CONTINUED
SET-UP INTERNET REMOTE SECURITY
MONITORING
STEP 4
CONTINUED
LOCAL VIEWING INSTALLATION GUIDE
Time: 30 Minutes Skills - IntermediateHardware
PC/Router
SkillLevel
Intermediate
easy advanced
Time
under30 minutesunder15 minutes under60 minutes
HandTools Hardware
Router
HiSpeed
over60 minutes
SkillLevel
Intermediate
easy advanced
Time
under30 minutesunder15 minutes under60 minutes
HandTools Hardware
Router
HiSpeed
over60 minutes
SkillLevel
Intermediate
easy advanced
Time
under30 minutesunder15 minutes under60 minutes
HandTools Hardware
Router
HiSpeed
over60 minutes
SkillLevel
Intermediate
easy advanced
Time
under30 minutesunder 15 minutes under60minutes
HandTools Hardware
Router
HiSpeed
over60 minutes
REMOTE VIEWING INSTALLATION GUIDE
Time: 60 Minutes Skills - AdvancedHardware
PC/Router
SkillLevel
Intermediate
easy advanced
Time
under30 minutesunder15 minutes under60 minutes
HandTools Hardware
Router
HiSpeed
over60 minutes
SkillLevel
Intermediate
easy advanced
Time
under30 minutesunder15 minutes under60 minutes
HandTools Hardware
Router
HiSpeed
over60 minutes
SkillLevel
Intermediate
easy advanced
Time
under30 minutesunder 15 minutes under60minutes
HandTools Hardware
Router
HiSpeed
over60 minutes
REMOTE VIEWING INSTALLATION GUIDE
Time: 60 Minutes Skills - AdvancedHardware
PC/Router
SkillLevel
Intermediate
easy advanced
Time
under30 minutesunder15 minutes under60 minutes
HandTools Hardware
Router
HiSpeed
over60 minutes
Double-click the Lorex
Client software icon on
your desktop to run the
program.
4Run the Lorex Client Software:
(on your local computer for local viewing):
From the Lorex Client main
window, click Client Setup in
the top-left corner.
5Lorex Client Set-up:
(on your local computer for local viewing):
From the Client Setup window,
click Register Site. A new
window opens for you to input
your system’s network
information.
6Register a Site:
(on your local computer for local viewing):
1. Enter your System’s IP
address (recorded in
Step 3 - 1)
2. Enter the Monitor TCP/IP
port ‘5000’ (by default)
3. In the Location field, enter
a name for your system
(i.e. Office).
4. Enter the User ID (ADMIN
by default), max. 5 characters.
5. Enter the Admin Password
(blank by default)
* User ID and Password are
case sensitive
6. Press OK
7. Select your newly added site
and click OK
Under IP Setup:
7
7
1
2
3
4
5
Office
6
7Enter Client Setup Information:
(on your local computer for local viewing):
STEP 3
CONTINUED
LOCAL VIEWING INSTALLATION GUIDE
Time: 30 Minutes Skills - IntermediateHardware
PC/Router
SkillLevel
Intermediate
easy advanced
Time
under30 minutesunder15 minutes under60 minutes
HandTools Hardware
Router
HiSpeed
over60 minutes
SkillLevel
Intermediate
easy advanced
Time
under30 minutesunder15 minutes under60 minutes
HandTools Hardware
Router
HiSpeed
over60 minutes
From the Lorex Client main
window, click Remote Viewer.
On the Remote Viewer, at
the top left corner of your
screen you will see the
site information. Click the
Connect button to connect
to Local Live Site to view
your cameras.
For complete information on using the Remote Viewer, Player,
and Backup functions of the Lorex Client, please refer to the
Lorex Client Software Users Guide.
LOCAL LIVE SITE*
*For viewing your system in your local area
network (LAN)
8View Cameras Locally:
(on your local computer for local viewing):
Congratulations!
You have completed Step 3 successfully.
You can now view, playback images and
remotely control your system on your
local computer over the Local Area
Network (LAN).
Port forward your router first before proceeding
with the set-up
A router configuration guide featuring the most commonly used
routers in the market is available on your Lorex Client Software
CD and also on www.lorexcctv.com/support in the Consumer’s
Guide Section.
An example of a port forwarding screen is shown for illustration
purposes.
System
System
5000 5000
80 80
12
12
EXAMPLE
1
You must forward Ports: 5000 (TCP/IP), 80 (WEB)
All routers are different. To port forward your router, please
refer to your router’s user manual.
http://www.lorexddns.net
DDNS (Dynamic Domain Name System) Set-up:
Open your web browser
(Internet Explorer by
default) and enter
www.lorexddns.net
in the address bar.
2
LOREX PROVIDES A FREE
DDNS SERVICE WITH THIS
SYSTEM.
Create Account
Click the CREATE ACCOUNT
option.
Create Account:
3
1. FOR PRODUCT LICENSE
select the L19WD option
from the drop down menu.
2. FOR PRODUCT CODE
enter the Monitor’s MAC
address (recorded in step
3 - 1) without the dashes.
12
3
VISIT
WWW.LOREXCCTV.COM/SUPPORT
TO VIEW THE ROUTER CONFIGURATION
GUIDE
4Complete New Account Information:
An automated
REGISTRATION
CONFIRMATION EMAIL
will be sent to your
email. Print and Save
this confirmation. You
will need this
information to access
your System remotely.
DDNS Domain Name: ddns.lorexddns.net
Domain: tomsmith.lorexddns.net
User ID: tomsmith
Password: (your password)
5Registration Email:
Mouse navigation (recommended)
1. Using the Mouse, click on the
Settings icon to enter the
System Main Menu. You will
be prompted to enter the
User Name and Password.
2. Click on the Network
icon.
3. Click on DDNS to enter the
DDNS Menu.
6Enter DDNS Set-up on your System:
In the DDNS checkbox, put a 
mark to enable DDNS.
7Enable DDNS Settings:
1. DDNS Domain Name is
ddns.lorexddns.net (by
default)
2. Using the Virtual Keyboard
enter the DOMAIN sent to
you in the REGISTRATION
CONFIRMATION EMAIL
(i.e.tomsmith.lorexddns.net).
tomsmith
tomsmith
*****
8Set the DDNS Settings:
3. Enter the User ID sent to you in the REGISTRATION
CONFIRMATION EMAIL.
4. Enter your Password (from the DDNS Registration Email sent
to you - blank by default).
5. Click the OK button - a SUCCESS message will appear if the
settings are correct.
6. Click to exit.
Repeat Steps from Step 3-2 to 3-6 to install, run, and set-up
Lorex Client Software on your remote computer for remote
viewing.
9
NOTE: The DDNS service supports Dynamic IP addresses for remote connection.
When this feature is configured on the remote system, you can access it remotely
using the domain name instead of IP address. To use this feature, the system
must be registered on the Lorex DDNS server. Alternatively, if you have a static
IP address you can enter it here. Please refer to the LOREX CLIENT Manual for
network setup and configuration.
1. Enter the DDNS Domain Name
from the Registration Email sent
to you. (i.e tomsmith)
2. Enter TCP/IP port ‘5000’ (by
default)
3. In the Location field, enter a name
for your system (i.e. Office).
4. Enter the User ID (ADMIN by
default), max. 5 characters
5. Enter the Admin Password (blank
by default) * User ID and
Password are case sensitive
6. Press OK
7. Select your newly added site and
click OK
Under IP Setup:
Enter Client Setup Information:
(on your remote computer for remote viewing):
tomsmith.lorexddns.net
Office
1
2
3
4
5
6
7
7
Repeat Step from Step 3-8 to
view cameras locally on your
remote computer.
Congratulations!
You have completed Step 4 successfully.
You can now view, playback images and
remotely control your system on your
Remote computer over the internet.
3. FOR URL REQUEST enter a unique URL name (e.g. tomsmith).
Note: URL name should not be more than 15 characters.
TAKE THIS OPPORTUNITY TO
REGISTER YOUR PRODUCT FOR
WARRANTY AND PRODUCT
UPDATES.

Other manuals for L19WD Series

1

Other Lorex Security System manuals

Lorex DVM2050 User manual

Lorex

Lorex DVM2050 User manual

Lorex SG6350 User manual

Lorex

Lorex SG6350 User manual

Lorex SG17F6584 User manual

Lorex

Lorex SG17F6584 User manual

Lorex SG15F6584 User manual

Lorex

Lorex SG15F6584 User manual

Lorex QLR1660 User manual

Lorex

Lorex QLR1660 User manual

Lorex SHS-4QM Series User manual

Lorex

Lorex SHS-4QM Series User manual

Lorex SHS-4SM User manual

Lorex

Lorex SHS-4SM User manual

Lorex LW1001 Series User manual

Lorex

Lorex LW1001 Series User manual

Lorex L222A8D Series User manual

Lorex

Lorex L222A8D Series User manual

Lorex L21Q784 User manual

Lorex

Lorex L21Q784 User manual

Lorex SG850 User manual

Lorex

Lorex SG850 User manual

Lorex LW1741 User manual

Lorex

Lorex LW1741 User manual

Lorex SG 6040 User manual

Lorex

Lorex SG 6040 User manual

Lorex SG6352 User manual

Lorex

Lorex SG6352 User manual

Lorex LW2702 series User manual

Lorex

Lorex LW2702 series User manual

Lorex SG7864R User manual

Lorex

Lorex SG7864R User manual

Lorex LW1200 Series User manual

Lorex

Lorex LW1200 Series User manual

Lorex VANTAGE LH110 ECO SERIES User manual

Lorex

Lorex VANTAGE LH110 ECO SERIES User manual

Lorex lx4471w Instruction Manual

Lorex

Lorex lx4471w Instruction Manual

Lorex LW2201 Series User manual

Lorex

Lorex LW2201 Series User manual

Lorex WA-410 Instruction Manual

Lorex

Lorex WA-410 Instruction Manual

Lorex L15LD400 series User manual

Lorex

Lorex L15LD400 series User manual

Lorex SG5550 User manual

Lorex

Lorex SG5550 User manual

Lorex SG6331P User manual

Lorex

Lorex SG6331P User manual

Popular Security System manuals by other brands

Kerbl 322084 user guide

Kerbl

Kerbl 322084 user guide

Skov DOL 2200 Technical user guide

Skov

Skov DOL 2200 Technical user guide

Paradox PGM4 instructions

Paradox

Paradox PGM4 instructions

Omega Engineering I SERIES I/32 quick start

Omega Engineering

Omega Engineering I SERIES I/32 quick start

Roth QuickStop Pro1 installation manual

Roth

Roth QuickStop Pro1 installation manual

Swann USB 2.0 DVR Guardian installation guide

Swann

Swann USB 2.0 DVR Guardian installation guide

Inhep Digital Security IDS X Series user manual

Inhep Digital Security

Inhep Digital Security IDS X Series user manual

Aqua-Vu Motorized   MAV user manual

Aqua-Vu

Aqua-Vu Motorized MAV user manual

Oxidation Technologies OA-1 Installation and operation manual

Oxidation Technologies

Oxidation Technologies OA-1 Installation and operation manual

Essentials EL00160 manual

Essentials

Essentials EL00160 manual

LogicMark 37920 Setup instructions

LogicMark

LogicMark 37920 Setup instructions

Cocoon DVR6093 instruction manual

Cocoon

Cocoon DVR6093 instruction manual

teko Astra-321 operating manual

teko

teko Astra-321 operating manual

Essence We.R user manual

Essence

Essence We.R user manual

Anviz M5 user manual

Anviz

Anviz M5 user manual

Kemo Electronic M073N manual

Kemo Electronic

Kemo Electronic M073N manual

Honeywell ADEMCO VISTA-40 Programming guide

Honeywell

Honeywell ADEMCO VISTA-40 Programming guide

2gig Technologies GC3 user guide

2gig Technologies

2gig Technologies GC3 user guide

manuals.online logo
manuals.online logoBrands
  • About & Mission
  • Contact us
  • Privacy Policy
  • Terms and Conditions

Copyright 2025 Manuals.Online. All Rights Reserved.