Xcruiser XDSR4000HD User manual

User’s Manual
Full HD
Digital Satellite Receiver
Please read this User’s Manual carefully before installing the receiver.
v1410

The terms HDMI and HDMI High-Definition Multimedia Interface, and the HDMI Logo are
trademarks or registered trademarks of HDMI Licensing LLC in the United States and other
countries.
Manufactured under license from Dolby Laboratories. Dolby and the double-D symbol are
trademarks of Dolby Laboratories.

3
1 SAFETY 5
2 INTRODUCTION 6
3 FEATURES 6
4 REMOTE CONTROL 7
5 FRONT PANEL 9
6 REAR PANEL 10
7 CONNECTING YOUR SYSTEM 11
7.1 TV with Motorized System (DiSEqC 1.2) 11
7.2 Connecting the Network 12
8 BASIC OPERATIONS 13
8.1 Turn on STB 13
8.2 Power 13
8.3 Channel Up/Channel Down 13
8.4 Volume Up/Volume Down- 13
8.5 Number 13
8.6 Mute 13
8.7 Pause 13
8.8 Recall 13
8.9 Favorite 14
8.10 Audio 14
8.11 Information 14
8.12 EPG 15
8.13 TV/RADIO 15
8.14 Channel List 16
8.15 Sleep 17
8.16 Page Up/Page Down 17
8.17 TEXT 17
8.18 Subtitle 17
8.19 Find 17
8.20 Zoom 17
8.21 TV/RCV 17
8.22 Menu 18
8.23 Video Format 18
8.24 Exit 18
9 SERVICE 18
9.1 Organizing Service 18
9.2 Organizing Favourites 20
10 INSTALLATION 21
10.1 Satellite Installation 21
10.2 Auto installation 23
10.3 Satellite Guide 24
11 SYSTEM 24
11.1 Language 25
11.2 A/V Control 26
11.3 Ethernet Setting 27
11.4 Time Setting 28
11.5 Timer 28
CONTENTS

4
11.6 Parental Control 30
11.7 Miscellaneous Settings 30
11.8 Software Upgrade 31
11.9 Default Setting 33
11.10 Information 34
12 CONDITIONAL ACCESS 34
12.1 CA Setting 34
13 MEDIA 35
13.1 Record 35
13.2 Movie 35
13.3 Music 36
13.4 Image 37
13.5 PVR Setting 39
13.6 Disk Manage 39
13.7 Remove USB Device safely! 40
14 APPLICATION 41
14.1 Youtube 41
14.2 RSS Reader 42
14.3 Weather Forecast 42
14.4 Google Maps 43
14.5 FTP 43
14.6 Web TV 43
15 GAME 44
15.1 Tetris 44
15.2 Snake 44
15.3 Othello 44
16 EPG 45
17 NEW FEATURES 45
17.1 Equalizer 45
17.2 Time Shift 45
17.3 Record 46
18 TROUBLE SHOOTING 47
19 SPECIFICATIONS 48

5
Connection to the TV: Disconnect the
receiver from the mains before
connecting or disconnecting the cable
from the satellite dish.
FAILURE TO DO SO CAN DAMAGE THE
TV.
Earthing: The LNB cable MUST BE
EARTHED to the system earth for the
satellite dish.
Location: Place the receiver indoor in
order not to expose to lightening, rain
or sunlight.
Xcruiser XDSR4000HD is fully compliant
with the international DVB standard
and thus transmits digital images,
sounds, information guides and teletext
directly to your TV through the satellite
broadcasting.
Please read the following safety
precautions carefully.
Main supply: External DC 12V Adapter
Overloading: Do not overload wall outlet,
extension cord or adapter as this may
result in fire or electric shock.
Liquids: Keep liquids away from the
receiver. The apparatus shall not be
exposed to dripping or splashing and
that no objects filled with liquids, such as
vases, shall be placed on the apparatus.
Cleaning: Disconnect the receiver from the
wall outlet before cleaning. Use a light
damp cloth (no solvents) to dust off the
receiver.
1 SAFETY
Ventilation: The slots on top of the receiver
must be left uncovered to allow proper
airflow to the unit. Do not stand the
receiver on soft furnishings or carpets. Do
not expose the receiver to direct sunlight
or do not place it near a heater. Do not
stack electronic equipments on top of
the receiver.
Attachments: Do not use any attachments
that are not recommended as these may
cause hazard or damage to the receiver.
Connection to the satellite dish LNB:
Disconnect the receiver from the mains
before connecting or disconnecting the
cable from the satellite dish.
FAILURE TO DO SO CAN DAMAGE THE
LNB.

6
3 FEATURES
This Manual will provide you with useful information
on using Xcruiser XDSR4000HD receiver.
Now you can comfortably see and receive digitally
transmitted music, news, movie and sports
satellite broadcasts in your office or home. You
can enjoy interesting games embedded in Xcruiser
XDSR4000HD receiver.
In Service Search section, both Automatic and
Manual search modes are provided.
It supports DiSEqC 1.0, 1.2 and USALS, enabling you
to move the antenna to focus preferred satellite.
You can save up to 6000 TV and Radio services and
work around with Favorite, Lock, Delete, Move and
Sort functions.
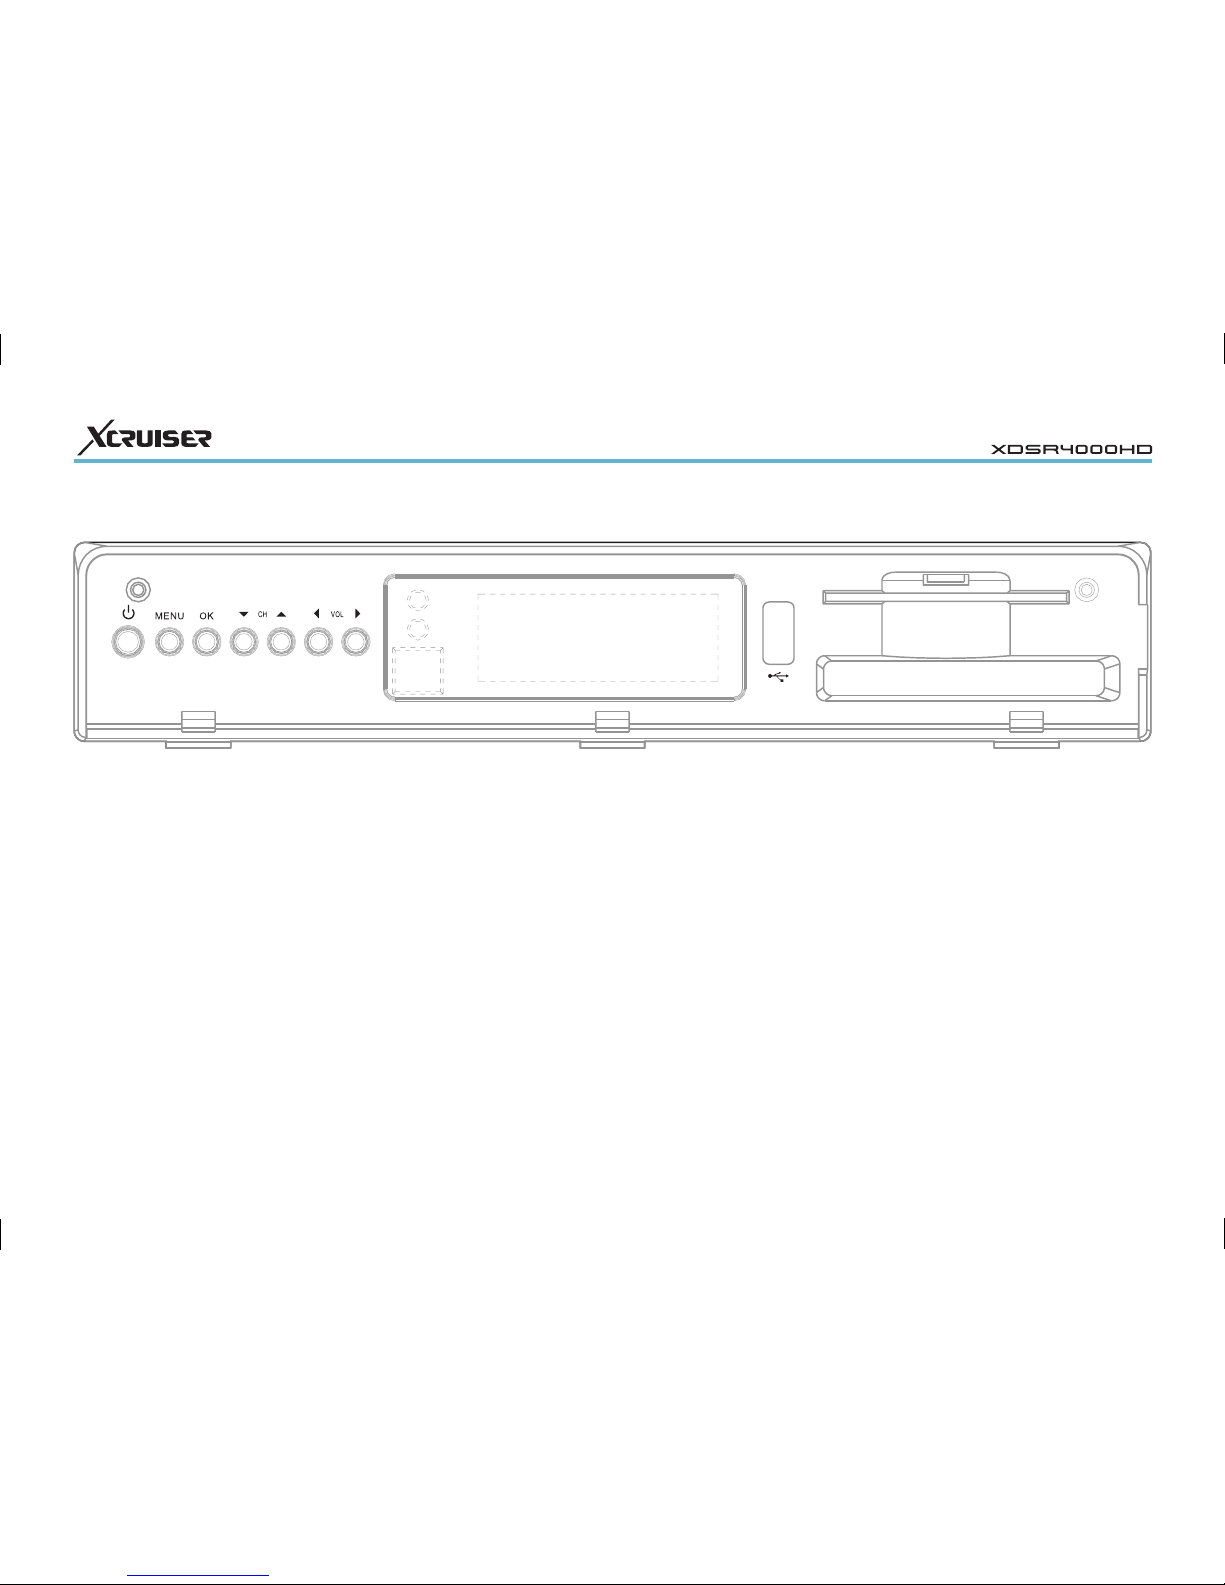
Well designed menu supports multiple languages. All
functions can be carried out using the remote control
or the front panel buttons. It is easy to use and
adaptable for future advances. Please be aware that
new software may change the functions of receiver.
If you have any difficulty concerning the operation of
your receiver, please refer to the relevant section of
this manual, includingTroubleshooting.
2 INTRODUCTION
• MPEG-Fully DVB-S / DVB-S2 (H.264)
HD compliant 6000 channels (TV
and Radio) programmable
• Multilingual menu text support
• Channel switching time less than 1
second
• Channel list editing
• Favorite channel list editing
• True-color On-Screen Display (OSD)
• Full Picture In Graphic (PIG) function
• EPG for on screen channel
information
• Subtitle supported
• Teletext support by VBI insertion and
software emulation
• Parental lock facility by channel and
program event
• Receiver to receiver Program and
Channel info transfer
• Exciting games embedded
• Dolby Digital Bit-Stream output via
HDMI
• DiSEqC 1.0, 1.1, 1.2 ,USALS and
Unicable
• HDMI Full HD (1080p) Video/Audio
Output
• 2x USB 2.0 Host
• 4 Digit LED Display for service
information (optional)
• RTC (Real-Time-Clock)
• Time Shift
• Video Recording
• Recording a channel and Time
Shifting another channel
• 3G Network Function Supported

7
You can power ON/OFF the receiver, use
on screen menu, and a variety of hot key
function.
1POWER - To switch the receiver ON
from STANDBY or vice versa.
2V. FORMAT - To switch the display
mode among AUTO, 480i, 480p, 576i,
576P, 720P_50, 720P_60, 1080i_50,
1080i_60, 1080P_50 and 1080P_60.
3TIMER - Press timer key you can
setup up the Standby time.
4USB - To remove the USB Hard
Disk safely.
5TV/SAT - Switches between TV and
receive mode.
6NUMERIC KEYS - To select channels or
enter programming parameters.
7(ZOOM) - Select zoom from x1 to
x16.
8TV / RADIO - Switches between TV and
Radio mode.
9MENU - Display the Main Menu on
the screen, or return to the previous
menu or status.
10 , KEY - To change channels, or to
move cursor up or down in the menu.
11 OK - To select menu option, or to
updated on entry.
12 , KEY - To adjust volume level, or to
move cursor left or right in the menu.
13 EXIT - Cancel the user selection and
return to the viewing mode from a
menu.
14 REC - Has different functions per
menu.
16 STOP - To stop the Time Shift,
recording, or MP3/JPEG player.
17 FOLDER - To enter the Record
Manager menu directly.
18 FB - To start Fast Backward function.
19 PAUSE - Used to select the freeze
function. Press once to freeze the
screen picture.
4 REMOTE CONTROL
2
25
21
16
4
11
20
7
6
23
18
1
13
24
5
12
20
8
15
3
10
19
14
26
10
22
9
17
27
29
12
36
30
33
28
35
39
32
37
31
34
38

8
20 / PREV/NEXT - Switch to preview
or next file in play mode.
21 SF - To start Slow Forward function.
22 SB - To start Slow Backward function.
23 OPTION (GREEN KEY)- Shows NVOD
information of the current channel
supports.
24 AUDIO RED KEY - Audio channels
setup, to select audio mode; Left,
Right, Stereo, Mono.
25 SAT - Display the satellite list at normal
picture.
26 FAV FAVORITE - To set receiver to the
favorite server mode, display the
favorite channel.
27 MUTE - To enable or disable audio
28 F1 - In case your TV is connected
through RF Modulator (UHF), select
output channel number between
CH21 and CH69 with up and down
key.
29 FIND - Use to prompt find channels
sort by character.
30 RECALL - Return to the previous
menu or status.
31 INFO - To display channel status or
various program information of
current service.
32 EPG ELECTRONIC PROGRAM GUIDE -
Display the Programs guide on screen
when available.
33 PAGE+/PAGE To move up the cursor
to the next or previous page in the
menu or channel list.
34 PLAY - To play the MP3, JPEG, or
Record files.
35 FF - To start Fast Forward function.
36 TMS (TIME SHIFT) - Press this button to
display Time Shift info bar.
37 PLAY MODE - Select the play mode
in MP3 or JPEG player.
38 TELETEXT - Shows teletext information
of the current channel supports.
39 SUBTITLE - Subtitle Display.

9
POWER KEY:
To switch the receiver power on/stand by
MENU KEY:
To enter into the main menu.
VOL- / VOL+ KEY:
To adjust volume level, or to move cursor
left or right in the menu.
CH+ / CH- KEY:
To change channels, or to move cursor
up or down in the menu
5 FRONT PANEL
OK KEY:
To see TV/Radio channel list, or to
confirm in the menu.
REMOTE SENSOR:
Detects infrared signal from remote
control unit
POWER INDICATOR:
While the receiver is power on and at
standby mode.
SIGNAL INDICATOR:
When receiving signal is strong, the
signal indicator is lighted.
CARD SLOT:
One slot CA Interface for Conax.
DISPLAY:
(LED type) Indicates operating status of
receiver.
USB1:
USB 2.0 Host, connect to USB hard disk,
or flash disk,and 3G dongles.

10
POWER ON/OFF SWITCH: To switch ON/OFF
the receiver power supply.
LNB IN 13/18V 400MA MAX: This port is to
connect the coaxial cable from LNB of
your Dish.
S/PDIF: Digital Audio interface, connect to
AV amplifier S/PDIF input terminal.
HDMI: Audio and Video output socket for
TV set with HDMI Input Jack only.
RS 232C SERIAL PORT: This is used to
connect your receiver to a computer
through a serial cable.
TV: This is used to connect your TV
through SCART cable.
Please refer to the diagram above for all
possible connections of your receiver.
Do not connect the unit to the mains
socket until all other connections have
been made and checked.
6 REAR PANEL
VIDEO OUT: This RCA connector is used to
connect any external video.
AUDIO OUT: These RCA connectors are
used to connect any external audio amp
or system.
USB: USB 2.0 Host, connect to USB hard
disk, flash disk and 3G dongles.
0/12V 50mA:This is used to Connect 12V to
an external 0V/12V switch.
ETHERNET: Network port, you can get a
new software updates from this port.

11
7 CONNECTING YOUR SYSTEM
With External Audio / Hi-Fi System
To connect any external Audio Hi-Fi
system, the receiver has been provided
with RCA connector at the back of the
receiver marked with AV OUT.
Connect an RCA cable from the AV OUT
jack on the back of the receiver to the
LINE, AUX, SPARE OR EXTRA input jacks
on your Hi-Fi System.
7.1 TV with Motorized System (DiSEqC
1.2)
Connect one end of your coaxial cable
to the LNB IN connector on the receiver
and the other end to the REC or Receiver
connector on the DiSEqC 1.2 motor.
Connect the coaxial cable from the LNB
to the LNB connector on the DiSEqC 1.2
motor.
All our receivers are designed to be
DiSEqC 1.0 and DiSEqC 1.2 compatible.
audio connections because the HDMI
connector can output stereo audio or
Dolby Digital audio.
• Connect RCA cable to the RCA jack on
the back of the receiver and the other
end to a RCA jack on your TV.
Finally connect the coaxial cable from the
LNB of your Dish to the LNB IN jack on
the receiver.
There are two ways to connect the
receiver to your existing TV system. We
recommend using one of the following
cases for the best result:
• For HD television set, you should use
a HDMI cable for best result, Plug one
end of the cable into the HDMI socket
on the receiver, and the other end into
the matching socket on your television.
In this case, you do not have to make

12
This allows multiple antennas to be
connected to the receiver at the same
time.
If you have two or more fixed antennas
or LNBs, then we recommend you use a
DiSEqC 1.0 switch.
Connect the coaxial cable from the
first LNB to the LNB 1 or LNB A input
connector of the DiSEqC switch.
Do the same for any other LNBs that you
have.
Connect one end of a coaxial cable to
the RF output connector of the DiSEqC
switch, connect the other end to the LNB
IN socket on the receiver.
To the digital receiver, you can connect
either a single satellite antenna directly
or LNB of multi-feed equipment.
7.2 Connecting the Network
1. CONNECTING TO THE LAN:
Connect one end of the Ethernet cable to
the product and the other end to the LAN
router.
2. CONNECTING TO THE WIFI WIRELESS LAN:
You can connect the network via the
Wi-Fi access point or DSL/cable modem.
Plug in the wireless USB dongle to the
USB port.(Separate purchase required)
Set the options for the Wi-Fi.
NETWORK NAME SSID: Select the network
name of your Wi-Fi access point from the
list.
SECURITY TYPE WEP: This product supports
WEP 40/128bit ASCII and WEP 40/128bit
HEX. The security type of the Wi-Fi and
the product shall be set the same.
PASSWORD: When using the security type,
you must set the password. Enter the
same password in the Wi-Fi setting menu.
3. CONNECTING TO THE 3G:
Connect the network via the 3G dongle.
Plug in the USB that has 3G dongle.
Note
Make sure the distance between the Wi-Fi access
point and the product is not too far away. This may
lower the quality of service.
It is recommended to purchase a wireless USB
dongle distributed by RT5370. Other products may
not function or respond.
It is recommended to purchase a 3G USB dongle
distributed by huawei E1750 , E1550 , E1752 ,
E173 Other products may not function or respond.
We recommend the network connection over a
direct LAN.

13
1. The channel which you select is not in your
allocate satellite. The simply solution is to
change channel.
2. The signal of current TV channel is too weak.
You can try to change channel to other
strong signal channels. If the problems still
exist, please consult your local dealer or other
professionals for technical service.
3. You use the Dual LNB, and you need Modify
LNB Type
8.2 Power
Press [Power] Key can enter the Standby
state
In Standby state, press [Power] Key again
can call back the unit and go on play the
previous channel
User can also disconnect the device’s
main power to end the Standby state.
8.3 Channel Up/Channel Down
In full screen, press [CH+/CH-] to change
channel.
8.4 Volume Up/Volume Down-
In full screen, press [VOL+/VOL-] to adjust
volume.
8.5 Number
In full screen, use number key and press
[OK] on the Remote Control Unit to
change channel.
8.6 Mute
Press [MUTE] key to mute the sound and
the screen will show up mute OSD.
Press [MUTE] key again to restore sound.
8.7 Pause
In playing mode, press [Pause] key, the
picture will be paused, but the sound of
the channel will still continues.
Press [PLAY] key again, the screen’s
picture will skip over to the current
playing picture, and the sound of the
channel will corresponding playing.
8.8 Recall
Press [RETURN] key will directly switch
to the previous channel that you played
before current channel.
8 BASIC OPERATIONS
8.1 Turn on STB
First, press the [Device’s Main Power] to
turn on the unit.
When the STB is first used, there will
play the first channel from the default
Channel List. If the STB is not first used,
STB will play the same channel as last
time before turning off.
? Frequently Asked Question
Q: The power of my STB has been turned on
and not in Standby mode, but the TV screen
showed nothing:
A: Make sure the TV set has been set to the
correct video input (not the TV channels). For
example, if you have connected the unit with the
Video1 input of the TV set, the TV set has to be
switched to Video1.
Q: The power of my STB has been turn on
and not in Standby mode, but the TV screen
showed nothing except one box with “No
Signal” image.
A: That means the channel, which you select, is
no signal. It could be several causes:

14
In ”Favorite list“ window, press [Left/
Right] key to select favorite groups
Pressing [P-/P+] keys can implement the
“Page up/Page down” function.
Press [Exit] key to exit the window.
? Frequently Asked Question
Q: Why the screen displays “No Favorite
Channel” after pressing [Favorite] key?
A: Because you haven’t set any “Favorite
Channel”. Please refer to Favorite.
8.10 Audio
In full screen, press [AUDIO] key can open
the “Audio” window on the screen.
You can modify the audio track by
pressing [Ch Up / Ch Down] key and
8.9 Favorite
In full screen, press [FAV] key to display
“Favorite list” on the left side of the
screen as can be seen on above picture.
In the window of “Favorite list“, you can
move highlight by press [Channel Up/
Channel Down] key to select Favorite
Channels.
modify the audio mode by pressing [Vol
Up / Vol Down] key.
Mode: Left/Right/Stereo/Mono
8.11 Information
In full screen, press [INFO] key (press
[INFO] key and [RED] key) to open
information screen, in the window shows
the parameters of current channel.

15
Press [Yellow] key in EPG menu to set one
record timer or go to Timer List menu.
In EPG menu, you can select to highlight
an event and set it to record timer list
directly by pressing [REC] button.
Press [Exit] to close EPG screen.
8.13 TV/RADIO
In TV mode, pressing [TV/RADIO] key can
switch to Radio mode. In Radio mode,
press [TV/RADIO] key to switch to TV
mode.
Press [EPG] key to display EPG screen.
Press [Red] key to select the channels
by different group, such as by Favorite,
Satellite, Provider, CAS etc.
Press [Green] key to select different
display mode among Now EPG, Next
EPG, More and Schedule, like above
picture.
8.12 EPG
With Electronic Program Guide (EPG)
you can navigate channels through all
the possible viewing options. The EPG
supplies information such as channel
listings, starting and ending time for all
available channels.

16
The five kinds of sorting way are:
Default: Sorting by scanning result.
FTA/$: Sort channel through free and
scramble sequence. Free channel will in
the front of channel list and scramble
channel will at the rear of channel list
Lock: Accumulated all locked channels
and list in the last of TV Channel List.
Name (A-Z): Sorting in Alphabetical
Order, ignore “$” symbol.
Name (Z-A): Sorting in Alphabetical
Order, ignore “$” Symbol.
Press [Up/Down] key to move
highlight and press [OK] key to play the
highlighted channel.
Press [Yellow] key to change the current
channel’s property, such as FAV/ Lock/
Skip/ Delete/ Rename.
Press [Blue] key to open the “Sort”
window like above. There are five kinds
of sorting ways. You can press [Page+/
Page-] key to move highlight and press
[OK] key to confirm you selection.
8.14 Channel List
In full screen, press [OK] key to enter
“Channel List”.
Press [Red] key to change the different
group which you can watch like above.
Press [Green] key to display details
information for EPG now.

17
8.20 Zoom
The [ZOOM] key allows you to magnify a
certain area on the images
Press [ZOOM] key again, the image will
enlarge rotate as x1, x2, x4, x6, x8, x12,
x16.
In “x2 ~ x16” image, using [Up/ Down/
Up/ Down] keys to move the image
center area you want to see.
In zoom mode, press [Exit] to close
“Zoom” window.
8.21 TV/RCV
Press [TV/RCV] key can switch between
TV mode and STB mode
8.19 Find
Press [Find] key in full screen can open
the “Find” window like above. You
can press[Channel Up/Channel Down/
Volume Up/Volume Down]key to move
highlight and press[OK]key to input
the selected symbol or letter into the
dialogue.
After input each character, the program
list on the left will search the channel
according your input, and list the
matched channel.
Move highlight to “OK” and press [OK]
key can close “Find” window and you
can select channel from the channels list
directly.
Press [Page Up/Down] key to page up
and page down.
Press [Exit] key to exit the channel list.
8.15 Sleep
This function can set sleep timer. By
setting this fuction, the system will enter
to standby automatically on sleep mode.
Pressing [SLEEP] key, it will switch
the mode between Sleep Timer Off
/10/30/60/90/120 minutes.
8.16 Page Up/Page Down
In Channel list, press [Page+/Page-] key
can page up and down the channel list.
8.17 TEXT
Press [green] key in full screen, to open
teletext page on the channel which has
teletext information.
If the channel has no teletext
information, it will show “No Teletext
Data” on the screen.
8.18 Subtitle
Press [Yellow] key in full screen, you can
switch subtitle on or off.

18
9 SERVICE
When you press [Menu] key to enter
menu, there will display the picture like
above.
Press [Up/Down] key you can select the
submenu of Organizing services and
Organizing favourites.
Press [OK] key to enter the “Organizing
Service”. If Menu Lock is “On”, it will
display an dialogue for user to key
in password. The default Password is
“0000”.
Press [Menu] key to go back to main
menu.
9.1 Organizing Service
When you enter to “Organizing Service”
menu, there will display the screen like
above.
You can move highlight by press
[Channel Up/Channel Down] key and
[OK] key to select the programs which
you want to edit.
You can press [Page Up/Page Down] key
to implement the Page Up/Page Down
function.
You can use [Red] key to switch different
Group.
You can press [Green] key to select the
programs by different select mode.
8.22 Menu
Press [MENU] key can open the menu,
exit the current menu to last menu or
close the window.
8.23 Video Format
Press [P/N] (white) key under Full Screen
playback for 1st, it will show the current
system outputting video resolution,
continuously press this key, system will
switch its outputting video resolution
by sequence “by source-> by native TV
-> 480i-> 480P-> 576i-> 576p-> 720P->
1080i->1080p”.
8.24 Exit
Press [EXIT] key can exit the current
menu to last menu or close the window.

19
Options
Press [Green] key to open the “Options”
window like above.
You can press [Up/Down] key to move
highlight and press [OK] key to confirm
the select mode.
Press [Menu] key to close “Options” List.
Move
Select the channels you want to edit in
channel list by press [OK] key or other
select mode. Then press [Right] key to
move the highlight to right toolbar.
Select Move icon by press [Channel Up/
Channel Down] key and [OK] key.
Press color key can implement the
corresponding function in “Organizing
Services”.
Groups
Press [Red] key can open the “Groups”
window like above.
You can press [Up/Down] key to move
highlight and press [OK] key to select
group.
Press [Menu] key to close “Groups” List.
Move the channels to the position which
you want and press [OK] key to confirm.
Like above picture.
Lock
Select the channels which you want to
edit in channel list by press [OK] key or
other select mode.
Then press [Right] key to move the high
light to right toolbar.
Select Lock icon by press [Channel Up/
Channel Down] key and [OK] key.

20
Skip and rename
Follow the same way you can set the
channel’s Skip or give the new name for
high light channel.
Find
Press [Find] key can open the “Find”
window like above. You can press
[Channel Up / Channel Down / Volume
Up / Volume Down] key to move
highlight and press [OK] key to input
the selected symbol or letter into the
dialogue.
After input each character, the program
list on the left will search the channel
according your input, and list the
matched channel.
Move highlight to “OK” and press [OK]
key can close “Find” window and you
can select channel from the channels list
directly.
9.2 Organizing Favourites
This menu is helpful in adding and
deleting services to and from the favorite
group.
Lock the channel by press [OK] key. Like
above picture:
Delete
Select the channels you want to edit in
channel list by press [OK] key or other
select mode.
Then press [Right] key to move the high
light to right toolbar.
Select Delete icon by press [Channel Up/
Channel Down] key and [OK] key.
Delete the channel by pressinng [OK] key.
Table of contents
Other Xcruiser Receiver manuals