XFX GeForce 9300 Motherboard
iv
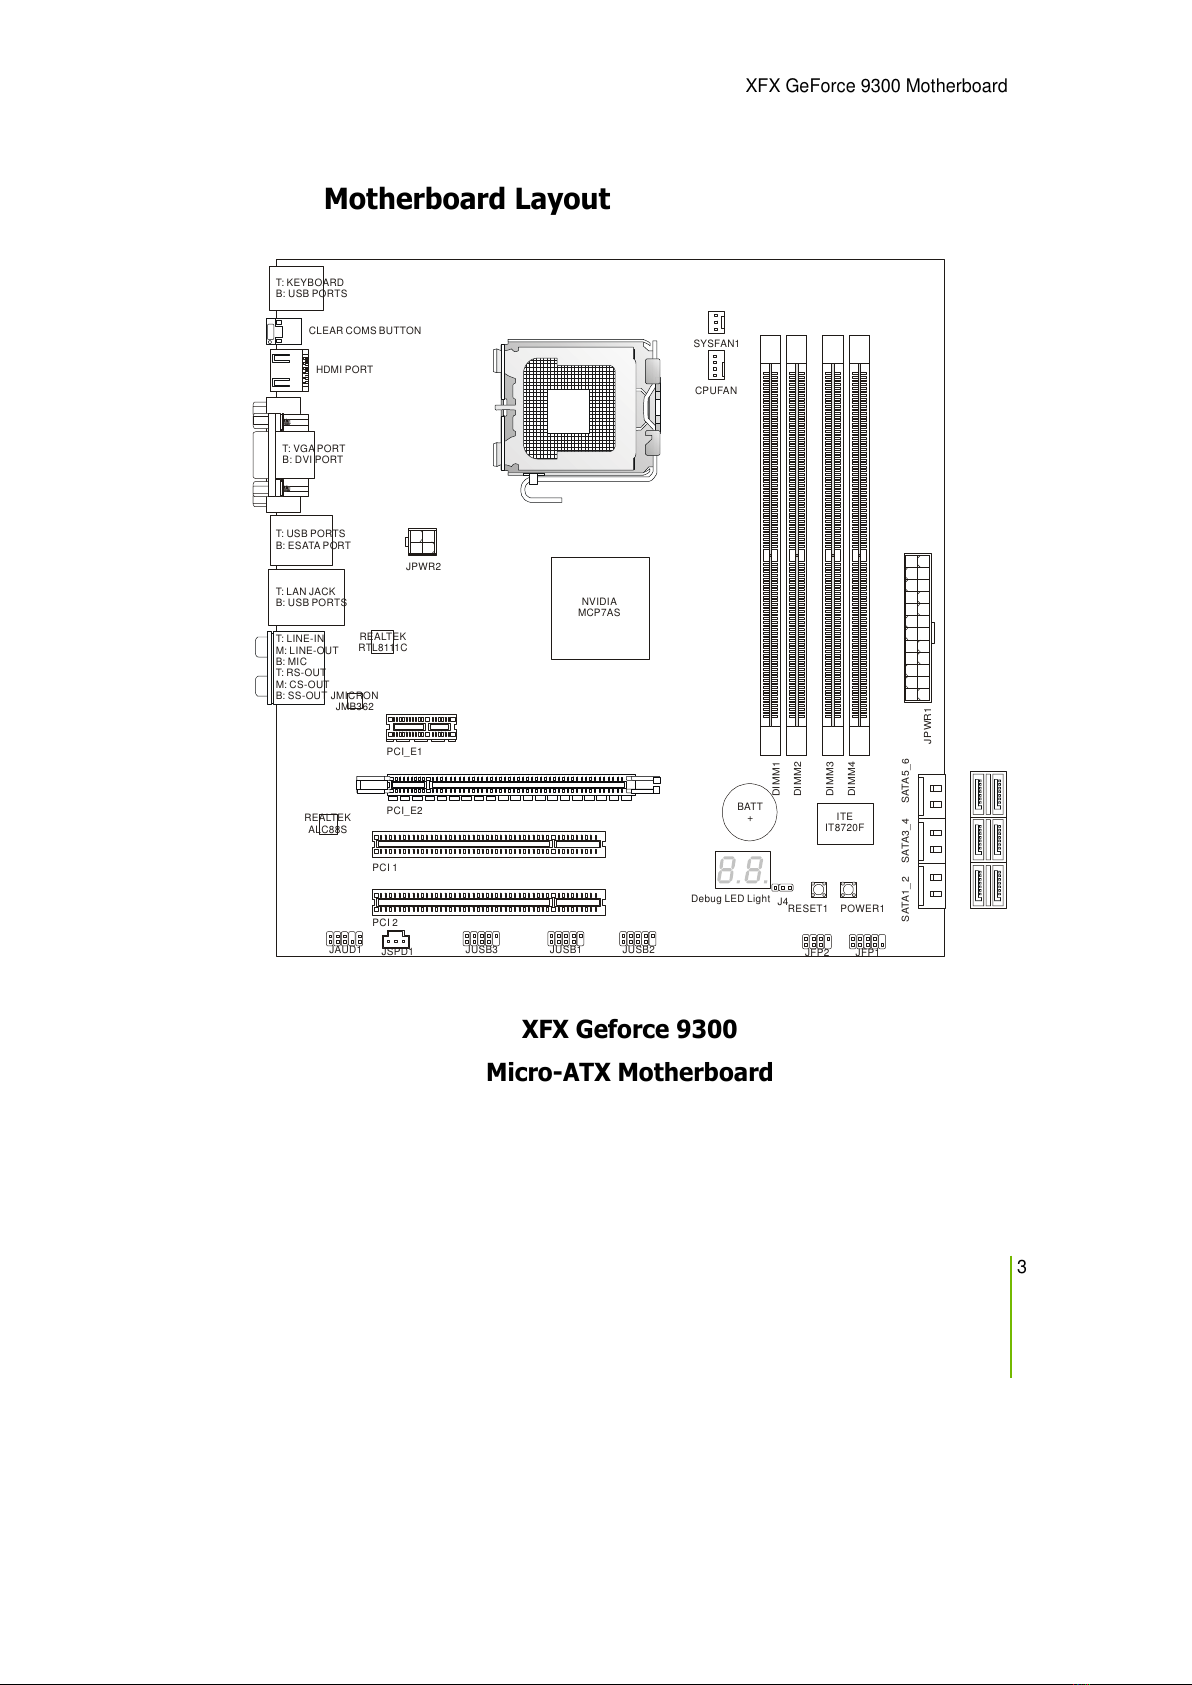
Parts NO in the Kit
his kit contains all the hardware necessary to install and connect
your new XFX GeForce 9300 motherboard. However, it does not
contain the following items that must be purchased separately to
make the motherboard functional.
Intel microprocessor:
Intel Core 2 Extreme, Intel Core 2 Quad, Intel Core 2 Duo Pentium
EE, Pentium D, Pentium in the Socket 775 package
Cooling fan for the microprocessor:
System memory support:
Supports dual channel DDR2 memory, and up to 8 GBs DDR2
Memory
Graphics Card
his motherboard supports one x16 PCI Express slot.
Power Supply
he power supply requirement is dependent upon the power and
the of the graphics card you install. As a rule, for one graphic card
you need a minimum of a 350 W power supply.
hese instructions tell you how to install each of the parts listed so
you can have a functioning motherboard. As you go through the
installation instructions, we are assuming you have purchased the
necessary parts.


 User manual")