8
PRACTICAL INFORMATION
Metal detecting is a fascinating hobby that can bring you huge satisfaction. However, some basic learning
is necessary to get the most enjoyment out of it. Begin by familiarizing yourself with your equipment and
its operation on suitable practise ground.
We recommend that you take an assortment of different objects - coins, everyday items, metal rubbish,
etc. Then nd a patch of ground relatively free from metal pollution and well away from any electromag-
netic interference (high voltage power lines, electric fences, domestic appliances, etc.). For instance, your
garden would probably be one of the most unsuitable places to begin as there is too much domestic
waste in the vicinity.
To test whether the site is suitable for practising, sweep the coil over the ground as if detecting. Move
somewhere else if you hear a multitude of sounds. Once you have found a suitable spot, arrange your
objects on the ground, spacing them approximately two coil widths apart. Before placing an object, use
the device to check that there is no metal already in the ground.
Spend a little time watching your device’s reactions when it passes over each target. You can then sort
them according to the sound response type and try and understand what makes them similar or different.
If you feel comfortable with this exercise, you can also try out some of the pre-congured settings.
Advice
When detecting, it is important to sweep the coil parallel to the ground, using wide movements, as close
as possible to the surface (without actually touching it). Proximity to the ground will increase the likelihood
of detecting a deep target and will enable the smallest objects to be identied more easily. Avoid knocking
the coil, as although it is designed to withstand this kind of treatment, careful handling will prolong the life
of the device and guarantee better perception of targets.
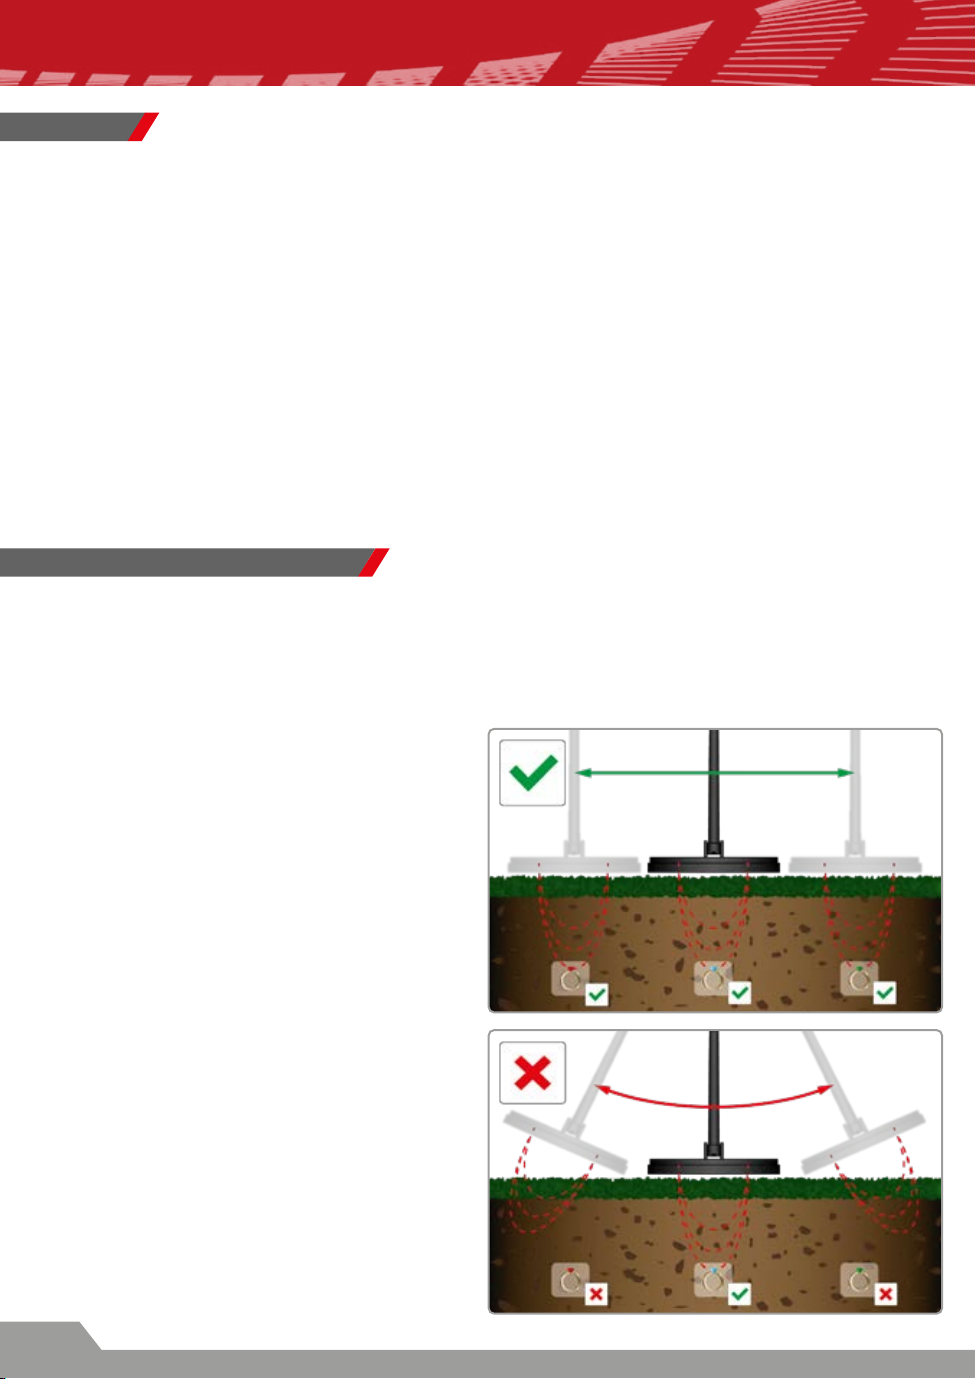
Optimize your searching
When you are detecting, the rate at which you
move is up to you. For example, covering a zone at
high speed while detecting will certainly give you
a global ‘snapshot’ of the site. However, clearly this
method of detecting will also leave large swathes
of ground unexplored between each sweep.
So, if you really want to scrutinise every inch of
ground closely, make sure that each sweep slight-
ly overlaps the previous one so that the zone not
scanned by your coil is as small as possible.
Bear in mind also that you will increase your
chances of nding and identifying a target further
by sweeping more slowly. This particularly applies
in metal-infested ground (when there are more tar-
gets to be investigated) or when you are search-
ing for deeper targets.