manuals.online logo
Brands
  1. Home
  2. •
  3. Brands
  4. •
  5. Xtreme Power
  6. •
  7. Saw
  8. •
  9. Xtreme Power 65115 Original instruction manual

Xtreme Power 65115 Original instruction manual

This manual suits for next models

3

Other Xtreme Power Saw manuals

Xtreme Power 47521 Original instruction manual

Xtreme Power

Xtreme Power 47521 Original instruction manual

Xtreme Power 50118 Original instruction manual

Xtreme Power

Xtreme Power 50118 Original instruction manual

Xtreme Power 50115 Original instruction manual

Xtreme Power

Xtreme Power 50115 Original instruction manual

Popular Saw manuals by other brands

General 90-125 M1 Setup & operation manual

General

General 90-125 M1 Setup & operation manual

Scheppach sd1600v instruction manual

Scheppach

Scheppach sd1600v instruction manual

Skil 5750 Operating/safety instructions

Skil

Skil 5750 Operating/safety instructions

Black & Decker Sawcat 3027-10 owner's manual

Black & Decker

Black & Decker Sawcat 3027-10 owner's manual

Uni-Vent PS-COS12 manual

Uni-Vent

Uni-Vent PS-COS12 manual

Bosch GKS 190 Professional Original instructions

Bosch

Bosch GKS 190 Professional Original instructions

Black & Decker KS999E user guide

Black & Decker

Black & Decker KS999E user guide

Ingco CS18528 instruction manual

Ingco

Ingco CS18528 instruction manual

IMET BS 300/60 SHI Instructions for use

IMET

IMET BS 300/60 SHI Instructions for use

Scheppach Deco-flex instruction manual

Scheppach

Scheppach Deco-flex instruction manual

CMi C-KGS-1450/210 Original instructions

CMi

CMi C-KGS-1450/210 Original instructions

Bosch GCO 14-2 operating instructions

Bosch

Bosch GCO 14-2 operating instructions

Clarke CCS185B Operation & maintenance instructions

Clarke

Clarke CCS185B Operation & maintenance instructions

Makita 2107F instruction manual

Makita

Makita 2107F instruction manual

Holzmann DKS 21PRO user manual

Holzmann

Holzmann DKS 21PRO user manual

RIDGID BS1400 owner's manual

RIDGID

RIDGID BS1400 owner's manual

Optimum OPTisaw CS 275 operating manual

Optimum

Optimum OPTisaw CS 275 operating manual

Makita BPB180 instruction manual

Makita

Makita BPB180 instruction manual

manuals.online logo
manuals.online logoBrands
  • About & Mission
  • Contact us
  • Privacy Policy
  • Terms and Conditions

Copyright 2025 Manuals.Online. All Rights Reserved.

Save This Manual for Future Reference
Original Instructions
16" Scroll Saws
Operator’s Manual
MODEL NUMBER : 65115 65115A 65115B
SERIAL NUMBER :
Both model number and serial number may be found on the main label.
You should record both of them in a safe place for future use.
FOR YOUR SAFETY
READ AND UNDERSTAND THE ENTIRE MANUAL BEFORE
OPERATING MACHINE
65115B
65115A
65115
16" SCROLL SAWS
2
GB TABLE OF CONTENTS
INTRODUCTION
Introduction 2
Specifications 2
Symbols 3
Safety 3
Specific Safety Rules 5
Contents Supplied 7
Assembly 7
Know your Machine 8
Features & Controls 8
Operation 9
Maintenance 12
Transport 14
Storage 14
Wiring Diagram 14
Trouble Shooting 16
Parts Schedule 17
Parts List 19
Your new Scroll saw will more than satisfy
your expectations. It has been manufactured
under stringent quality standards to meet
superior performance criteria. You will find
it easy and safe to operate, and with proper
care, it will give you many years of dependable
service.
High performance and powerful variable
speed scroll saw. Suitable for precise or
intricate cuts in wood, plastic, metal, plexiglass
and plaster.
Carefully read through this entire
operator’s manual before using your
new Scroll saw. Take special care to
heed the cautions and warnings.
This scroll saw is designed for operating under
ambient temperatures between +5°C and
40°C and for installation at altitudes no more
than 1000m above M.S.L. The surrounding
humidity should less than 50% at 40°C. It
APPLICATION CONDITIONS
* S2, Short-time duty. After continuous operation
of 10 minutes the drill stops until the device
tem-perature deviates by less than 2 K (2°C)
from the room temperature.
Specifications
Model 65115 65115A 65115B
Light None Double
lamp
Adjustable
hose lamp
Rated Input Voltage 230-240V ~ 50Hz
Power Input 120W (S2 10 min*)
Safety Class I
Protection Category
IP 20
Weight 13 kg 13.1 kg 13.1 kg
Throat Capacity 406 mm
Max. Cutting Height 50 mm @ 90°
20 mm @ 45°
Stroke 19 mm
Stroke Speed 400-1650 SPM
Blade Length 127 mm
Table Size 255×415mm
Table Tilt 0° - 45°
Sound pressure
level (LPA)78.1 db(A)* k=3 db(A)
Sound power level
(LwA)88.6 db(A)* k=3 db(A)
* The noise was measured according to clause
13.2 of EN 61029-1:2009+A11
can be storedor transported under ambient
temperatures between -25°C and 55°C.
RECYCLING AND DISPOSAL
This marking indicates that this
product should not be disposed with
other household wastes. To prevent
possible harm to the environment
or human health from uncontrolled
waste disposal, recycle it responsibly
to promote the sustainable reuse of
material resources. To return your
used device, please use the return
and collection systems or check with
your local authority or local stores
for advice of environmental safe
recycling.
SAFETY INFORMATION
16" SCROLL SAWS 3
GB
SYMBOLS
The rating plate on your machine may
show symbols. These represent important
information about the product or instructions
on its use.
Read these instructions for use
carefully.
Caution! Wear ear-muffs. The
impact of noise can cause damage
to hearing.
Caution! Wear safety goggles.
Sparks generated during working
or splinters, chips and dust
emitted by the device can cause
loss of sight.
Caution! Wear a breathing mask.
Dust which is injurious to health
can be generated when working
on wood and other materials.
Never use the device to work on
any materials containing asbestos!
Caution! Risk of injury! Failure
to keep your hands away from
the blade will result in serious
personal injury.
Unplug power cord before
changing saw blades or marking
adjustment!
Disconnect the mains plug prior
to the repair, cleaning, and
maintenance of the splitter!
Rotating the clamping screw to
"+" to tighten the saw blade, to
"-" to loosen.
Rotating the speed switch to "+"
to increase the saw blade speed,
on the contrary, forward to "-" to
decrease.
SAFETY
General Safety Rules
WARNING! When using electric tools basic
safety precautions should always be followed
to reduce the risk of fire, electric shock and
personal injury including the following.
Read all these instructions before attempting
to operate this product and save these
instructions.
Understand your Machine
Read this manual and labels affixed to the
machine to understand its limitations and
potential hazards.
Be thoroughly familiar with the controls and
their proper operation. Know how to stop the
machine and disengage the controls quickly.
Do not attempt to operate the machine until
you fully understand how to properly operate
and maintain the engine and how to avoid
accidental injuries and/or property damage.
If the unit is to be used by someone other than
original purchaser or loaned, rented, or sold,
always provide this manual and any needed
safety training before operation. The user can
prevent and is responsible for accidents or
injuries that may occur to themselves, other
people, and property.
Do not force the machine. Use the correct
machine for your application. The correct
machine will do the job more efficiently and
safer at the rate it was designed.
Personal Safety
Do not permit children to operate this machine
at any time.
Keep children, pets, and other people not
using the unit away from the work area. Be
alert and shut off unit if anyone enters work
area. Keep children under the watchful care of
a responsible adult.
Do not operate the machine while under the
influence of drugs, alcohol, or any medication
that could affect your ability to use it properly.
SAFETY INFORMATION
16" SCROLL SAWS
4
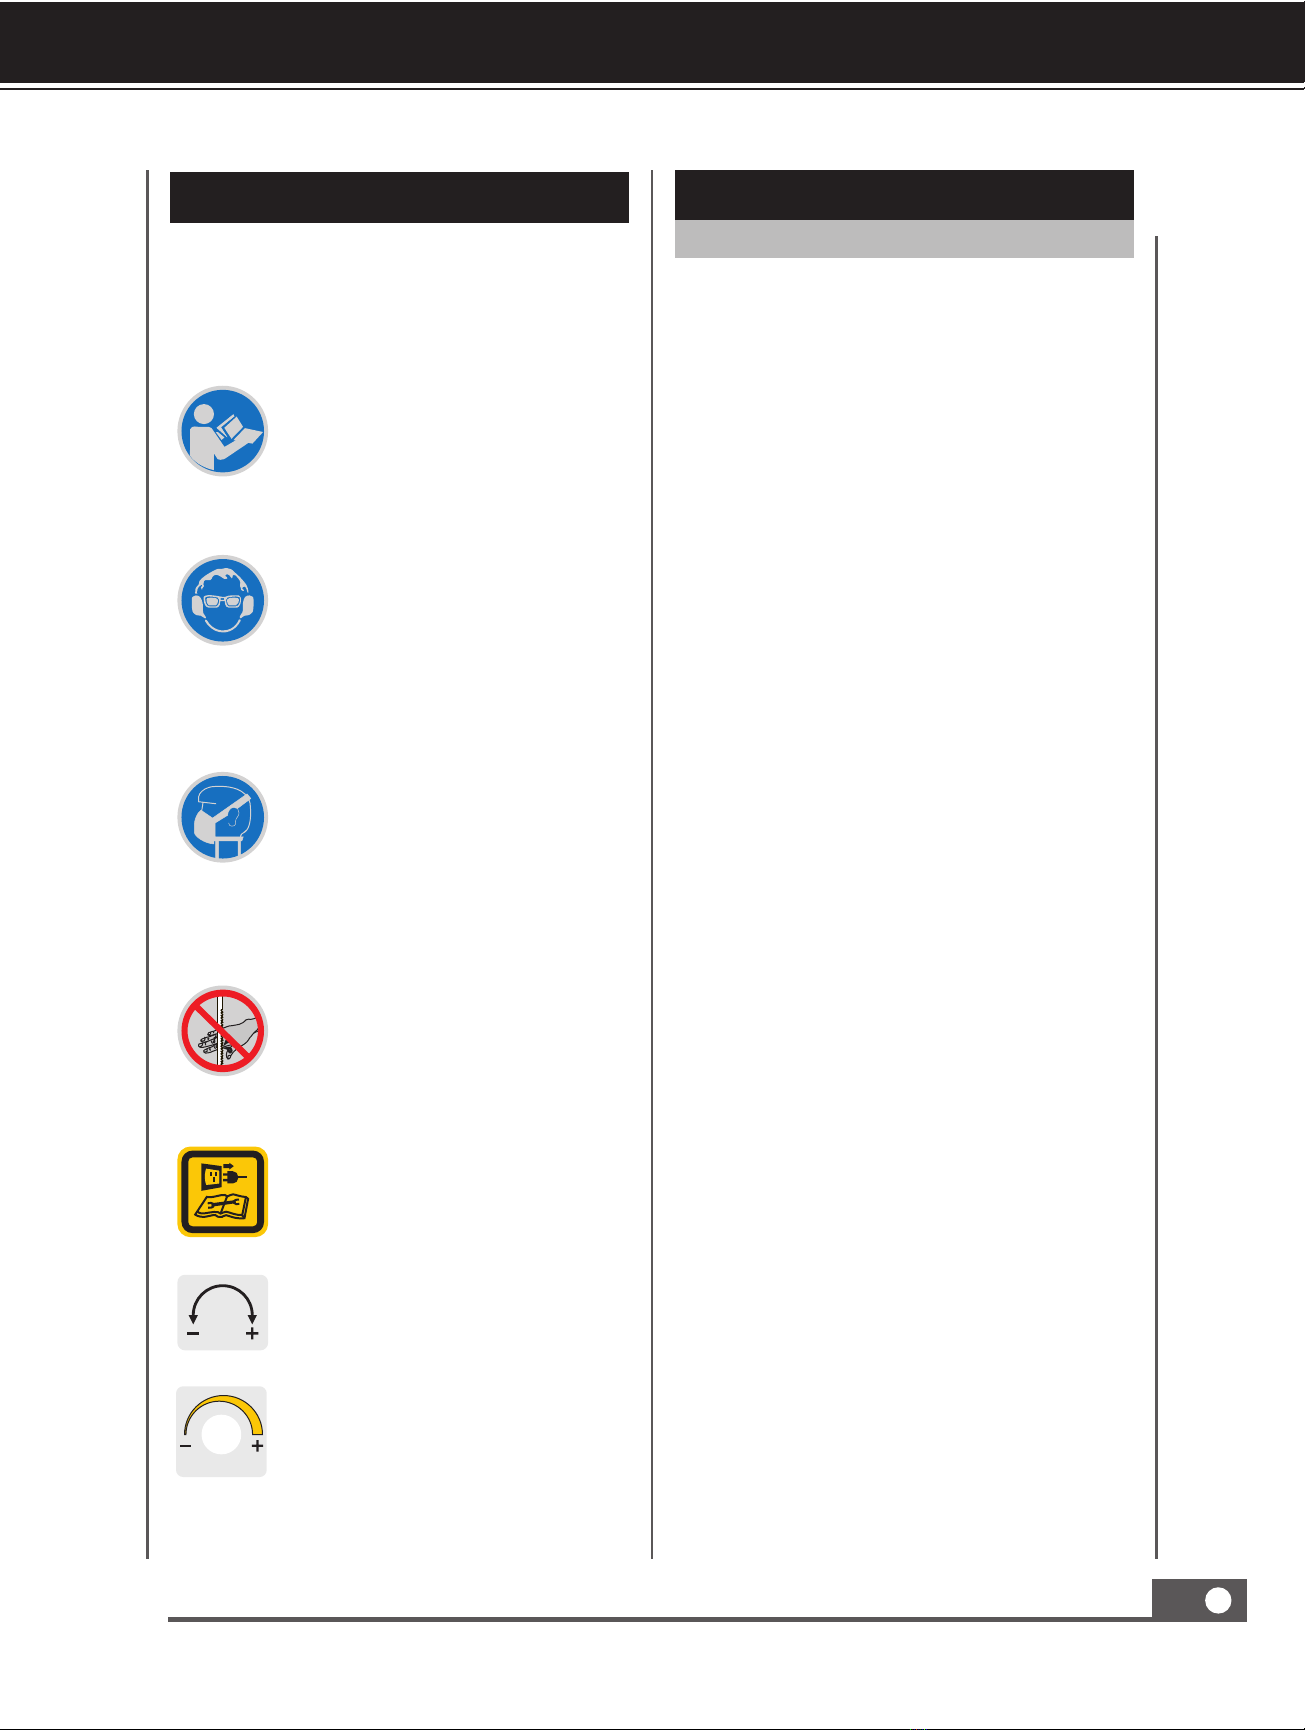
GB Dress properly. Do not wear loose clothing,
short pants, or jewelry of any kind. Secure long
hair so it is above shoulder level. Keep your
hair, clothing, and gloves away from moving
parts. Loose clothes, jewelry, or long hair can
be caught in moving parts.
Protect eyes, face, and head from objects that
may be thrown from the unit. Always wear
safety goggles or safety glasses with side
shields when operating.
Wear appropriate hearing protection. Wear
respiratory protection to avoid the risk of
inhaling harmful dust.
Always keep hands and feet away from all
moving parts during operation. Moving parts
can cut or crush body parts.
Always keep hands and feet away from all
pinch points.
Do not touch parts that might be hot
from operation. Allow parts to cool before
attempting to maintain, adjust, or service.
Stay alert, watch what you are doing, and use
common sense when operating the machine.
Do not overreach. Do not operate the machine
while barefoot or when wearing sandals or
similar lightweight footwear. Wear protective
footwear that will protect your feet and
improve your footing on slippery surfaces.
Keep proper footing and balance at all times.
This enables better control of the machine in
unexpected situations.
Inspect your Machine
Check your machine before starting it. Keep
guards in place and in working order. Make
sure all nuts, bolts, etc., are securely tightened.
Never operate the machine when it is in need
of repair or is in poor mechanical condition.
Replace damaged, missing, or failed parts
before using it. Keep the machine in safe
working condition. Regularly check to see that
keys and adjusting wrenches are removed
from the machine area before starting it. A
wrench or a key that is left attached to a
rotating part of the machine may result in
personal injury. Avoid accidental starting.
Be sure the motor switch is off before
transporting the machine or performing any
maintenance or service on the unit.
Transporting or performing maintenance
or service on a machine with its switch on
invites accidents. If the machine should start
to vibrate abnormally, stop the motor and
check immediately for the cause. Vibration is
generally a warning sign of trouble.
Electric Safety
Protect yourself from electric shock. Do not
plug or unplug the motor while standing in or
around damp or wet ground. Do not use the
unit in wet or damp areas or expose it to rain.
Prevent body contact with grounded surfaces:
pipes, radiators, ranges, and refrigerator
enclosures. Make sure your fingers do not
touch the plug’s metal prongs when plugging
or unplugging the unit.
Avoid inadvertent starting. Make sure that the
switch is switched off when plugging the plug
into an outlet.
Only use approved and appropriately
identified extension cables for use outdoors.
Only use cable reels in the unrolled state.
Do not use the cable for purposes for which
it is not intended. Do not use the cable to pull
the plug out of the outlet. Protect the cable
from heat, oil and sharp edges.
Have your electric tool repaired by a qualified
electrician. This electric tool conforms to the
applicable safety regulations. Repairs may
only be performed by an electrician using
original spare parts. Otherwise accidents can
occur.
Work Area & Store Area
Insure sufficient lighting in the work area and
the area around the machine.
Keep the work area orderly. Disorder in the
work area can lead to accidents.
Take environmental influences into account.
Do not expose electric tools to rain. Do
not use electric tools in a damp or wet
environment. Make sure that the work area
is well-illuminated. Do not use electric tools
where there is a risk of fire or explosion.
Securely store unused electric tools. Unused
electric tools should be stored in a dry,
elevated or closed location out of the reach of
children.
SAFETY INFORMATION
16" SCROLL SAWS 5
GB
Specific Safety Rules
Intended Use
The contents of the instructions must cover
not only the intended use of the machinery
but also take into account any reasonably
foreseeable misuse thereof.
Safety Precautions
Connect the dust extraction device. If
connections for dust extraction and a
collecting device are present, make sure that
they are connected and used properly.
Operation in enclosed areas is only permitted
with a suitable extraction system.
Machine Use and Care
Do not use low-output electric tools for heavy
work. Do not use the electric tool for purposes
for which it is not intended. For example, do
not use hand-held circular saws for the cutting
of branches or logs. Do not use the electric
tool to cut firewood.
When the saw blade is blocked due to
abnormal feed force during cutting, turn the
machine off and disconnect it from power
supply. Remove the work piece and ensure
that the saw blade runs free. Turn the machine
on and start new cutting operation with
reduced feed force.
Do not remove any cutting residues or other
parts of workpieces from the cutting zone
while the machine is running and the saw unit
is not at rest.
Never remove loose splinters, chips or jammed
pieces of wood while the saw blade is running.
Switch off the machine to troubleshoot or
remove jammed pieces of wood.
Refitting, including adjusting and measuring
works, and cleaning must be carried out only
when the motor is switched off. - Disconnect
the main power plug -
Before switching on again, ensure that keys
and adjustment tools have been removed.
This electric tool generates an electromagnetic
field during operation. This field can impair
active or passive medical implants under
certain conditions. In order to prevent the risk
of serious or deadly injuries, we recommend
that persons with medical implants consult
with their physician and the manufacturer of
the medical implant prior to operating the
electric tool.
Take care of your tools. Keep cutting tools
sharp and clean in order to be able to work
better and more safely. Follow the instructions
for lubrication and for tool replacement.
Check the connection cable of the electric tool
regularly and have it replaced by a recognized
specialist when damaged. Check extension
cables regularly and replace them when
damaged. Keep the handle dry, clean and free
of oil and grease.
Check the electric tool for potential damage.
Protective devices and other parts must be
carefully inspected to ensure that they are
fault-free and function as intended prior to
continued use of the electric tool. Check
wether the moving parts function faultlessly
and do not jam or whether parts are damaged.
alll parts must be correctly mounted and all
conditions must be fulfilled to ensure fault-
free operation of the electric tool. The moving
protective hood may not be fixed in the open
position. Damaged protective devices and
parts must be properly repaired or replaced
by a recognised workshop, insofar as nothing
different is specified in the operating manual.
Damaged switches must be replaced at a
customer service workshop. Do not use any
faulty or damaged connection cables. Do not
use any electric tool on which the switch can
not be switched on and off.
Additional Safety Rules for Scroll Saws
This scroll saw is intended for use in dry
conditions, and for indoor use only.
Do not cut pieces of material too small to
hold by hand outside the blade guard.
Avoid awkward hand positions where a
sudden slip could cause a hand to move into
the blade.
Always use the blade guard to avoid possible
injury due to blade breakage.
Never leave the scroll saw work area with
the power, or before the machine has come
to a complete stop.
SAFETY INFORMATION
16" SCROLL SAWS
6
GB Do not perform layout, assembly or set up
work on the table while the cutting tool is in
operation.
Never turn your scroll saw on before clearing
the table of all objects: (tools, scraps of
wood, etc) except for the workpiece and
related feed or support devices for the
operation planned.
Maintenance and Repair
Pull out the mains plug for any adjustment or
repair tasks.
The generation of noise is influenced by
various factors, including the characteristics
of saw blades, condition of saw blade and
electric tool. Use saw blades which were
designed for reduced noise development,
insofar as possible. Maintain the electric
tool and tool attachments regularly and if
necessary, initiate repairs in order to reduce
noise.
Report faults on the electric tool, protective
devices or the tool attachment to the person
responsible for safety as soon as they are
discovered.
Check the electric tool for potential damage.
Protective devices and other parts must be
care-fully inspected to ensure that they are
fault-free and function as intended prior to
continued use of the electric tool. Check
whether the moving parts function faultlessly
and do not jam or whether parts are dam-
aged. All parts must be correctly mounted and
all conditions must be fulfilled to ensure fault-
free operation of the electric tool. The moving
protective hood may not be fixed in the open
position. Damaged protective devices and
parts must be properly repaired or replaced
by a recognized workshop, insofar as nothing
different is specified in the operating manual.
Damaged switches must be replaced at a
customer service workshop. Do not use any
faulty or damaged connection cables. Do
not use any electric tool on which the switch
cannot be switched on and off.
Residual Risks
The machine has been built using modern
technology in accordance with recognized
safety rules. Some remaining hazards, how
ever, may still exist.
/RQJ KDLU DQG ORRVH FORWKLQJ FDQ EH
hazardous when the work piece is rotating.
Wear personal protective gear such as a
hair net and tight fitting work clothes.
6DZGXVWDQGZRRGFKLSVFDQEHKD]DUGRXV
Wear personal protective gear such as
safety goggles and a dust mask.
7KHXVHRILQFRUUHFWRUGDPDJHGPDLQVFDEOHV
can lead to injuries caused by electricity.
lead to injuries caused by electricity, maining
hazards which are not yet evident may still be
present.
5HPDLQLQJ KD]DUGV FDQ EH PLQLPL]HG
by following the instructions in “Safety
Precautions”, “Proper Use” and in the entire
operating manual.
'R QRW IRUFH WKH PDFKLQH XQQHFHVVDULO\
excessive cutting pressure may lead to rapid
deterioration of the blade and a decrease in
performance in terms of finis and cutting
precision.
$YRLG DFFLGHQWDO VWDUWV GR QRW SUHVV WKH
start button while inserting the plug into the
socket.
Keep this safety information in a safe place.
SAFETY INFORMATION
16" SCROLL SAWS 7
GB
Blade Guard Assembly
Install the blade guard to the holder. Secure
the screw with a nut and two washers.
The scroll saw comes partially assembled and is shipped in carefully packed carton. After all the
parts have been removed from the carton, you should have:
1. Main Machine
2. Blade guard
3. Foot Switch (Optional Feature #1)
4. Saw-blade Adapter & Allen Wrench (Optional
Feature #2)
5. Flat Saw-blade (Optional Feature #3)
6. Operator’s Manual
7. Hardware Bag
CONTENTS SUPPLIED
OPTIONAL FEATURE #2
OPTIONAL FEATURE #1
OPTIONAL FEATURE #3
4
7
53
1
2
6
M4 ×25 ×1
UNPACKING THE SCROLL SAW
16" SCROLL SAWS
8
GB
Optional Feature
#2 & #3
Optional Feature #1 Optional Feature #4
65115A 65115B
KNOW YOUR MACHINE
Features and Controls
Speed Switch
Clamping Screw
ON/OFF switch
Foot Switch (Optional Feature #1)
Saw-blade Adapter
(Optional Feature #2)
Flat Saw-blade
(Optional Feature #3)
Double Lamp
(for 65115A use)
Adjustable Hose Lamp
(for 65115B use)
Air Nozzle
Suction Adapter
Nodal Type Air Nozzle
(Optional Feature #4)
Star Button
Blade Guard
Power Cord & Plug
Angle scale
PRODUCT INFORMATION
16" SCROLL SAWS 9
GB
Mounting the machine on a work bench
A workbench made from solid wood is better
than one made of plywood, as interfering
vibrations and noise are more noticeable with
plywood.
The necessary tools and small parts for
assembling the saw on a workbench are
not supplied with the saw. However, use
equipment of at least the following:
1. Machine
2. Bolt M8 (×3)
3. Flat Washer Ø8 (×3)
4. Rubber Pad
5. Work Table
6. Big Flat Washer Ø8 (×3)
7. Lock Washer Ø8 (×3)
8. Nut M8 (×3)
First of all, drill holes into the seating surface
and then Insert the screws.
A foam rubber base for reduction of noise is
not supplied with the saw either. However, we
expressly recommend that you use such a base
to keep vibration and noise to a minimum. Ideal
size 400 ×240 mm.
Operation
Horizontal Saw Bench and Diagonal Cuts
The saw bench can be positioned into a 45°
diagonal position or be left in the horizontal
position.
You can read off the approximate slope angle
by using the angle scale located under the work
bench. For more exact adjustment, use scrap
wood for some saw tests; adjust the bench if
necessary.
Bolt M8 (×3)
Flat Washer Ø8 (×3)
Rubber
Support Leg
Work Table
Big Flat Washer Ø8 (×3) Nut M8 (×3)
Lock Washer Ø8 (×3)
Min: 0°
Lock Screw
Saw Bench
Angle Scale
Star Button
Setting the Saw Bench
5HOHDVH WKH VWDU EXWWRQ DQG EULQJ WKH VDZ
bench to a right angle in relation to the saw
blade. Use a 90° angle L-square measure
the right angle between the blade and the
bench. The saw blade be at 90° to the angle.
&ORVH WKH VWDU EXWWRQ ZKHQ WKH GLVWDQFH
between the blade and the 90° angle is at a
minimum. The bench should then be at 90°
to the saw blade.
Setting the angle scale
5HOHDVHWKHORFNVFUHZDQGEULQJWKHLQGLFDWRU
to the zero position. Fasten the screw.
Please note: the angle scale is a useful piece
of supplementary equipment, but should not
be used for precision work. Use scrap wood
for saw tests, adjust the bench if necessary.
OPERATION
16" SCROLL SAWS
10
GB
Max: 45°
A scroll saw is fundamentally a “curve cutting
tool“ but which can also carry out straight
and angled edge cuts. Familiarise yourself
with the following important points prior to
commissioning the saw.
7KH VDZ GRHV QRW DXWRPDWLFDOO\ FXW ZRRG
You must feed the wood against the saw
blade manually.
7KH FXWWLQJ SURFHVV RFFXUV RQO\ ZKLOH WKH
blade is moving downwards.
)HHGWKHZRRGVORZO\DJDLQVWWKHVDZEODGH
as the saw blade teeth are small and cut
only while moving downwards.
$OOSHUVRQVFDUU\LQJRXWZRUNZLWKWKHVDZ
require training. The saw blade may break
easily during this training time while the
operator is still unfamiliar with the saw.
7KH VDZ LV EHVW VXLWHG IRU VKHHWV RI ZRRG
less than 2.5 cm thick.
)HHGWKHZRRGHVSHFLDOO\VORZO\DJDLQVWWKH
blade and avoid abrupt curves to prevent
the saw blade from breaking, if you wish to
cut wood sheets thicker than 2.5 cm.
6DZ EODGH WHHWK EHFRPHV EOXQW RYHU WLPH
saw blades must be replaced. The saw
blades are sufficient for 1/2 to 2 operating
time depending upon the type of wood.
7U\DQGPDNHVXUHWKDWWKHVDZEODGHIROORZV
the grain of the wood in order to obtain a
This saw is suited also to inside cuts cut not
starting at the edge of the work piece. Proceed
as follows:
'ULOODPPKROHLQWKHZRUNSLHFH
/RRVHQWKHFODPSLQJVFUHZEODGHWHQVLRQHU
and release the tension in the blade.
3ODFHWKHERUHKROHRYHUWKHVDZEODGHVORW
in the work bench.
,QVWDOOWKHVDZEODGHWKURXJKWKHKROHLQWKH
work piece and through the work blade slot,
and fasten the blade to the holders.
:KHQ \RX KDYH FRPSOHWHG WKH LQVLGH FXW
remove the saw blade and then remove the
work piece from the bench.
clean cut.
7KHVDZVSHHGPXVWEHUHGXFHGWRPLQLPXP
when cutting precious and non-terrous
metals.
Inside Cuts
Continuous Operation
It is possible to switch the saw on by pressing
the green "I" button for continuous operation.
In order to switch the saw off, it is necessary to
press the red "0" button.
With the continuously variable electronic speed
control, the cutting speed can be increased by
turning to the right or reduced by turning to
the left.
Warning: Switch off the saw
and remove the mains supply
plug before doing inside cuts in
order to avoid injuries caused by
unintentional activation of the saw.
Red “O” button Speed Switch
Green “I” button
OPERATION