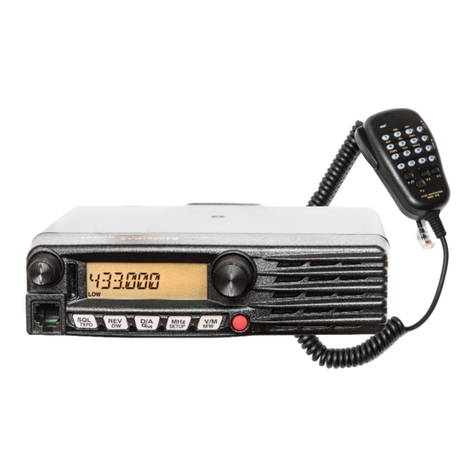
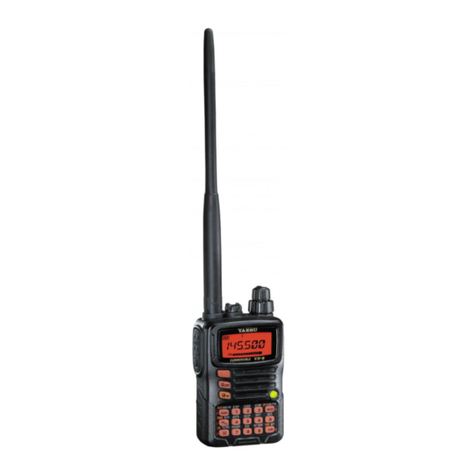
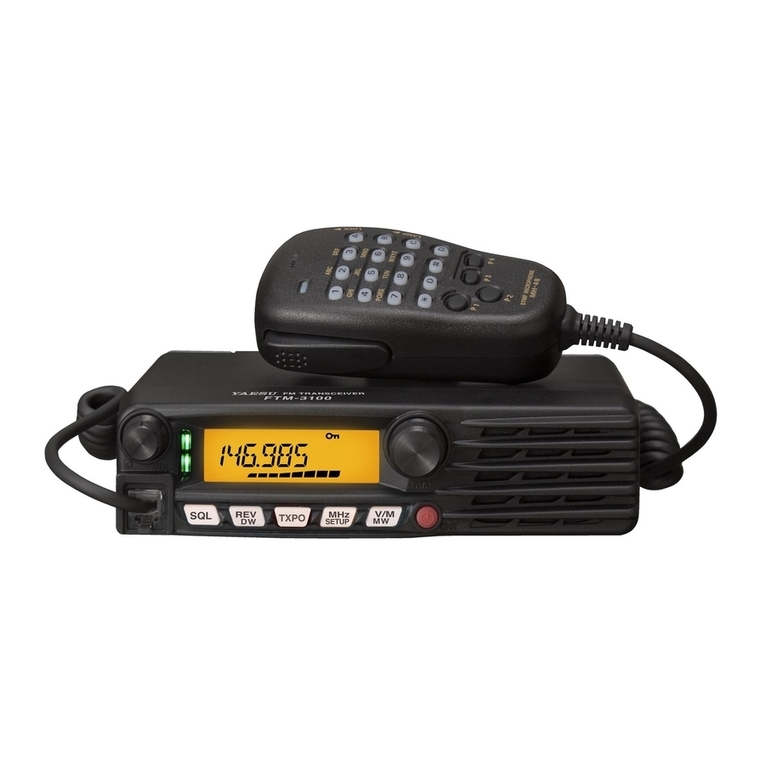
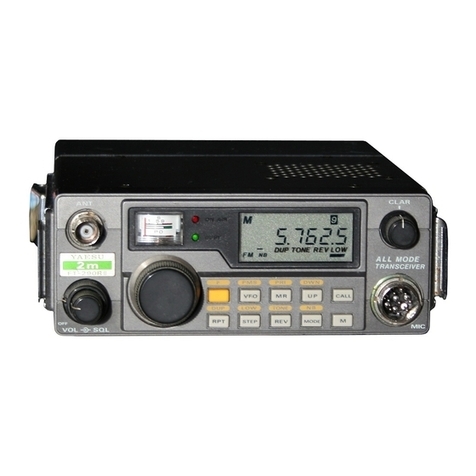
Yaesu FT-8800 Service manual

Yaesu FT-8800 Reference
Table of Contents
5 March 2009 i
CHANGING BANDS................................................................1
TUNING.....................................................................................1
CHANNEL SELECTION..........................................................1
TONE ACTIVATION................................................................1
TONE SELECTION...................................................................2
ADD MEMORIES .....................................................................2
DELETE MEMORIES...............................................................2
MEMORY BANK ASSIGNMENT...........................................2
CLEAR MEMORY BANK ASSIGNMENT.............................3
MEMORY BANK RECALL .....................................................3
SKIP A CHANNEL DURING MEMORY SCAN.....................3
SCAN RESUME MODE ...........................................................4
HYPER MEMORY....................................................................4
CROSS-BAND EXTENDER.....................................................4
AUTOMATIC POWER-OFF (APO).........................................5
TIME-OUT TIMER ...................................................................5
INTERNET CONNECTION FEATURE...................................6
TONE SEARCH SCANNING...................................................7
HOME Channel Memory ...........................................................8
LOCK FEATURE......................................................................8
KEYBOARD BEEPER..............................................................9
CHANNEL STEP SELECTION................................................9
BAND LINKING.....................................................................10
AUDIO MUTING....................................................................10
RF SQUELCH..........................................................................11
REPEATER SHIFTS................................................................12
AUTOMATIC REPEATER SHIFT (ARS).........................12
MANUAL REPEATER SHIFT ACTIVATION.................13
Changing the Default Repeater Shifts..................................14
MICROPHONE CONTROLS..................................................15

Yaesu FT-8800 Reference
Table of Contents Continued
ii 5 March 2009
PROGRAMMING THE MICROPHONE CONTROLS..........16
AVAILABLE MICROPHONE CONTROLS..........................17
FRONT PANEL CONTROLS.................................................19
DISPLAY BRIGHTNESS........................................................20
SMART SEARCH FEATURE.................................................20

[SET] [LOW] [V/M] [HM] [SCN]
FT-8800 Reference 1
CHANGING BANDS
VFO mode; press and hold “Main” DIAL to toggle operating
band
144 MHz – 250 MHz – 350 MHz – 430 MHz – 850 MHz – 144
MHz.
TUNING
To change frequency steps to 1 MHz, Tap the “Main” DIAL
momentarily, then rotate DIAL
CHANNEL SELECTION
A channel in an active bank and band may be quickly selected
by entering the channel number on the keypad. Use zeros to
precede channels less than 10 or 100.
TONE ACTIVATION
1. Tap the [SET] key momentarily to enter Set mode.
2. Rotate “Main” DIAL to Menu #41 (TONE M)
3. Tap the “Main” DIAL momentarily.
4. Rotate “Main” DIAL to select “ENC", “ENC DEC” or
“DCS".
5a. Tap the “Main” DIAL or the [Set] key momentarily to
enter Set Mode for Tone Selection.
OR
5b. Press “Main” DIAL or the [Set] key for 1/2 a second to save
and exit.

[LOW] [V/M] [HM] [SCN] [SET]
2 FT-8800 Reference
TONE SELECTION
1. Tap the [SET] key momentarily to enter Set mode.
2. Rotate “Main” DIAL to Menu #40 (TONE F)
3. Tap the “Main” DIAL momentarily.
4. Rotate “Main” DIAL to select frequency.
5a. Tap the “Main” DIAL or the [Set] key momentarily to enter
Set Mode for Tone Selection.
OR
5b. Press “Main” DIAL or the [Set] key for 1/2 a second to save
and exit.
ADD MEMORIES
1. Select frequency, PL and offset while in VFO mode on the
“Main” band.
2. Press [SET] key for 1/2 a second. A memory number will
begin blinking.
3. Use “Main” DIAL to select memory channel for storage.
4. Press [SET] key for 1/2 second to begin alpha tag or, Tap
the [SET] key momentarily to exit.
DELETE MEMORIES
1. Radio to Memory mode by momentarily tapping the [V/M]
key if necessary.
2. Press [SET] key for 1/2 second.
3. Rotate “Main” DIAL to select Memory Channel to be
deleted.
4. Tap the “Main” band [SCN] momentarily to exit
MEMORY BANK ASSIGNMENT
1. Recall memory channel to be assigned to a bank.
2. Press and hold [V/M] key until ALL.MEM or current
BANK appears.

[SET] [LOW] [V/M] [HM] [SCN]
FT-8800 Reference 3
3. Rotate “Main” DIAL to select Memory Bank ("BANK1” ~
“BANK10") for the channel.
4. Press and hold the [SET] key until you hear a “beep” (about
1 second).
NOTE: The “BEEP” function must be turned on to hear the beep.
5. To return to normal Memory mode: press and hold [V/M]
key until current BANK appears, then rotate “Main” DIAL
clockwise until you see ALL.MEM; and, then momentarily
tap the [SET] key to exit.
CLEAR MEMORY BANK ASSIGNMENT
1. From the memory bank mode, recall the memory channel to
be cleared from the bank and recall the bank that is involved.
2. Press and hold [V/M] key for 1/2 second.
3. Press and hold [SET] key until you hear a “beep”. Display
will revert to lowest channel in the bank
MEMORY BANK RECALL
1. Radio to Memory mode by tapping the [V/M] key
momentarily, if necessary.
2. Press [V/M] key until ALL.MEM or current BANK
appears.
3. Rotate “Main” DIAL to select Memory Bank ("BANK 1 ~
“BANK10").
4. Tap the [SET] key momentarily to lock in selected bank.
SKIP A CHANNEL DURING MEMORY SCAN
1. Main band has Channel to be skipped.
2. Rotate “Main” DIAL to channel to be skipped.
3. Tap the [SET] key momentarily to enter set mode.
4. Rotate “Main” DIAL to Menu #37 (SKP.MSM)
5. Tap the “Main” DIAL momentarily, then rotate to “SKIP"
6 Tap the [SET] key momentarily twice to exit

[LOW] [V/M] [HM] [SCN] [SET]
4 FT-8800 Reference
SCAN RESUME MODE
1. Tap the [SET] key momentarily to enter set mode.
2. Rotate the “Main” DIAL to Menu #34 (SCAN)
3. Tap the “Main” DIAL momentarily, and then rotate to
select the desired scan-resume mode.
4. Press and hold in the “Main” band dial knob for ½ second to
save the new setting and exit to normal operation.
HYPER MEMORY
1. To store a configuration, press and hold a Hyper Memory
key (1 to 6) until the radio “beeps” three times then emits a
long tone.
2. Tap a Hyper Memory key (1 to 6) momentarily to retrieve
a configuration.
CROSS-BAND EXTENDER
1. Before enabling cross-band extender operation, configure
both band settings as desired, and set the squelch such that
background noise is silenced.
2. Reduce power to both sides to minimum necessary.
3. Tap the [SET] key momentarily to enter the Set mode.
4. Rotate the “Main” band DIAL knob to select Menu #45 (X-
RPT).
5. Tap the “Main” band DIAL knob momentarily,
“XSTART” will appear on the display.
6. Tap the “Main” band DIAL knob momentarily again to
activate the cross-band extender mode
7. To exit the cross-band extender mode, tap the [SET] key
momentarily again.

[SET] [LOW] [V/M] [HM] [SCN]
FT-8800 Reference 5
AUTOMATIC POWER-OFF (APO)
1. Tap the [SET] key momentarily to enter the Set mode.
2. Rotate the “Main” band DIAL knob to select Menu #1
(APO).
3. Tap the “Main” band DIAL knob momentarily, then rotate
the “Main” band DIAL knob to set the desired “switch-off'
time (between 1 and 12 hours in 0.5 hours increments), or
OFF.
4. Press and hold in the “Main” band DIAL knob for 1/2
second to save the new setting and exit to normal operation.
TIME-OUT TIMER
The Time-Out Timer's “switch-to-receive” time may be
adjusted, in one minute increments, for any period between 1
and 30 minutes. To change the default (6 minute) time setting,
use the following procedure:
1. Tap the [SET] key momentarily to enter the Set mode.
2. Rotate the “Main” band DIAL knob to select Menu #42
(TOT).
3. Tap the “Main” band DIAL knob momentarily, then rotate
the “Main” band DIAL knob to select the desired interval
(between 1 and 30 minutes), or OFF.
4. Press and hold in the “Main” band DIAL knob for 1/2
second to save the new setting and exit to normal operation.

[LOW] [V/M] [HM] [SCN] [SET]
6 FT-8800 Reference
INTERNET CONNECTION FEATURE
DTMF tone is sent at the
beginning of every
transmission
The FT-8800R can be used to access the repeater which is
configured to provide access to the Vertex Standard WIRES™
(Wide-Coverage Internet Repeater Enhancement System).
1. Tap the “left” VOL knob momentarily to activate the
WIRES™ access capability. The “INT ON” will appear for
2 seconds at the “Main” band frequency display. The “int”
icon will appear in the memory channel field on the “Sub”
band while WIRES™ access is enabled.
2. Rotate the “Main” band DIAL knob, while pressing and
holding in the “left” VOL knob, to select the access number
(ICODE “0” - “9,"A,” “B ,” “C,” “D ,” “E (*),” or “F (#)")
corresponding to the WIRES™ repeater to which you wish
to establish an Internet link (ask your repeater
owner/operator if you don't know the access numbers in the
network).
3. With the WIRES™ capability activated (as in step 1 above),
the FT-8800R will generate a brief (0.1 second) DTMF tone
according to your selection in step 2. This DTMF tone is
sent at the beginning of every transmission to establish or
maintain the link to the remote WIRES™ repeater.
4. To disable the WIRES'™ access capability; tap the “left”
VOL knob again.

[SET] [LOW] [V/M] [HM] [SCN]
FT-8800 Reference 7
TONE SEARCH SCANNING
~ You must be sure that your repeater uses the same tone type
(CTCSS vs. DCS).
~ Some repeaters do not pass the CTCSS tone; you may have to
listen to the station(s) transmitting on the repeater uplink (input)
frequency in order to allow Tone Search Scanning to work.
To scan for the tone in use:
1. Set the radio up for either CTCSS or DCS Decoder
operation (see the previous discussion). In the case of
CTCSS, “ENC DEC” will appear on the display; in the case
of DCS, “DCS” will appear on the display.
2. Tap the [SET] key momentarily to enter the Set mode.
3. Rotate the “Main” band DIAL knob to select Menu #40
(TONE F) when CTCSS is selected, or Menu #10
(DCS.COD) during DCS operation.
4. Press the “Main” band DIAL knob to enable adjustment of
the selected Menu Item.
5. Tap the “Main” band [SC N] key momentarily to start
scanning for the incoming CTCSS or DCS tone/code.
6. When the radio detects the correct tone or code, it will halt
on that tone/code, and audio will be allowed to pass. Tap the
“Main” band DIAL knob momentarily to lock in that
tone/code, then press and hold in the “Main” band DIAL
knob for 1/2 second to save the new setting and exit to
normal operation.
♦♦ If the Tone Scan feature does not detect a tone or code, it
will continue to scan indefinitely. When this happens, it may be
that the other station is not sending any tone. You can press the
[SC N] key to halt the scan at any time.
Tone Scanning works either in the VFO or Memory modes.

[LOW] [V/M] [HM] [SCN] [SET]
8 FT-8800 Reference
HOME Channel Memory
1 Select the desired frequency, while operating in the VFO
mode on the “Main” band. Be sure to set up any desired
CTCSS or DCS tones, as well as any desired repeater offset.
The power level may also be set at this time, if you wish to
store it.
2 Press and hold in the [SET] key for 1/2 second. A memory
number will appear (blinking) on the display.
3 While the memory channel number is blinking, just press the
“Main” [H/M] key. The frequency and other data (if any)
will now be stored in the special HOME channel register.
4 You may repeat this process on the other operating bands.
5 To recall the HOME channel, just press the [H/M] key while
operating either in the VFO or MR mode.
LOCK FEATURE
In order to prevent accidental frequency change, the panel
switches and DIAL knobs may be locked out.
To activate the Lock feature:
1. Tap the [SET] key momentarily to enter the Set mode.
2. Rotate the “Main” band DIAL knob to select Menu #21
(LOCK).
3. Tap the “Main” band DIAL knob momentarily, then rotate
the “Main” band DIAL knob to change the setting to “ON.”
4. Tap the [SET] key momentarily to save the new setting and
exit to normal operation.
5. To unlock the panel switches and DIAL knobs, select “OFF”
in step 3 above.

[SET] [LOW] [V/M] [HM] [SCN]
FT-8800 Reference 9
KEYBOARD BEEPER
A key/button beeper provides useful audible feedback whenever
a key/button is pressed.
If you want to turn the beep off:
1. Tap the [SET] key momentarily to enter the Set mode.
2. Rotate the “Main” band DIAL knob to select Menu #5
(BEEP).
3. Tap the “Main” band DIAL knob momentarily, then rotate
the “Main” band DIAL knob to change the setting to “OFF.”
4. Press and hold the “Main” band DIAL knob for 1/2 second
to save the new setting and exit to normal operation.
5. To turn the beep back on again, select “ON” in step 3 above.
CHANNEL STEP SELECTION
The FT-8800R’s synthesizer provides the option of utilizing
channel steps of 5/10/12.5/15/ 20/25/50 kHz per step, any
number of which may be important to your operating
requirements. The FT-8800R is set up at the factory with
different default steps on each operating band which probably
are satisfactory for most operation. However, if you need to
change the channel step increments, the procedure to do so is
very easy; remember to get set up on the desired band before
making any changes, as different steps may be programmed for
each operating band.
1. Tap the [SET] key momentarily to enter the Set mode
2. Rotate the “Main” band DIAL knob to select Menu #38
(STEP).
3. Tap the “Main” band DIAL knob momentarily, then rotate
the “Main” band DIAL knob to select the new channel step
size.
4. Press and hold in the “Main” band DIAL knob for 1/2
second to save the new setting and exit to normal operation.

[LOW] [V/M] [HM] [SCN] [SET]
10 FT-8800 Reference
BAND LINKING
For operation on Amateur satellites which use a “normal” (not
“inverted”) FM transponder, the Band Link feature may be
useful.
1. Tap the [SET] key momentarily to enter the Set mode.
2. Rotate the “Main” band DIAL knob to select Menu #43
(VFO.TR).
3. Tap the “Main” band DIAL knob momentarily, then rotate
the “Main” band DIAL knob to change the setting to “ON.”
4. Press and hold in the “Main” band DIAL knob for 1/2
second to save the new setting and exit to normal operation.
As you rotate the “Main” band DIAL, you will observe that both
bands’ frequencies are changing together. When you are done
with this operating mode, select “OFF” in step 3 above.
5. Press and hold in the “Main” band DIAL knob for 1/2
second to save the new setting and exit to normal operation.
AUDIO MUTING
The Audio Mute feature is useful in situation where it would be
helpful to reduce the audio level of the “Receive Only” band
whenever you receive a signal on the “Main” band or you
transmit on the “Main” band during Dual Receive operation.
To activate the Audio Mute feature:
1. Tap the [SET] key momentarily to enter the Set mode.
2. Rotate the “Main” band DIAL knob to select Menu #24
(MUTE).

[SET] [LOW] [V/M] [HM] [SCN]
FT-8800 Reference 11
3. Tap the “Main” band DIAL knob momentarily, then rotate
the “Main” band DIAL knob to choose the desired selection.
TX: Reduces the audio level of the “Receive Only” band
whenever you transmit on the “Main” band
RX: Reduces the audio level of the “Receive Only” band
whenever you receive a signal on the “Main” band.
TX/RX: Reduces the audio level of the “Receive Only” band
whenever you receive a signal on the “Main” band or
you transmit on the “Main” band
OFF: Disables the Audio Mute feature
4. Press and hold in the “Main” band DIAL knob for 1/2
second to save the new setting and exit to normal operation.
RF SQUELCH
This feature allows you to set the squelch so that only signals
exceeding a certain S-meter level will open the squelch. You
may set the RF Squelch independently for the “left” and “right”
sides, using the following procedure:
1. Tap the [SET] key momentarily to enter the Set mode.
2. Rotate the “Main” band DIAL knob to select Menu #32 (RF
SQL).
3. Tap the “Main” band DIAL knob momentarily, then rotate
the “Main” band DIAL knob to select the desired signal
strength level for the squelch threshold (OFF, S-2, S-5, S-9,
or S-FULL).
4. Press and hold in the “Main” band DIAL knob for 1/2
second to save the new setting and exit to normal operation.
5. Finally, rotate the SQL knob fully clockwise.

[LOW] [V/M] [HM] [SCN] [SET]
12 FT-8800 Reference
REPEATER SHIFTS
Your FT-8800R has been configured, at the factory, for the
repeater shifts customary in your country. While the 144 MHz
shift will be 600 kHz; on 70 cm, the shift may be 1.6 MHz, 7.6
MHz, or 5 MHz (USA version).
Depending on the part of the band in which you are operating,
the repeater shift may be either downward (–) or upward (+),
and one of these icons will appear at the bottom of the LCD
when repeater shifts have been enabled.
AUTOMATIC REPEATER SHIFT (ARS)
The FT-8800R provides a convenient Automatic Repeater Shift
feature, which causes the appropriate repeater shift to be
automatically applied whenever you tune into the designated
repeater sub-bands in your country. These sub-bands are shown
below.
If the ARS feature does not appear to be working, you may have
accidentally disabled it.
To re-enable ARS:
1. Tap the [SET] key momentarily to enter the Set mode.
2. Rotate the “Main” band DIAL knob to select Menu #2
(ARS).
3. Tap the “Main” band DIAL knob momentarily, then rotate
the “Main” band DIAL knob to change the setting to “ON”
(to enable Automatic Repeater Shift).
4. Press and hold in the “Main” band DIAL knob for 1/2
second to save the new setting and exit to normal operation.

[SET] [LOW] [V/M] [HM] [SCN]
FT-8800 Reference 13
MANUAL REPEATER SHIFT ACTIVATION
If the ARS feature has been disabled, or if you need to set a
repeater shift direction other than that established by the ARS,
you may set the direction of the repeater shift manually.
To do this:
1. Tap the [SET] key momentarily to enter the Set mode.
2. Rotate the “Main” band DIAL knob to select Menu #33
(RPT.MOD).
3. Tap the “Main” band DIAL knob momentarily, then rotate
the “Main” band DIAL knob to select the desired shift
among “–,” “+,” and “OFF.”
4. Press and hold in the “Main” band DIAL knob for 1/2
second to save the new setting and exit to normal operation.

[LOW] [V/M] [HM] [SCN] [SET]
14 FT-8800 Reference
Changing the Default Repeater Shifts
If you travel to a different region, you may need to change the
default repeater shift so as to ensure compatibility with local
operating requirements.
To do this, follow the procedure below:
1. Tap the [SET] key momentarily to enter the Set mode.
2. Rotate the “Main” band DIAL knob to select Menu #36
(SHIFT).
3. Tap the “Main” band DIAL knob momentarily, then rotate
the “Main” band DIAL knob to select the new repeater shift
magnitude.
4. Press and hold in the “Main” band DIAL knob for 1/2
second to save the new setting and exit to normal operation.
♦♦ If you just have one “odd” split that you need to program,
don’t change the “default” repeated shifts using this Menu Item!
Enter the transmit and receive frequencies separately.

[SET] [LOW] [V/M] [HM] [SCN]
FT-8800 Reference 15
MICROPHONE CONTROLS
[P1] key: Switch Main between left and right.
[P1] key: Hold for ½ second to move to next higher
frequency range.
[P2] key: Switch between VFO and Memory Operation.
[P2] key: When Main band is set to VFO mode, press and
hold ½ second to activate “Smart Search”
Feature.
[P2] key: When Main band is set to Memory mode, press
and hold ½ second to activate “Memory
Bank” Feature.
[P3] key: Switch between CTCSS or DCS “Tone” mode
(default).
[P3] key: Reverse Transmit and Receive frequencies
(K6HEW).
[P4] key: Select transmitter power: L; M1; M2; H.
[P4] key: When Main band is set to Memory mode or
Home Channel, press and hold ½ second to
switch display between “Frequency” and
“Alpha-numeric Tag” format.
[LOCK] key: Locks out Microphone buttons except keypad
and PTT switch.
[LIGHT] key: Activates Microphone back lighting.
[UP/DOWN] buttons: Press to tune or scan frequencies in
memory on Main band DIAL.

[LOW] [V/M] [HM] [SCN] [SET]
16 FT-8800 Reference
PROGRAMMING THE MICROPHONE CONTROLS
To program the function assigned to a key:
1. Tap the [SET] key momentarily to enter the Set mode.
2. Rotate the “Main” band DIAL knob to select the Menu Item
to be configured ("#28 PG P1,” “#29 PG P2 ,” “#30 PG P3,”
or “#31 PG P4").
3. Tap the “Main” band DIAL knob momentarily, and then
rotate the “Main” band DIAL knob to select the function you
wish to assign to the button you selected in the previous
step.
4. Press the [SET] key to save the new setting, and then rotate
the “Main” band DIAL knob to select another programmable
button to modify, if desired, and repeat the above steps.
5. Press and hold in the “Main” band DIAL knob for 1/2
second to exit to normal operation.

[SET] [LOW] [V/M] [HM] [SCN]
FT-8800 Reference 17
AVAILABLE MICROPHONE CONTROLS
Function Tap momentarily Press and hold ½ second
SCAN Activate the Scanner
on the “Main” band Shifts to the “Memory
Tuning” feature.
SOLOFF Opens the Squelch on
the “Main” band to
allow un-muted
reception.
Opens the Squelch on the
“Main” band to allow un-
muted reception.
TCALL Activates 1750 Hz
Tone Burst. Activates 1750 Hz Tone
Burst
RPTR Selects Repeater Shift
direction on the
“Main” band.
―
PRI Activates the Priority
feature on the “Main”
band.
―
LOW Selects the transmit
power output level on
the “Main” band
Switches the memory
channel display between
the “Frequency” format
and “Alpha-numeric Tag”
format.
TONE Activates the CTCSS
or DCS operation on
the “Main” band.
―
MHz Allows tuning in 1-
MHz step on the
“Main” band VFO.
Allows tuning in 10-MHz
step on the “Main” band
VFO.

[LOW] [V/M] [HM] [SCN] [SET]
18 FT-8800 Reference
AVAILABLE MICROPHONE CONTROLS, Continued
Function Tap momentarily Press and hold ½ second
REV Reverses the transmit
and receive
frequencies during
split-frequency
operation.
Press this button
momentarily to select
Repeater Shift direction
on the “Main” band.
HOME Switches operation to
the “Home” channel Activate the Priority
Scanning. on the “Main”
band.
BAND Toggles the “Main”
band of operation Switches operating band
on the “Main” band
between the “Left” band
and “right” band.
VFO/MR Switches frequency
control between the
VFO and Memory
modes on the “Main”
band
Activate the Smart Search
Feature when the.
Other manuals for FT-8800
2
Table of contents
Other Yaesu Transceiver manuals

Yaesu
Yaesu FT-857 series Manual

Yaesu
Yaesu FT-902DM User manual

Yaesu
Yaesu FT DX 9000 TFT User manual

Yaesu
Yaesu FT-8100R Manual

Yaesu
Yaesu FT-1000 User manual

Yaesu
Yaesu Mark-V FT-1000MP Installation guide

Yaesu
Yaesu FT-817ND User manual

Yaesu
Yaesu FT-840 User manual

Yaesu
Yaesu FT-101 User manual

Yaesu
Yaesu FT-857 series User manual