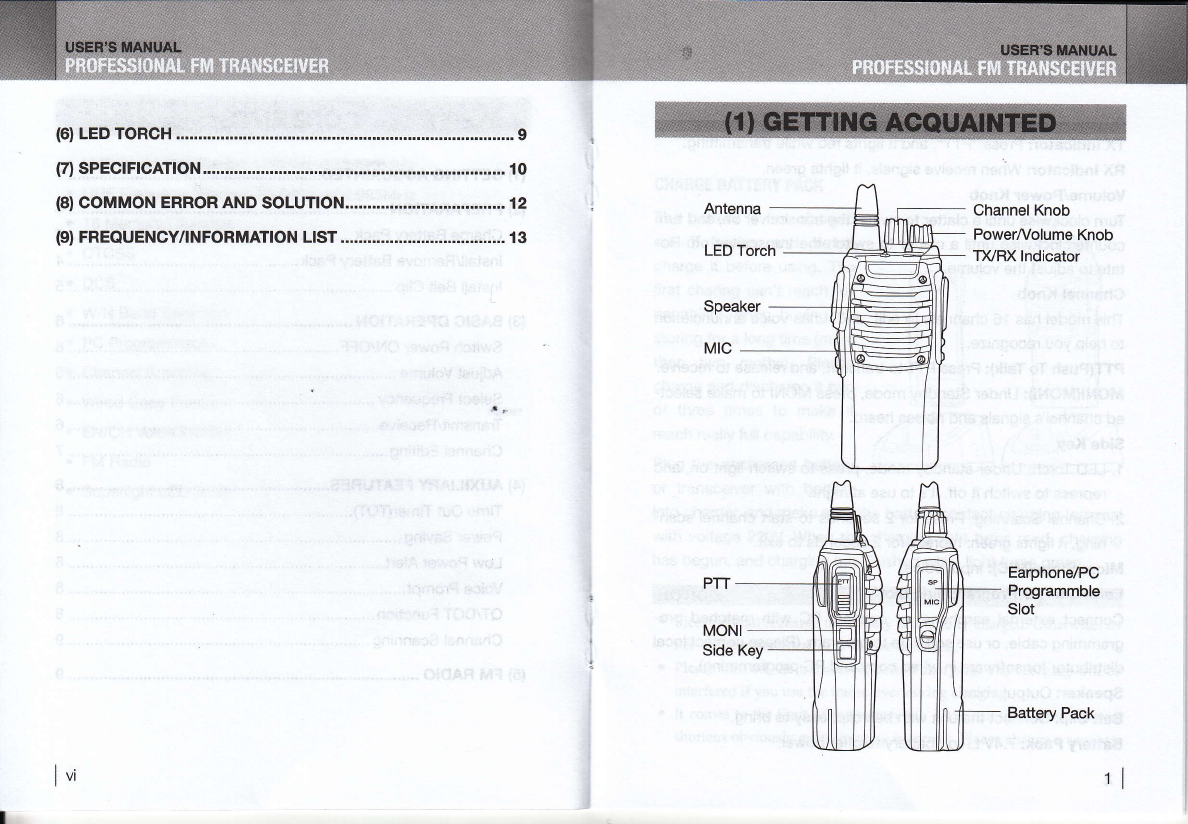
Antenna: Rubber antenna used to receive and transmit signals.
TX lndicator: Press "PTT", and it lights red while transmitting.
RX lndicator: When receive signals, it lights green.
Volume/Power Knob
Turn clockwise until a clatter to switch the transceiver on, and turn
counterclockwise until a clatter to switch the transceiver off. Ro-
tate to adjust the volume.
Channel Knob
This model has 16 channels to edit, and it has voice annunciation
to help you recognize.
PTT(Push To Talk): Press PTT to transmit, and release to receive.
MONI(MONI): Under Standby mode, press MONI to make select-
ed channel's signals and noises heard.
Side Key
1. LED Torch: Under standby mode, press to switch light on, and
repress to switch it off. lt's to use at night.
2. Channel Scanning: Press for 2 seconds to start channel scan-
ping, it lights green; repress for 2 seconds to exit.
Microphone(MlG): lnput voice.
Earphone/PC Programming Slot
Connect external earphone, or connect PC with matched pro-
gramming cable, or use software to program. (Please contact local
distributor for software in wired copy and PC programming).
Speaker: Output voice.
Belt Clip: Connect the unit with belt clip, easy to bring.
Battery Pack:.7 .4V Li-ion battery to offer power.
lz
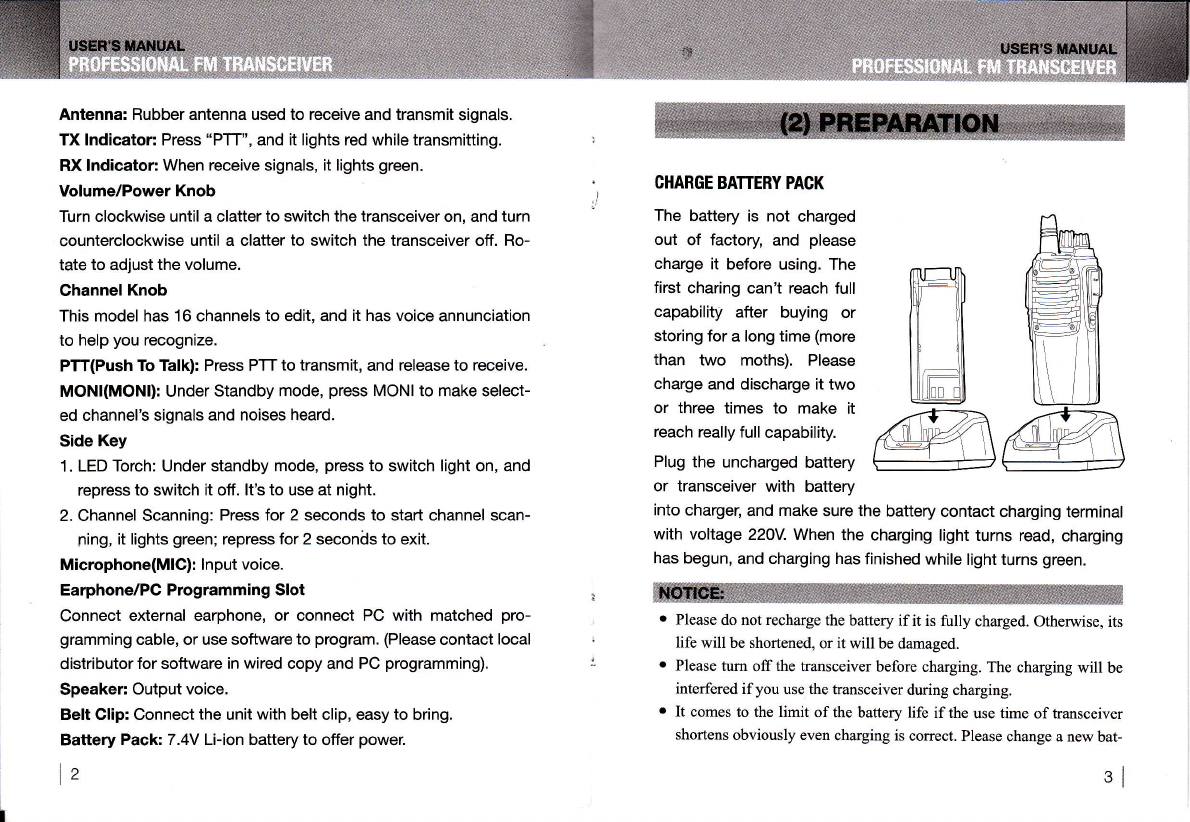
CHARGE BAITERY PACK
The battery is not charged
out of factory and please
charge it before using. The
first charing can't reach full
capability after buying or
storing for a long time (more
than two moths). Please
charge and discharge it two
or three times to make it
reach really full capability.
Plug the uncharged battery
or transceiver with battery
into charger, and make sure the battery contact charging terminal
with voltage 220V. When the charging light turns read, charging
has begun, and charging has finished while light turns green.
. Please do not recharge the battery if it is fully charged. Otherwise, its
life will be shortened, or it will be damaged.
o Please tum offthe transceiver before charging. The charging will be
interfered ifyou use the transceiver during charging.
o It comes to the limit of the battery life if the use time of transceiver
shortens obviously even charging is correct. Please change a new bat-
3l