Yaesu FTM-300DR User manual

FTM-300DR
FTM-300DE
Instruction Manual
(APRS Edition)
C4FM/FM 144/430MHz
DUAL BAND DIGITAL TRANSCEIVER

1
APRS® initial settings ........................................................................................................ 2
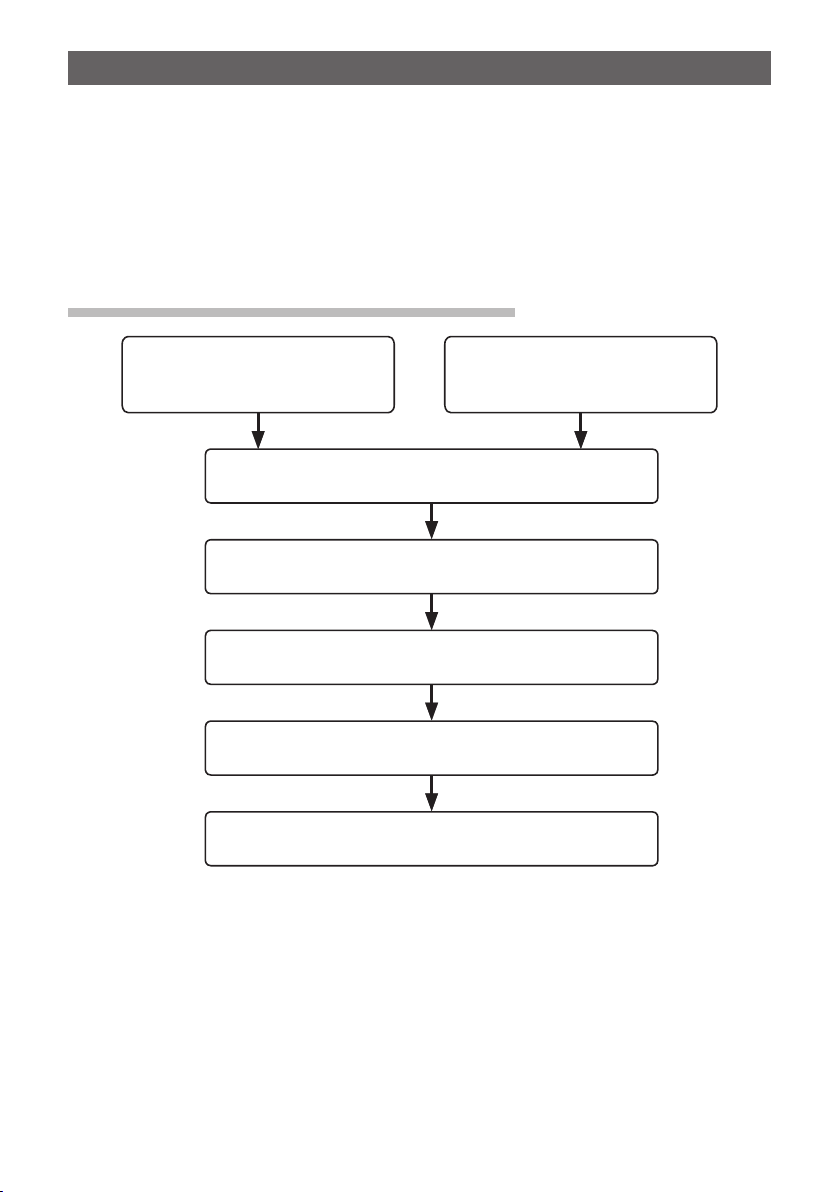
Initial setting process for APRS operations................................................................... 2
When operating APRS using the GPS function ............................................................ 3
When operating APRS without using the GPS function................................................ 3
Setting your own station callsign................................................................................... 4
Setting the APRS modem ............................................................................................. 4
Setting the APRS baud rate.......................................................................................... 5
Setting the APRS operating frequency ......................................................................... 5
Other initial settings ...................................................................................................... 5
Changing the symbol of your station......................................................................... 5
Deciding the operating band ..................................................................................... 6
Receiving APRS® beacons ............................................................................................... 8
Receiving beacons........................................................................................................ 8
Description of the APRS STATION LIST screen and operations .................................. 9
APRS reception pop-up setting................................................................................... 20
Display to notify reception of the same beacon or message ...................................... 20
Audio notification of a beacon or message received APRS RINGER function ........... 21
Displaying RAW packet data ...................................................................................... 22
Deleting a beacon station from the list........................................................................ 22
Transmitting APRS®beacons ......................................................................................... 23
Transmitting an APRS beacon manually .................................................................... 23
Transmitting an APRS beacon automatically.............................................................. 23
Setting the SmartBeaconing™.................................................................................... 24
Registering status text ................................................................................................ 24
Selecting a position comment..................................................................................... 25
Setting the digipeater route......................................................................................... 26
Setting the address of the digipeater route ............................................................. 27
APRS® message screen and operating instructions ....................................................... 28
Description of the APRS MESSAGE LIST screen and operations ............................. 28
Checking messages................................................................................................ 28
Description of the APRS MESSAGE LIST detail screen and operations.................... 29
Message edit screen and description of operations.................................................... 30
Receiving messages................................................................................................... 31
Filter setting for messages received ........................................................................... 31
Deleting a message from the list................................................................................. 32
Transmitting APRS® messages....................................................................................... 33
Creating and sending messages ................................................................................ 33
APRS Setup menu List................................................................................................... 37
APRS Setup menu function list ...................................................................................... 40
Table of Contents

2
APRS®initial settings
APRS (Automatic Packet Reporting System) is a communication system to exchange
GPS location data and packet messages; it was developed and is supported by Bob
Bruninga (WB4APR). Position data may be entered manually in advance or automatically
from the built-in GPS satellite receiver.
When an APRS signal is received from a partner station, the direction, distance, speed
etc. of the partner station as seen from your own station will be shown on the display of
your transceiver.
Initial setting process for APRS operations
When operating APRS using
the GPS function
When operating APRS without
using the GPS function
(Page 3)
(Page 4)
Setting the APRS modem
(Page 4)
Setting the APRS baud rate
(Page 5)
(Page 5)
Transmitting APRS beacons
(Page 23)
(Page 3)
Setting your own station call sign
Setting the APRS operating frequency

3
When operating APRS using the GPS function
In order to use the GPS satellite data for your own position information, press and hold
the [F(SETUP)] key → [APRS] → [24 MY POSITION SET ] to “GPS”.
Factory setting value: GPS
Then proceed to “Setting your own station callsign” (page 4).
When operating APRS without using the GPS function
When operating APRS without using the GPS function, follow the procedure below to
manually set the clock and position information.
ySetting the position information
Enter the position information of your own station manually.
1Press and hold the [F(SETUP)] key → [APRS] → [24 MY POSITION SET].
2Press the DIAL knob to select [MANUAL].
A screen to enter the position information of your own
station will be displayed.
Factory setting value: GPS
3Rotate the DIAL knob to select “25 MY POSITION” and
then press the DIAL knob.
4Press the DIAL knob.
5Rotate the DIAL knob to select “N(North Latitude)” or
“S(South Latitude)” press the DIAL knob .
6Enter the latitude using the DIAL knob.
7After entering the latitude, press and hold the DIAL knob.
8Rotate the DIAL knob to select “LONGITUDE” and press
the DIAL knob.
9Rotate the DIAL knob to select “E(East Longitude)” or
“W(West Longitude)” and press the DIAL knob.
10 Enter the longitude using the DIAL knob.
11 After entering the longitude, press and hold the DIAL knob.
12 Press the [DISP] key or press the PTT switch to return to the operating screen.
MANUAL
24
25
26
27
MY POSITION SET
MY POSITION >
MY SYMBOL >
POSITION COMMENT
APRS
25 MY POSITION
APRS
LATITUDE :
N 0°00.00’(’00”)
LONGITUDE :
E 0°00.00’(’00”)

4
Setting your own station callsign
Register your own station callsign in order to send and receive messages and to transmit
beacons in APRS. Enter the callsign like “JA1ZRL-9”. The “-9” in the callsign indicates
the SSID (Secondary Station Identifier) of which there are 16 types, including one with no
SSID. Generally, the SSIDs shown in the table below are used in APRS.
SSID Description SSID Description
(NIL) Fixed stations that can exchange mes-
sages
-8 Marine mobile stations, land mobile sta-
tions
-1 1200 bps narrow-to-middle band digipe-
ater
-9 Using the FTM-300D etc. for mobile ap-
plications
-2 9600 bps digipeater -10 I-Gate station, Internet connection station
-3 1200 bps broadband digipeater -11 Balloons, aircraft, spacecraft, etc.
-4 Digipeater, mobile station, meteorological
station, etc.
-12 1-way tracker station (messages cannot
be exchanged)
-5 Operation station using mobile devices
(smartphones etc.)
-13 Meteorological station (weather station)
-6 Operation station for satellite communica-
tions, events, etc.
-14 Tracking mobile stations
-7 Use of FT3D etc. in handy terminals -15 Digipeater, mobile station, meteorological
station, etc.
1Press and hold the [F(SETUP)] key → [APRS] → [21 CALLSIGN (APRS)].
The text input screen will be displayed.
2Input the callsign and the SSID in the character input
screen.
Refer to “Text input screen” (FTM-300DR/DE Operating
Manual).
3After entering the callsign, press and hold the DIAL knob.
4Press the [DISP] key or press the PTT switch to return to
the operating screen.
Setting the APRS modem
Turn on the APRS modem to activate the APRS function.
1Press and hold the [F(SETUP)] key → [APRS] → [4 APRS MODEM].
2Press the DIAL knob to set to [ON].
The display will show “A12” (for 1200 bps) or “A96” (for 9600 bps).
yStop APRS operation
1Set it to [OFF] in step 2 above.

5
Setting the APRS baud rate
This sets the APRS baud rate.
1Press and hold the [F(SETUP)] key → [DATA] → [3 DATA SPEED].
2Rotate the DIAL knob to select the “APRS” and then press the DIAL knob.
3Rotate the DIAL knob to select the APRS baud rate.
1200 bps: APRS operations using AFSK 1200 bps packets
9600 bps: APRS operations using GMSK 9600 bps packets
4Press the [DISP] key or press the PTT switch to return to the operating screen.
Setting the APRS operating frequency
The customary APRS operating frequency differs depending on the region and country.
In the USA, the usual operating frequency is 144.39 MHz. Therefore, to begin APRS
operations set the Band B frequency to 144.39 MHz.
1Press the lower DIAL knob or the [A/B] key to switch the operating band to B band.
The APRS will operate in B band (factory default setting). Check that A12 (1200bps)
or A96 (9600bps) is displayed on the right-hand side of the frequency.
2Setting the operating frequency.
Other initial settings
Changing the symbol of your station
This sets the transmit symbol of your station.
The default setting when shipped from the factory is “ ICON 1 [/>] Car”.

6
1Press and hold the [F(SETUP)] key → [APRS] → [26 MY SYMBOL].
2Rotate the DIAL knob to select the symbol.
The following four symbol types can be selected as your
own symbol: “ICON 1”, “ICON 2”, “ICON 3” and “USER”.
If “USER” is selected, symbol characters can be input
directly. * See the following page on how to enter the
characters.
3To use the currently set symbol as is, press the [DISP]
key to return to the operation screen.
4Press the DIAL knob to change the symbol.
The cursor will move to the “Code” area of the table below.
5Rotate the DIAL knob to select “Code” and set the symbol to use.
The default value of each symbol is as follows.
MY SYMBOL Code Symbol
ICON 1 /> Car
ICON 2 /R REC.Vechicle
ICON 3 /- House QTH (VHF)
USER YY Yaesu Radios
6Press the [DISP] key or press the PTT switch to return to the operating screen.
yEntering a symbol character directly
You can enter a symbol character directly if the symbol that you want is not available.
1Press and hold the [F(SETUP)] key → [APRS] → [26 MY SYMBOL].
2Rotate the DIAL knob to select “USER”, and then press the DIAL knob.
The cursor will move to the “Code” area.
3Rotate the DIAL knob to select the Symbol Table ID (character on the left side of the
code) and then press the DIAL knob.
4Rotate the DIAL knob to select the Symbol Code (character on the right side of
“Code”).
Reference Please refer to “http://aprs.org/symbols/symbolsX.txt” and “http://aprs.
org/symbols.html” for the latest symbol table.
5Press the [DISP] key or press the PTT switch to return to the operating screen.
Deciding the operating band
Although the APRS is set to operate in B Band when shipped from the factory, A Band and
also separate operating bands can be used for sending and receiving.
1Press and hold the [F(SETUP)] key → [DATA] → [2 DATA BAND SELECT].
2Rotate the DIAL knob to select the “APRS” and then press the DIAL knob.
26 MY SYMBOL
APRS
ICON 2[/R]
REC.Vehicle
ICON 1[/>]
Car

7
3Rotate the DIAL knob to select the band to be used for APRS operation.
MAIN BAND: Send and receive using the operating band at that point.
SUB BAND: Send and receive using the sub-band at that point.
A-BAND FIX: Always send and receive using A band.
B-BAND FIX: Always send and receive using B band.
A=TX/B=RX: Send using A band and receive using B band.
A=RX/B=TX: Receive using A band and send using B band.
Default: B-BAND FIX
4Press the [DISP] key or press the PTT switch to return to the operating screen.

8
Receiving APRS®beacons
Receiving beacons
yDisplaying beacons in the APRS pop-up screen
A alarm will sound when a beacon is received on the B band
frequency, and the APRS pop-up screen will be displayed.
The contents displayed in the “APRS POP-UP SCREEN”
and the “APRS STATION LIST DETAIL SCREEN” to be
explained next are basically the same.
yDisplaying beacons in the APRS STATION LIST detail screen
1Press the [F(SETUP)]key → [APRS FUNCTION] → [STN LIST]
The APRS STATION LIST screen will be displayed.
2Rotate the DIAL knob to select the beacon whose details
you want to review.
3Press the DIAL knob to display the details screen.
Rotate the DIAL knob to scroll the screen.
4Press the [BACK] key.
Returns the screen to the APRS STATION LIST screen.
Tips
• When [APRS] → [2 APRS FILTER] is set to on, a received beacon matching the filter setting will be
stored and shown on the display.
• The receive audio (beacon or voice etc.) of B band when APRS is operating may be muted by setting
[APRS] → [5 APRS MUTE] in the setup menu.
• The reception of an APRS beacon is notified by a ringing sound set in [APRS] → [7 APRS RINGER]
in the setup menu. If “OFF” is selected, no audio alarm will sound upon receiving a beacon.
FT1D 04/07
15114km 10:09
Speed 0km/h
Course 0
Alt -m
(En Route
)
N 36
43
.
17
�
E 139
47
.
35
�
[
STATUS TEXT
]
1 E JA1ZRL- 9 15:36
2 E JA6YPC- 7 12:34
3 W JA1YOE-13 04:56
4 E JQ1YBF- 9 12/27
5 E JQ1YBG-14 11/18
6 E JA1ZRL- 9 11/14
STATION LIST ALL

9
Description of the APRS STATION LIST screen and operations
1 E JA1ZRL- 9 15:36
2 E JA6YPC- 7 12:34
3 W JA1YOE-13 04:56
4 E JQ1YBF- 9 12/27
5 E JQ1YBG-14 11/18
6 E JA1ZRL- 9 11/14
APRS STATION LIST
①
②
③
④
⑤
①Number: Received beacons (up to a maximum of 100) will be displayed, starting with the most
recent one received.
②Character: The station list characters will be displayed.
Refer to the following page for details.
③Station name: The callsign or object name / item name of the received beacon will be displayed.
④Beacon auto / manual transmission icon:
Do not display (MANUAL), Display “ ” (AUTO) (page 23), Display “ ” (SMART)
(page 23)
⑤Time or date: Time (HH:MM) or date (MM/DD) will be displayed. The time display will change the date
display on the following day.
yOperation
Scroll the screen Rotate the DIAL knob.
Move to the “APRS STATION LIST” detail screen
(page 11 - page 19)
Rotate the DIAL knob to select the beacon whose
details you want to see and press the DIAL knob.
Move to the top of the APRS STATION LIST [F(SETUP)]→[TOP]
Replying messages (page 34) [F(SETUP)]→[REPLY]
Manual transmission of a beacon (page 23) [F(SETUP)]→[BCN-TX]
Move to the APRS MESSAGE LIST screen (page 28)
[F(SETUP)]→[MSG LIST]
Displays the setup menu “29 SORT FILTER” [F(SETUP)]→[SORT FILTER]
Sorts the APRS Station List [F(SETUP)]→[SORT]
Switch ON / OFF of automatic beacon transmission [F(SETUP)]→[BEACON]
Displays the GPS Infomation display [F(SETUP)]→[GPS]
Delete a selected beacon station from the display
(page 22) [F(SETUP)]→[DEL]
Display QUERY (Command: ?APRSP) message [F(SETUP)]→[QUERY]
Sets the frequency of the opposite band of the
APRS operating band according to the frequency
information included in the beacon.
[F(SETUP)]→[QSY]
Setup menu (page 37) Press and hold the [F(SETUP)] key.

10
yDescription of Station List Character
Examples of 15 types of station list character are described here. Refer to the description
page listed on the table for the detail screen.
1 E JA1ZRL- 9 15:36
2 E JA6YPC- 7 12:34
3 W JA1YOE-13 04:56
4 E JQ1YBF- 9 12/27
5 E JQ1YBG-14 11/18
6 E JA1ZRL- 9 11/14
APRS STATION LIST
Display Description Page
E Mic-E: Displayed when a beacon of a Mic-E station is received 11
PPosition: Displayed when the beacon from a fixed station (FIXED) or a mobile
station (MOVING) is received 12-14
pPosition: Displayed when the beacon of a fixed station (FIXED) or a mobile
station (MOVING) is received (compression type) -
WWeather report: Displayed when the beacon of a meteorological station is
received 15
wWeather report: Displayed when the beacon of a meteorological station is
received (compression type) 15
O Object: Displayed when the beacon of an object station is received 16
oObject: Displayed when the beacon of an object station is received
(compression type) 16
I Item: Displayed when the beacon of an item station is received 16
iItem: Displayed when the beacon of an item station is received (compression
type) 16
KKilled Object/Item: Displayed when a deleted object station or item station is
received 16
kKilled Object/Item: Displayed when a deleted object station or item station is
received (compression type) 16
S Status: Displayed when the beacon of a status station is received 17
GRaw NMEA: Displayed when Raw NMEA data (GGA / GGL / RMC) is received 18
? Other: Displayed when a beacon that cannot be interpreted is received 19
Emg Displayed when an emergency signal from a Mic-E station is received 11
Tips
• When the transceiver is turned ON, if the detail screen is displayed before the GPS satellites are
acquired, the position arrow and distance will not be displayed.
• If GPS satellite information is no longer available due to obstructions such as buildings, tunnels,
etc., the most recently acquired coordinates (position arrow, latitude / longitude, distance) will be
displayed. The accurate position information will be displayed again when you move to a position
that can be located.

11
yExplanation of the detail screen display in an E (Mic-E) APRS STATION LIST and
description of operations
Rotate the DIAL knob in the APRS STATION LIST screen to select the “E” station and
press the DIAL knob to display the E (Mic-E) detailed screen.
FT1D 04/07
15114km 10:09
Speed 0km/h
Course 0
Alt -m
(En Route
)
N 36
43
.
17
�
E 139
47
.
35
�
[
STATUS TEXT
]
① ② ④ ⑤ ⑥ ⑦
⑧
⑨
⑩
⑪
⑫
⑬
⑭
⑮
⑯
③
Number: The number of received beacon (up to a maximum of 100).
Character: The station list characters will be displayed.
Compass: The direction of the partner station as seen from your own station will be displayed.
Symbol: The symbol of the radio station will be displayed.
Callsign: The received station callsign will be displayed.
Type code: The type code used by the partner station will be displayed (Mic-E, McE-Trk, McE-Msg and model name of
the radio, etc.)
Distance: Distance to the received station will be displayed.
Date: The date the beacon was received (MM/DD) will be displayed.
Time: The time the beacon was received (HH:MM) will be displayed.
Speed: The moving speed of the partner station will be displayed.
Direction: The direction of movement of the partner station will be displayed.
Altitude: The altitude of the partner station will be displayed.
Position comment:
The position comments of the partner station will be displayed.
When an emergency message is received, the message (Emergency!) is displayed and a sound will be
repeated 12 times.
Latitude: The N (north latitude) or S (south latitude) of the current position will be displayed (DDMM.MM or DDMMSS).
Longitude: The E (east longitude) or W (west longitude) of the current position will be displayed (DDMM.MM or
DDMMSS).
STATUS TEXT: The comments information will be displayed.
yOperation
Scroll the screen Rotate the DIAL knob.
Select the beacon to display Press the DIAL knob to display , then
rotate the DIAL knob.
Move to the top of the detail screen display [F(SETUP)]→[TOP]
Move to the top of the STATUS TEXT [F(SETUP)]→[TEXT]
Display the packet data (raw data) [F(SETUP)]→[RAW]
Manual transmission of a beacon (page 23) [F(SETUP)]→[BCN-TX]
Delete a selected beacon station from the display (page 22)
[F(SETUP)]→[DEL]
Sets the frequency of the opposite band of the APRS operating band
according to the frequency information included in the beacon.
[F(SETUP)]→[QSY]
Setup menu (page 37) Press and hold the [F(SETUP)] key.

12
yExplanation of the detail screen display in a P (Position: Fixed station) APRS
STATION LIST and description of operations
Rotate the DIAL knob in the APRS STATION LIST screen to select the “P” station and
press the DIAL knob to display the P (Position) detailed screen.
FIXED 04/07
15114km 10:09
Alt 376m
N 36
43
.
17
�
E 139
47
.
35
�
[
COMMENT TEXT
]
① ② ④ ⑤ ⑥ ⑦
⑧
⑨
⑩
⑪
⑫
⑬
③
Number: The number of received beacon (up to a maximum of 100).
Character: The station list characters will be displayed.
Compass: The direction of the partner station as seen from your own station will be displayed.
Symbol: The symbol of the radio station will be displayed.
Callsign: The received station callsign will be displayed.
Partner station information:
The fixed station information (FIXED) will be displayed.
Distance: Distance to the received station will be displayed.
Date: The date the beacon was received (MM/DD) will be displayed.
Time: The time the beacon was received (HH:MM) will be displayed.
Altitude: The altitude of the partner station will be displayed.
Latitude: The N (north latitude) or S (south latitude) of the current position will be displayed (DDMM.MM or DDMMSS).
Longitude: The E (east longitude) or W (west longitude) of the current position will be displayed (DDMM.MM or
DDMMSS).
COMMENT TEXT: The comment’s information will be displayed.
yOperation
Scroll the screen Rotate the DIAL knob.
Select the beacon to display Press the DIAL knob to display , then
rotate the DIAL knob.
Move to the top of the detail screen display [F(SETUP)]→[TOP]
Move to the top of the COMMENT TEXT [F(SETUP)]→[TEXT]
Display the packet data (raw data) [F(SETUP)]→[RAW]
Manual transmission of a beacon (page 23) [F(SETUP)]→[BCN-TX]
Delete a selected beacon station from the display (page 22) [F(SETUP)]→[DEL]
Sets the frequency of the opposite band of the APRS operating band
according to the frequency information included in the beacon.
[F(SETUP)]→[QSY]
Setup menu (page 37) Press and hold the [F(SETUP)] key.

13
yExplanation of the detail screen display in a P (Position: Fixed station) APRS
STATION LIST and description of operations
Rotate the DIAL knob in the APRS STATION LIST screen to select the “P” station and
press the DIAL knob to display the P (Position) detailed screen. Detailed information
known as the PHGR code may be included in the position information.
FIXED 04/07
15114km 10:09
Power 50W
Height 25m
Gain 5dB
A-Dir 120
P-Rate 35
N 36
43
.
17
�
E 139
47
.
35
�
① ② ④ ⑤ ⑥ ⑦
⑧
⑨
⑩
⑪
⑫
⑬
⑭
⑮
⑯
③
Number: The number of received beacon (up to a maximum of 100).
Character: The station list characters will be displayed.
Compass: The direction of the partner station as seen from your own station will be displayed.
Symbol: The symbol of the radio station will be displayed.
Callsign: The received station callsign will be displayed.
Partner station information:
The fixed station information (FIXED) will be displayed.
Distance: Distance to the received station will be displayed.
Date: The date the beacon was received (MM/DD) will be displayed.
Time: The time the beacon was received (HH:MM) will be displayed.
Transmission power: The transmission power of the partner station will be displayed.
Antenna ground height: The antenna ground height of the other station will be displayed.
Antenna gain: The antenna gain of the partner station will be displayed.
Antenna direction: The antenna direction of the partner station will be displayed.
P-Rate: The probe rate will be displayed.
Latitude: The N (north latitude) or S (south latitude) of the current position will be displayed (DDMM.MM
or DDMMSS).
Longitude: The E (east longitude) or W (west longitude) of the current position will be displayed (DDMM.
MM or DDMMSS).
COMMENT TEXT: The comments information will be displayed.
yOperation
Scroll the screen Rotate the DIAL knob.
Select the beacon to display Press the DIAL knob to display , then
rotate the DIAL knob.
Move to the top of the detail screen display [F(SETUP)]→[TOP]
Move to the top of the COMMENT TEXT [F(SETUP)]→[TEXT]
Display the packet data (raw data) [F(SETUP)]→[RAW]
Manual transmission of a beacon (page 23) [F(SETUP)]→[BCN-TX]
Delete a selected beacon station from the display (page 22) [F(SETUP)]→[DEL]
Sets the frequency of the opposite band of the APRS operating band
according to the frequency information included in the beacon.
[F(SETUP)]→[QSY]
Setup menu (page 37) Press and hold the [F(SETUP)] key.

14
yExplanation of the detail screen display in a P (Position: Moving station) APRS
STATION LIST and description of operations
Rotate the DIAL knob in the APRS STATION LIST screen to select the “P” station and
press the DIAL knob to display the P (Position) detailed screen. Movement-related
information (Speed, Course), if any, will be displayed as follows.
MOVING 04/07
15114km 10:09
Speed 30km/h
Course 45
Alt 240m
N 36
43
.
17
�
E 139
47
.
35
�
[
COMMENT TEXT
]
① ② ④ ⑤ ⑥⑦
⑧
⑨
⑩
⑪
⑫
⑬
⑭
⑮
③
Number: The number of received beacon (up to a maximum of 100).
Character: The station list characters will be displayed.
Compass: The direction of the partner station as seen from your own station will be displayed.
Symbol: The symbol of the radio station will be displayed.
Callsign: The received station callsign will be displayed.
Partner station information:
The fixed station information (MOVING) will be displayed.
Distance: Distance to the received station will be displayed.
Date: The date the beacon was received (MM/DD) will be displayed.
Time: The time the beacon was received (HH:MM) will be displayed.
Speed: The moving speed of the partner station will be displayed.
Direction: The direction of movement of the partner station will be displayed.
Altitude: The altitude of the partner station will be displayed.
Latitude: The N (north latitude) or S (south latitude) of the current position will be displayed (DDMM.MM or DDMMSS).
Longitude: The E (east longitude) or W (west longitude) of the current position will be displayed (DDMM.MM or
DDMMSS).
COMMENT TEXT: The comments information will be displayed.
•Operation
Scroll the screen Rotate the DIAL knob.
Select the beacon to display Press the DIAL knob to display , then
rotate the DIAL knob.
Move to the top of the detail screen display [F(SETUP)]→[TOP]
Move to the top of the COMMENT TEXT [F(SETUP)]→[TEXT]
Display the packet data (raw data) [F(SETUP)]→[RAW]
Manual transmission of a beacon (page 23) [F(SETUP)]→[BCN-TX]
Delete a selected beacon station from the display (page 22) [F(SETUP)]→[DEL]
Sets the frequency of the opposite band of the APRS operating band
according to the frequency information included in the beacon.
[F(SETUP)]→[QSY]
Setup menu (page 37) Press and hold the [F(SETUP)] key.

15
yExplanation of the detail screen display in a W (weather report: meteorological
station) APRS STATION LIST and description of operations
Rotate the DIAL knob in the APRS STATION LIST screen to select the “W” (Weather report)
station and press the DIAL knob to display the W or w (Weather report) detailed screen.
WEATHER 04/07
15114km 10:09
Temp 25
C
RainH 1.6mm
RainD 5.8mm
RainN 3.2mm
W-Dir 220
W-Spd 1.6m/s
Gust 3.2m/s
① ② ④ ⑤ ⑥⑦
⑧
⑨
⑩
⑪
⑫
⑬
⑭
⑮
⑯
③
Number: The number of received beacon (up to a maximum of 100).
Character: The station list characters will be displayed.
Compass: The direction of the partner station as seen from your own station will be displayed.
Symbol: The symbol of the radio station will be displayed.
Callsign: The received station callsign will be displayed.
Partner station information: The meteorological station (weather) information will be displayed.
Distance: Distance to the received station will be displayed.
Date: The date the beacon was received (MM/DD) will be displayed.
Time: The time the beacon was received (HH:MM) will be displayed.
Temperature: The temperature information will be displayed.
Rainfall: Information on the rainfall per hour will be displayed.
Rainfall: Information on the rainfall per day will be displayed.
Rainfall: Information on the rainfall from midnight onwards will be displayed.
Wind direction: Information on the maximum direction will be displayed.
Wind speed: Wind speed information will be displayed.
Maximum wind speed: Information on maximum wind speed will be displayed.
Atmospheric pressure: Information on the atmospheric pressure will be displayed
Humidity:
Information on the humidity will be displayed.
Maximum wind speed: Information on maximum wind speed will be displayed.
Latitude: The N (north latitude) or S (south latitude) of the current position will be displayed (DDMM.MM or DDMMSS).
Longitude: The E (east longitude) or W (west longitude) of the current position will be displayed (DDMM.MM or DDMMSS).
•Operation
Scroll the screen Rotate the DIAL knob.
Select the beacon to display Press the DIAL knob to display ,
then rotate the DIAL knob.
Move to the top of the detail screen display [F(SETUP)]→[TOP]
Move to the top of the COMMENT TEXT [F(SETUP)]→[TEXT]
Display the packet data (raw data) [F(SETUP)]→[RAW]
Manual transmission of a beacon (page 23) [F(SETUP)]→[BCN-TX]
Delete a selected beacon station from the display (page 22) [F(SETUP)]→[DEL]
Sets the frequency of the opposite band of the APRS operating band
according to the frequency information included in the beacon.
[F(SETUP)]→[QSY]
Setup menu (page 37) Press and hold the [F(SETUP)] key.

16
yExplanation of the detail screen display in a O (Object) or I (Item) APRS STATION
LIST and description of operations
Rotate the DIAL knob in the APRS STATION LIST screen to select the “O” (Object) or
“” (Item) station and press the DIAL knob to display the O (Object) or I (Item) detailed
screen.
JA1ZRL-9
OBJECT 04/07
15114km 10:09
N 36
43
.
17
�
E 139
47
.
35
�
[
COMMENT TEXT
]
① ② ④ ⑤
⑨
⑩
⑪
⑫
⑬
③⑥ ⑦⑧
Number: The number of received beacon (up to a maximum of 100).
Character: The station list characters will be displayed.
Compass: The direction of the partner station as seen from your own station will be displayed.
Symbol: The symbol of the radio station will be displayed.
Station name:The object name / item name of the received beacon will be displayed.
Callsign: The received station callsign will be displayed.
Partner station information:
The fixed station information (OBJECT) will be displayed.
Distance: Distance to the received station will be displayed.
Date: The date the beacon was received (MM/DD) will be displayed.
Time: The time the beacon was received (HH:MM) will be displayed.
Latitude: The N (north latitude) or S (south latitude) of the current position will be displayed (DDMM.MM or DDMMSS).
Longitude: The E (east longitude) or W (west longitude) of the current position will be displayed (DDMM.MM or
DDMMSS).
COMMENT TEXT:
The comment’s information will be displayed.
•Operation
Scroll the screen Rotate the DIAL knob.
Select the beacon to display Press the DIAL knob to display ,
then rotate the DIAL knob.
Move to the top of the detail screen display [F(SETUP)]→[TOP]
Move to the top of the COMMENT TEXT [F(SETUP)]→[TEXT]
Display the packet data (raw data) [F(SETUP)]→[RAW]
Manual transmission of a beacon (page 23) [F(SETUP)]→[BCN-TX]
Delete a selected beacon station from the display (page 22) [F(SETUP)]→[DEL]
Sets the frequency of the opposite band of the APRS operating band
according to the frequency information included in the beacon.
[F(SETUP)]→[QSY]
Setup menu (page 37) Press and hold the [F(SETUP)] key.

17
yExplanation of the detail screen display in a S (Status) APRS STATION LIST and
description of operations
Rotate the DIAL knob in the APRS STATION LIST screen to select the “S” (Status) station
and press the DIAL knob to display the S (Status) detailed screen.
STATUS 04/07
15114km 10:09
N 36
43
.
17
�
E 139
47
.
35
�
[COMMENT TEXT ]
① ② ④
⑦⑧
⑨⑩
⑪
③⑤ ⑥
Number: The number of received beacon (up to a maximum of 100).
Character: The station list characters will be displayed.
Compass: The direction of the partner station as seen from your own station will be displayed.
Callsign: The received station callsign will be displayed.
Partner station information:
Status information will be displayed.
Distance: Distance to the received station will be displayed.
Date: The date the beacon was received (MM/DD) will be displayed.
Time: The time the beacon was received (HH:MM) will be displayed.
Latitude: The N (north latitude) or S (south latitude) of the current position will be displayed (DDMM.MM or
DDMMSS).
Longitude: The E (east longitude) or W (west longitude) of the current position will be displayed (DDMM.MM or
DDMMSS).
COMMENT TEXT: The comments information will be displayed.
•Operation
Scroll the screen Rotate the DIAL knob.
Select the beacon to display Press the DIAL knob to display ,
then rotate the DIAL knob.
Display the packet data (raw data) [F(SETUP)]→[RAW]
Manual transmission of a beacon (page 23) [F(SETUP)]→[BCN-TX]
Delete a selected beacon station from the display (page 22) [F(SETUP)]→[DEL]
Sets the frequency of the opposite band of the APRS operating band
according to the frequency information included in the beacon.
[F(SETUP)]→[QSY]
Setup menu (page 37) Press and hold the [F(SETUP)] key.

18
yExplanation of the detail screen display in a G (Raw GPS) APRS STATION LIST
and description of operations
Rotate the DIAL knob in the APRS STATION LIST screen to select the “G” (Raw GPS)
station and press the DIAL knob to display the G (Raw GPS) detailed screen.
GGA/GLL 04/07
15114km 10:09
Alt 240m
N 36
43
.
17
�
E 139
47
.
35
�
① ② ④
⑦⑧
⑨⑩
⑪
③ ⑤ ⑥
Number: The number of received beacon (up to a maximum of 100).
Character: The station list characters will be displayed.
Compass: The direction of the partner station as seen from your own station will be displayed.
Callsign: The received station callsign will be displayed.
Partner station information:
Raw GPS (Raw NMEA data) information will be displayed.
Distance: Distance to the received station will be displayed.
Date: The date the beacon was received (MM/DD) will be displayed.
Time: The time the beacon was received (HH:MM) will be displayed.
Altitude: The altitude of the partner station will be displayed.
Latitude: The N (north latitude) or S (south latitude) of the current position will be displayed (DDMM.MM or DDMMSS).
Longitude: The E (east longitude) or W (west longitude) of the current position will be displayed (DDMM.MM or
DDMMSS).
•Operation
Scroll the screen Rotate the DIAL knob.
Select the beacon to display Press the DIAL knob to display ,
then rotate the DIAL knob.
Display the packet data (raw data) [F(SETUP)]→[RAW]
Manual transmission of a beacon (page 23) [F(SETUP)]→[BCN-TX]
Delete a selected beacon station from the display (page 22) [F(SETUP)]→[DEL]
Sets the frequency of the opposite band of the APRS operating band
according to the frequency information included in the beacon.
[F(SETUP)]→[QSY]
Setup menu (page 37) Press and hold the [F(SETUP)] key.

19
yExplanation of the detail screen display in a ? (Other) APRS STATION LIST and
description of operations
Rotate the DIAL knob in the APRS STATION LIST screen to select the “?” (Other) station
and press the DIAL knob to display the ? (Other) detailed screen.
This is displayed when a packet that cannot be interpreted as an APRS beacon is received.
OTHER 04/07
10:09
[COMMENT TEXT ]
① ② ③
⑤
⑥
⑦
④
Number: The number of received beacon (up to a maximum of 100)
Character: The station list characters will be displayed.
Callsign: The received station callsign will be displayed.
Partner station information:
Other packet information will be displayed.
Date: The date the beacon was received (MM/DD) will be displayed.
Time: The time the beacon was received (HH:MM) will be displayed.
COMMENT TEXT: The comments information will be displayed.
•Operation
Scroll the screen Rotate the DIAL knob.
Select the beacon to display Press the DIAL knob to display ,
then rotate the DIAL knob.
Display the packet data (raw data) [F(SETUP)]→[RAW]
Manual transmission of a beacon (page 23) [F(SETUP)]→[BCN-TX]
Delete a selected beacon station from the display (page 22) [F(SETUP)]→[DEL]
Sets the frequency of the opposite band of the APRS operating band
according to the frequency information included in the beacon.
[F(SETUP)]→[QSY]
Setup menu (page 37) Press and hold the [F(SETUP)] key.
Other manuals for FTM-300DR
6
This manual suits for next models
1
Table of contents
Other Yaesu Transceiver manuals

Yaesu
Yaesu FT-7800R Manual

Yaesu
Yaesu FT 201 User manual

Yaesu
Yaesu FT-80C - SERVICE User manual

Yaesu
Yaesu FT-2800M User manual

Yaesu
Yaesu FT-8900R User manual

Yaesu
Yaesu FT-757GX II User manual

Yaesu
Yaesu FT-51R Manual

Yaesu
Yaesu FT-1802M User manual

Yaesu
Yaesu FT-710 Use and care manual

Yaesu
Yaesu FT-857D User manual

Yaesu
Yaesu FT-2000 - MENU MODE LIST User manual

Yaesu
Yaesu FT-5100 User manual

Yaesu
Yaesu FT-23R MKII Manual

Yaesu
Yaesu FT-891 Product guide

Yaesu
Yaesu FT-2800M Manual

Yaesu
Yaesu FT-1907R User manual

Yaesu
Yaesu FT-857 series User manual

Yaesu
Yaesu FT-707 Manual

Yaesu
Yaesu FT-857 series User manual

Yaesu
Yaesu FTH-2006 Owner's manual