FTM-100DE
1. Turn the transceiver OFF.
2. Connect the supplied microphone MH-48A6JA to the
transceiver.
3. Press and hold the [A/B(DW)] and [GM] keys while turn-
ing the transceiver ON.
4. Press the [Power] key briey, then “LOCK” will appear on
the display for one sec.
5. Press
[8]à[3]à[7]à[8]à[3]à[7]keys on the MH-
48A6JA microphone.
6. Press the [Power] key briey, then “UNLOCK” will appear
on the display for one sec.
7. Press and hold the [DISP(SETUP)] key.
8. Rotate the DIAL to select [13 RST/CLONE], then press
the [DISP(SETUP)] key.
9. Rotate the DIAL to select [8 SOFTWARE VERSION],
then press the [DISP(SETUP)] key.
FT-70DE
10. The ARS Conguration name “Region “EXP” Type “B2”
will appear in the
bottom on the dis-
play.
11. Press [BAND(MHz)] key, then the message <FROM “B2”
TO “C2”> appears on the display.
12.Rotate the DIAL to select [OK?], and then press the
[DISP(SETUP)] key. The radio will re-start automatically.
Setting of the ARS feature to “Conguration C2” is suc-
cessfully complet-
ed.
TorestoretheARSfeaturesettingtothefactorydefault(B2),
performthesameproceduresabove.
FT-4XE / FT-65E
1. Turn the transceiver OFF.
2.
Press and hold the MONI/T.CALL key and the PTT switch
simultaneously, while turning the transceiver ON.
3. When the LCD backlight comes on, release the MONI/
T.CALL key and PTT switch.
4. Press the [0]à[2]à[2]keys.
The radio will re-start automatically. Setting of the ARS
feature to “Conguration C2” is successfully completed.
TorestoretheARSfeaturesettingtothefactorydefault(B2),
performthesameproceduresabove.
1. Turn the transceiver ON.
2. Press and hold the [F]key.
3. Rotate the DIAL knob to select “36 OPN.MSG” and then
press the [F]key.
4. Rotate the DIAL knob to select “MSG” and then press
the [V/M]key.
5. Enter “AH051M”.
1) Press the [2] to select “A”.
2) Press the [4] two times to select “H”.
3) Press the [0] to select “0”.
4) Press the [5]four times to select “5”.
5) Press the [1] to select “1”.
6) Press the [6] to select “M”.
6. Press the [PTT] switch, the screen that was shown when
the transceiver was turned ON will reappear on the dis-
play.
7. Turn the transceiver OFF.
8. Press and hold the [HM/RV]and [GM] keys while turning
the transceiver ON.
9. <TYP.B2> appears in the display.
10.Rotate the DIAL knob to select
<TYP.C2> and touch the [F]key.
The radio will re-start automatical-
ly. Setting of the ARS feature to
“Conguration C2” is successfully completed.
TorestoretheARSfeaturesettingtothefactorydefault(B2),
performthesameproceduresabove.
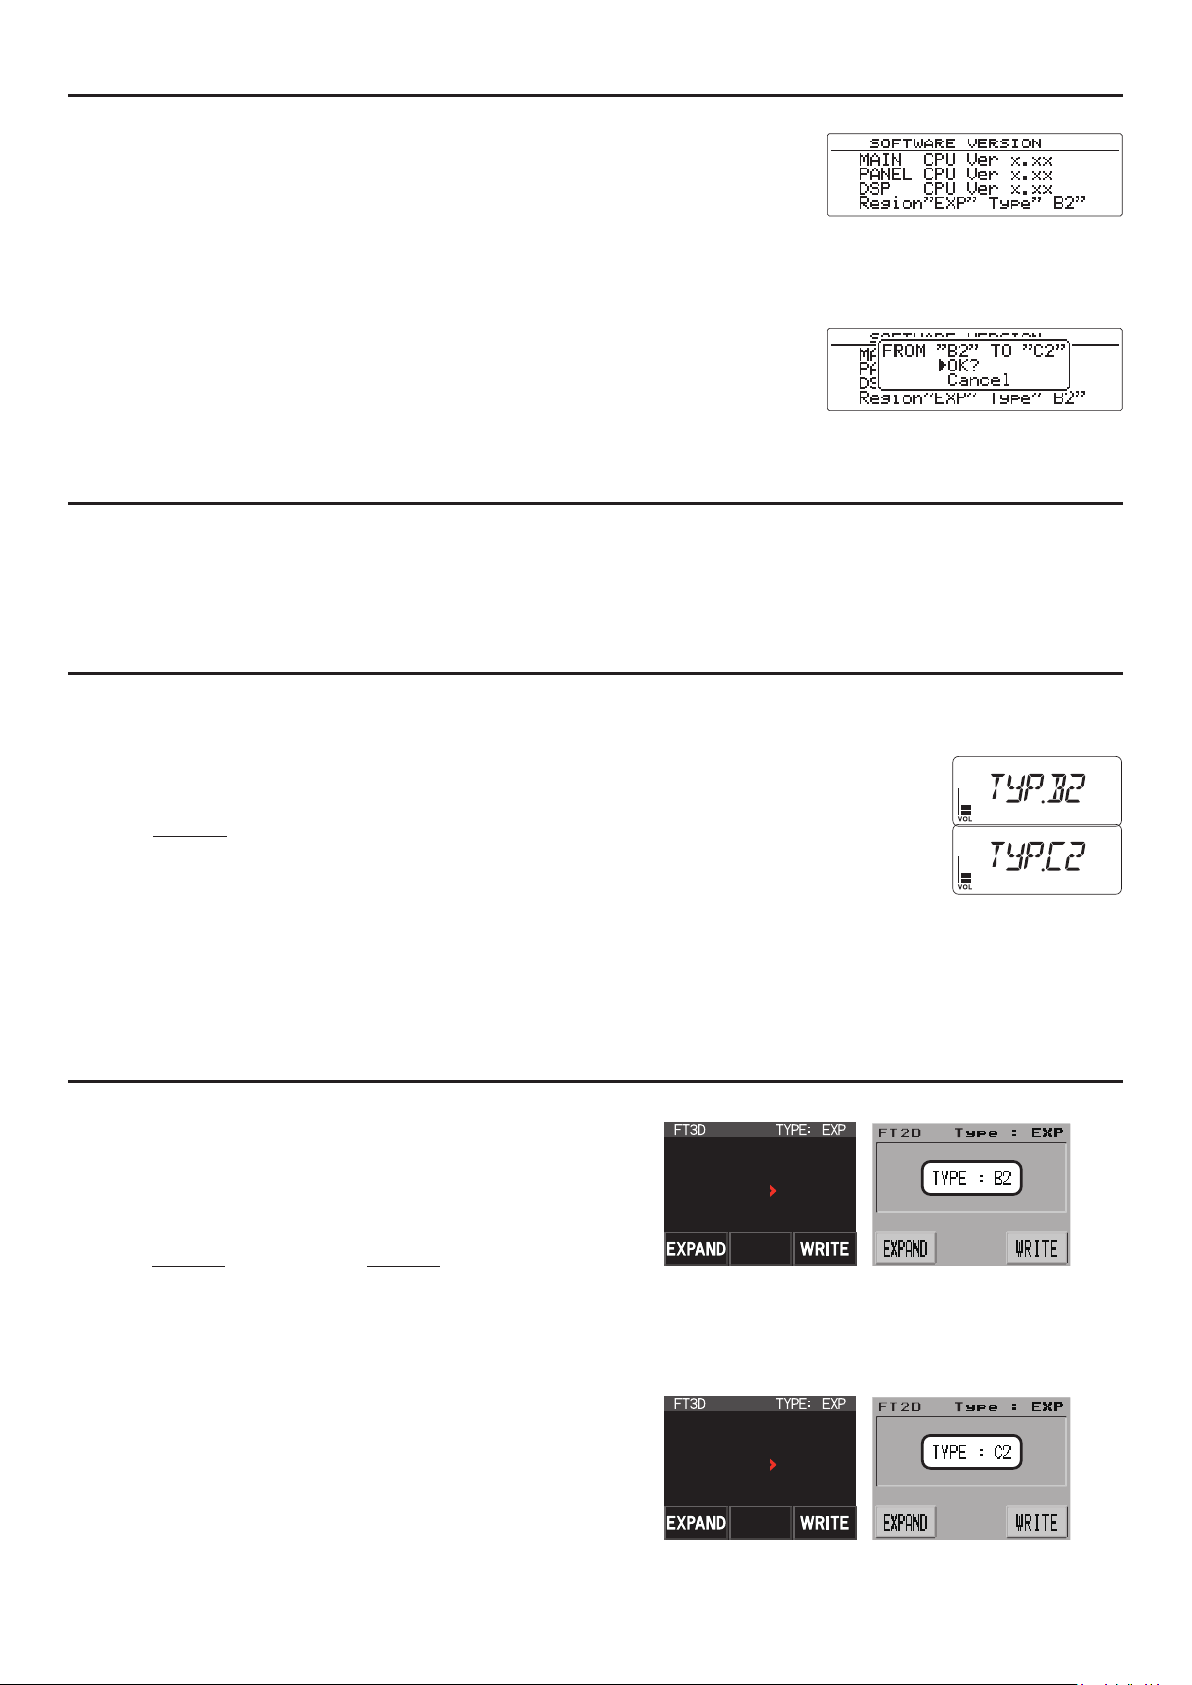
FT3DE / FT2DE
1. Turn the transceiver ON.
2.
Press and hold the [DISP]key, then touch the [DISPLAY].
3. Rotate the DIAL knob to select “7 OPENING MESSAGE”
(for FT3DE) or “8 OPENING MESSAGE” (for FT2DE)
and then press the [DISP]key.
4. Rotate the DIAL knob to select “MESSAGE” and then
press the [DISP]key.
5.
Enter “AH072M” (for FT3DE) or “AH060M” (for FT2DE)
.
1) Touch the [abc]four times to select “A”, then touch
the [Æ].
2) Touch the [ghi] ve times to select “H”, then touch the
[Æ].
3) Touch the [123]to display the numeric keypad input
screen.
4) FT3DE: Touch the [0]à[7]à[2]à[Æ].
FT2DE: Touch the [0]à[6]à[0]à[Æ].
5)
Touch the [ABC]to display the alphabet input screen.
6) Touch the [mno]four times to select “M”.
6. Press the [PTT] switch, the screen that was shown when
the transceiver was turned ON will reappear on the dis-
play.
7. Turn the transceiver OFF.
8. Press and hold the [X]and [GM] keys while turning the
transceiver ON.
9. <TYPE : B2> appears in the display.
TYPE : B2
FT3DE FT2DE
10.Rotate the DIAL knob to select <C2> and touch the
[WRITE] key. The radio will re-start automatically. Set-
ting of the ARS feature to “Conguration C2” is success-
fully completed.
TYPE : C2
FT3DE FT2DE
TorestoretheARSfeaturesettingtothefactorydefault(B2),
performthesameproceduresabove.


