Yamaha ClickStation CLST-100 User manual

2
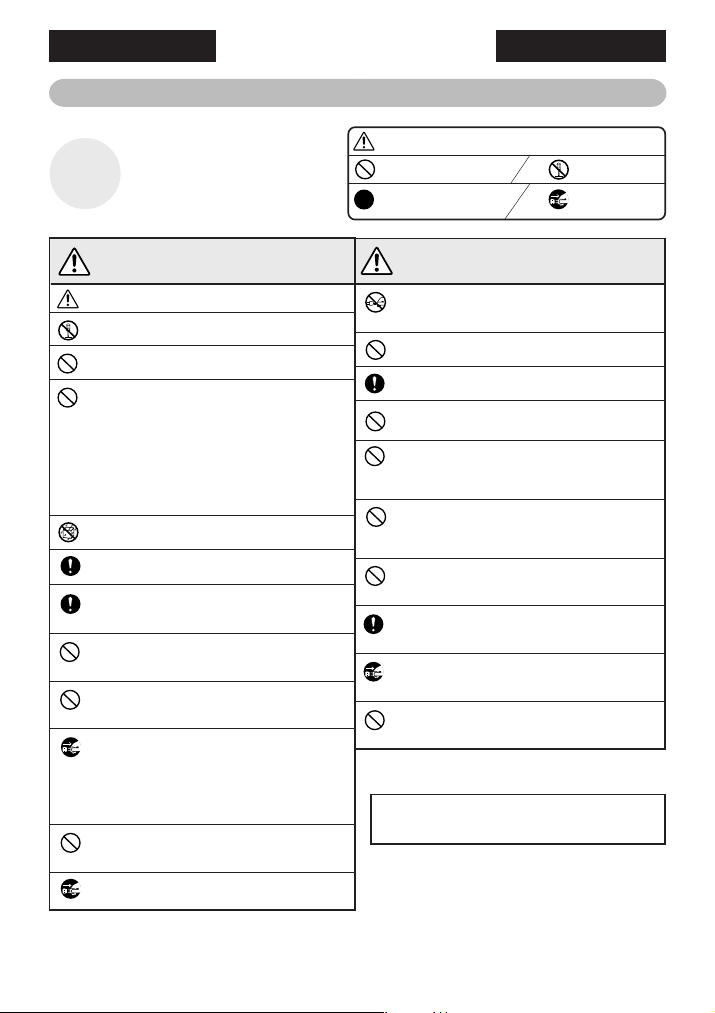
火災・感電・人身傷害の危険を防止するには 〜以下の指示を必ず守ってください〜
この「安全へのこころがけ」は製品を安
全に正しくお使いいただき、お客様や他
の人々への危害や財産への損害を未然
に防止するために、いろいろな絵表示を
使って説明しています。
絵表示の意味をよく理解してから、本文
をお読みください。
注意(危険・警告を含む)を促す内容があることを告げるものです。
禁止の行為を告げるものです。
行為を強制したり指示する内容
を告げるものです。
例: →分解禁止
例: →電源プラグをコン
セントから抜く
絵表示に
ついて
この機器を使用する前に以下の指示と取扱説明書をよく読んでください。
この機器を分解したり、改造したりしないでください。
火災、感電の原因となります。
修理/部品の交換などで、取扱説明書に書かれている以外のことは、絶対
にしないでください。必ずサービスセンターに相談してください。
次のような場所での使用や保存はしないでください。
火災、感電の原因となります。
●温度が極端に高い場所(直射日光の当たる場所、暖房機器
の近く、発熱する機器の上など)
●温度が極端に低い場所
●
水気の近く(風呂場、洗面台、濡れた床など)や湿度の高い場所
●ホコリの多い場所
●振動の多い場所
※特に自動車内は直射日光などにより非常に高温となります。
この機器を車内に放置しないでください。
本体の上に花瓶や薬品など液体の入ったものを置かないでください。
火災、感電、故障などの原因となります。
電源アダプターは、必ず指定のものをお使いください。異なった電
源アダプターの使用は、故障、発火などの原因になります。
電源アダプターは、必ずAC100Vの電源コンセントに接続して使
用してください。エアコンの電源などAC200Vのものがありま
す。誤って接続すると火災、感電、故障などの原因となります。
電源アダプターコードをストーブなどの熱器具に近づけたり、無理
に曲げたり、重いものを乗せたり、傷つけたりしないでください。
電源アダプターコードが破損し、感電や火災の原因になります。
この機器に、異物(燃えやすいもの、硬貨、針金など)や液体(水
やジュースなど)を絶対に入れないでください。感電や火災の原
因になります。
次のような場合は、直ちに電源スイッチを切り電源アダプタープラグをコ
ンセントから抜いて、サービスセンターに修理を依頼してください。
●電源アダプターのコードやプラグが破損した場合
●使用中に音が出なくなったり異常なにおいや煙が出た場合
●異物が内部に入ったり、液体がこぼれた場合
●機器が(雨などで)濡れた場合
●機器に異常や故障が生じた場合
ぐらついた台の上や傾いた所など、不安定な場所に置かないで
ください。また、過度に積み重ねての使用はしないでくださ
い。落ちたり倒れたりして、けがの原因となります。
長期間使用しないときや落雷のおそれがあるときは、必ずコン
セントから電源アダプタープラグを抜いておいてください。
警告 この表示を無視して誤った取扱いをする
と、人が死亡又は重傷を負う危険の恐れ
がある内容を示しています。
電源アダプタープラグを抜くときは、電源コードを持たずに、必
ず電源プラグを持って引き抜いてください。電源コードが破損し
て、感電や火災が発生するおそれがあります。
タコ足配線はしないでください。音質が劣化したり、コンセント
部が異常発熱して発火したりすることがあります。
本機の電源を入れる際は、必ずVOLUMEコントロールを0にした状態で
行なってください。感電または機器の損傷のおそれがあります。
雑音を発生する装置(モーター、調光器など)や消費電力の大きな
機器とは別のコンセントをお使いください。
本機の近くにパワーアンプなどの大型トランスを持つ機器がある
場合、ハムやうなりが生じることがあります。その場合は、本機
との向きや距離を変えてみてください。また、雑音の原因となる
ネオンや蛍光灯からは十分に離してご使用ください。
本体のお手入れは、必ず柔らかい布で乾拭きしてください。ベンジ
ンやシンナー、洗剤、化学ぞうきんなどは絶対に使用しないでくだ
さい。また、本体上にビニール製品やプラスチック製品などを置か
ないでください。本体の変色や変質の原因になります。
物をぶつけたり、落としたりの乱暴な取り扱いや、ボタンやスイッチ、
入出力端子などに無理な力を加えたりしないでください。製品に悪い影
響を与え、性能を劣化させます。また、思わぬけがの原因となります。
本体を移動するときは、必ず電源アダプターコードなどの接続
ケーブルをすべて外した上で行なってください。コードをいため
たり、お客様が転倒したりするおそれがあります。
手入れをするときは、必ず電源アダプタープラグをコンセントか
ら抜いてください。また、濡れた手で電源アダプタープラグを抜
き差ししないでください。感電のおそれがあります。
電源アダプタープラグにホコリが付着している場合は、ホコリを
きれいに拭き取ってください。そのままの使用は火災、感電、故
障などの原因となります。
この表示を無視して誤った取扱いをすると、
人が障害を負ったり、財産が損害を受ける危
険の恐れがある内容を示しています。
注意
安全へのこころがけ
不適切な使用や改造により故障した場合の保証は致しかねま
す。また、データが破損したり失われたりした場合の保証は
致しかねますので、ご了承ください。
使用後は、必ず電源を切りましょう。

3
楽しい音楽も時と場所によってはたいへん気になるものです。隣近所への配慮を充分にいたしましょう。静かな
夜間には小さな音でもよく通り、特に低音は床や壁などを伝わりやすく、思わぬ所で迷惑をかけてしまうことが
あります。適度な音量を心がけ、窓を閉めたりヘッドフォンをご使用になるのもひとつの方法です。ヘッドフォ
ンをご使用になる場合には、耳をあまり刺激しないよう適度な音量でお楽しみください。
音楽を楽しむエチケット
これは日本電子機械工業会「音のエチケット」キャンペーンのシンボルマークです。
このたびはヤマハクリックステーションをお買い求めいただ
き、まことにありがとうございます。クリックステーションの
機能を充分活用するために、この取扱説明書をよくお読みに
なってからご使用ください。なお、ご一読いただいたあとも、
不明な点が生じた場合に備えて、保証書とともに大切に保管し
ていただきますようお願い申し上げます。
仕様
メトロノーム
テンポ:35〜300回/分
ビート:BEAT1:0〜9
BEAT2(複合ビート):ー〜9
テンポ精度:0.16%
バイブレーション:テンポに応じてバイブレー
ションユニットが振動
テンポLED:テンポ/ビートに応じて点灯
基準音
発音範囲:C2〜B6
基準ピッチ:438〜446Hz
発音精度:±1Cent
メモリー
メモリー数:86ソング
チェインプログラム:10
ステップ数:20ソング(1プログラムにつき)
入出力
TRIGGERIN:標準モノラルフォンジャック
MIDIIN:DIN規格5ピン
AUXIN:標準ステレオジャック
DCIN:9V
PHONE:標準ステレオフォンジャック/ミニス
テレオフォンジャック
スピーカー
57mmx1
電源
電源アダプター(PA-3C)または6LR61乾電池x1
寸法/重量
170x122x37mm/395g(乾電池含む)
付属品
チルトアングル、蝶ネジ、6LR61乾電池、
取扱説明書(本書)
*仕様および外観は、改良のため予告なく変更することがあります。

4
各部の名称
■フロントパネル
qディスプレイ
wビートスライダー
eバイブレーションスライダー(VIB.)
rボリュームスライダー(VOL)
tバイブレーター(VIBRATION)
yスピーカー
uビートインジケーター
iコントロールボタン
o
スタート/ストップボタン(タップボタン兼用)
(TAPSTART/STOP)
!0 テンポダイアル(TEMPO)
!1 バックライトボタン
(自動消灯/連続点灯選択可能、9ページ参照)
■サイドパネル
!2 ヘッドフォン端子(PHONES)
!3 電源スイッチ(POWERON/OFF)
!4 ミディイン端子(MIDIIN)
■リアパネル
!5 外部入力端子(AUXIN)
!6 トリガーイン端子(TRIGGERIN)
!7 アタッチメント取り付けホルダー
!8 電源アダプター接続端子(DCIN9V)
標準ジャック/
ミニジャック
が両方同時に
使えます。
MIDI機器
DTXパッドなど
CDプレーヤーなど 電源アダプター(別売)
❑アタッチメント取付方法
付属のチルトアングルを取り付けると、机の上な
どに置きながら使用することができます。
下記参照
チルトアングル(付属)
蝶ネジ(付属)
また、別売のマウントアダプターやマイクスタン
ドアダプターを組み合わせることにより、クリッ
クステーションをマイクスタンド、シンバルスタ
ンド、カウベルホルダーなどに取り付けることが
できます。

5
電源の準備
■乾電池を使用する場合
1. 市販のアルカリ乾電池(6LR61:9V, S-
006P)を1個用意します。
*マンガン乾電池をご使用になると、乾電池に
よっては極端に電池寿命が短くなることがあ
ります。
2. 本機の電源スイッチがOFFになっているこ
とを確認し、リアパネルの電池カバーを外し
ます。
3. 用意した乾電池を、向きと極性(+/-)を確認
してバッテリースナップに取り付け、電池カ
バーを閉めます。
■電源アダプターを使用する場合
1. 本機の電源スイッチがOFFになっているこ
とを確認し、電源アダプターのDCプラグを
本機のDCIN9V端子に差し込みます。
2. 電源アダプターのA C プラグを家庭用
(AC100V)コンセントへ差し込みます。
*乾電池が消耗すると、音が小さくなったり
ディスプレイ表示が薄くなります。そのよう
なときは、乾電池を新品に交換してくださ
い。
*乾電池が入っている状態で電源アダプターを
接続すると、電源は自動的に電源アダプター
から供給されます。
*電源アダプターは、必ず指定のものをご使用
ください。他の電源アダプターの使用は、故
障や発火などの原因になります。このような
場合は、保証期間内でも保証いたしかねる場
合がございますので、充分にご注意くださ
い。
電源アダプター
電源アダプター
接続端子
メモリーのバックアップに関する注意
・本機は、乾電池や電源アダプターを外した時の、データバックアップ機能を持っていません。
・乾電池や電源アダプターを外した状態で放置すると、作成したソングやチェインプログラムのデータは消
滅します。
・記憶したデータを消さずに電池交換をするには、電源アダプターを接続した状態で電池交換するか、
電池が完全に無くなる前に、3分以内で電池交換を完了してください。
・乾電池が消耗すると、バイブレーターの振動が弱くなります。
・液晶表示が暗くなってきたら、お早めに乾電池を交換してください。

6
メトロノームを使用する
メトロノームを鳴らそう
qCLICKボタンを押します。
wSTART/STOPボタンを押すと、メトロ
ノームがスタートします。
eスライドボリュームの4分音符とVOLを上
げると、音が聞こえます。
*VOLスライダーは本機の主音量です。VOLス
ライダーが「0」(一番下の状態)では、音は鳴り
ません。
【バイブレーションを活用する】
rVIBRATIONを押さえると、メトロノーム
に合わせて振動します。メトロノームが止
まっているときは振動とビートインジケー
ターの点滅だけになります。
振動の強さはVIB.スライダーで変えます。
ビートの音量を変えよう
qビートボリュームを変えると、ビートの各
音量を変えることができます。(上図)
テンポを変更しよう
zTEMPOダイアルを回すと、テンポ(35〜
300)が変わります。
【テンキーを使ってテンポを入力するには】
z
TYPETEMPOボタンを押します。(ランプ点灯)
xテンキーを押してテンポ値を入力します。
cSTART/STOPボタンを押すと、入力した
テンポでメトロノームがスタートします。
v入力を終わるときは、TYPETEMPOボタ
ンを押します。(ランプ消灯)
*TYPETEMPOのランプが点灯している状態で
は、テンキーは数値入力モードになっていま
す。CLICKやSEARCHなどの機能ボタンとし
て使う場合は、TYPETEMPOのランプを消灯
させてください。
*メトロノームが鳴っているときにテンポを変
更する場合
・手順
cでSTART/STOPボタンを押すと、
押した時点でテンポが切り替わります(小
節頭からスタート)。
・手順
cでTYPETEMPOボタンを押すと、
押した時の次の拍からテンポが切り替わり
ます。
ビートを変更しよう
BEATボタンを押すと、ディスプレイ左上
BEATの数字が点滅します。点滅中にBEATボ
タンを押すと、0〜9の間でビートを設定でき
ます。2秒以上そのままにしていると、ビート
の設定が確定し、元の画面に戻ります。
*ビートを設定すると、1拍目にACC.の音が鳴
ります。「0」にするとACC.は鳴りません。
【ビート2を設定して、複合ビートを作る】
BEATボタンを2秒以上押すと、BEAT隣の
COUNTの数字が点滅します。点滅中にBEAT
ボタンを押すと、−〜9の間でビート2を設定
できます。2秒以上そのままにしていると、
ビートの設定が確定し、元の画面に戻ります。
*ビート2を設定すると、2小節の複合ビート(変
拍子)を作ることができます。

7
設定したソングを保存しよう
本機では、設定したメトロノームパターンをソ
ングと呼びます。作成したソングに名前を付け
て、最大86個まで記憶させることができま
す。
1. STOREボタンを押すと、STORE画面にな
り、ソング名が点滅します。
2. SONG/STEP−/+ボタンを押して、保存
したいソングナンバーを選びます。
3. TEMPOダイアルを回して文字を選び、
BEAT(CURSOR)ボタンを押して決定し、
カーソルを右へ動かします。
4. START/STOPボタンを押すと、ディスプ
レイのSTOREが2回点滅して、ソングが保
存されます。
ソングを呼び出そう
本機に記憶されているソングは、SONG/
STEP−/+ボタンを押して選びます。
【ソングを検索するには】
1. SEARCHボタンを押すと、SEARCH画面
になり、ソングネームが点滅します。
2. TEMPOダイアルを回して、保存したソン
グネームの最初の文字を入力します。
3. START/STOPボタンを押すと、入力した
文字から始まるソングが表示されます。も
う一度START/STOPボタンを押すと、次
のソングネームが表示されます。
タップ
タップでテンポを入力しよう
1. TAPボタンを押してTAPモードにします。
2. START/STOP(TAP)ボタンを好きな速さ
で叩くと、叩いた速さを計測し、ディスプレ
イにテンポ値が表示されます。
3. 表示されたテンポ値でメトロノームをスター
トさせるときは、CLICKボタンを押したあ
と、START/STOP(TAP)ボタンを押しま
す。
【トリガーやパッドを使って、テンポ値を入力する】
TRIGGERIN端子へDTXのパッドやドラムト
リガーを接続すると、パッドを叩いたとき
に、START/STOP(TAP)ボタンを押したと
きと同様の機能が得られます。
*TAPモードで決めたテンポに名前を付けて保
存するときは、このページの「設定したソング
を保存しよう」を参照してください。
*計測できるテンポの速さは、35〜300までで
す。35よりも遅い場合は「Lo」、またはテンポ
値は変わりません。300よりも速い場合は「Hi」
と表示されます。
41
100
00

8
-1 1 01
120
チェイン
ソングを並べ替えよう
チェインとは、本機に保存したソングを自分の
鳴らしたい順にプログラムする機能です。
1. CHAINボタンを押してCHAINモードにし
ます。
2. STOREボタンを押して、CHAINと
STOREを表示させます。
3. CHAINNO.(BEAT)ボタンを押して、保存
するチェインプログラムナンバー(0〜9)を
指定します。
4. TEMPOダイアルを回して、1ステップ目
(表示は0)にプログラムするソングを選びま
す。
5. START/STOPボタンを押すと、ディスプ
レイのSTOREが2回点滅して、1ステップ
目のソングが保存されます。
6. SONG/STEP+ボタンを押すと、次ステッ
プの入力が可能になります。
7. 手順4〜6をくり返して、チェインプログラ
ムを作成します。
*1つのチェインプログラムにつき、最大20ス
テップ(曲)のソングが保存できます。
チェインプログラムを鳴らしてみよう
1. CHAINボタンを押してCHAINモードにし
ます。
2. CHAINNO.ボタンを押して、鳴らしたい
チェインプログラムナンバーを選びます。
3. START/STOPボタンを押すと、1ステッ
プ目のソングが鳴ります。
4. 次のソングを鳴らすときは、START/
STOPボタンを押してソングを止めたあ
と、SONG/STEP+ボタンを押します。
*戻すときはSONG/STEP−ボタンを押します。
保存したソング(ソングナンバー0〜85)
最大86曲
好みの順にソングを並べ替える
最大20曲(ステップ)
ここで保存してできたものが、
1チェインプログラム
同様のチェインプログラムを
10種類(0〜9)作ることができる

9
MIDI
外部MIDI機器のテンポと同期させよう
1. 電源スイッチを切った状態で、外部MIDI機
器のMIDIOUT端子と、本機のMIDIIN端子
をMIDIケーブルを使って接続します。
2. 電源スイッチを入れてMIDIボタンを押す
と、MIDIモードになります。
(表示:STOP)
3. 外部MIDI機器のシーケンサーをスタートさ
せると、自動的にテンポを計測し表示しま
す。(表示:START)
4. START/STOPボタンを押してから(表示:
MIDIが点滅)シーケンサーをスタートさせる
と、メトロノームとビートインジケーター
が、シーケンサーに同期して動作します。
*メトロノームを動作させずにテンポ表示だけ
させたい場合は、START/STOPボタンをもう
一度押します。
*
シーケンサーを一旦止めたあと、再スタートさ
せるとCONT(コンティニュー)が表示されます。
*AUXIN端子にシーケンサー側のオーディオア
ウトプットを接続すると、曲とメトロノーム
を同時に聞くことができます。
*
START/STOPボタンを押してテンポ計測中に、
MIDIケーブルが外れるなどのトラブルにより信
号が3分間受信できない場合、ディスプレイに
「STOP」が表示され計測が中止されます。
120
その他の機能
バックライト活用方法
1. BACKLIGHTボタンを押すと、ディスプレ
イのバックライトが点灯(約20秒後に消灯)
します。
2. BACKLIGHTボタンを1秒以上押し続ける
と、バックライトが2回点滅したあと連続し
て点灯し続けます。(BACKLIGHTボタン
を押すと消灯)。
チューナー
基準音を鳴らそう
1. TUNEボタンを押すと、TUNEモードにな
ります。
2. TEMPOダイアルを回して、2C〜6Bの間
で鳴らしたい音の高さを決めます。
3. START/STOPボタンを押すと、その高さ
で基準音が鳴ります。
【基準音のピッチを変えるには】
1. BEATボタンを押すと、438Hz〜446Hz
の間でピッチを変えることができます。
4A

10
保証書
この度はヤマハ・クリックステーションをお買上げ戴きましてあ
りがとうございました。本書は、本書記載内容で修理を行なう事
をお約束するものです。お買上げの日から下記期間中に故障が発
生した場合は、本書をご提示の上お買上げの販売店に修理をご依
頼ください。
ご販売店様へ※印欄は必ずご記入の上お渡しください。
※
販
売
店
店名
住所
電話
クリックステーション製番
本体:お買上げの日から1ヶ年間
年 月 日
ご住所 〒
お名前 様
電 話 ( )
印
( )
品名/品番
保証期間
※お買上げ日
お客様
持込修理
1. 正常な使用状態(取扱説明書、本体貼り付けラベルなどの注
意書に従った使用状態)で故障した場合には、お買上げの販
売店が無料修理を致します。
2. 保証期間内に故障して無料修理をお受けになる場合は、お買
上げの販売店に商品と本書をご持参のうえご依頼ください。
3. ご贈答品、ご転居後の修理についてお買上げ販売店にご依頼
できない場合には、最寄りのヤマハ電気音響製品アフター
サービス拠点にお問い合わせください。
4. 保証期間内でも次の場合は有料となります。
(1) 本書のご提示がない場合。
(2) 本書にお買上げの年月日、お客様、お買上げの販売店の記入
がない場合、及び本書の字句を書き替えられた場合。
(3) 使用上の誤り、他の機器から受けた障害または不当な修
理や改造による故障及び損傷。
(4) お買上げ後の移動、輸送、落下などによる故障及び損傷。
(5) 火災、地震、風水害、落雷、その他の天災地変、公害、
塩害、異常電圧などによる故障及び損傷。
(6) 消耗部品の交換。
(7) お客様のご要望により出張修理を行なう場合の出張料金。
5. この保証書は日本国内においてのみ有効です。
ThiswarrantyisvalidonlyinJapan.
6. この保証書は再発行致しませんので大切に保管してください。
※この保証書は本書に示した期間、条件のもとにおいて無料修理をお
約束するものです。したがってこの保証書によってお客様の法律上
の権利を制限するものではありませんので、保証期間経過後の修理
などについてご不明の場合は、お買上げの販売店、ヤマハ電気音響
製品アフターサービス拠点にお問い合わせください。
無償修理規定
■保証とアフターサービス
●保証書
保証書は、販売店にて「販売店印、お買い上げ年月日」の押印、記入をしてお渡
し致しますので、お買い上げの際にご確認の上、大切に保管ください。
●保証期間
お買い上げ日から1年間です。
●保証期間中の修理
保証書記載内容に基づいて修理いたします。詳しくは保証書をご覧ください。
●保証期間経過後の修理について
修理可能な部分は、ご要望により有料にて修理させて頂きます。但し、修理料
金の金額や補修部品の保有期間の都合により、相当品の代替購入をおすすめす
る場合もございます。
ヤマハ電気音響製品アフターサービス拠点(修理受付および修理品お持込み窓口)
北海道サービスステーション
〒064-8543 札幌市中央区南10条西1丁目1-50ヤマハセンター内 TEL(011)512-6108
仙台サービスステーション 〒984-0015 仙台市若林区卸町5-7仙台卸商共同配送センター3F TEL(022)236-0249
首都圏サービスセンター 〒143-0006 東京都大田区平和島2丁目1番1号京浜トラックターミナル内14号棟A-5F TEL(03)5762-2121
浜松サービスステーション 〒435-0016 浜松市和田町200 ヤマハ(株)和田工場6号館2階 TEL(053)465-6711
名古屋サービスセンター 〒454-0058
名古屋市中川区玉川町2-1-2ヤマハ(株)名古屋流通センター3F
TEL(052)652-2230
大阪サービスセンター 〒565-0803 吹田市新芦屋下1-16ヤマハ(株)千里丘センター内 TEL(06)6877-5262
四国サービスステーション 〒760-0029 高松市丸亀町8-7(株)ヤマハミュージック神戸高松店内 TEL(087)822-3045
九州サービスステーション 〒812-8508 福岡市博多区博多駅前2-11-4 TEL(092)472-2134
〒064-8543 札幌市中央区南10条西1丁目1-50ヤマハセンター内 TEL(011)512-6113
〒980-0804 仙台市青葉区大町2-2-10 TEL(022)222-6147
〒108-8568 東京都港区高輪2-17-11 TEL(03)5488-5471
〒460-8588 名古屋市中区錦1-18-28 TEL(052)201-5199
〒542-0081 大阪市中央区南船場3-12-9心斎橋プラザビル東館 TEL(06)6252-5231
〒812-8508 福岡市博多区博多駅前2-11-4 TEL(092)472-2130
〒108-8568 東京都港区高輪2-17-11 TEL(03)5488-5445
※住所及び電話番号、名称は変更になる場合があります。
ヤマハ株式会社 各営業所(商品に関する問い合わせ先)
お客様ご相談窓口
(ヤマハギター・ドラム製品に対するお問合せ窓口)
ヤマハ管弦打楽器
インフォメーションセンター
Tel:053-411-4744
(月曜日〜土曜日 /10:30 〜 19:00)
*日曜、祝日及びセンター指定休日を除く
EM営業統括部
EM北海道
EM仙台
EM東京
EM名古屋
EM大阪
EM九州
EM企画推進室
弦打楽器事業部 ギタードラム営業部 国内営業課
〒430-8650 静岡県浜松市中沢町10番1号TEL.053-460-2433

11
Owner’s Manual
Thank you for purchasing the Yamaha CLICKSTATION. To get the
most out of this product, we ask that you read this Owner’s Manual
thoroughly before using the device. Also, after reading this manual,
please keep it in a safe place for future reference.
Specifications
Metronome
Tempo: 35 - 300 beats/minute
Beats: BEAT 1:0 - 9, BEAT 2 (complex beat):– - 9
Tempo Accuracy: 0.16 %
Vibration: Pulses in sync with the tempo
Tempo LED: Flashes in sync with the tempo/beat
Tuning Pitch
Range: C2 - B6
Standard Pitch: 438 - 446 Hz
Accuracy: +/– 1 Cent
Memory
Memory Allocations: 86
Total Number of Chain Programs: 10
Steps: 20 songs (per chain program)
Input/Output
TRIGGER IN: Standard Monaural Phone Jack
MIDI IN: Standard 5-Pin DIN Connector
AUX IN: Standard Stereo Phone Jack
DC IN: 9V
PHONES: Standard Stereo Phone Jack x1,
Mini Stereo Phone Jack x1
Speaker
57 mm x1
Power Supply
Power Adaptor (PA-3C) or 6LR61 Battery (x1)
Dimensions
170 x 122 x 37 mm (6-11/16" x 4-13/16" x 1-7/16")
Weight (including battery)
395 g (13.9 oz)
Accessories
Tilt Angle, Wing Bolt, 6LR61 Battery,
Owner’s Manual
* Specifications and/or design may change for reasons of improvement without notice.

12
●Avoid using your CLICKSTATION in the following
locations to prevent possible damage:
•In direct sunlight or next to heating equipment.
•Extremely cold or hot locations.
•Locations exposed to high humidity or exces-
sive dust.
•Locations subject to strong shocks or vibration.
●Before making any connections, make sure that
the power on the CLICKSTATION and any exter-
nal devices is switched OFF.
●To protect the speaker from possible damage,
always set the VOL. Slider to “0” before switching
the power ON/OFF.
●Do not apply excessive force to the switches and
controls.
●Your Yamaha CLICKSTATION is a precision mu-
sical instrument. Handle it with care and avoid
dropping or bumping it.
●For safety, always remove the power adaptor plug
from the AC wall outlet if there is any danger of
lightning striking in your area.
●Keep the CLICKSTATION away from neon signs
or fluorescent lighting to prevent noise pickup.
●To prevent damage and possibly electrical shock,
never open the case and tamper with the internal
circuitry.
●Never use benzene, thinner or other volatile liq-
uids for cleaning, as these chemicals may cause
damage or discoloration to the finish. Always use
a dry, soft cloth to wipe off dust and dirt.
Precautions
FCC INFORMATION (U.S.A.)
the user’s manual, may cause interference harmful to the operation of
other electronic devices. Compliance with FCC regulations does not
guarantee that interference will not occur in all installations. If this
product is found to be the source of interference, which can be
determined by turning the unit “OFF” and “ON”, please try to
eliminate the problem by using one of the following measures:
Relocate either this product or the device that is being affected by the
interference.
Utilize power outlets that are on different branch (circuit breaker or
fuse) circuits or install AC line filter/s.
In the case of radio or TV interference, relocate/reorient the antenna.
If the antenna lead-in is 300 ohm ribbon lead, change the lead-in to
co-axial type cable.
If these corrective measures do not produce satisfactory results,
please contact the local retailer authorized to distribute this type of
product. If you cannot locate the appropriate retailer, please contact
Yamaha Corporation of America, Electronic Service Division, 6600
Orangethorpe Ave, Buena Park, CA 90620
1. IMPORTANT NOTICE: DO NOT MODIFY THIS
UNIT!
This product, when installed as indicated in the instructions contained
in this manual, meets FCC requirements. Modifications not expressly
approved by Yamaha may void your authority, granted by the FCC,
to use the product.
2. IMPORTANT:When connecting this product to accessories and/
or another product use only high-quality shielded cables. Cable/s
supplied with this product MUST be used. Follow all installation
instructions. Failure to follow instructions could void your FCC
authorization to use this product in the USA.
3. NOTE: This product has been tested and found to comply with the
requirements listed in FCC Regulations, Part 15 for Class “B” digital
devices. Compliance with these requirements provides a reasonable
level of assurance that your use of this product in a residential
environment will not result in harmful interference with other
electronic devices. This equipment generates/uses radio frequencies
and, if not installed and used according to the instructions found in
CANADA
THIS DIGITAL APPARATUS DOES NOT EXCEED THE “CLASS B” LIMITS FOR RADIO NOISE EMISSIONS FROM DIGITAL APPARATUS SET
OUT IN THE RADIO INTERFERENCE REGULATION OF THE CANADIAN DEPARTMENT OF COMMUNICATIONS.
• This applies only to products distributed by Yamaha Canada Music Ltd.
•
The above statements apply ONLY to those products distributed by Yamaha Corporation of America or its subsidiaries.

13
Nomenclature
■Front Panel
qDisplay
wBeat Volume
eVibration Volume (VIB.)
rVolume (VOL.)
tVibrator (VIBRATION)
ySpeaker
uBeat Indicators
iControl Buttons
oStart/Stop Switch (also used as Tap Switch)
!0 Tempo Dial (TEMPO)
!1 Back Light Switch
(auto off or continuous operation available,
refer to page 18)
■Side Panel
!2 Headphones Jacks x2 (PHONES)
!3 Power Switch (POWER ON/OFF)
!4 MIDI IN jack (MIDI IN)
■Rear Panel
!5 External Device Input Jack (AUX IN)
!6 Tr igger Input Jack (TRIGGER IN)
!7 Holder Attachment
!8 Power Adaptor Jack (DC IN 9V)
Both standard
phone and mini
jacks can be used
simultaneously.
MIDI device
DTX pad, etc.
CD player, etc. AC adaptor (optional)
■ Attaching the Holder
Attaching the supplied tilt angle lets you set the
CLICKSTATION at an angle on top of a desk, etc.,
for use.
Refer to the “Attach-
ing the Holder” section
described below.
Tilt Angle (supplied)
Wing Bolt (supplied)
Also, the CLICKSTATION can be attached to a
mic stand, cymbal stand, cowbell holder, etc.,
using the optional mount adaptor or mic stand
adaptor.

14
Preparing for Use
■Using Battery Power
1. Prepare one alkaline battery (6LR61: 9V, S-
006P).
*Amanganese battery can be used but battery life
may be extremely short depending upon the battery
type.
2. Make sure that the power switch is set to its
OFF position then remove the battery cover
from the rear panel.
3. Check the alignment and polarity markings
(+/–) on the battery, attach the battery to the
battery terminal then replace the battery
cover.
■Using a Power Adaptor
1. Make sure that the power switch is set to its
OFF position, then connect the power
adaptor’s DC plug into the device’s DC IN 9V
jack.
2. Connect the power adaptor’s AC plug to an
AC wall outlet.
*When battery power gets low, the volume output
will be reduced or the display will grow dim. If this
is the case, replace the battery with a new one as
soon as possible.
*If the power adaptor is connected when a battery is
installed in the device, power is automatically sup-
plied from the power adaptor.
*Make sure only the specified power adaptor is used.
The use of any power adaptor other than the one
specified may result damage, fire, etc. Doing so may
void the warranty even if the device is still within
the warranty period so please use caution.
Power adaptor
Power adaptor jack
Cautions Regarding Memory Backup
•This device has no data backup capabilities to preserve data when the battery is removed or when the AC adaptor is
disconnected.
•If the device is left without power supplied from a battery or AC adaptor, song and chain program data created by the
user will be lost.
•To replace the battery without loosing data connect the AC power adaptor to the device while changing the battery or,
change the battery before battery power is completely exhausted and complete the battery changing procedure within
3 minutes.
•The device’s vibrator grows weak as battery power depletes.
•When the display dims, the battery should be replaced as soon as possible.

15
Using the Metronome
Start the Metronome’s Audio Click
qPress the CLICK button.
wPress the START/STOP button to start the
metronome.
eUse the Quarter Note and VOL volume con-
trol sliders to increase the volume level.
*The VOL slider is used to control the device’s over-
all volume level. When the VOL slider is set to [0]
(all the way down), no sound is produced.
[Using the VIBRATION feature]
rPress and hold the VIBRATION pad and the
vibrator will pulse in tempo with the metro-
nome. When the metronome is stopped only
the vibrator and flashing beat indicator will
operate.
Use the VIB. slider to adjust the amount of
vibration.
Adjust Beat Volumes
qUse the volume sliders qfor each beat to
adjust individual beat volumes. (Shown in
the illustration above)
Change the Tempo
zRotate the TEMPO dial to adjust the tempo
(35 - 300).
[Using the ten-key pad to set the tempo]
z
Press the TYPE TEMPO button. (Lamp lights)
xUse the ten-key pad to set the tempo value.
c
Press the START/STOP button and the metro-
nome will start at the tempo you just entered.
vPress the TYPE TEMPO button to cancel the
setting. (The lamp goes off.)
*When the TYPE TEMPO lamp lights, the ten-key
pad is in the tempo setting mode. Turn the TYPE
TEMPO lamp off when you want to use the CLICK,
SEARCH, or other function buttons.
*To change the tempo when the metronome is in use:
•
If the START/STOP button is pressed in step 3, the
tempo will change from that instant (from beat 1).
•If the TYPE TEMPO button is pressed in step 3,
the tempo will change from the next beat.
Change the Beat
Press the BEAT button and the BEAT value
shown on the upper left corner of the display will
flash. While the BEAT value is flashing, press
the BEAT button to set the beat value between
0 and 9. After 2 seconds, if the button is not
pressed, the beat setting is entered and the dis-
play will return to its original display.
*When the beat is set, the ACC. tone will sound on
the first beat of every measure. If the beat is set to
[0], the ACC. tone will not sound.
[Use Beat 2 to create a complex beat or
subdivisions]
Press and hold the BEAT button for more than 2
seconds and the COUNT value located next to the
BEAT value will flash. While the COUNT value is
flashing, press the BEAT button to set Beat 2 to a
value between – and 9. After 2 seconds, if the but-
ton is not pressed, the beat setting is entered and
the display will return to its original display.
*The Beat 2 setting can be used to create complex
beats over 2 measures (subdivisions).

16
Using the Metronome
Saving Songs
In this section, metronome settings (tempo,
beat, count, etc.) can be saved as a song. With
the CLICKSTATION, you can create, name,
and save a maximum of 86 songs.
1. Press the STORE button to enter the Store
display and the SONG name will flash.
2. Use the SONG/STEP –/+ buttons to select
the song number to which you want to save
your song.
3. Rotate the TEMPO dial to select a letter and
then press the BEAT (CURSOR) button to
enter the setting and move the cursor to the
right.
4. Press the START/STOP button and STORE
will flash two times in the display to indicate
that the song is saved.
Recall a Song
Use the SONG/STEP –/+ buttons to select a
saved song.
[Search for a song]
1. Press the SEARCH button to enter the
SEARCH display. The SONG name will
flash.
2. Rotate the TEMPO dial to select the first let-
ter of the saved song name you want to find.
3. Press the START/STOP button to display
the song name that begins with the letter you
selected. Press the START/STOP button
again to display the next song name in the
list.
Tap Function
Set the Tempo Using the TAP Function
1. Press the TAP button to enter the TAP
mode.
2. Tap in tempo on the START/STOP (TAP)
button. The CLICKSTATION automatically
calculates the tapped tempo and displays
the tempo value on the display.
3. To start the metronome at the tempo shown
on the display, press the CLICK button and
then press the START/STOP (TAP) button.
[Use a trigger or drum pad to set the
tempo value]
Connect a drum pad or DTX Drum Trigger to the
TRIGGER IN jack and the pad or trigger can be
used in the same manner as the START/STOP
(TAP) button.
*To name and save the tempo you calculated using
the TAP function, refer to the [Saving Songs] sec-
tion on this page.
*The tempo can be calculated within a range of 35
and 300 beats per minute. If the tempo is slower than
35 [Lo] will be displayed, and [Hi] will be displayed
if the tempo is faster than 300.
41
100
00

17
-1 1 01
120
Chain Function
Changing Song Order
The Chain Function lets you place saved songs
in any order you like.
1. Press the CHAIN button to enter the CHAIN
mode.
2. Press the STORE button so that both CHAIN
and STORE are shown on the left side of the
display.
3. Press the CHAIN NO. (BEAT) button to se-
lect the chain program number (0 - 9) to
which you want to save the chain.
4. Rotate the TEMPO dial to select the song
that will become the first step in the chain.
5. Press the START/STOP button and STORE
will flash two times in the display to indicate
that the first step in the chain is saved.
6. Press the SONG/STEP+ button to move to
the next step and enter the setting.
7. Repeat numbers 4 through 6 above to create
a chain program.
*Amaximum of 20 steps (songs) can be saved in a
chain program.
Play the Chain Program
1. Press the CHAIN button to enter the CHAIN
mode.
2. Press the CHAIN NO. button to select the
chain program number that you want to use.
3. Press the START/STOP button to start the
song that is set at the top of the list.
4. Press the START/STOP button to stop the
song and then press the SONG/STEP + but-
ton to start the next song in the list.
* Press the SONG/STEP – button to return to the pre-
vious song in the list.
Saved songs (song numbers 0-85)
86 songs maximum
Place the songs in any order you like
20 songs (steps) maximum
The grouping of songs saved here
is a Chain Program
A maximum of 10 Chain Programs
like those shown above can be
created and saved.

18
MIDI
Synchronize the tempo to an exter-
nal MIDI device
120
Other Functions
Using the Back Light
1. Press the BACK LIGHT button to light the
display’s back light (it will stay on for about
20 seconds and then switch off).
2. To keep the display lit continuously, press
and hold the BACK LIGHT button for more
than 1 second. The back light will flash twice
then stay on. (Press the BACK LIGHT but-
ton to switch off the back light.)
Tune (Pitch) Function
Sound the Tuning Pitch
1. Press the TUNE button to enter the TUNE
mode.
2. Rotate the TEMPO dial and select the note
between 2C and 6B that you want to hear.
3. Press the START/STOP button to sound the
tuning pitch that is selected.
[To change the standard pitch]
1. Press the BEAT button to adjust the stan-
dard pitch between 438Hz and 446Hz.
4A
1. After the power is switched OFF, use a MIDI
cable to connect the external MIDI device’s
MIDI OUT jack to the MIDI IN jack on the
CLICKSTATION.
2. Turn the power switch ON and press the
MIDI button to enter the MIDI mode.
(Display: STOP)
3. When the external MIDI device’s sequencer
starts, its tempo is automatically calculated
and shown on the display. (Display: START)
4. Press the START/STOP button then start
the sequencer (Display: MIDI flashes) and
the metronome and beat indicator will start
and play in sync with the sequencer.
*To only display the tempo without metronome play-
back, press the START/STOP button again.
*If the sequencer is temporarily stopped, CONT
(continue) appears in the display when the se-
quencer starts again.
*To hear the sequencer’s song playback along with
the metronome, connect the audio output from the
sequencer to the CLICKSTATION’s AUX IN jack.
*If the device cannot detect the MIDI signal (due to
trouble such as a disconnected MIDI cable, etc.)
within 3 minutes of pressing the START/STOP but-
ton, “STOP” will appear in the display and the cal-
culation will quit.

19
Mode d’emploi
Nous vous remercions d’avoir fait l’achat du CLICKSTATION
Yamaha. pour avoir la certitude d’obtenir un maximum de bénéfices
de ce produit, nous demandons de bien vouloir lire ce mode d’emploi
dans son intégrité avant de faire usage de cet appareil. Par ailleurs,
après avoir lu ce manuel, veuillez le conserver dans un endroit sûr à
des fins de consultation ultérieure.
Caractéristiques techniques
Métronome
Tempo: 35 - 300 battements/minute
Battements: BEAT 1:0 - 9, BEAT 2 (battement
complxe):– - 9
Précision du tempo: 0,16 %
Vibrations: Impulsions en synchronisation au
tempo
Diode électroluminescente de tempo: Clignote
en synchronisation au tempo/battement
Accordage de hauteur du son
Gamme: C2 - B6
Hauteur de son standard: 438 - 446 Hz
Précision: +/– 1 cent
Mémoire
Allocation de mémoire: 86
Nombre total de programmes en chaîne: 10
Pas: 20 morceaux de musique (par programme
en chaîne)
Entrée/sortie
TRIGGER IN: Fiche téléphonique monaurale
standard
MIDI IN: Connecteur DIN 5-broches standard
AUX IN: Fiche téléphonique stéréo standard
DC IN (Entrée courant continu): 9 V
PHONES: Fiche téléphonique stéréo standard: 1,
Mini fiche téléphonique stéréo: 1
Haut-parleur
57 mm x1
Source d’alimentation
Adaptateur d’alimentation (PA-3C) ou pile 6LR61 (1)
Dimensions/poids (piles incluses)
170 x 122 x 37 mm / 395 g
Accessoires
Angle d’inclinaison, Boulon à oreilles, Pile 6LR61,
Mode d’emploi
* Sous réserve de modification des renseignements techniques et de l’aspect extérieur sans préavis.

20
●Évitez d’utiliser votre CLICKSTATION dans les
emplacements suivants pour éviter d’endomma-
ger éventuellement l’appareil:
•In direct sunlight or next to heating equipment.
•Exposition directe au soleil ou près d’un
équipement de chauffage.
•Emplacements extrêmement chaud ou froid.
•Emplacements exposés à un taux d’humidité
élevé ou présence excessive de poussière.
•Emplacements soumis à des chocs violents ou
de fortes vibrations.
●Avant d’effectuer le moindre raccordement, assurez-
vous que le courant d’alimentation du
CLICKSTATION et de tout périphérique externe
est coupé.
●Afin de protéger le haut-parleur de tout
endommagement éventuel, réglez toujours le cur-
seur VOL. sur “0” avant de commuter l’alimenta-
tion sur activation ou désactivation.
●N’exercez pas de force excessive sur les commu-
tateurs et les commandes.
●Votre CLICKSTATION Yamaha est un instrument
musical de précision. Manipulez-le avec précau-
tion et évitez de le laisser tomber par terre ou de
le buter contre une surface dure.
●Par mesure de sécurité, retirez toujours la prise de
l’adaptateur d’alimentation de la prise murale de
sortie secteur s’il existe un danger quelconque de
chute de la foudre dans votre région.
●Maintenez le CLICKSTATION éloigné des
enseignes au néon ou des éclairages fluorescents
afin d’éviter la récupération de bruits parasites.
●Pour éviter les dégâts et une éventuelle électrocu-
tion, n’ouvrez jamais le boîtier ni modifiez les mon-
tages électroniques internes.
●N’utilisez jamais de benzène, diluant chimique ou
tout autre produit liquide volatil pour nettoyer l’ap-
pareil, étant donné ces produits chimiques peu-
vent endommager voire décolorer la finition exté-
rieure. Utilisez toujours un chiffon sec et souple
pour retirer la poussière et les saletés.
Précautions
CANADA
LE PRESENT APPAREIL NUMERIQUE N’EMET PAS DE BRUITS RADIOELECTRIQUES DEPASSANT LES LIMITES APPLICABLES AUX
APPAREILS NUMERIQUES DE LA “CLASSE B” PRESCRITES DANS LE REGLEMENT SUR LE BROUILLAGE RADIOELECTRIQUE EDICTE PAR
LE MINISTERE DES COMMUNICATIONS DU CANADA.
• Ceci ne s’applique qu’aux produits distribués par Yamaha Canada Musique Ltée.
Table of contents
Languages:
Other Yamaha Accessories manuals

Yamaha
Yamaha FL1024M User manual

Yamaha
Yamaha UW10 User manual

Yamaha
Yamaha FC9 User manual

Yamaha
Yamaha SWK-W10 User manual

Yamaha
Yamaha FC900 User manual

Yamaha
Yamaha YPDR-CRK User manual

Yamaha
Yamaha CD8-AD User manual

Yamaha
Yamaha UX16 User manual

Yamaha
Yamaha SPAT1 User manual

Yamaha
Yamaha MAT1 User manual

Yamaha
Yamaha HY144-D-SRC User manual

Yamaha
Yamaha HY144-D Mounting instructions

Yamaha
Yamaha SPCVR-18S01 User manual

Yamaha
Yamaha MFC06 User manual

Yamaha
Yamaha SPM-10TV User manual

Yamaha
Yamaha MLA-200 User manual

Yamaha
Yamaha G1D User manual

Yamaha
Yamaha DTP4K2SP User manual

Yamaha
Yamaha L-2C Installation guide

Yamaha
Yamaha Audiogram6 User manual