4
Drumming Fundamentals
Holding the Sticks
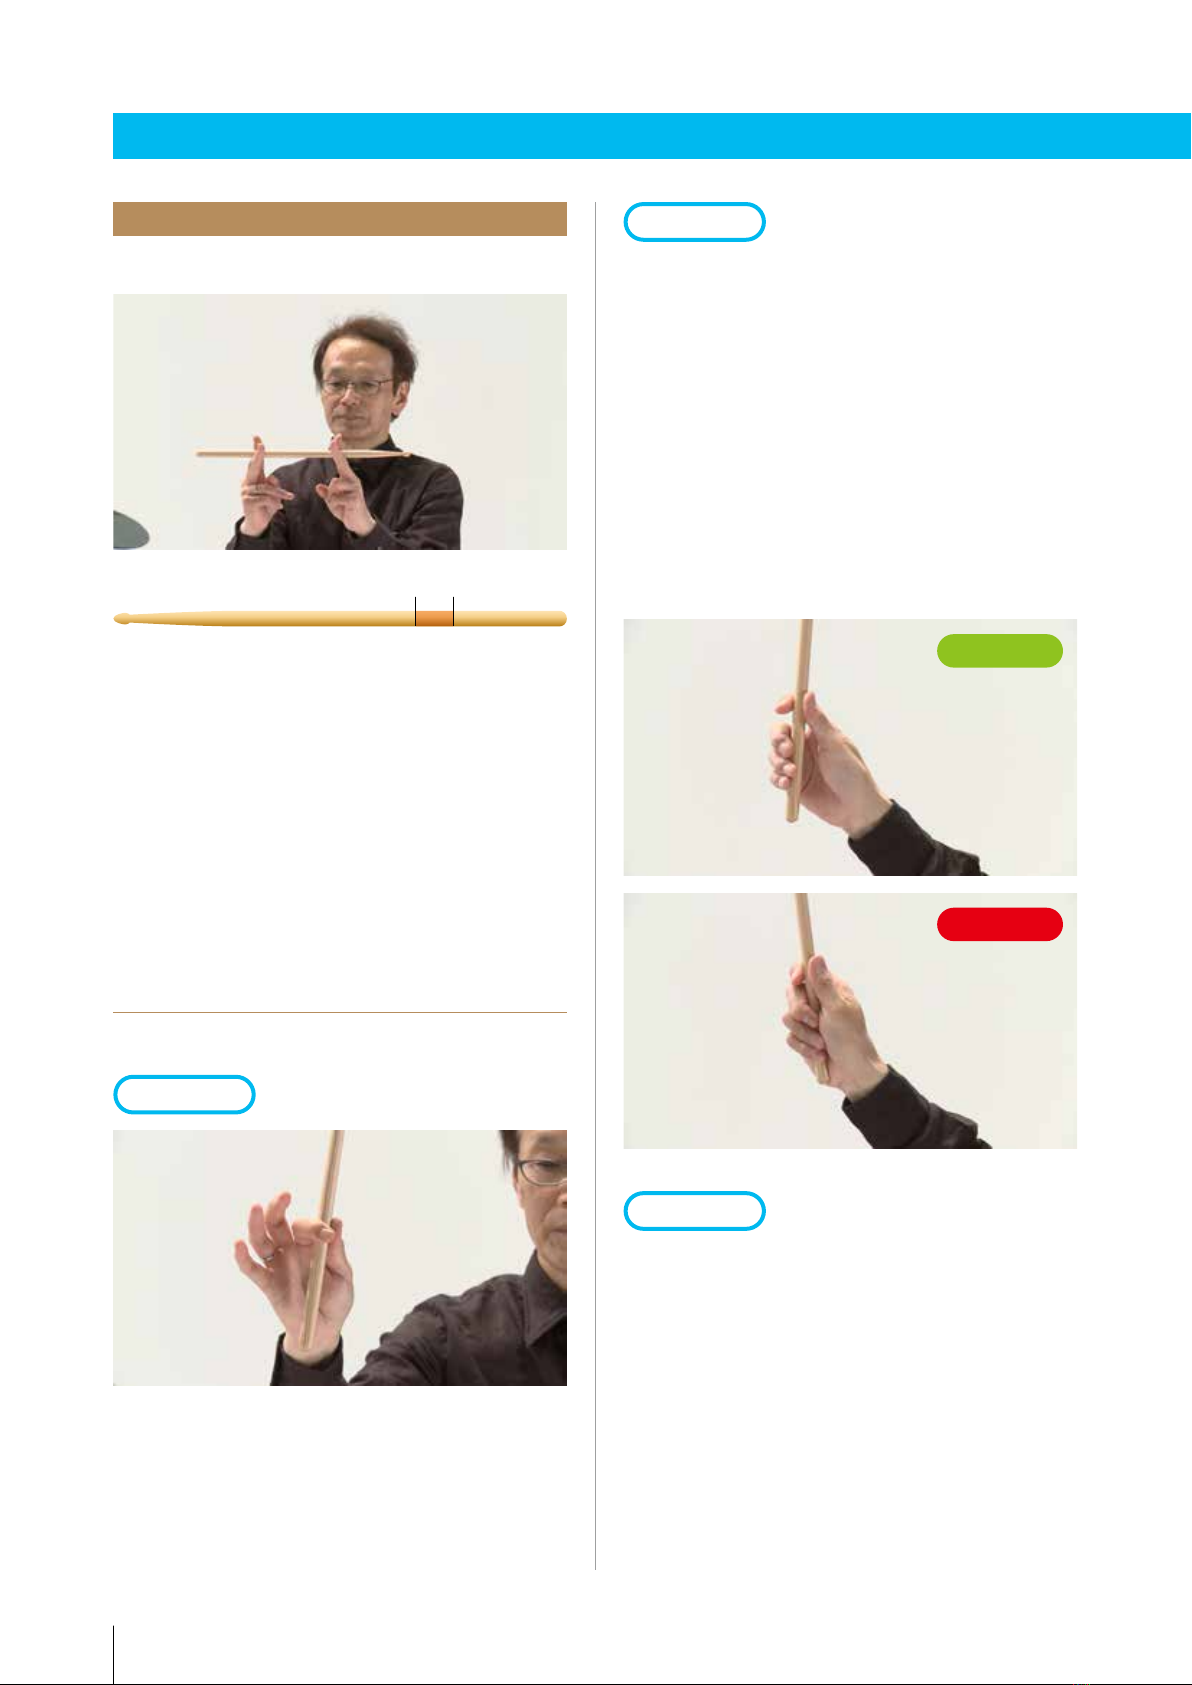
《 Where to hold the sticks 》
《 Holding the sticks 》
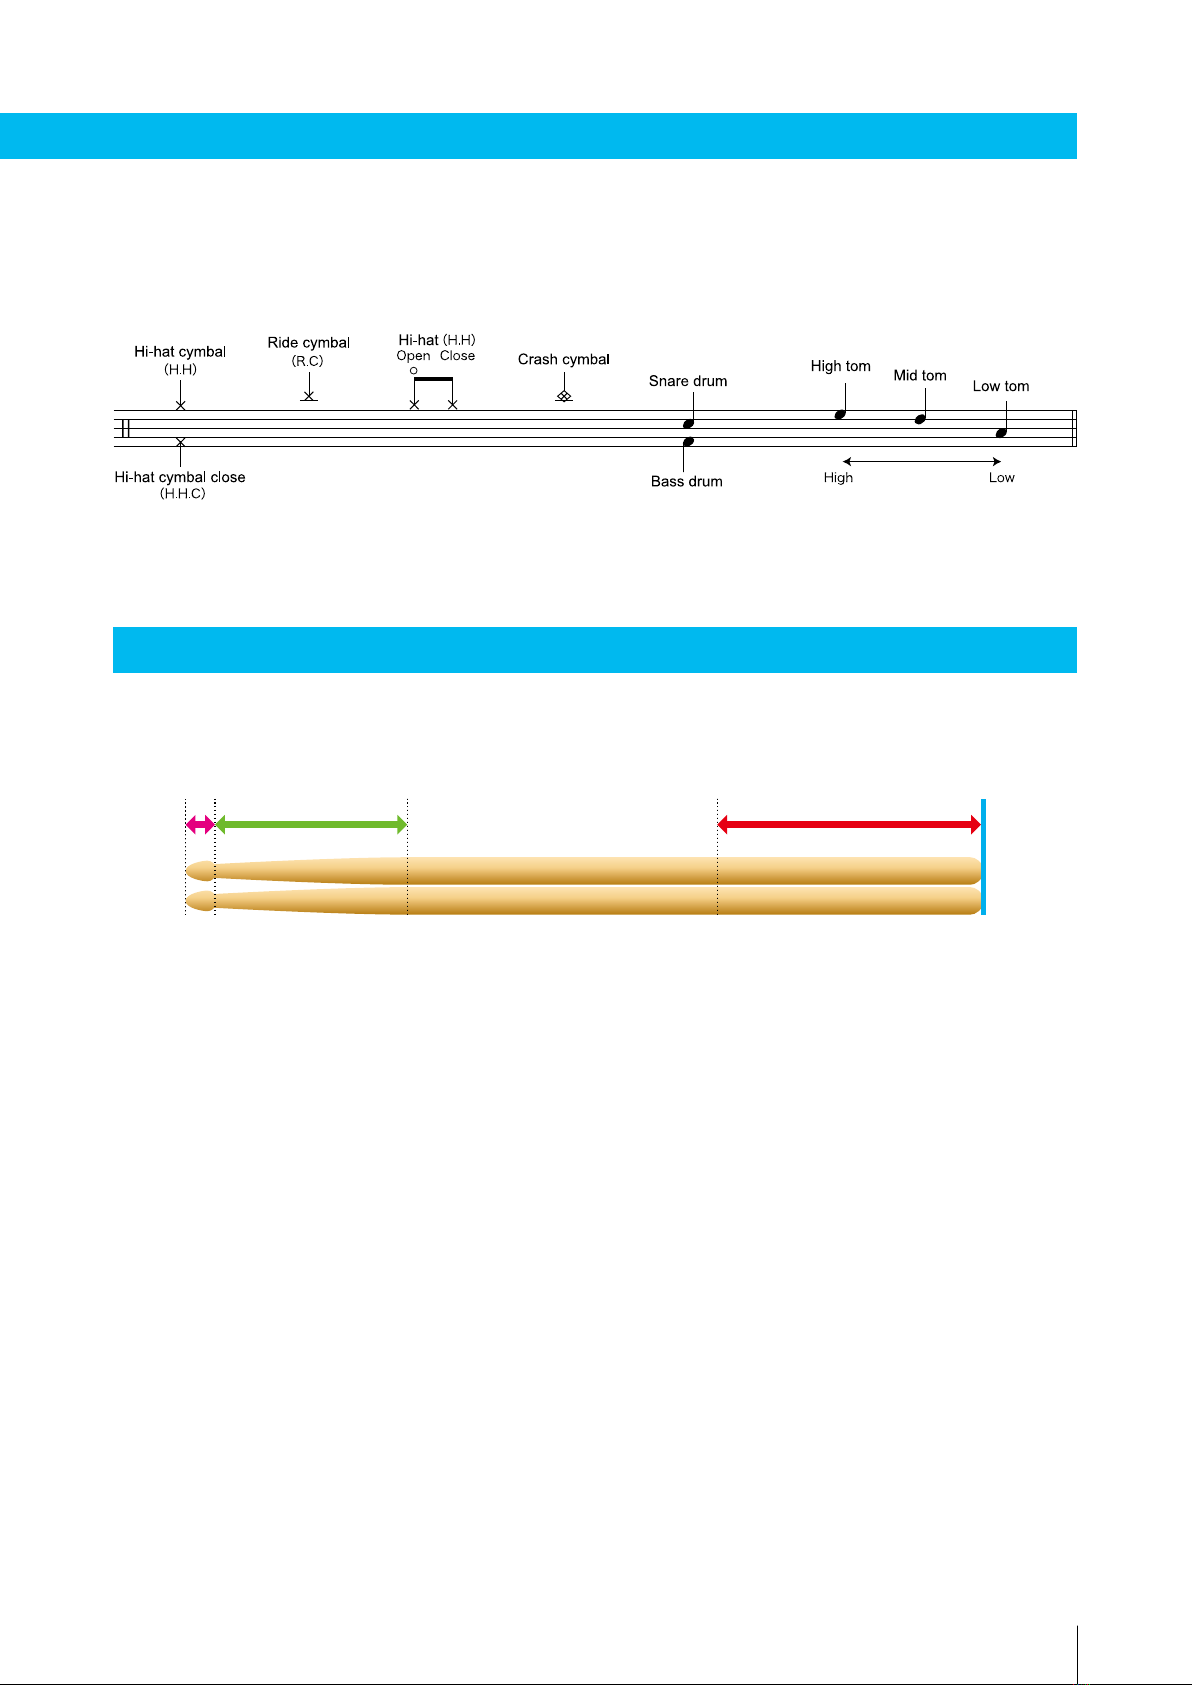
・ Hold the stick about midway between 1/3
and 1/4 of the way from the end (page 9).
Holding at 1/3 will make the striking side too
short and make the stick feel too light, while
at 1/4 it will be too long and feel heavy.
・ To put it more specifically, the stick has a
balance point from which it can most easily
rebound off the drum. Ideally you want to
find that point, but just use the position
described above to start with.
Once you know where you should hold the stick,
hold that point firmly between the fleshy part of
the thumb and first joint of the index finger.
Try striking the drum by using just those two
fingers at first.
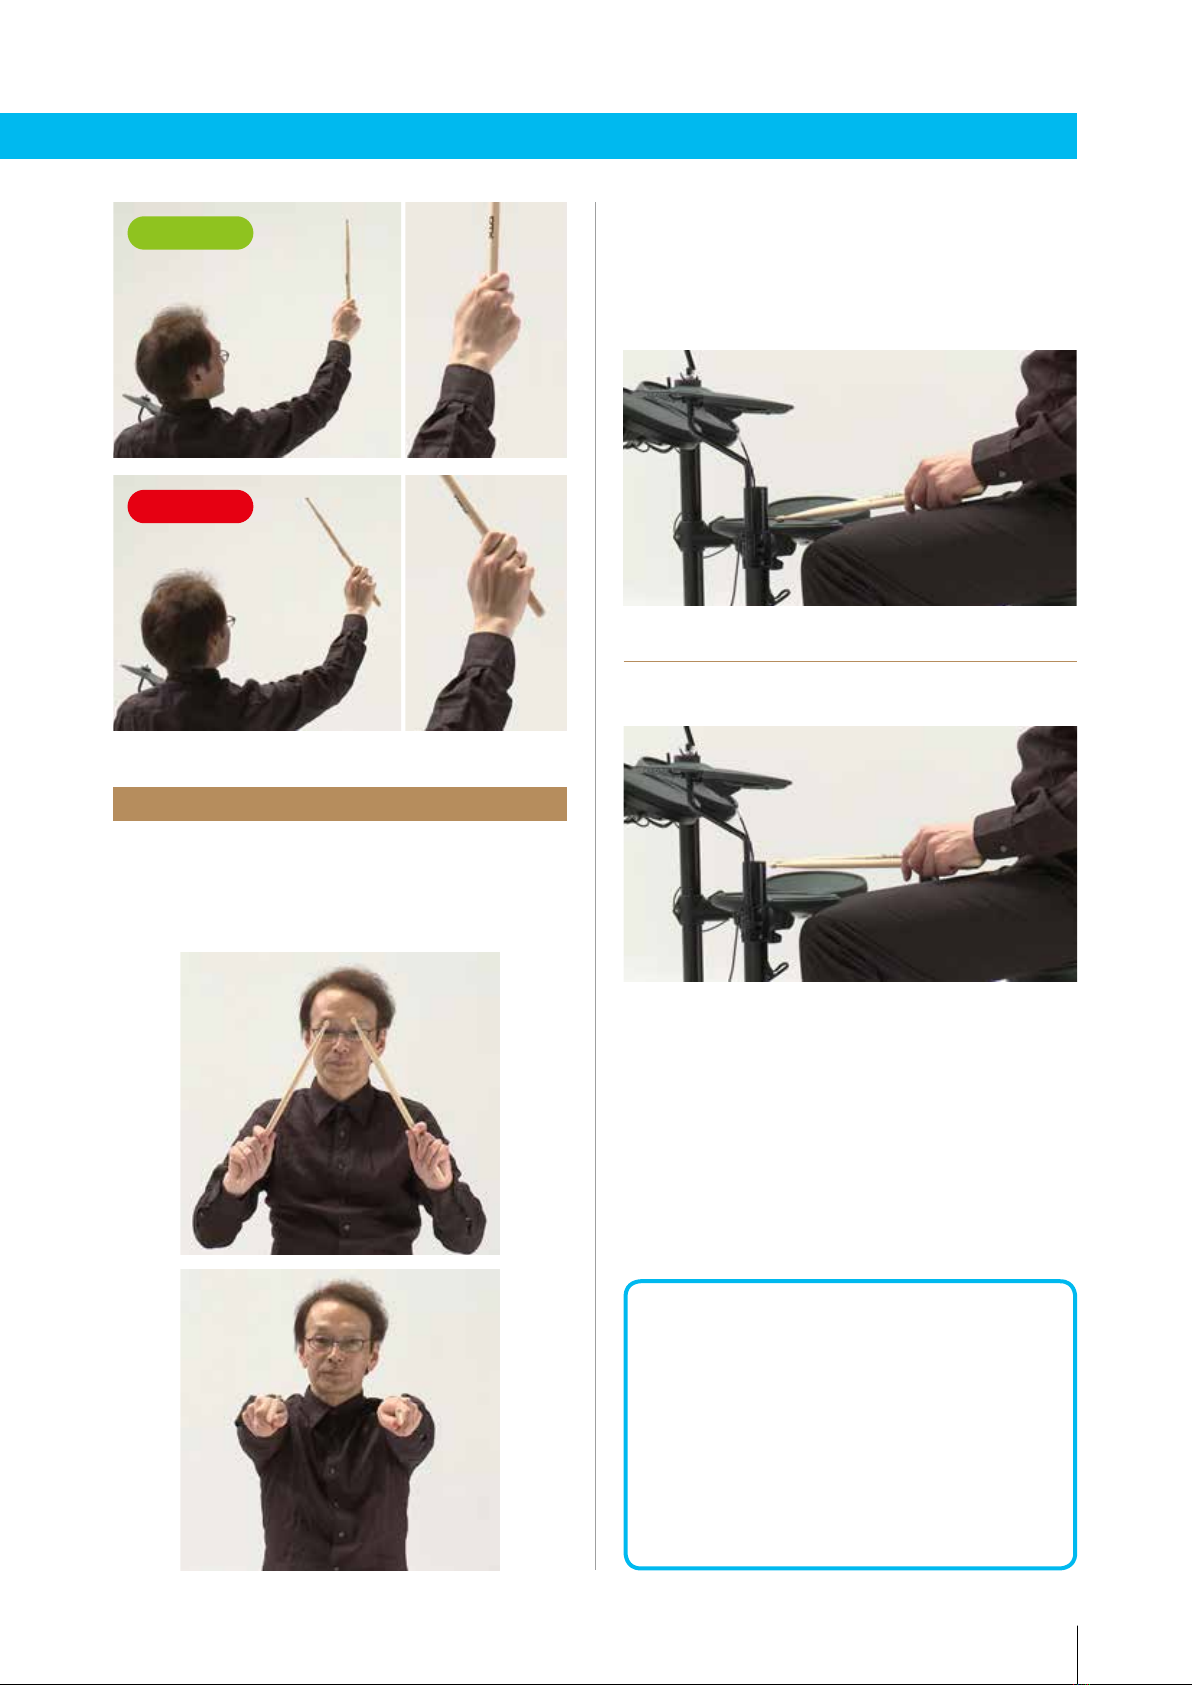
Right
Wrong
Use the remaining three fingers to lightly
support the stick. Gripping tightly with these
three fingers will cause the following problems:
・ Tiring out while playing
・ Stick not rebounding off the drum, ruining
the sound
・ Striking from the arm without using the wrist
Ideally there should be a bit of space between
the stick and the palm without trying too
hard. Make sure you are not putting any
unnecessary strength into the grip.
Step 1
Step 3
Step 2
Hold the stick so that it is in line with the
forearm. If this prevents the little finger from
touching the stick, you may hold it at a slight
angle so that the little finger touches the stick.
There is a lot of movement when playing
the drums, and it is best to position yourself
thinking of the whole arm as an extension of
the stick.