8
A−1sti㎎量隔ePi量C隔
When using the timpani forthe first time,be sureto set it up according to the
instructions of 1論itial Preparatio,,on pages6and7、
■Head Tヒ』論i論9
7¶uningisadjusted。nthel。westn。te。fthetim.
pani.Forthis reason,the heel ofthe pedal must
stay fuy Iowered during the tuning procedure.
The pitch of the Iowest note(and the tonaI range)
dependsonthesizeofyourtimpani.Forexample,
as shown in the chart below,the bwest sound of
a26timpani should be tuned to A.When tuned
properly,yourヤamaha timpani wiII play through−
out its fuIl tonaI range with baIanced tension in
the peddIe.
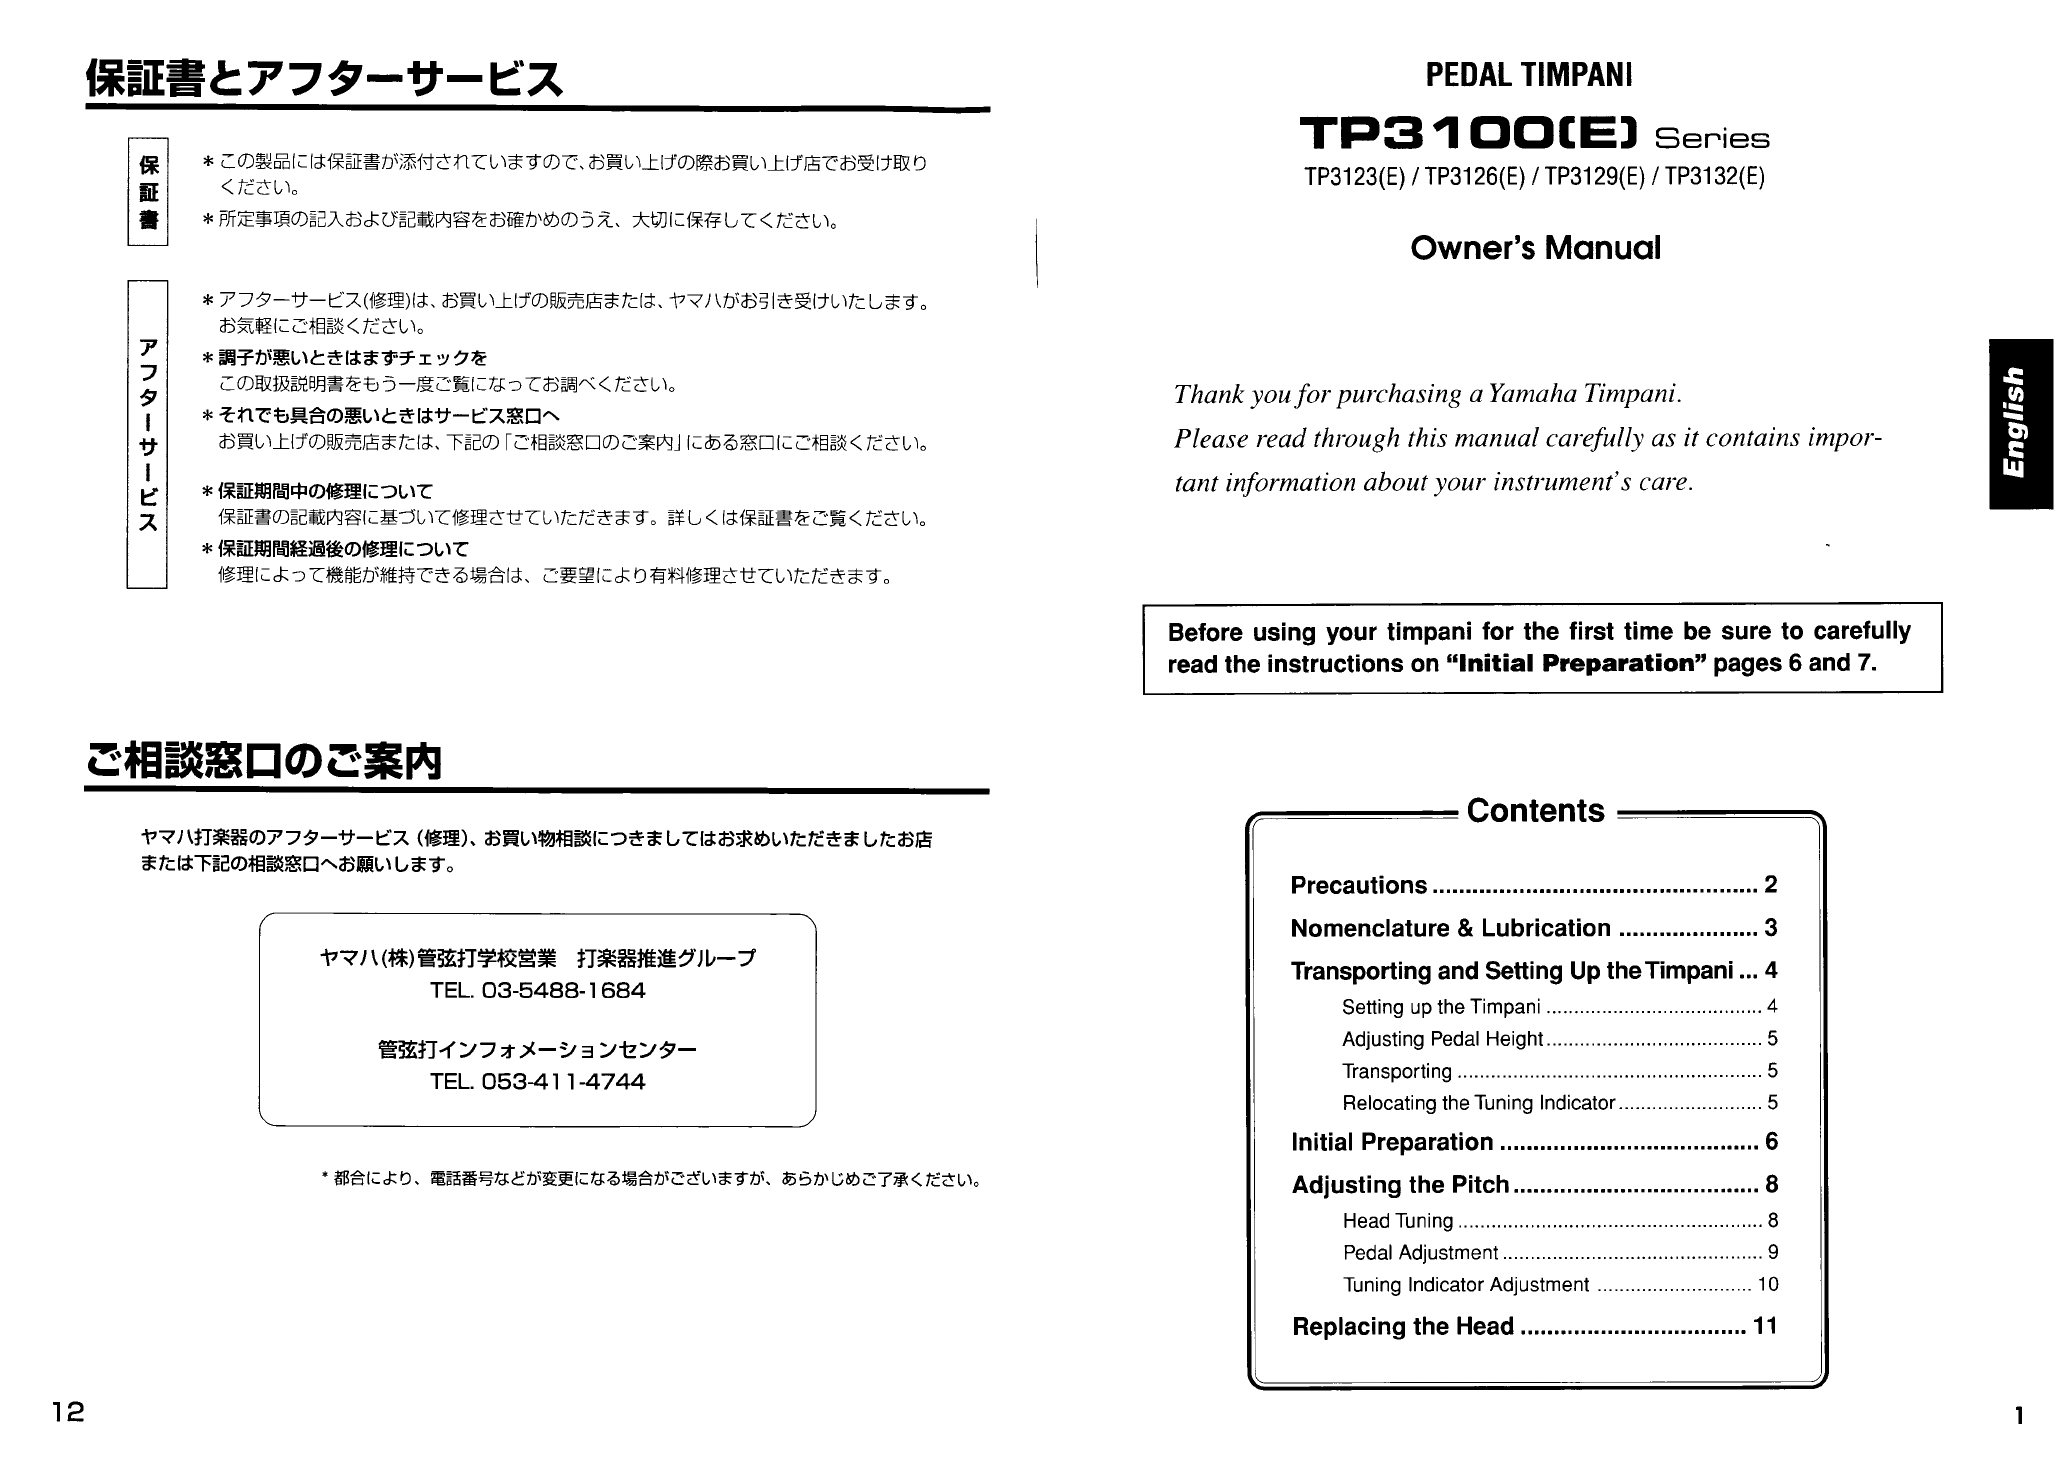
■Standard Tonal Ranges forYamahaTimpani
32(81cm) 29(74cm) 26(66cm) 23(58cm)
When Ioosening the tuning bolts,aIways loosen
them by double the desired amount,and then
return(re−tighten)them by half、When the sound
lies within l halftone beIow the desired pitch af−
ter loosening the tu ning bdts(repeatedly,if nec−
essary),proceed with step2.
2LightIystriketheheadwiththemaIletab。ut2
inches(5cm)fromthekettleedgeateachtuning
boIt.Check which tuning boIt has the highest
sound.
一
u
D Bレ F Dレ A F C Aレ
Keep the heel of the pedal fully lowered during
thetuningProcedure(steps2through7bebw)
if not specified othe『wise.
2Striketheheadandcheckthes。und.
The standard striking point is shown below.
r
/
/一−、 N
ぜt「ikingPoint湯
く
\、 、/
The standard striking
pointliesatdistanceB
fromthekettleedge,
whlch corresponds
approximateIy to1/4to
1/30f the distance
be加veen the ke廿le
edge and the center of
the head.
。Pitchofthehighestsound ishigherthanthe
tuning note(去2)
→ Loosen the corresponding tuning boIt by
about1/16to1/180faturn.Firstloosen
the boIt by double the desired amount,and
then return(re−tighten)it by half.A負er Ioos−
ening the tuning boIt,repeat from the be−
ginningofstep,.
・Pitch of the highest sound is lower than the
tuning note
→Goto step々.
口
・Sound is bwer than the tuning note
→Go to step3.
・Sound is higher than the tuning note
→ Loosen the tuning bolts by an equaI
amount in the order shown in the figure of
step50n page7. 蒙
躍Tightenthe。therb。ltsIiUlebyIi廿le(byab。ut1/
16to1/80faturn)untilthesoundsatthecorre−
sponding striking points match the pitch of the
highest sound.PIease note that tightening one
boltalsoraisesthepitchatneighboringandoP−
posite tuning bolts.Thus,after tightening the tun−
ing boIt with the Iowest sound,again check the
pitch at the other tuning bolts before tightening
the tuning boIt with the next Iowest pitch.While
aIternatelytightening the otherbolts,do nottouch
the tuning bolt with the highest pitch(reference
pitch).
5L。。sena11。ver−tightenedb・ltsacc・rdingt・the
proceduredescribed in step2(★2).Whenthe pitch
is approximateIy the same at each bolt,repeat−
edIy depress the toe and heel of the pedaI sev−
eral times.
6Repeatsteps2thr・ugh5untilthepitchateach
boIt is exactly the same.
7checkthes。undbystrikingtheheadasde−
scribedinstep2.
・Sound is Iower than the tuning note
→¶une the instrument by tightening atun−
ing boIts by an equal amount(max、
1/160faturn).
・Sound is higher than the tuning note
→1「une the instrument by bosening alI tun−
ing bolts by an equaI amount(max.
1/160faturn)accordingtotheprocedure
describedinstep,.
80peratethepedaIasdescribedinstep5.Ifthe
pitch does not change,the instrument is tuned
properly、
(lfthe pitch changes,repeatfrom step7.)
The instrument is now tuned to the Iowest sound
(note)of its tonal range、Depress the toe of the
pedaI to change to a higher pitch(note).
9A杜ertuning,peげ。rm・PedaIAdjustmentand
then■Tuning lndicator Adlustment、
Adlsti㎎thePitch
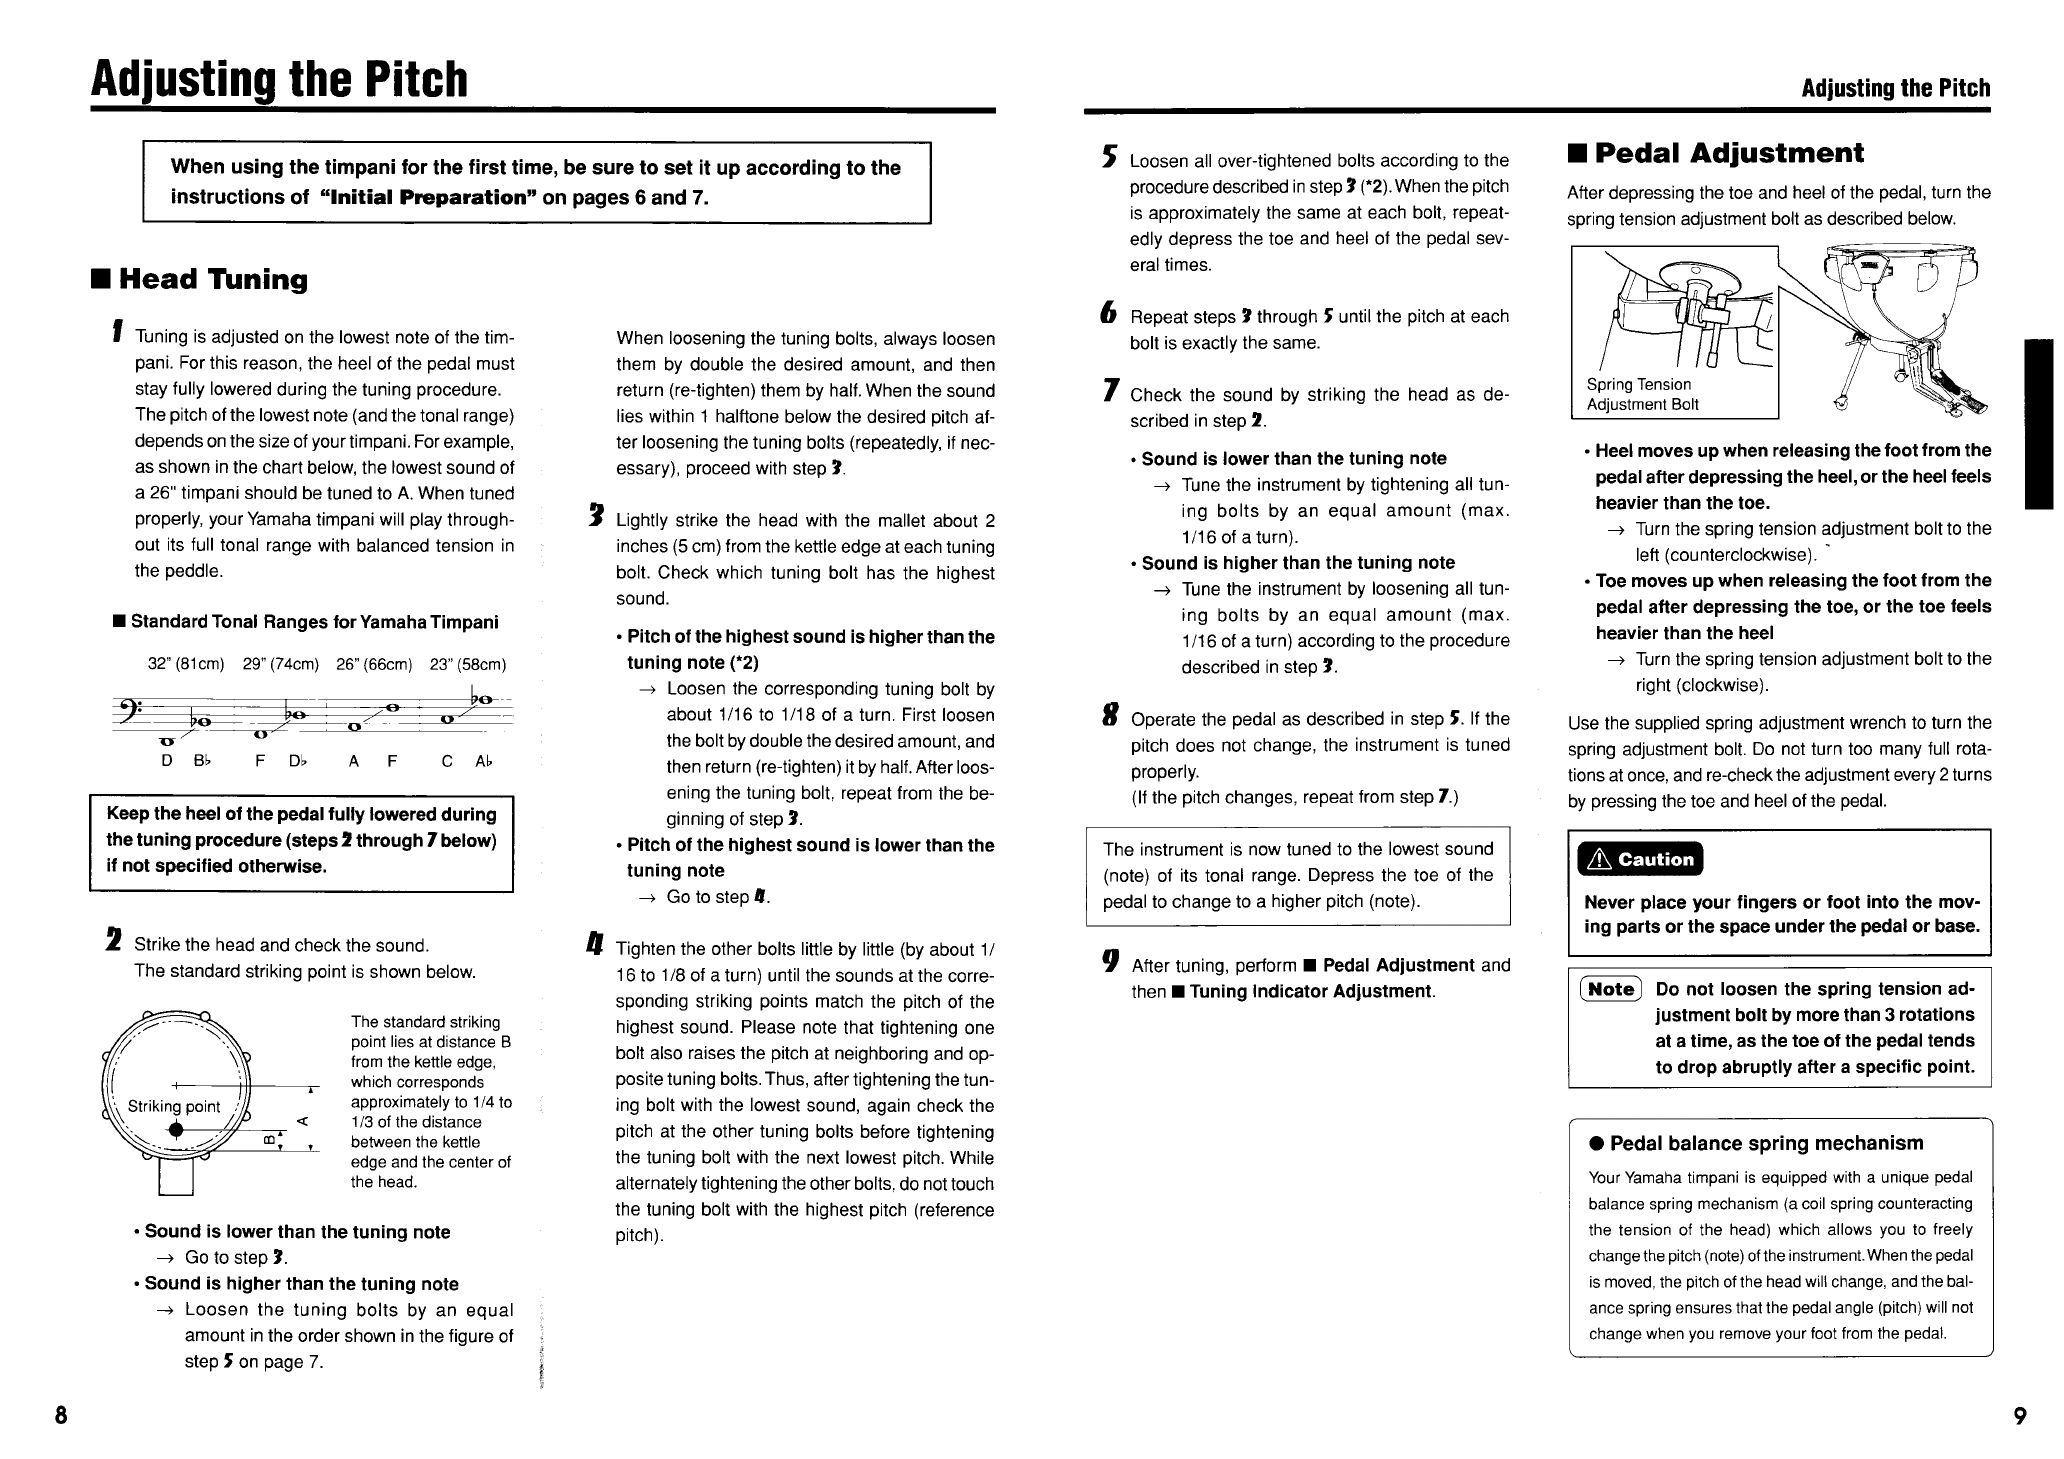
■Pedal Adj聞stme論t
After depressing the toe and heel of the pedal,turn the
spring tension adjustment bolt as described bebw.
o
1
Spring1「ension
Adjustment Bolt
/
還
。Heel moves up when releasing thefootfrom the
pedal a貴er depressing the heeI,or the heel feels
heavier than the tOe.
→Tum the spring tension adjustment bolt to the
left(countercIockwise).
・Toe moves up when reIeasing the foot from the
pedal a備er depressing the toe,or the toe feels
heavier than the heel
→¶um the spring tension adjustment boIt to the
right(cIockwise).
Use the suppIied spring adjustment wrench to tum the
spring adjustment bolt,Do not tum too many full rota−
tions at once,and re−checkthe adjustment every2tums
by pressing the toe and heel of the pedaI.
Never place your fingers or foot into the mov・
ing Parts or the space under the peda書or base・
画D・n・tI・・senthespringtensi・nad・
justment bolt by more than3rotations
at a time,as the toe of the pedal tends
todropabruptlya貴eraspecificpoint・
●Pedal balance spring mechanism
梅ur粕maha timpani is equipped with a unique pedaI
baIancespring mechanism(acoll springcounteracting
the tension of the head)which aIlows you to freeIy
changethe pitch(note)ofthe instrument、WhenthepedaI
is moved,the pitch ofthe head wiIl change,and the baト
ance sprlng ensures that the pedal angIe(pitch)will not
change when you remove your foot from the pedaL
9