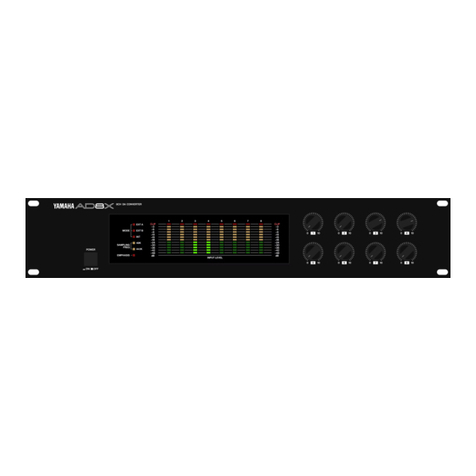
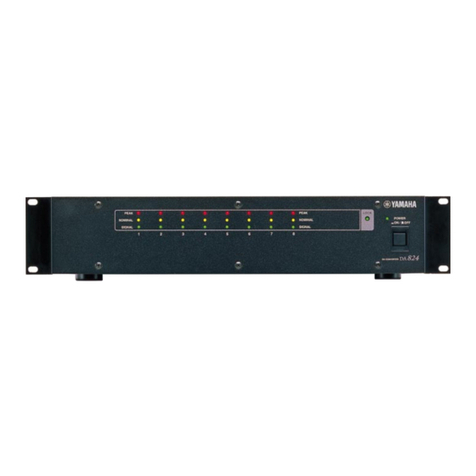
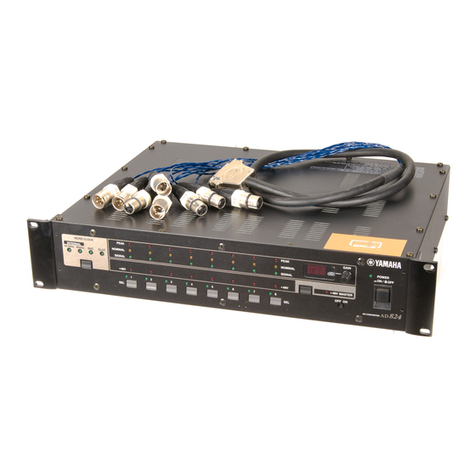
Yamaha AD824 User manual

SERVICE MANUAL
PA 011523
HAMAMATSU, JAPAN
1.45K-9731 K Printed in Japan '00.07
CONTENTS
SPECIFICATIONS···································································· 3
PANEL LAYOUT······································································· 5
CIRCUIT BOARD LAYOUT······················································ 6
DIMENTIONS ··········································································· 8
BLOCK DIAGRAM···································································· 9
DISASSEMBLY PROCEDURE··············································· 10
LSI PIN DESCRIPTION·························································· 14
IC BLOCK DIAGRAM ····························································· 16
CIRCUIT BOARDS································································· 19
INSPECTION·········································································· 36
TEST PROGRAM··································································· 39
FLASH ROM UPGRADE························································ 43
ERROR MESSAGES······························································ 45
PARTS LIST
OVERALL CIRCUIT DIAGRAM
AD CONVERTER
200006**-150000
This document is printed on chlorine free (ECF) paper with soy ink.

AD824
2
WARNING: CHEMICAL CONTENT NOTICE!
The solder used in the production of this product contains LEAD. In addition, other electrical/electronic and/or plastic (where
applicable) components may also contain traces of chemicals found by the California Health and Welfare Agency (and possibly
other entities) to cause cancer and/or birth defects or other reproductive harm.
DO NOT PLACE SOLDER, ELECTRICAL/ELECTRONIC OR PLASTIC COMPONENTS IN YOUR MOUTH FOR ANY REASON
WHAT SO EVER!
Avoid prolonged, unprotected contact between solder and your skin! When soldering, do not inhale solder fumes or expose eyes
to solder/flux vapor!
If you come in contact with solder or components located inside the enclosure of this product, wash your hands before handling
food.
IMPORTANT NOTICE
This manual has been provided for the use of authorized Yamaha Retailers and their service personnel. It has been assumed that
basic service procedures inherent to the industry, and more specifically Yamaha Products, are already known and understood by
the users, and have therefore not been restated.
WARNING: Failure to follow appropriate service and safety procedures when servicing this product may result in personal
injury, destruction of expensive components and failure of the product to perform as specified. For these
reasons, we advise all Yamaha product owners that all service required should be performed by an authorized
Yamaha Retailer or the appointed service representative.
IMPORTANT: This presentation or sale of this manual to any individual or firm does not constitute authorization, certification,
recognition of any applicable technical capabilities, or establish a principal-agent relationship of any form.
The data provided is belived to be accurate and applicable to the unit(s) indicated on the cover. The research engineering, and
service departments of Yamaha are continually striving to improve Yamaha products. Modifications are, therefore, inevitable and
changes in specification are subject to change without notice or obligation to retrofit. Should any discrepancy appear to exist,
please contact the distributor's Service Division.
WARNING: Static discharges can destroy expensive components. Discharge any static electricity your body may have
accumulated by grounding yourself to the ground bus in the unit (heavy gauge black wires connect to this bus).
IMPORTANT: Turn the unit OFF during disassembly and parts replacement. Recheck all work before you apply power to the
unit.
WARNING
Components having special characteristics are marked and must be replaced with parts having specification equal to those
originally installed.
LITHIUM BATTERY HANDLING
This product uses a lithium battery for memory back-up.
WARNING: Lithium batteries are dangerous because they can be exploded by improper handling. Observe the following
precautions when handling or replacing lithium batteries.
Leave lithium battery replacement to qualified service personnel.
Always replace with batteries of the same type.
When installing on the PC board by soldering, solder using the connection terminals provided on the battery cells.
Never solder directly to the cells. Perform the soldering as quickly as possible.
Never reverse the battery polarities when installing.
Do not short the batteries.
Do not attempt to recharge these batteries.
Do not disassemble the batteries.
Never heat batteries or throw them into fire.
ADVARSEL!
Lithiumbatteri-Eksplosionsfare ved fejlagtig håndtering. Udskiftning må kun ske med batteri af samme fabrikat og type. Levér det
brugte batteri tilbage til leverandøren.
VARNING
Explosionsfara vid felaktigt batteribyte.
Använd samma batterityp eller en ekvivalent typ som rekommenderas av apparattillverkaren.
Kassera använt batteri enligt fabrikantens instruktion.
VAROITUS
Paristo voi räjähtää, jos se on virheellisesti asennettu.
Vaihda paristo ainoastaan laitevalmistajan suosittelemaan tyyppiin.
Hävitä käytetty paristo valmistajan ohjeiden mukaisesti.
The following information complies with Dutch Official Gazette 1995. 45; ESSENTIALS OF ORDER ON THE COLLECTION OF
BATTERIES.
• Please refer to the diassembly procedure for the removal of Back-up Battery.
• Leest u voor het verwijderen van de backup batterij deze beschrijving.
SPECIFICATIONS
AD824
3
IMPORTANT NOTICE FOR THE UNITED KINGDOM
Connecting the Plug and Cord
IMPORTANT. The wires in this main lead are coloured in
accordance with the following code:
BLUE: NEUTRAL
BROWN: LIVE
As the colours of the wires in the main lead of this apparatus may not
correspond with the coloured markings identifying the terminals in
your plug, proceed as follows:
The BLUE wire must be connected to the terminal that is marked with
the letter N (or coloured BLACK).
The BROWN wire must be connected to the terminal that is marked
with the letter L (or coloured RED).
Be certain that neither core is connected to the earth terminal of the
three pin plug.
MY8-AE, MY8-TD
Sampling rate MY8-AT
AD conversion resolution
Frequency response
Dynamic range *1
Gain error
THD *2
Hum & noise level *1
Equivalent input noise *1
Crosstalk
Signal delay
Phantom power
PEAK
NOMINAL
Channel indicators SIGNAL
+48 V
SEL
Wordclock
Other indicators +48 V MASTER
POWER
Gain display
Power requirements
Power consumption
Dimensions (W x H x D)
Weight
Free-air operating temperature
Storage temperature
Relative humidity
Power cord length
Supplied accessories
Options
39.69–50.88 kHz
41.013–50.88 kHz
24-bit linear, 128-times oversampling
-1.5, +1 dB, 20 Hz–20 kHz, GAIN +10 dB
-3, +1 dB, 20 Hz–20 kHz, GAIN -62 dB
110 dB (typical), GAIN +10 dB
±1 dB @ 1 kHz, GAIN -62 dB to +10 dB
0.1 %, 4 dB output @ 20 Hz–20 kHz, GAIN -62 dB
0.05 %, full scale output @ 1 kHz, GAIN -62 dB
0.05 %, 4 dB output @ 20 Hz–20 kHz, GAIN +10 dB
0.01 %, full scale output @ 1 kHz, GAIN +10 dB
-92 dB (typical), Rs = 150 Ω, GAIN +10 dB
-62 dB, Rs = 150 Ω, GAIN -62 dB
-128 dB, Rs = 150 Ω, GAIN -62 dB
-70 dB between adjacent channels @ 1 kHz
0.85 ms (analog input to digital output, fs = 48 kHz)
+48 V
3 dB below full scale
14 dB below full scale
34 dB below full scale
Phantom power on/off
Channel select
44.1kHz, 48kHz, BNC, SLOT
Phantom power master on/off
Power on/off
3-digit, 7-segment LED
U.S.A. & Canada 120 V AC, 60 Hz
Europe 230 V AC, 50 Hz
50 W
480 x 97.5 x 377.6 mm (18.9 x 3.84 x 14.86 inches)
8.5 kg (18.7 lbs)
10˚ C to 35˚ C (50˚ F to 95˚ F)
-20˚ C to 60˚ C (-4˚ F to 140˚ F)
10 %–95 %
1.9 m
Owner’s Manual, 9-pin D-sub crossed cable (1.5m)
MY8-AT, MY8-TD, MY8-AE mini YGDAI I/O cards
*1. Measured with a 6 dB/octave filter at 12.7 kHz;
equivalent to a 20 kHz filter with infinite dB/
octave attenuation.
*2. Measured with a 6 dB/octave filter @ 80 kHz.
* Where dB represents a specific voltage, 0 dB
is referenced to 0.775 V rms.

AD824
4
*1. 24-bit linear, 128-times oversampling A/D converters.
*2. XLR-type connectors are electronically balanced (pin 1 = ground, pin 2 = hot, pin 3 = cold).
*3. TRS phone jacks are electronically balanced (tip = hot, ring = cold, sleeve = ground).
* Where dB represents a specific voltage, 0 dB is referenced to 0.775 V rms.
Analog Input
Connection GAIN Actual Load
Impedance
For Use
with
Nominal Connector
Input Level
Nominal Max.
before clip
INPUT 1–8 *1
INSERT IN 1–8
3k Ωlines
10k W
50–600 Ω
mics &
600 Ωlines
600 Ωlines
-62 dB
+10 dB
-62 dB
(615 µV)
+10 dB
(2.45 V)
+10 dB
(2.45 V)
-48 dB
(3.08 mV)
+24 dB
(12.28 V)
+24 dB
(12.28 V)
XLR-3-31 type
(balanced)*2
TRS phone jack
(balanced)*3
*1. TRS phone jacks are electronically balanced (tip = hot, ring = cold, sleeve = ground).
* Where dB represents a specific voltage, 0 dB is referenced to 0.775 V rms.
Analog Output
Connection Actual Source
Impedance
For Use
with
Nominal Connector
Output Level
Nominal Max.
before clip
INSERT OUT 1–8 150 Ω10k Ωlines +10 dB
(2.45 V) +24 dB
(12.28 V) TRS phone jack
(balanced)*1
Digital I/O
Connection
COM PC/RS422
COM RS422
WORD CLOCK IN
WORD CLOCK OUT
SLOT
Format
—
—
—
—
mini YGDAI
Level/Impedance
RS232C/RS422
RS422
TTL, 75 Ω(ON/OFF)
TTL, 75 Ω
—
Connector
9-pin D-sub (male)
9-pin D-sub
BNC
BNC
—

ON OFF
POWER
AD CONVERTER
12345678
PEAK
SIGNAL
NOMINAL
PEAK
SIGNAL
+48V
SEL
NOMINAL
+48V
WORD CLOCK
INTERNAL
44.1kHz BNC SLOT48kHz
SEL
dB
GAIN
OFF ON
+48V MASTER
INPUT
(BAL)
OUT
(BAL)
IN
(BAL)
INSERT
COM
N
VERTER
AD824
8 2314567
83214567
8 4321567
SLOT
OUT
PC RS422 75 IN
ON
OFF
WORD CLOCK
RS422
1
6 7 8 9 10 11 12 13
15 16 17 18 19 20
22
21
23
24
14
2 3 4 5
1PEAK, NOMINAL & SIGNAL indicators
2GAIN display
3GAIN control
4POWER indicator
5POWER switch
6WORD CLOCK indicators
7WORD CLOCK Source button
8Channel SEL indicators
9Channel SEL buttons
10 Channel +48V indicators
11 +48V on/off button
12 +48V MASTER indicator
13 +48V MASTER switch
14 Power cable
15
16 COM RS422 port
COM PC/RS422 switch
17 COM PC/RS422 port
18 WORD CLOCK OUT connector
19 WORD CLOCK 75 ON/OFF switch
20 WORD CLOCK IN connector
21 INPUT (BAL) connectors
22 SLOT
23 INSERT OUT (BAL) connectors
24 INSERT IN (BAL) connectors
PANEL LAYOUT
AD824
5
Front Panel
Rear Panel

AD824
6
CIRCUIT BOARD LAYOUT
MAIN
MYSL
HA
JK
AD
AC
Rear panel assembly
Front panel assembly
Power transformer
PN
SW
CN909
CN903
CN906 CN902
CN904 CN905
CN901
CN908CN907
CN101 CN201
CN002
CN001
CN961
CN960
CN962
CN963
CN052 CN053
CN051 CN054

AD824
7
JK
AD
CN103
AD-
CN104
AD-
CN204
CN203
CN202CN102
CN005
CN004 CN002 CN001
CN003
CN004
CN001
CN003
MYSL
AC
DC
PN
SW
CN002
CN008CN010CN011
CN007
CN006
CN005
CN009

AD824
8
DIMENTIONS
67.5 67.5345
35 35410
430 13
88
H: 97.5
3030
48 (33)
274
10.8
45 17 355
D: 377.6
W: 480
Unit: mm

CH1
INPUT
JK101
INSERT OUT
JK102
CN002
CN101CN102
IC101
CN003
FS
SDATA
OUT1 ~ 8 , FS-AD , 64FS-AD , 256FS-AD , RESET-AD
64FS
256FS
RESET
CN002 CN962
LEVEL
PAD PAD
HA1 HA1
HA2A ,HA2B ,HA2C
+48V
Q102
RY101
IC101 IC102
PAD HA2
A / D
PERK
NOMINAL
SIGNAL
HA1
BA
INSERT IN
JK103
IC103
77 1
IC104 IC104 AINL+
AINL–
IC105
AK5342
BUFF
IC008
A / D
IC305
AK5342
AINR+
AINR–
CH2
CH3
CH4
D-FF
CH5
CH6
CH7
CH8
ADD-0~7
ADD-0~7
RST-HA , A1-HA , A2-HA , A3-HA , CS-HA
CPU
SH7042A
IC911
IC916
IC919
PE4
TX, RX
LOCK44
9.8304MHz
LOCK48
MUTE
COMA-TX, TX-COMB
256k SRAM
IC923
256k SRAM
IC924
8M ROM
IC927
BUFF
IC932
CN901CN054
CN051b
CN051a
CN901 OUT3/4,OUT7/8
OUT1/2,OUT5/6
CN904
CN905
CN961 SWA SWA,SWB ECA,ECB+48
CN960
CN902CN053
CN902
CN053
CN054
BUFF
IC933
MUTE
PC/RS422
RS422
IC901
COM B/SLOT
SELECT
IC903
INT/EXT
SELECT
IC913
SELECT
IC910
D-FF
IC907
INT 48kHz
X902
INT 44.1kHz
X901
WORD
CLOCK
SELECT
IC921
PLL &
TIMING
GEN.
IC922
CN903
CN909
PC
ON
OFF
RS422
EXT-DIRIN
XI
CN907
CN908
RESET
SLOT
SLOT
D-FF
D-FF
RES
EXTAL
44.1kHz
48kHz
BNC
SLOT
WORD CLOCK
INTERNAL +48V x 8 SEL x 8
SEL1~8
+48V
MASTER
Rotary Encoder
GAIN
dB
OUT
IN
JK902
JK901
MAIN
MYSL
HA HA
AD
AD
A / D
IC505
AK5342
AD
A / D
IC705
AK5342
AD
PN
AD
PN
JK
AD
COM
WORD CLOCK
KEC-92536
IC001
–006
415–18
6
7
9
8
5
25
24
EC960
IC928,
929
84
74
87
9
547,48
90
88
15 15
12
3
11 3,9
36 36
56
5,6
19
3,5
9,15
2,4
3,4
7
7
11 SW901
BLOCK DIAGRAM
AD824
9

HA
<Top View>
Top cover
IF plate
[460]
[530]
[300] [450] X16[290] [A]
[500] X14
[310]
[500]: Bind Head Tapping Screw-B A4.0X8 MFZN2BL (VC688800)
Fig. 1
<Rear View>
[330]: Bonding Tapping Screw-B 3.0X8 MFZN2BL (VN413300)
[390]: Bonding Tapping Screw-B 3.0X8 MFZN2BL (VN413300)
[530]: Bind Head Screw A4.0X12 MFZN2BL (VP156900)
Fig. 2
[A]
MAIN
[390]X6[330][330]
3. JK Circuit Board and AD Circuit Board
3-1 Remove the top cover. (See procedure 1.)
3-2 Remove the HA circuit board. (See procedure 2.)
3-3 Remove the two (2) screws marked [430]. The AD shield
sheet can then be removed. (Fig. 4)
3-4 Remove the six (6) screws marked [390] and the two (2)
screws marked [400]. The JK circuit board can then be
removed. (Fig. 2 and Fig. 3)
4. AD Circuit Board
4-1 Remove the top cover. (See procedure 1.)
4-2 Remove the HA circuit board. (See procedure 2.)
4-3 Remove the JK circuit board. (See procedure 3.)
4-4 Remove the six (6) screws marked [330], the two (2)
screws marked [350] and the two (2) screws marked
[370]. The AD circuit board can then be removed. (Fig. 2
and Fig. 3)
AD824
10
DISASSEMBLY PROCEDURE
1. Top Cover
1-1 Remove the fourteen (14) screws marked [500]. The top
cover can then be removed. (Fig. 1)
2. Circuit Boards and Units
Remove the top cover, each circuit board and unit can
then be removed.
Circuit Board and Unit
MAIN
HA
DC Assembly
Power Transformer
A
290
300
310
450
460
210
190
Screw
Bonding Screw 4.0X8 MFZN2BL (VS154500)
Bonding Screw 3.0X6 MFZN2BL (VS863000)
Bind Head Tapping Screw-B 3.0X6 MFZN2BL (EP600230)
Bonding Tapping Screw 3.0X8 MFZN2BL (VN41330)
Bind Head Tapping Screw-B 3.0X6 MFZN2BL (EP600230)
Bind Head Tapping Screw-B A4.0X6 MFZN2BL (VC688800)
4
1
2
5
16
4
2
4
Ref. No. Screw QTY 2
2
2
1
2
1
5
5
Fig.

AD824
11
<Top View>
[400]
[350]
[370]
[370]
JK
AD
[350]: Bonding Tapping Screw-B 3.0X8 MFZN2BL (VN413300)
[370]: Bonding Tapping Screw-B 3.0X8 MFZN2BL (VN413300)
[400]: Bind Head Tapping Screw-B 3.0X6 MFZN2BL (EP600230) [430]: Bind Head Tapping Screw-B 3.0X6 MFZN2BL (EP600230)
Fig. 3 Fig. 4
<Top View>
[400]
[430] [430]
AD shield sheet
5. MYSL Circuit Board
* Note that remove card before following operation.
5-1 Remove the top cover. (See procedure 1.)
5-2 Remove the MAIN circuit board. (See procedure 2.)
5-3 Remove the two (2) screws marked [530]. The IF plate
can then be removed. (Fig. 2)
5-4 Remove the four (4) screws marked [260]. The OPT
assembly can then be removed. (Fig. 5)
5-5 Remove the two (2) screws marked [240]. The MYSL
circuit board can then be removed. (Fig. 5)
6. AC Circuit Board
6-1 Remove the top cover. (See procedure 1.)
6-2 Remove the MAIN circuit board. (See procedure 2.)
6-3 Remove the three (3) screws marked [50A] and the two
(2) screws marked [110A]. The AC circuit board can then
be removed. (Fig. 6)
* The fuse is not a part of the AC circuit Board. When you
replace the AC circuit board, you should remove the fuse
from the board, and put it back into the holder on the new
board.
7. DC Circuit Board
7-1 Remove the top cover. (See procedure 1.)
7-2 Remove the DC assembly. (See procedure 2.)
7-3 Remove the four (4) screws marked [60]. The transistor
holder can then be removed. (Fig. 7)
7-4 Remove the three (3) screws marked [40]. The DC circuit
board can then be removed. (Fig. 7)
* The four fuses are not part of the DC circuit Board. When
you replace the DC circuit board, you should remove the
fuses from the board, and put it back into the holder on the
new board.

[60]
[140]
[140]
[140]
DC
[40]: Bonding Tapping Screw-B 3.0X8 MFZN2BL (VN413300)
[60]: Pan Head Screw SP4.0X8 MFZN2Y (EL200020)
Fig. 7
[140]: Oval Head Screw B4.0X10 MFZN2BL (V6221000)
Fig. 8
• DC Assembly
[40]
[40]
[40]
Transistor holder Rack mount angle
Rack mount angle
<Right View>
<Left View>
[140]
Fuses
Fuses
AD824
12
8. PN Circuit Board and SW Circuit Board
8-1 Remove the top cover. (See procedure 1.)
8-2 Remove the six (6) screws marked [140]. The right and
left rack mount angles can then be removed. (Fig. 8)
8-3 Remove the knob marked [110B]. (Fig. 9)
8-4 Remove the six (6) screws marked [80]. The front panel
can then be removed. (Fig. 9)
AC
[250]: Bind Head Screw 4.0X8 MFZN2BL (EG340360)
[260]: Bonding Tapping Screw-B 3.0X8 MFZN2BL (VN413300)
Fig. 5
<Top View>
DC assembly
OPT assembly
MYSL
Power transformer
[190]
[260]
[260]
[210]
[250] [250]
[210]
[110A] X2
Fuse
AC
[50A]: Bind Head Tapping Screw-B A4.0X8 MFZN2BL (VC688800)
[110A]: Bonding Tapping Screw-B 3.0X8 MFZN2BL (VN413300)
Fig. 6
• Rear Panel Assembly
[50A] X3

Fig. 10
Battery VN103500
VN103600(Battery holder for VN103500)
Notice for back-up battery removal
Push the battery as shown in figure,
then the battery will pop up.
Druk de batterij naar beneden zoals
aangeven in de tekening, de batterij
springt dan naar voren.
Battery
Battery holder
MAIN
[80]
PN SW
[80]: Oval Head Screw 4.0X8 MFZN2BL (VS153600)
Fig. 9
[30]: Bind Head Tapping Screw-B 3.0X6 MFZN2BL (EP600230)
[50B]: Bonding Screw 3.0X6 MFZN2BL (VS863000)
<Front View>
[80]
[30]
[50B]
[50B]
[30]
[80][80] [110B]
[90]
Front panel
[30]
AD824
13
8-5 PN Circuit Board:
Remove the four (4) screws marked [30]. The PN circuit
board can then be removed. (Fig. 9)
8-6 SW Circuit Board:
Remove the PSW knob marked [90]. (Fig. 9)
Remove the two (2) screws marked [50B]. The SW circuit
board can then be removed. (Fig. 9)
9. Replacement of the Lithium Battery
9-1 Remove the top cover. (See procedure 1.)
9-2 Remove the MAIN circuit board. (See procedure 2.)
9-3 The lithium battery can be replacement on the MAIN
circuit board. (Fig. 10)
* The lithium battery is not a part of the MAIN circuit
board. When you replace the MAIN circuit board, remove
the lithium battery and install it in the new circuit board.

AD824
14
LSI PIN DESCRIPTION
PIN
NO. I/O FUNCTIONNAME PIN
NO. I/O FUNCTIONNAME
1
2
3
4
5
6
7
8
9
10
11
12
13
14
15
16
17
18
19
20
21
22
DAUX
HDLT
DOUT
VFL
OPT
SYNC
MCC
WC
MCB
MCA
SKSY
XI
XO
P256
LOCK
Vss
TC
DIM1
DIM0
DOM1
DOM0
KM1
I
O
O
O
O
O
O
O
O
O
I
I
O
O
O
O
I
I
I
I
I
Auxiliary input for audio data
Asynchronous buffer operation flag
Audio data output
Parity flag output
Fs x 1 Synchronous output signal for DAC
Fs x 1 Synchronous output signal for DSP
Fs x 64 Bit clock output
Fs x 1 Word clock output
Fs x 128 Bit clock output
Fs x 256 Bit clock output
Clock synchronization control input
Crystal oscillator connection or external
clock input
Crystal oscillator connection
VCO oscillating clock connection
PLL lock flag
Logic section power (GND)
PLL time constant switching output
Data input mode selection
Data output mode selection
Clock mode switching input 1
23
24
25
26
27
28
29
30
31
32
33
34
35
36
37
38
39
40
41
42
43
44
RSTN
Vdda
CTLN
PCO
(NC)
CTLP
Vssa
TSTN
KM2
KM0
FS1
FS0
CSM
EXTW
DDIN
LR
Vdd
ERR
EMP
CD0
CCK
CLD
I
I
O
I
I
I
I
O
O
I
I
I
O
O
O
O
I
I
System reset input
VCO section power (+5 V)
VCO control input N
PLL phase comparison output
VCO control input P
VCO section power (GND)
Test terminal. Open for normal use
Clock mode switching input 2
Clock mode switching input 0
Channel status sampling frequency
display output 1
Channel status sampling frequency
display output 0
Channel status output method selection
External synchronous auxiliary input
word clock
EIAJ (AES/EBU) data input
PLL word clock output
Logic section power (+5 V)
Data error flag output
Channel status emphasis control code
output
3-wire type microcomputer interface data
output
3-wire type microcomputer interface clock
input
3-wire type microcomputer interface load
input
YM3436DK (XG948E0) DIR2 (Digital Format Interface Receiver) MAIN: IC921, 922
PIN
NO. I/O FUNCTIONNAME PIN
NO. I/O FUNCTIONNAME
1
2
3
4
5
6
7
8
9
10
11
12
13
14
VREFL
GNDL
VCOML
AINL+
AINL-
ZCAL
VD
DGND
CAL
/RST
SMODE2
SMODE1
LRCK
SCLK
O
-
O
I
-
I
-
-
O
I
I
I
I/O
I/O
L ch standard voltage output (+3.75 V)
L ch Ground
L ch common voltage (+2.5 V)
L ch analog (+) input
L ch analog (-) input
Zero calibration
“L”: VCOML,VCOMR
“H”: Analog input (AINL+/-,AINRR+/-)
Power supply for digital
Ground for digital
Calibration status
Reset
Serial interface mode select
MSB first, 2’s compliment
L/R ch select clock
Serial data clock
15
16
17
18
19
20
21
22
23
24
25
26
27
28
SDATA
FSYNC
MCLK
CMODE
HPFE
TEST
BGND
AGND
VA
AINR-
AINR+
VCOMR
GNDR
VREFR
O
I/O
I
I
I
I
-
-
-
I
I
O
-
O
Serial data output
Frame synchronization clock
Master clock input
CMODE=“H”:384 fs
CMODE=“L”:256 fs
Master clock select
“L”: MCLK=256 fs (12.288 MHz @fs=48 kHz)
“H”: MCLK=384 fs (18.432 MHz @fs=48 kHz)
HPF enable “L”: OFF “H”: ON
TEST pin
Connect it with DGND.
Ground
Ground for analog
Power supply for analog (+5 V)
R ch analog (+) input
R ch analog (-) input
R ch common voltage (-2.5 V)
R ch ground
R ch standard voltage output (+3.75 V)
AK5392-VS-E2 (XV065A00) ADC (Analog to Digital Converter)
SMODE2
L
L
H
H
SMODE1
L
H
L
H
MODE
Slave mode
Master mode
Slave mode
Master mode
LRCK
H/L
H/L
L/H
L/H
AD: IC105, 305, 505, 705

AD824
15
PIN
NO. I/O FUNCTIONNAME PIN
NO. I/O FUNCTIONNAME
1
2
3
4
5
6
7
8
9
10
11
12
13
14
15
16
17
18
19
20
21
22
23
24
25
26
27
28
29
30
31
32
33
34
35
36
37
38
39
40
41
42
43
44
45
46
47
48
49
50
51
52
53
54
55
56
PE14
PE15
VSS
A0
A1
A2
A3
A4
A5
A6
A7
A8
A9
A10
A11
A12
A13
A14
A15
A16
VCC
A17
VSS
/RAS
/CASL
/CASH
VSS
RDWR / PB5
A18
A19
A20
PB9 /A21
VSS
/RD
/WDTOVF
/WRH
VCC
/WRL
VSS
/CS1
/CS0
PA9 / TCLKD
/IRQ2 / TCLKC
/CS3
/CS2
/IRQ1
TXD
RXD
/IRQ0
PA1 / TXD0
PA0 / RXD0
D15
D14
D13
VSS
D12
O
O
I
O
O
O
O
O
O
O
O
O
O
O
O
O
O
O
O
O
I
O
I
O
O
O
O
O
O
O
O
O
I
O
O
O
I
O
I
O
O
O
I
O
O
I
O
I
I
O
I
I/O
I/O
I/O
I
I/O
Port E
Port E
Ground
Address bus
Power supply
Address bus
Ground
Row address strobe
Column address strobe (low)
Column address strobe (high)
Ground
DRAM read/write / Port B
Address bus
Port B / Address bus
Ground
Read
Watch dog timer overflow
High write
Power supply
Low write
Ground
Chip select
Chip select
Port A / Timer clock
Interrupt request / Timer clock
Chip select
Chip select
Interrupt request
Data transmission
Data reception
Interrupt request
Port A / Data transmission
Port A / Data reception
Data bus
Ground
Data bus
57
58
59
60
61
62
63
64
65
66
67
68
69
70
71
72
73
74
75
76
77
78
79
80
81
82
83
84
85
86
87
88
89
90
91
92
93
94
95
96
97
98
99
100
101
102
103
104
105
106
107
108
109
110
111
112
D11
D10
D9
D8
VSS
D7
D6
D5
VCC
D4
D3
D2
D1
D0
VSS
XTAL
MD3
EXTAL
MD2
NMI
VCC
MD1
MD0
PLLVCC
PLLCAP
PLLVSS
PA15 / CK
/RES
PE0
PE1
PE2
PE3
PE4
VSS
AN0 / PF0
AN1 / PF1
AN2 / PF2
AN3 / PF3
AN4 / PF4
AN5 / PF5
AVSS
AN6 / PF6
AN7 / PF7
AVCC
VSS
PE5
VCC
PE6
PE7
PE8
PE9
PE10
VSS
PE11
PE12
PE13
I/O
I/O
I/O
I/O
I
I/O
I/O
I/O
I
I/O
I/O
I/O
I/O
I/O
I
I
I
I
I
I
I
I
I
I
I
I
O
I
I
I
I
I
I
I
I
I
I
I
I
I
I
I
I
I
I
O
I
O
O
O
O
O
I
O
O
O
Data bus
Ground
Data bus
Power supply
Data bus
Ground
Crystal oscillator
Mode control
Crystal oscillator
Mode control
Non-maskable interrupt request
Power supply
Mode control
Mode control
PLL Power supply
PLL capacitor
PLL Ground
Port A / Clock
Reset
Port E
Ground
Analog input / Port F
Analog ground
Analog input / Port F
Power supply
Ground
Port E
Power supply
Port E
Ground
Port E
HD6477042AF28 (XV731A00) CPU MAIN: IC911

AD824
16
IC BLOCK DIAGRAM
HD74LV04AFPEL (IS000400)
HD74LVU04AFPEL (XY102A00)
Hex Inverter
MAIN: IC914,920
HD74LV08AFPEL (IS000800)
Quad 2 Input AND
MAIN: IC912
HD74LV32AFPEL (IS003200)
Quad 2 Input OR
MAIN: IC926
HD74LV74AFPEL (IS007400)
Dual D-Type Flip-Flop
MAIN: IC907,919
SN74LV138ANSR (IS013810)
SN74LV138AFPEL (IS013800)
3 to 8 Demultiplexer
MAIN:
HA:
SN74LV139ANSR (IS013910)
Dual 2 to 4 Demultiplexer
MAIN: IC915
TC74HC153AFEL (XY309A00)
Dual 4 to 1 Data Selectors
MAIN: IC910,913
HD74LV157AFPEL (IS015700)
Quad 2 to 1 Multiplexer
MAIN: IC935
SN74LV174ANSR (IS0174100)
Hex D-Type Flip-Flop
MAIN: IC929
1
2
3
4
5
6
7
1A
1Y
2A
2Y
3A
3Y
Vss
14
13
12
11
10
9
8
VDD
6A
6Y
5A
5Y
4A
4Y
1
2
3
1A
1Y
42A
52B
62Y
7
VSS
1B
14
13
12
VDD
4A
11 4Y
10 3B
93A
83Y
4B
1
2
3
1A
1Y
42A
52B
62Y
7GND
1B
14
13
12
Vcc
4A
11 4Y
10 3B
93A
83Y
4B
INPUTS OUTPUTS
PR CLR CLK D Q Q
L
H
H
L
H
Q O
H
L
H
H
L
Q O
X
X
X
H
L
X
X
X
X
f
f
L
H
L
L
H
H
H
L
H
L
H
H
H
1
2
3
4
5
6
7
1CLR
1D
1CK
1PR
1Q
1Q
GND
14
13
12
11
10
9
8
VCC
2CLR
CLR
2D
D
2CK
CK
2PRPR
2Q
2Q
Q
Q
CLR
D
CK
PR
Q
Q
IC917
IC009
1
2
3
4
5
6
7
AA
Select
Enable
Output
Output
BB
CC
G2A G2A
G2B
G2B
G1 G1
Y7 Y7 Y5
Y4
Y3
Y2
Y1
Y0
Y6
16
15
14
13
12
11
10
Vcc
YO
Y1
Y2
Y3
Y4
Y5
8
GND 9Y6
1
2
3
4
5
6
7
1G
1A
1B
1Y0
1Y1
1Y2
1Y3
AG
B
Y0
Y1
Y2
Y3
16
15
14
13
12
11
10
Vcc
2G
2A
2B
2Y0
2Y1
2Y2
8
GND 92Y3
Y2
Y3
Y1
Y0
B
A
G
1
2
3
4
5
6
7
1G SELECT
STROBE B
OUTPUT 1Y
1G
IC3
IC2
IC1
IC0
1Y
16
15
14
13
12
11
10
Vcc
SELECT 2G
STROBE A
8
GND 9OUTPUT 2Y
2C0
2Y
2C1
2C2
2C3
2G
B
B
B
B
AA
AA
DATA
INPUTS
DATA
INPUTS
1
2
3
4
5
6
7
SELECT
1A 1A
1B 1B
1Y 1Y
2A 2A
2B 2B
2Y 2Y
16
15
14
13
12
11
10
Vcc
STROBE
G
4A
S3Y
4A
4B
4B
4Y
4Y
3A
3A
3B
3B
8
GND 93Y
Q
Q
DCK CK
C K
DCK
GG
CLEAR
1Q
1D
2D
2Q
3D
3Q
GND
116
215
314
413
512
611
710
8 9
Vcc
6Q
6D
5D
5Q
4D
4Q
CK
Q
D
GG
Q
DCK
GC K
Q
D
G
Q
D

AD824
17
HD74LV245AFPEL (IS024500)
Octal 3-State Bus Transceiver
MAIN:
AD:
HA:
HD74LV273AFPEL (IS027300)
Octal D-Type Flir Flop
MAIN:
HA:
SN75121NSR (XU816A00)
Dual Line Driver
MAIN: IC930
SN75124NS (XN976A00)
Triple Line Receiver
MAIN: IC902
SN75C1168NSR (XU073A00)
Line Driver / Receiver
MAIN: IC903
HD74HC4053AF(EL) (XY879A00)
Triple 2-Channel
Multiplexer/Demultiplexer
HA: IC102,202,302,402,502
TC7S04F (XM182A00)
Inverter Gate
AD: IC007
TC7S08F (XM616A00)
2 Input AND Gate
HA: IC007
NJM072M (XC458A00)
Dual Operational Amplifier
HA: IC103,203,303,403,503,603,703,803
1
2
3
4
5
6
7
20
19
18
17
16
15
14
Vcc
G
B1
B2
B3
B4
B5
B6
B7
B8
8
9
10
12
11
GND
A8
A7
A6
A5
A4
A3
A2
A1
D1R
13
CLEAR
1Q
1D
2D
2Q
3Q
3D
4D
4Q
GND
VCC
8Q
8D
7D
7Q
6Q
6D
5D
5Q
CLOCK
120
219
318
417
516
615
714
813
912
10 11
Q
DCK
CL
D
Q
CK
CL
Q
DCK
CL
D
Q
CK
CL
D
Q
CK
CL
Q
DCK
CL
D
Q
CK
CL
Q
DCK
CL
Vcc
2F
2E
2A
2Y
GND
1Y
1
2
3
4
5
6
7
89
10
11
12
13
14
15
16
2C
2B
2D
1A
1B
1C
1D
1E
1F
IC901,904-906,908,909,932-934
IC008
IC008
IC925-928
IC001-006
1A
1B
2R
2S
2A
2B
2Y
GND
116
215
314
413
512
611
710
8 9
Vcc
1S
1R
1Y
3A
3S
3R
3Y
1
2
3
4
5
6
7
1B
1A
1R
1DE
2R
2A
2B
16
15
14
13
12
11
10
Vcc
1D
1Y
1Z
2DE
2Z
2Y
8
GND 92D
1
Switches IN/OUT
2
3
4
5
6
7
8
- do. - Y0
- do. - Z1
Z
Z0
Commons OUT/IN
Swiches IN/OUT
Control Inhibit
-DC Voltage Supply
- do -
VDD
Y
X
X1
X0
A
B
C9
10
11
12
13
14
15
16 +DC Voltage Supply
Commons OUT/IN Y
- do. - X
Swiches IN/OUT X1
- do - X0
Control Input A
- do. - B
- do. - C
Y1
Y0
Z1
Z
Z0
INH
VEE
VSS
Y1
1
2
3
5
4
NC
VSS
VDD
OUT
IN 1 5
2
34
IN B
VSS
VDD
OUT
IN A 1
A
23456789
+V -IN -V
+INOUT
AAA
+V-IN
+IN OUT
BBB
-
+
B
-
+

AD824
18
NJM2082M(T1) (XN797A00)
NJM2068MD-T1 (XJ553A00)
NJM4556AL (XP844A00)
Dual Operational Amplifier
MAIN:
AD:
HA:
PN:
JK:
1
2
3
4-V
8
7
6
5
Output A +V
Non-Inverting
Input A
-DC Voltage Supply
+DC Voltage
Supply
Output B
Inverting
Input B
Non-Inverting
Input B
Inverting
Input A
+-
+-
IC918
IC103,104,203,204,303,304,403,404,
503,504,603,604,703,704,803,804
IC101,201,301,401,501,601,701,801
IC101,301,501,701
IC101,201,301,401,501,601,701,801

AC, SW(H,W,B): 3NA-V579150
AC, SW(J,U,V): 3NA-V579140
POWER
ON/OFF
1
1
SW Circuit Board (J, U, V) AC Circuit Board (J, U, V)
SW Circuit Board (H, W, B) AC Circuit Board (H, W, B)
Power transformer
AC cord
POWER
ON/OFF
Power transformer
AC cord
CIRCUIT BOARDS
AD824
19
AC Circuit Board (J, U, V) (XY031C0)······································································· 19
AC Circuit Board (H,W,B) (XY032C0) ······································································· 19
AD Circuit Board (XY028A0)······················································································ 28
DC Circuit Board (J, U, V) (XY031C0)······································································· 34
DC Circuit Board (H,W,B) (XY032C0) ······································································· 35
HA Circuit Board (XY029A0)······················································································ 24
JK Circuit Board (XY028A0) ······················································································ 29
MAIN Circuit Board (XY030A0)·················································································· 20
MYSL Circuit Board (XY030A0)················································································· 21
PN Circuit Board (XY027B0)······················································································ 32
SW Circuit Board (J, U, V) (XY031C0) ······································································ 19
SW Circuit Board (H,W,B) (XY032C0)······································································· 19
Note: See parts list for details of circuit board component parts.
Component side
Component side
Component side
Component side

to AD-CN003
MAIN Circuit Board
A'
A
3NA-V579130
to HA-CN002to MYSL-CN054to PN-CN960to PN-CN961 to MYSL-CN053
from DC-CN010
AD824
20
Other manuals for AD824
1
Table of contents
Other Yamaha Media Converter manuals

Yamaha
Yamaha musiccast Installation guide

Yamaha
Yamaha DA824 User manual

Yamaha
Yamaha AD8HR User manual

Yamaha
Yamaha UD-BT01 User manual

Yamaha
Yamaha UX96 User manual

Yamaha
Yamaha EZ-EG Supplement

Yamaha
Yamaha AD8HR User manual

Yamaha
Yamaha YMC10 User manual

Yamaha
Yamaha G50 User manual

Yamaha
Yamaha MBCL User manual

Yamaha
Yamaha MB2000 User manual

Yamaha
Yamaha DSR-100PRO User manual

Yamaha
Yamaha AD808 User manual

Yamaha
Yamaha UX96 Assembly instructions

Yamaha
Yamaha UX16 Assembly instructions

Yamaha
Yamaha PMC1 User manual

Yamaha
Yamaha PMC1 User manual

Yamaha
Yamaha DSR-70PRO User manual

Yamaha
Yamaha MB1000 User manual

Yamaha
Yamaha UX96 User manual