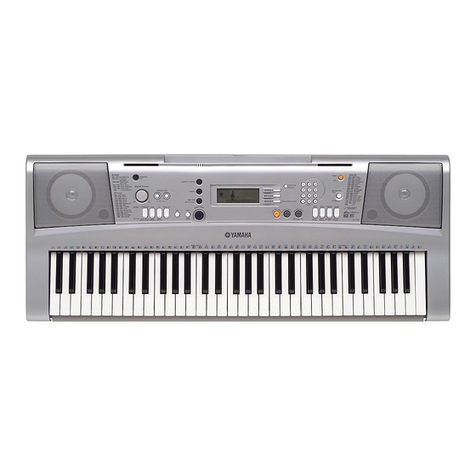
Yamaha SY.22 User manual

AUTHORIZED
PRODUCTMANUAL
MUSIC SYNTHESIZER

MUSIC SYNTHESIZER

Congratulations!
You're about to enter an exciting new world ofvector synthesis combining
Yamaha's advanced AWM sample playback technology with high-performance
FM tone generation. Vector synthesis allows you to create and control synthe-
sized sound with unprecedented ease— in a very intimate, "human" way,
putting you more closelyintouch with your instrument and music. The vector
controlletsyou blendsounds manually inrealtime, and dynamic vectors let you
"record"dynamic vector sweeps that will play automatically whenever you play
anote.Foreven more expressivecapability, the SY22keyboard features both
velocity sensitivity and after-touch response that can be assigned to a number of
musical parameters. The more you play the SY22, the more you'll find that
"vectors"will becomean indispensable part ofyour musical repertoire.
Yamaha AWM and FM tone generators for superior sound and tonal
versatility.
2-elementor4-element voicearchitecture brings AWM and FMwaveforms
together.
Vectorcontrolfor 2-axiscontrolofelementlevel and detuning.
Dynamic levelanddetune vectorscanberecordedeasilyinrealtime.
128presetAWM waveforms and 256preset FM waveforms provide an
extensivelibrary ofsonic"buildingblocks"from which to createnew voices.
64presetvoicesand 64user voice memory locations.
External memory cards provide limitlessbackup and storagecapability.
Easy-edit features make creating new voices quick and virtually program-
ming-free.
Detailedprogramming parameters for in-depth programming when necessary.
Fully programmable 8-partmulti-play mode isperfect for sequencer-driven
applicationsand layeredmulti-voice performance.
16internaldigitaleffects including reverb, delayand distortion.
Overlapping voiceselectioncapabilityfor seamlessvoicetransitions.
Velocity and after-touch sensitivekeyboard.
Pitchbend and modulation wheels.
Stereo output.

VOICECOMMON....................................................29
NAME
....................................................................
31
CONFIGURATION
..............................................
31
EFFECT
(Type &
Depth)....................................
31
PITCH BEND
........................................................ 32
WHEEL (Amplitude & Pitch Modulation)..........32
AFTERTOUCH (Amplitude & PitchModulation,
Pitch& LevelControl).....................................33
ENVELOPE (Attack & Release Rates).............33
RANDOM (Element, Level & Detune)..............34
VOICE VECTOR......................................................35
LEVEL
SPEED
(Vector
Rate).............................
37
LEVEL
RECORD
..................................................
37
LEVEL EDIT(Step,X-axis, Y-axis& Time).....37
DETUNE
SPEED
(Vector
Rate).........................
39
DETUNE
RECORD
..............................................
39
DETUNE EDIT
(Step, X-axis, Y-axis & Time)........................39
ELEMENT TONE....................................................41
WAVE
TYPE
........................................................
43
ELEMENT
COPY
.................................................
45
FREQUENCY
SHIFT
..........................................
45
VOLUME
..............................................................
46
PAN
........................................................................
46
VELOCITYSENSITIVITY.................................46
AFTERTOUCH SENSITIVITY..........................47
TONE (FMElements B and D Only).................47
LFO(LowFrequency Oscillator)AM Depth,
PM Depth, Type, Delay, Rate & Speed
.........
48
ELEMENTENVELOPE.........................................51
TYPE.
.....................................................................
53
ENVELOPE COPY.
.............................................
54
DELAY (Delay Rate & Element ON/OFF).......54
INITIAL LEVEL
...................................................
54
ATTACK
(Level
&
Rate).....................................
55
DECAY 1
(Level
&
Rate)....................................
55
REFERENCE SECTION
3.VECTORS............................................................14
Voice Configurations.............................................14
Two Types of Vectors:Manual & Dynamic........14
Manual Vector
Control
.........................................
15
An
Exercise.
..........................................................
16
Recording an OriginalDynamic Vector................20
The
STORE Key
....................................................
23
Conclusion
..............................................................
24
4.INSTANT VOICE PROGRAMMING............. 25
Conclusion
..............................................................
26
1.SETTINGUP YOUR SYSTEM..........................9
Connections
.............................................................
9
Power-on
Procedure
................................................
9
Enjoy
the
Demos
...................................................
10
2.SELECTINGAND PLAYING VOICES..........11
ThePRESET,INTERNAL and CARD Voice
Memories..........................................................
11
Selectingthe VOICE PLAY Mode,a Voice
Memory, and
Voice
..........................................
12
Overlapping Voice
Selection
.................................
13
TUTORIALS SECTION
PRECAUTIONS ..........................................................2
THE CONTROLS & CONNECTORS......................3
HOW TOUSE THISOPERATING
MANUAL................................................................1
CONTENTS
DECAY 2
(Level
&
Rate)....................................
55
RELEASE
RATE
..................................................
56
LEVEL SCALING
................................................. 56
RATE SCALING
...................................................
57
MULTI.......................................................................59
NAME
....................................................................
62
EFFECT
(Type &
Depth
)....................................
62
VOICE NUMBER................................................. 62
MIDI RECEIVE CHANNEL
...............................63
VOLUME
...............................................................
63
DETUNE
................................................................
64
NOTE LIMIT (Low & High
)................................
64
N
OTE SHIFT
........................................................
64
UTILITY SETUP.....................................................67
MASTER
TUNE
....................................................
69
TRANSPOSE
........................................................
69
MEMORY CARD
(Save, Load, Format, & Bank)........................69
VOICE INITIALIZE
............................................. 71
MULTI INITIALIZE
..............................................
72
MEMORY PROTECT (Internal & Card)............ 73
UTILITY RECALL.................................................75
UTILITY MIDI........................................................79
MIDI
ON/OFF......................................................
81
BASICRECEIVE CHANNEL.............................81
TRANSMIT CHANNEL......................................81
LOCAL CONTROL ON/OFF..............................82
MIDI PROGRAM CHANGE...............................82
MIDI CONTROL CHANGE................................82
AFTERTOUCHON/OFF....................................83
PITCHBEND ON/OFF........................................83
EXCLUSIVE ON/OFF.........................................83
ALL V/M
TRANSMIT..........................................
84
1
VOICE TRANSMIT
..........................................
84
APPENDIX...............................................................85
SPECIFICATIONS...............................................87
ERROR MESSAGES...........................................88
INDEX...................................................................
89
MIDI DATA FORMAT........................................91
MIDI IMPLEMENTATION CHART..................94
ii

HOW TO USETHISOPERATING MANUAL
This operationmanual isbroadlydivided intotwomain sections— TUTORIALS and REFERENCE.
What's In the
TUTORIALS Section TheTUTORIALS sectioncontains four separatetutorials that take you step-by-
stepthrough the main procedures you will needtoknow to become familiar with
your SY22:
1.SETTINGUP YOUR SYSTEM[Page9]
Basic systemconnections.
2.SELECTINGAND PLAYING VOICES[Page11]
Selectingand playing voices from the PRESET, INTERNAL and CARD
voicebanks.
3.VECTORS [Page14]
Understanding and using manual and dynamic vectors.
4.INSTANT VOICE PROGRAMMING [Page25]
Thefast way tocreatean unlimited range ofnew voices for the SY22.
We recommend that you gothrough the tutorials in sequence while actually
carrying out procedures onyour SY22.Onceyou've gone through theentire
TUTORIALSsectioninthis way, you should befamiliar enoughwith the SY22
to need only the REFERENCE sectioninfuture.
What's In the
REFERENCE Section
TheREFERENCE sectionisthe "nuts and bolts" sectionofthe manual,
individually describing each ofthe SY22's many functions in detail. The
REFERENCE sectionisdivided into eight sub-sections, each describing the
various functions within a particularSY22editorutility mode.
1.VOICECOMMON [Page29]
2.VOICEVECTOR [Page35]
3.ELEMENT TONE [Page41]
4.ELEMENT ENVELOPE [Page51]
5.MULTI [Page59]
6.UTILITYSETUP[Page67]
7.UTILITYRECALL [Page75]
8.UTILITYMIDI [Page79]
Onceyou have become familiar with the way the SY22 works by going
through the TUTORIALS section, you should only need to refer to the
REFERENCE section from time to time to getdetailsonfunctions you've never
used before, orrefresh your memory about functions that you don't use very
often.
Eachsub-sectionofthe REFERENCE section has itsown table ofcontents,
soyou should beableto locateany particular function quickly and easily. Func-
tionsand references canalso be locatedby referring to the INDEX atthe back of
the manual.
1

PRECAUTIONS
1.Avoid Excessive Heat,
Humidity,Dustand
Vibration
2.Avoid Physical Shocks
3.Do Not Open TheCase
Or Attempt Repairs Or
Modifications Yourself
4.Make Sure Power IsOff
Before Making Or
Removing Connections
Keepthe unit away from locations where itis likely to be exposed to high tem-
peratures orhumidity — such asnear radiators, stoves, etc. Also avoid loc-
tions which aresubject toexcessivedust accumulation orvibration which could
cause mechanical damage.
Strongphysicalshocksto the unit cancausedamage.Handle itwith care.
This product contains no user-serviceable parts. Refer allmaintenance to
qualified Yamaha servicepersonnel.Openingthe caseand/or tampering with the
internalcircuitrywill voidthe warranty.
Always turn the power OFFpriortoconnectingordisconnecting cables.
5.Handle CablesCarefully Always plugandunplug cablesby grippingthe connector, not the cord.
6.CleanWith a Soft Dry
Cloth
7.Always Use theCorrect
PowerSupply
8.Electrical Interference
9.Memory Backup
Neveruse solventssuchasbenzine orthinner tocleanthe unit. Wipe cleanwith
asoft,dry cloth.
Always use the supplied AC Adaptor to power your SY22 or,ifthe original
adaptorislostor broken, a replacement orequivalent type obtainedfrom your
Yamaha dealer.Also, make surethat theadaptor you have isappropriate for the
AC mains supply voltageinthe area where you intend to use the SY22 (the
correctINPUTvoltageismarked onthe adaptor).
Sincethe SY22contains digitalcircuitry, itmay cause interference and noise if
placedtoo closeto TVsets,radiosorsimilarequipment. Ifsucha problem does
occur, move theSY22further away from the affected equipment.
TheSY22 contains a specialbackup power systemthat will retain the contents
ofthe internalRAM memory for up to approximately one month evenwhen the
power isturned off! Ifthe power isleft off continuously for longer periods, the
contents ofthe internal memory may be lost.Be sureto turn the SY22 onfor a
shortperiod atleastonce a month ifyou wish to retain data inthe internal
memory.
2

THE CONTROLS & CONNECTORS
FRONT PANEL
[VECTORCONTROL]
This is the key to SY22's remarkable vector
synthesis system. The [VECTORCONTROL]
allows manual control oflevelordetune for 2 or4
voice "elements"simultaneously. Italsoallows
realtime recording ofdynamic level and detune
vectors.
[PITCHBEND] Wheel
This self-centering pitch wheel allows smooth
upward and downward pitch bends.
[MODULATION] Wheel
Can be assignedto applypitch and/or amplitude
modulation for a range ofexpressiveeffects.
Keyboard
The SY22 keyboard isboth velocity and after-
touch sensitive for broad, intimate expressive
control.
VOLUME Control
Adjusts the volume ofthe sound delivered via
the rear-panelOUTPUTandPHONESjack.
VECTOR PLAY [ON/OFF]and
[LEVEL/DETUNE]Keys & Indicators
The [ON/OFF]key turns manual vector control
onoroff, while the [LEVEL/DETUNE] key
selectslevelordetune control.
andCursorKeys
Move the screencursor from parameter to
parameterinmany ofthe SY22editing functions.
3

[-1/NO]and[+1/YES]Keys
Can be used to selectvoices and multi-play
setups,and areused to edit parameter valuesin
any ofthe SY22editmodes. Eitherkeycanbe
pressed briefly for singlestepping inthe
specified direction, or held for continuous
scrolling.Thesekeys are alsoused to answer
the "Areyou sure?"confirmation prompt when
savingorinitializingdata.
[VOICE]Key& Indicator
Selectsthenormal voiceplay mode inwhich any
ofthe SY22'spreset,internalorcardvoicescan
be played via me keyboard orothercontroller
connectedtotheMIDIIN connector.
[MULTI]Key & Indicator
Selectsthe multi-play mode inwhich up to8
voicescanbeplayedvia simultaneously via the
keyboard orcontrolledondifferent MIDIchan-
nelsvia an externalMIDIsequencer.
[EDIT/UTILITY/COMPARE] Key
Accesses the SY22'svoiceedit, multi-play edit
and utility modes. Also activates the compare
function when inany editmode,allowing quick
comparisonofthe originaland editedvoice or
multi-playsetup.
[STORE]Key
Used to storethe selectedvoice onmulti-play
setuptoaninternalorcardmemory location.
LED Display
This 2-digit 7-segment LED numeric display
shows the bank and number ofthe currently
selectedvoiceormulti-playsetup inthe VOICE
PLAY orMULTIPLAY mode.Italsoindicates
when an editorutilitymode isactive,and shows
thecharacter— A, B, C orD — ofthecurrently
selectedelement in one ofthe element edit
modes.
4

Liquid CrystalDisplay Panel
This 16-characterx 2-linebacklitliquid crystal
display panel shows the selectedvoiceormulti -
play setup name in the voice or multi-play
modes, as well as functionnames and
parameters in the utility and editmodes.
[INTERNAL],[CARD],and [PRESET]Keys
&Indicators
Select the data bank — preset, internal orcard
—from which voicesormulti-play setups will be
selected.
[BANK] Selectand Edit/Utility Mode Access
keys
In the VOICE PLAY orMULTI PLAY mode,
these keys — [1]through [8]— are used to
selectthe bank ofthe voice ormulti-play setup to
be selected.
Inan edit orutility mode, or immediately after
the [EDIT/UTILITY]key has been pressed to
access these modes, these keys are used to
selectedthe desirededit orutility function group
(green labels below the keys).
[NUMBER/MULTI PART SELECT]and
ElementControlKeys
In the VOICEPLAY orMULTI PLAY mode,
these keys — [1]through [8]— areused to
selectthenumber ofthe voiceormulti-play setup
to be selected.
Inthe MULTIeditmode they selectthe multi-
play part to be edited,and inthe ELEMENT
TONE orELEMENT ENVELOPE edit mode
they areused toselectindividual elementsand
turn individual elementsonand off for editing
(greenlabelsbelow the keys).
[DEMO]Key
Activates the SY22 built-in demonstration — a
greatway to hear what the SY22can do after
you setup your system.
5

REAR PANEL
DC 10V-12VIN Jack
[POWER]Switch
PHONES Jack
OUTPUT R and
L/MONO Jacks
FOOT VOLUME Jack
SUSTAIN Jack
CARD Slot
MIDI IN,OUT and
THRU Connectors
TheDC output cablefrom the suppliedAC Adaptor shouldbe connected here.
When connectingthe power supply,make surethat the SY22POWER switch is
intheOFFposition(extended),thenplug theAC adaptor output cableintothe
DC 10V-12VIN jack, and finally the adaptor's AC plug into a convenient AC
walloutlet.Thecablecliplocatedimmediately belowthe DC 10V-12VIN jack
helpstoprevent accidentalunplugging ofthe power supply during use.Wrap the
DC cablefirmly around theclipa few centimetersfrom theplug end.
CAUTION!
Donot attemptto use a different AC adaptorto power the SY22.Theuse ofan
incompatibleadaptor may causeirreparable damage to the SY22, and might
posea seriousshock hazard!
Slidetothe "ON"positionto turn power ON.
Acceptsa standard pairofstereoheadphones(1/4"stereophone plug) for head-
phonemonitoringofthe SY22soundwithout the needfor externalamplification
equipment.
Theseare the main stereooutputs from the SY22.Ifa plug isinsertedonly into
the L/MONO jack, the left and right-channelsignalsare combinedand delivered
via this jack (for connectionto a monaural soundsystem).
An optionalYamaha FC-7foot controllerconnectedhere can be used for volume
control.
An optionalYamaha FC-4orFC-5footswitch canbeconnected here for press-
on/release-offsustain control.
TheCARD slotacceptsYamaha MCD64 orMCD32Memory Cards for storage
andretrievalofSY22voices.
TheMIDIIN connector receivesthe data from a sequenceror otherMIDI con-
troller which istocontrolthe SY22.The MIDI THRU connector simply re-
transmits the data received atthe MIDI IN connector, allowing convenient
chaining ofMIDIdevices.TheMIDIOUT connectortransmits data correspond-
ingto allSY22performance operations,orbulk data when oneofthe MIDIvoice
data transmission functions areactivated.
6

7

8

1.SETTING UPYOUR SYSTEM
Connections Thediagrambelowshows the basicconnections ina setup using only the SY22
and a stereosoundsystem.
CAUTION!!:Make surethat both the SY22and your sound system areturned
OFFwhen makingconnections.
STEREOSOUND
SYSTEM
L/MONO
OUTPUT
R
OUTPUT
Optional
FC-4or
FC-5foot
switchfor
sustain.
Optional
FC-7foot
controller
forvolume
control.
DC
IN
To
AC
wall
outlet.
PA-3AC
ADAPTER
FOOT
VOLUME
SUSTAIN
Power-on Procedure
1.Make sure your sound system's volume control and the SY22 volume con-
trol areturned allthe way down prior toturning power on.
2.Turn onthe SY22.
3.Turn onthe sound system.
4.Raise the sound system volume to a reasonable level.
5.Gradually raisethe SY22 VOLUME control while playing the keyboard to
setthe desired listening level.
Caution: The SY22 automatically transmits MIDI control change data corre-
sponding to itscontrol status when its power switch isturned ON or OFF.
This caninterfere with operation ofother MIDI equipment connected to the
SY22 MIDI OUT connector.Ifthe SY22 isconnected to other MIDI equip-
ment, the SY22power switch should be ON first, and turned OFFlast.
9

Enjoy theDemoTheSY22isprogrammed with a demonstration sequence that you might enjoy
listening to after setting up your system. Take a short break and enjoy the demo:
1.Pressthe [DEMO]key. "YestoStart"will appear on the LCD display.
2.Press the [+1/YES]key to start demo playback. "Noto Stop"will appear
onthe LCD display.
3.Pressthe [-1/NO]key when you want to stopdemo playback.
10

2. SELECTING AND PLAYING VOICES
The PRESET,
INTERNAL and CARD
Voice Memories
Here's a global view ofthe SY22 system:
SY22
CARD
MEMORY
VOICE& VECTORCONTROL
Element
A
(AWM)
PANNING
EFFECTS
STEREOOUTPUT
Element
B(FM)
INTERNAL
MEMORY
PRESET
MEMORY
PRESET
Pleasenote that the voices played by the SY22 can come from three different
sources: the PRESETvoice memory, the INTERNAL voice memory, ora CARD
voice memory:
ThePRESETvoice memory contains 64pre-programmed voices inROM (Read
Only Memory) that cannot be overwritten orchanged in any way. The PRESET
voice memory isrepresented onthe display by the letter "P".
PRESETVOICELIST
1
2
3
4
5
6
7
8
9
10
11
12
13
14
15
16
No.
1.1
1.2
1.3
1.4
1.5
1.6
1.7
1.8
2.1
2.2
2.3
2.4
2.5
2.6Nautilus
2.7
2.8
VoiceName
Genesis
DXIegend
FullStr
DistGtr
Itopia
PowerBrs
RainNite
Nostromo
Matrix22
Arpegi8
SadAngel
DynaPad
IceField
VectaSeq
Thriller
EL*
4
4
4
4
4
4
4
4
4
4
4
4
4
4
4
4
17
18
19
20
21
22
23
24
25
26
27
28
29
30
31
32
No.
3.1
3.2
3.3
3.4
3.5
3.6
3.7
3.8
4.1
4.2
4.3
4.4
4.5
4.6
4.7
4.8
VoiceName
Piano
PinPiano
Elekroad
MalletEP
Clavi
ThinClav
RokOrgan
JazOrgan
PipeOrgn
Trumpet
Trombone
FrHorn
BrasSect
Fanfare
FatBrass
Flute
EL*
2
4
2
4
2
2
2
4
2
2
4
2
4
4
4
2
33
34
35
36
37
38
39
40
41
42
43
44
45
46
47
48
No:
5.1
5.2
5.3
5.4
5.5
5.6
5.7
5.8
6.1
6.2
6.3
6.4
6.5
6.6
6.7
6.8
VoiceName
Oboe
Sax
12String
MuteGtr
WoodBass
PlukBass
FunkBass
SlapBass
Fretless
SynBass
Strings
Chamber
SynStr
BoyChoir
Marimba
BellWah
EL*
2
2
4
4
2
2
2
4
2
2
4
2
4
4
2
4
49
50
51
52
53
54
55
56
57
58
59
60
61
62
63
64
No.
7.1
7.2
7.3
7.4
7.5
7.6
7.7
7.8
8.1
8.2
8.3
8.4
8.5
8.6
8.7
8.8
VoiceName
Inca
Voyager
Crystals
VCO Sync
VCO Lead
MiniLead
Groover
Digicord
SuperPad
Prophecy
Industry
Evolver
VectaEko
Zombie
RapPerc
Dr.Kit
EL*
4
4
4
4
4
2
2
2
4
4
4
4
4
4
4
2
*EL= No.ofelements.
11

INTERNAL
CARD
SelectingtheVOICE
PLAY Mode, a Voice
Memory, andVoice
The INTERNAL voice memory isa RAM (Random Access Memory) areainto
which you can storeup to 64voices that you createorload from an external
memory card. TheINTERNAL voice memory isrepresented onthe display by
the letter"I".
TheCARD memory bank isa Yamaha MCD64 orMCD32 Memory Card(or
pre-programmed voicecard) plugged intothe SY22CARD slotonthe rearpanel.
Memory cards are convenient for externalstorageand transportation ofvoices
that you orotherscreate.You canalsostoresetsofrelatedvoices ondifferent
memory cards.An MCD32 Memory Cardallowsstorageofup to 64voices.An
MCD64Memory Cardholdstwo banks of64voiceseach— a totalof128voices
per card (REFERENCE SECTION,page 70).The CARD voice memory is
representedonthe displayby the letter"C".
Note:No warning isgivenonthe SY22 displays when a memory card backup
battery isabout to fail.Seeyour memory cardowner's manual for details.
Any voiceinany ofthesevoicememories canbe selectedand played while
theSY22isinthe VOICEPLAY mode.
1.Ifthe VOICEPLAY mode isnot already selected— asindicated by a lit
[VOICE]key LED and "VOICEPLAY" acrossthe top ofthe LCD —
pressthe [VOICE]key to selectit.
2.The [INTERNAL], [CARD], and [PRESET]keys are used to selectthe
desiredvoice memory. Ifno memory cardisinsertedin the CARD slot,the
"Cardnot ready!"display will appear ifyou attempt to selectthe card voice
memory.
3.The64voices ineachvoice memory areorganized into8 banks of8 voices
each (8x8=64).Any voicecan beselectedby specifying itsbank using the
BANK keys, and its number using the NUMBER/MULTI PART SELECT
keys.
Voice numbers aredisplayedonthe LCDinthe same way. " ,"for example,
isnot presetvoice number 25,but rather presetvoice bank 2,number 5.On
the largeLEDdisplay, this would be shown as
"2.5".
The64th
preset
voice,
therefore, isdisplayed as"P88"onthe LCD or"8.8"onthe LED display.
To selectvoice bank 4 number 7,for example, press the BANK [4]key and
NUMBER/MULTI PART SELECT[7]key — inany order.
12

BANK
1
2
3
4
56
7
8
NUMBER/MULTIPARTSELECT
5
4
3
2
1
6
7
8
Thedisplaysshouldlooksomethinglikethis:
Toselecta different number within the same bank it isonly necessary to
pressthe appropriate NUMBER key. Inthe sameway, to selectthe same
number ina different bank allyou have todo ispress the appropriate BANK
key.
The [-1/NO]and [+1/YES]keys can alsobe used to selecta voice inthe
VOICE PLAY mode. Holding the [-1/NO]or [+1/YES]key causes con-
tinuous scrollinginthe specifieddirection.
4.Playthe keyboard.
Ifyou don't getany sound atthis point:
Make sureyour sound system isturned ON and the volume isturned up to a
reasonable level.
Make sure that the SY22 VOLUME control isturned up to a reasonable
level.
Checkallconnections carefully.
Overlapping Voice
Selection
TheSY22 has been designedto allow overlappingvoice selection.Thatis,ifyou
selecta new voice while holding notes onthe keyboard (or by using a sustain
footswitch), the held notes will continue playing the previous voice while
subsequently played notes will use the new voice. Although the primary reason
for this feature isto allow smooth switching between voices without unnatural
sound cutoff or gaps, it isactually possible to play several voices atonce by
holding a note ortwo, selectinga new voice, holding a couple more notes,
selecting a secondnew voice,and soon.Pleasenote, however, that ifdifferent
voicesselectedusing this method have different effects, a corresponding change
ineffect will be heard.
13

3.VECTORS
Voice Configurations
SY22 voices can have either a 2-element or 4-element configuration
(REFERENCE SECTION,page 31).Each"element"isactually an indepen-
dent sound or"waveform," and vector control allowsthe 2 or4 different wave-
forms ina voiceto be blended anddetuned ina variety ofways — manually or
automatically.
VECTORCONTROL
A
D
C
A
D
C
B
B
Two Types of Vectors:
Manual &Dynamic
Forthe sakeofclarity, we'll represent the SY22 vector controlby a simple
graphlikethe oneshown to the right for therestofthe tutorial.
The"A,""B,""C,"and "D"markings around the [VECTORCONTROL]
correspond tothe voice elements.A 2-elementvoiceuses only elements A and
B,while a 4-elementvoiceusesallfour elements— A, B,C and D.
ElementsA and C are always AWM elements,while B and D arealways
FMelements.When you startprogramming your own voices you can assignany
of128presetAWM waveforms to elementsA and C,and any of256presetFM
waveforms to elementsB and D (REFERENCE SECTION,page43).
AWM & FM: AWM standsfor "AdvancedWave Memory," Yamaha's sophis-
ticatedsamplingtechnologythat allowshigh-fidelity reproduction ofdigitally
recorded "live"sound. FM isYamaha's proven Frequency Modulation
synthesis technology which is capable ofcreating extraordinarily warm,
vibrant simulations ofactual instruments, aswell asan infinite variety of
originalsounds.
Vector controlcan be accomplishedin two ways: manually by operating the
[VECTORCONTROL]whileplaying, orautomatically. Automatic vectors are
called"dynamicvectors"inthe SY22,and these play automatically whenever
you play a note onthe keyboard. Dynamic vectors canbe recorded inrealtime
via the [VECTOR CONTROL] by using the procedure described in the
"Recordingan Original Dynamic Vector" sectiononpage20.Dynamic vectors
function whenever the VECTORPLAY mode isOFF— i.e.when both the
VECTOR PLAY [LEVEL]and [DETUNE]indicatorsareout.
Manual vector control ispossible whenever the VECTOR PLAY mode is
ON — i.e.when eitherthe VECTOR PLAY [LEVEL]or [DETUNE] indicator
is
lit.
14

Manual VectorControlManual vector control whileplaying can be accomplished by turning the vector
play mode on— pressthe VECTOR PLAY [ON/OFF]key sothat either the
[LEVEL]or[DETUNE]indicator lights, and then selecteitherlevel or detune
controlby pressingtheVECTORPLAY [LEVEL/DETUNE]key.
VECTORPLAY
ON/OFF
The[VECTORCONTROL] can then be used to control the selected
parameter — levelordetune— alongthe verticalaxis onlyifa 2-elementvoice
isselected,oralongboth the verticaland horizontal axesifa 4-element voice is
selected.
2-ELEMENTVOICE
4-ELEMENTVOICE
C
(AWM)
B
(FM)
B
(FM)
When levelvector controlisselected,moving the controltowards one ele-
ment (A, B,C orD) increasesthe levelofthat elementwhile decreasingthe
levelofthe othersproportionally.The[VECTORCONTROL]works ina similar
way when detune vectorcontrolisselected— moving the controltowards one
elementincreasesthe pitch ofthat element while decreasing the pitch ofthe
others.
Ifthe selectedvoice has a dynamic detune vector, the detune vector will
playwhile manual levelvectorcontrolisselected,andviceversa.
Thefollowing diagrams shouldgive you a rough ideaofhow the level or
pitch ofeachelementina 4-elementvoiceisaffected by [VECTORCONTROL]
motion.
15
LEVEL
DETUNE
A
(AWM)
D
C
A(AWM)
D
(FM)
Other manuals for SY.22
3
Table of contents
Other Yamaha Synthesizer manuals

Yamaha
Yamaha PortaTone PSR-260 User manual

Yamaha
Yamaha SY99 User manual

Yamaha
Yamaha CS-30 User manual

Yamaha
Yamaha SY99 Manual

Yamaha
Yamaha MX88 User manual

Yamaha
Yamaha S08 Voice Editor User manual

Yamaha
Yamaha DX7 II FD User manual

Yamaha
Yamaha EOS B500 User manual

Yamaha
Yamaha Electone D-3 User manual

Yamaha
Yamaha CS1X User manual

Yamaha
Yamaha CS-80 User manual

Yamaha
Yamaha DX5 User manual

Yamaha
Yamaha CP10 User manual

Yamaha
Yamaha PF-1000 User manual

Yamaha
Yamaha Harmony Director HD-300 User manual

Yamaha
Yamaha montage6 User manual

Yamaha
Yamaha P-140P-140S User manual

Yamaha
Yamaha P-120 P-120S User manual

Yamaha
Yamaha DX5 User manual

Yamaha
Yamaha PF2000 User manual