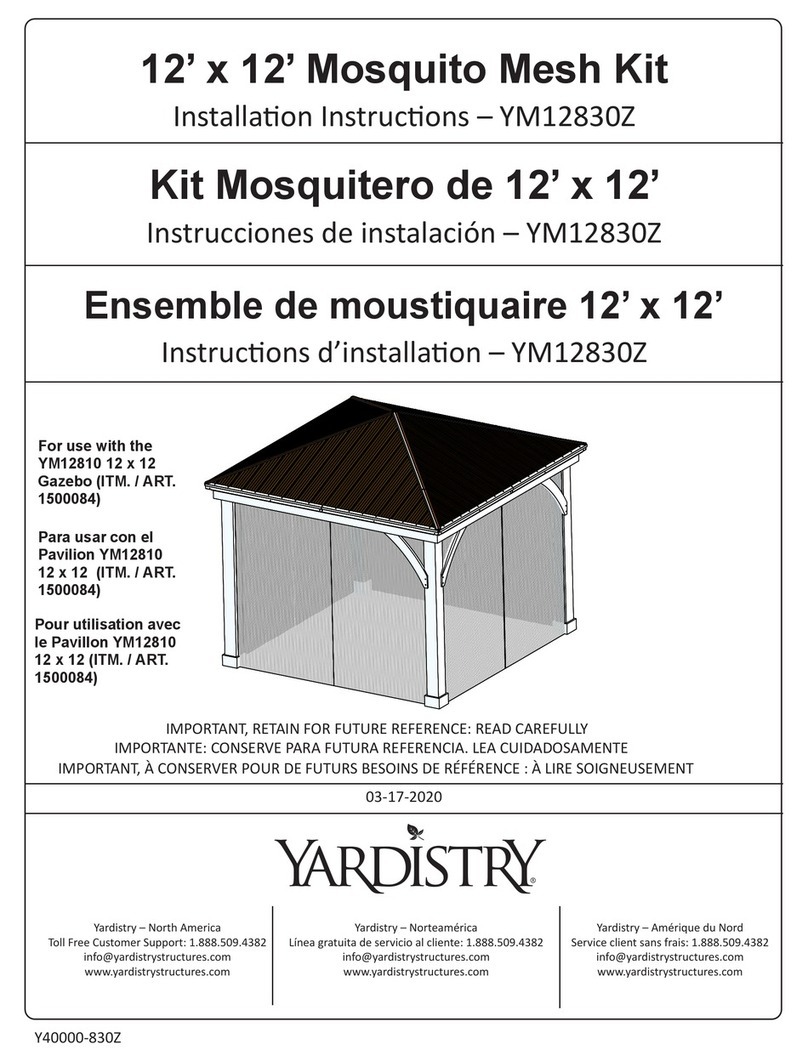
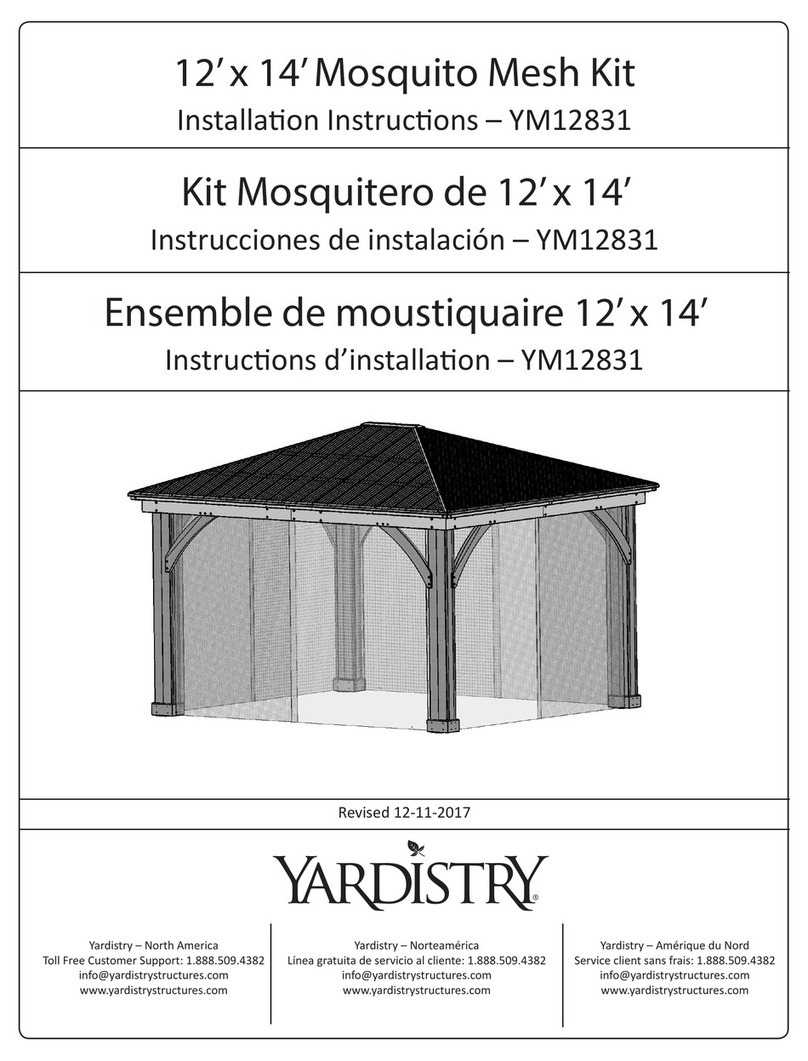
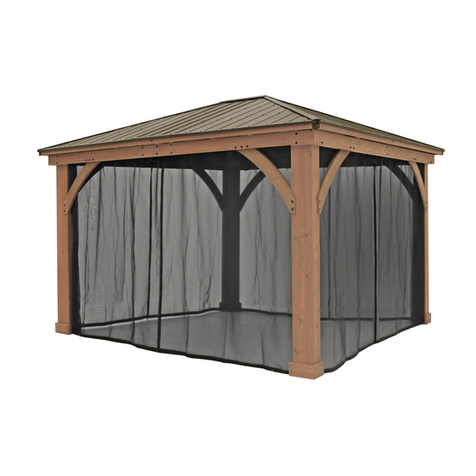
Yardistry YM12831Z User manual

11-01-2019
12’ x 14’ Mosquito Mesh Kit
Installaon Instrucons – YM12831Z
Kit Mosquitero de 12’ x 14’
Instrucciones de instalación – YM12831Z
Ensemble de moustiquaire 12’ x 14’
Instrucons d’installaon – YM12831Z
Yardistry – North America
Toll Free Customer Support: 1.888.509.4382
info@yardistrystructures.com
www.yardistrystructures.com
Yardistry – Norteamérica
Línea gratuita de servicio al cliente: 1.888.509.4382
info@yardistrystructures.com
www.yardistrystructures.com
Yardistry – Amérique du Nord
Service client sans frais: 1.888.509.4382
info@yardistrystructures.com
www.yardistrystructures.com
Y40000-831Z
IMPORTANT, RETAIN FOR FUTURE REFERENCE: READ CAREFULLY
IMPORTANTE: CONSERVE PARA FUTURA REFERENCIA. LEA CUIDADOSAMENTE
IMPORTANT, À CONSERVER POUR DE FUTURS BESOINS DE RÉFÉRENCE : À LIRE SOIGNEUSEMENT
Pour utilisation avec
le Pavillon YM12941
12 x 14 (ITM. / ART.
1031553)
For use with the
YM12941 12 x 14
Gazebo (ITM. / ART.
1031553)
Para usar con el
Pavilion YM12941
12 x 14 (ITM. / ART.
1031553)

Important Safety Notice! - ¡Nota importante de seguridad! - Avis important de sécurité!
Yardistry components are intended for privacy, decorative and ornamental use only.
Product is NOT INTENDED for the following:
• A safety barrier to prevent unsupervised access to pools, hot tubs, spas or ponds.
• As load bearing support for a building, structure, heavy objects or swings.
• Used in structures that trap wind, rain or snow that would create extra load on the product.
Netting is NOT ame retardant and will burn. Grills, re pits and chimineas are a re hazard if placed
too close to a Yardistry structure. Consult user’s manual of the grill, re pit or chimnea for safe distances
from combustible materials.
During installation, follow all safety warnings provided with your tools and use approved safety
glasses. Some structures may require two or more people to install safely.
Los componentes Yardistry están hechos para brindar privacidad y usarse de forma decorativa y
ornamental.
El producto NO TIENE COMO PROPÓSITO lo siguiente:
• Ser usado como barrera de seguridad para evitar el acceso no supervisado a piscinas, jacuzzis,
spas o estanques.
• Ser usado como soporte para un edicio, estructura, objetos pesados o columpios..
• Ser usado en lugares donde haya acumulación de viento, lluvia o nieve que genere una carga
adicional al producto.
El mosquitero NO es un retardante de incendios y se prende fuego. Las parrillas, fosas para fogatas
y chimeneas son un peligro de incendio si se colocan muy cerca de una estructura Yardistry. Consulte
en el manual del usuario de la parrilla, fosa para fogata o chimenea las distancias seguras de materiales
inamables.
Durante el montaje, siga todas las advertencias de seguridad proporcionadas con sus
herramientas y use gafas de seguridad aprobadas. Algunas estructuras pueden requerir de dos o
más personas para un montaje seguro.
Les composantes Yardistry sont conçues uniquement pour des ns d’initimité, de décoration et
d’ornementation.
Le produit N’EST PAS CONÇU pour les usages suivants:
• Barrière de sécurité pour empêcher l’accès à des piscines, spas ou étangs.
• Support structural pour bâtiment, structure, objet lourd ou balançoire.
• Utilisation en tant que structure brise-vent, our servant à accumuler la pluie ou la neige, ce qui
créerait une charge supplémentaire sur le produit.
La moustiquaire n’est PAS ignifuge et peut s’enammer. Les barbecues, foyers extérieurs et
cheminées représentent un risque d’incendie s’ils sont situés trop près de la structure Yardistry.
Consultez le manuel d’utilisation du barbecue, foyer extérieur ou de la cheminée pour connaître les
distances sécuritaires pour les matériaux combustibles.
Lors de l’installation, respectez toutes les normes de sécurité de vos outils et portez des lunettes
de protection certiées. Certaines structures pourraient nécessiter l’aide de deux personnes ou plus
pour une installation sécuritaire.

Instructions for Proper Maintenance
Your Yardistry structure is designed and constructed of quality materials. As with all outdoor products it will weather and
wear. To maximize the enjoyment, safety and life of your structure it is important that you, the owner, properly maintain it.
If you dispose of your Yardistry structure: Please disassemble and dispose of your unit so that it does not create
any unreasonable hazards at the time it is discarded. Be sure to follow your local waste ordinances.
HARDWARE:
• Check metal parts for rust. If found, sand and repaint using a non-lead paint complying with 16 CFR 1303.
• Inspect and tighten all hardware after completion of assembly; after rst month of use; and then annually.
Do not over-tighten as to cause crushing and splintering of wood.
• Check for sharp edges or protruding screw threads, add washers if required.
• Step Ladder • Standard or Cordless Drill
Tools Required:
• Tape Measure
• Safety Glasses
Instrucciones para el mantenimiento correcto
Instructions pour un entretien adéquat
Su estructura Yardistry está diseñada y construida con materiales de calidad. Como todos los productos para exteriores
se erosiona y desgasta. Para maximizar el placer, seguridad y vida útil de su estructura es importante que usted, el
dueño, le dé el mantenimiento apropiado.
TORNILLOS Y ACCESORIOS::
• Revise si están oxidadas las partes metálicas. Si se encuentra alguna, líjela y vuélvala a pintar usando
pintura sin plomo que cumpla con el 16 CFR 1303.
• Inspeccione y ajuste todos los tornillos y accesorios al nalizar el montaje; después del primer mes de uso;
y luego, anualmente. No ajuste los tornillos de más ya que puede romper y astillar la madera.
• Verique si hay bordes losos o tornillos sobresalidos, agregue arandelas si es necesario.
Si se deshace de su estructura Yardistry: Por favor desarme y deshágase de su unidad de manera de no generar
riesgos innecesarios el momento de desecharla. Asegúrese de cumplir con las ordenanzas locales de eliminación.
• Escalera • Taladro estándar
o sin cable
Herramientas requeridas:
• Cinta métrica
• Gafas de seguridad
Votre structure Yardistry est conçue et fabriquée à l’aide de matériaux de qualité. Comme pour tous les produits
d’extérieur, elle sera soumise au climat et à l’usure. An de maximiser l’utilisation, la sécurité et la durée de vie de votre
structure, il est important que vous l’entreteniez adéquatement.
QUINCAILLERIE:
• Assurez-vous qu’aucune rouille n’est présente. Si c’est las cas, sablez et repeignez à l’aide de peinture
sans plomb respectant la norme 16 CFR 1303.
• Inspectez et resserrez toute la quincaillerie après l’assemblage; après le premier mois d’usage; et ensuite
annuellement. Ne pas trop serrer an de ne pas écraser ou fendiller le bois.
• Assurez vous qu’aucune bordure coupante ou let de vis ne dépasse, ajoutez des rondelles si nécessaire.
Si vous jetez une structure Yardistry: Veuillez démonter et jeter l’unité de façon à ne pas créer de risque excessif
au moment de l‘élimination. Assurez-vous de respecter vos normes locales de mise aux rebuts.
• Échelle • Perceuse standard
ou sans l
Outils nécessaires:
• Ruban à mesurer• Lunettes de
sécurité

Y20118-036
Y00400-005 D4
Y70818-176
Y70818-142
SB Y09991-600
(2) - Insect Panel for 12 x 14 Gazebo (2 pack)
Y70818-237
Y00918-143
Y70892-908
Y06491-610
S6
Y00918-144
Y06091-522
S3
-Panel Mosquitero (paquete de 2)
- Panneau pour insecte (pqt de 2)
(24) - #12 Screw Bezel
- Bisel para tornillo No.12
- Vis à collerette #12
(1) - #2 x 2" Robertson Bit
-Mecha Robertson No.2 x 2"
-Mèche Robertson #2 x 2"
(4) - Tie Back Ribbon 1" x 35"
- Lazo de sujeción de 1" x 35"
- Ruban d’attache arrière 1" x 35"
(1) - Male Snap w. Screw(8 Pack)
-Broche macho c/tornillo (paquete de 8)
-Fixation mâle avec vis (pqt de 8)
(72) - #12 x 1" Pan Screw
- Tornillo de c beza plana No.12 x 1"
- Vis à tête cylindrique #12 x 1"
(1) - Curtain Track Gusset (4 Pack)
- Refuerzo de guía de cortina (Paquete de 4)
- Gousset de rail pour rideaux (Pqt. de 4)
(8) - #8 x 2-1/2" Wood Screw
- Tornillo para madera No.8 x 2-1/2"
- Vis à bois #8 x 2-1/2"
(1) - Gazebo Curtain Hanger (70 Pack)
- Gancho de Cortina de gazebo (Paquete de 70)
- Support à rideaux pour gazebo (Pqt. de 70)
(4) - Curtain Track 12 x 14 Short
- Guía de cortina 12 x 14 Corta
- Rail pour rideaux 12 x 14 court
(4) - Curtain Track 12 x 14 Long
- Guía de cortina 12 x 14 Larga
- Rail pour rideaux 12 x 14 long
Part Identification - Identificación de las piezas - Identification des pièces

STOP PARE
A. This is the time for you to
inventory all your hardware
and components referencing
the parts identication
sheets. This will assist you
with your assembly.
• Each step indicates what
you will need for assembly.
B. If there are any missing
or damaged pieces or
you need assistance with
assembly please contact
the consumer relations
department directly. Call
us before going back to the
store.
C. Read the assembly manual
completely, following the
instructions in order.
Step 1: Inventory Parts - Paso 1: Piezas del inventario - Étape 1 : Inventaire des pièces
ARRÊT
A. Este es el momento en que
debe hacer el inventario
de todos los tornillos y
accesorios consultando las
hojas de identicación de
piezas. Esto lo ayudará en
el montaje.
• Cada paso indica los
pernos y/o tornillos
que necesitará para el
montaje.
B. Si hay alguna pieza que
falte o esté dañada, o si
necesita ayuda con el
montaje, por favor
contáctese directamente
con el departamento
de atención al cliente.
Llámenos antes de regresar
a la tienda.
C. Lea todo el manual de
instalación. Siga las
instrucciones en orden.
A. Il est temps pour vous de
faire l’inventaire de toute
la quincaillerie et des
accessoires présentés sur
les pages d’identication.
Cela vous facilitera la
tâche d’assemblage.
• Chaque étape
indique ce dont vous
avez besoin pour
l’assemblage.
B. Si des pièces sont
manquantes ou
endommagées, ou si vous
avez besoin d’assistance
pour l’assemblage,
contactez le département
des relations avec la
clientèle directement.
Appelez-nous avant de
retourner en magasin
C. Lisez la totalité du manuel
d’assemblage. Suivez les
instructions dans l’ordre.
1-888-509-4382
YM12831Z
CARTON I.D. STAMP: / No. ID DE LA CAJA: / IDENTIFIANT DE BOÎTE:
__ __ __ __ __ ___

Step 2: Attach Curtain Track Short - Paso 2: Fijación de la guía de cortina corta -
Étape 2: Fixation du rail pour rideaux court
Instructions - Instrucciones - Instructions
A: From the inside of the
assembly nd the centre on one
Short Beam Assembly then place
one Curtain Track Short at the
centre mark. Track should sit tight
on top of gusset (2” up from bottom
of assembly). Attach Curtain Track
Short to Short Beam Assembly with
ve (S6) Pan Screws. (F2.1 and
F2.2)
B: Slide 14 Curtain Hangers in the
channel of the Curtain Track Short
which is furthest from the beam.
Hangers should be able to slide
easily and are able to turn. (F2.3)
C: Tight to the rst Curtain Track
Short and tight to the top of the
gusset place a second Curtain
Track Short and attach to Short
Beam Assembly with ve (S6) Pan
Screws. Curtain Hangers should
be able to slide freely between
both tracks. (F2.2 and F2.4)
D: Repeat Steps A-C for the other
Short Beam Assembly.
4 x Curtain Track Short / Guía de Cortina Corta / Rail pour rideaux
court
20 x #12 x 1”
28 x Curtain Hangers / Ganchos de cortina /
Supports à rideaux
S6
Hardware / Tornillos y accesorios / Quincaillerie
Components / Componentes / Composants
A: De l’intérieur de l’assemblage,
trouvez le centre sur un Assemblage
de poutre courte, puis placez un Rail
pour rideaux court sur la marque
centrale. Le rail devrait reposer
bien appuyé sur le haut du gousset
(2” vers le haut à partir du bas de
l’assemblage). Fixez le Rail pour
rideaux court à l’assemblage de
poutre courte avec cinq Vis à tête
cylindriques (S6). (F2.1 et F2.2)
B: Glissez 14 Supports à rideaux
dans le sillon du Rail pour rideaux
court qui est le plus loin de la poutre.
Les supports devraient glisser
aisément et être en mesure de
tourner. (F2.3)
C: Bien appuyé au premier Rail
pour rideaux court et bien appuyé au
haut du gousset, placez un second
Rail pour rideaux court et xez à
l’assemblage de poutre courte avec
cinq Vis à tête cylindriques (S6). Les
supports à rideaux devraient être en
mesure de glisser aisément entre
les rails. (F2.2 et F2.4)
D: Répétez les étapes A-C pour
l’autre assemblage de poutre courte.
A: Desde el interior del ensamble,
marque el centro de uno de los
Ensambles de Vigas Cortas y
coloque una Guía de Cortina Corta
en la marca central. La guía debe
asentarse contra la parte superior
del refuerzo (2” arriba de la base del
ensamble). Fije la Guía de Cortina
Corta al Ensamble de Viga Corta con
cinco Tornillos de cabeza plana (S6).
(F2.1 y F2.2)
B: Deslice 14 Ganchos de Cortina
en el canal de la Guía de Cortina
Corta que está más alejado de la
viga. Los ganchos deben poder
deslizarse fácilmente y girar. (F2.3)
C: Contra la primera Guía de
Cortina Corta y contra la parte
superior del refuerzo, coloque una
segunda Guía de Cortina Corta y
fíjela al Ensamble de Viga Corta con
cinco Tornillos de cabeza plana (S6).
Los ganchos deben poder deslizarse
fácilmente entre ambas guías. (F2.2
y F2.4)
D: Repita los pasos A-C para el
otro Ensamble de Viga Corta.

Step 2: Attach Curtain Track Short - Paso 2: Fijación de la guía de cortina corta
Étape 2: Fixation du rail pour rideaux court
Images - Fotos - Images
Assembly x2
x2
•Y00918-142 Curtain Track Long
x40
Insect Screen Inst - Attach Short Tracks
x2
•#12x1" Pan Screw
•Y00918-143 Curtain Track Short
Hardware
Important
Centre the end of one Curtain Track Short in the opening between the long
side of Posts (measure 2" up from bottom of beam), make sure the track rests tight to the Gusset and Beam. Attach with Pan Screws.
Add all 14 curtain track hangers to the short track. Attach second Curtain Track Short.
When installing Curtain Track Long, repeat steps above, adding 18 curtain track hangers
Insect Screen Inst (12x14) - Curtain Hangers -Short Track
Feed 7 Gazebo Curtain Hangers Y00800-142 -Through the2nd channel of the Curtain Track Short -Y00918-143; furthest from Beam.
Repeat for a second assembly.
Assembly x2
x2
•Y00918-142 Curtain Track Long
x40
Insect Screen Inst - Attach Short Tracks
x2
•#12x1" Pan Screw
•Y00918-143 Curtain Track Short
Hardware
Important
Centre the end of one Curtain Track Short in the opening between the long
side of Posts (measure 2" up from bottom of beam), make sure the track rests tight to the Gusset and Beam. Attach with Pan Screws.
Add all 14 curtain track hangers to the short track. Attach second Curtain Track Short.
When installing Curtain Track Long, repeat steps above, adding 18 curtain track hangers
S6
F2.1 F2.2
F2.3
Short Beam
Assembly /
Ensamble de
Viga Corta /
Assemblage de
poutre courte
Gusset /
Refuerzo /
Gousset
Short Beam
Assembly /
Ensamble de Viga
Corta / Assemblage
de poutre courte
Short Beam Assembly / Ensamble de
Viga Corta / Assemblage de poutre
courte
Gusset /
Refuerzo /
Gousset
Gusset /
Refuerzo /
Gousset
Gusset /
Refuerzo /
Gousset
Side View / Vista lateral / Vue de côté
Tight /
Ajustado /
Bien appuyé
Tight / Ajustado /
Bien appuyé
Tight / Ajustado / Bien appuyé
Tight / Ajustado /
Bien appuyé
Tight / Ajustado /
Bien appuyé
Curtain Track
Short / Guía de
Cortina Corta /
Rail pour rideaux
court
Curtain Track
Short / Guía de
Cortina Corta /
Rail pour rideaux
court S6
Curtain Track Short / Guía
de Cortina Corta / Rail pour
rideaux court
Curtain Track Short /
Guía de Cortina Corta /
Rail pour rideaux court
Center of beam /
Centro de la viga /
Centre de la poutre
F2.4
Short Beam Assembly / Ensamble
de Viga Corta / Assemblage de
poutre courte
Curtain Hanger
/ Gancho de
Cortina / Support
à rideaux
2”

Step 3: Attach Curtain Track Long - Paso 3: Fijación de la guía de cortina larga -
Étape 3: Fixation du rail pour rideaux long
Instructions - Instrucciones - Instructions
A: From the inside of the
assembly nd the centre on one
Beam Assembly then place one
Curtain Track Long at the centre
mark. Track should sit tight on top
of gusset (2” up from bottom of
assembly). Attach Curtain Track
Long to Beam Assembly with ve
(S6) Pan Screws. (F3.1 and F3.2)
B: Slide 18 Curtain Hangers in the
channel of the Curtain Track Long
which is furthest from the beam.
Hangers should be able to slide
easily and are able to turn. (F3.3)
C: Tight to the rst Curtain Track
Long and tight to the top of the
gusset place a second Curtain
Track Long and attach to Beam
Assembly with ve (S6) Pan
Screws. Curtain Hangers should
be able to slide freely between
both tracks. (F3.2 and F3.4)
D: Repeat Steps A-C for the other
Beam Assembly.
4 x Curtain Track Long / Guía de Cortina Larga /
Rail pour rideaux long
Hardware / Tornillos y accesorios / Quincaillerie
Components / Componentes / Composants
20 x #12 x 1”
36 x Curtain Hangers / Ganchos de
cortina / Supports à rideaux
S6
A: De l’intérieur de l’assemblage,
trouvez le centre sur un
Assemblage de poutre, puis placez
un rail pour rideaux long sur la
marque centrale. Le rail devrait
être bien appuyé sur le haut du
gousset (2” vers le haut à partir du
bas de l’assemblage). Fixez le Rail
pour rideaux long à l’assemblage
de poutre avec cinq Vis à tête
cylindriques (S6). (F3.1 et F3.2)
B: Glissez 18 Supports à rideaux
dans le sillon du Rail pour rideaux
long qui est le plus loin de la poutre.
Les supports devraient glisser
aisément et être en mesure de
tourner. (F3.3)
C: Bien appuyé au premier rail
pour rideaux long et bien appuyé
au haut du gousset, placez un
second rail pour rideaux long et
xez à l’assemblage de poutre avec
cinq Vis à tête cylindriques (S6).
Les supports à rideaux devraient
être en mesure de glisser aisément
entre les rails. (F3.2 et F3.4)
D: Répétez les étapes A-C pour
l’autre assemblage de poutre.
A: Desde el interior del ensamble,
marque el centro de uno de los
Ensambles de Vigas y coloque una
Guía de Cortina Larga en la marca
central. La guía debe asentarse
contra la parte superior del refuerzo
(2” arriba de la base del ensamble).
Fije la Guía de Cortina Larga al
Ensamble de Viga con cinco Tornillos
de cabeza plana. (S6). (F3.1 y F3.2)
B: Deslice 18 Ganchos de Cortina
en el canal de la Guía de Cortina
Larga que está más alejado de la
viga. Los ganchos deben poder
deslizarse fácilmente y girar. (F3.3)
C: Contra la primera Guía de
Cortina Larga y contra la parte
superior del refuerzo, coloque una
segunda Guía de Cortina Larga y
fíjela al Ensamble de Viga con cinco
Tornillos de cabeza plana (S6). Los
ganchos deben poder deslizarse
fácilmente entre ambas guías. (F3.2
y F3.4)
D: Repita los pasos A-C para el
otro Ensamble de Viga.

Insect Screen Inst - Attach Long Tracks
Centre the end of one Curtain Track Long in the opening adjacent to the previous one.
Long track. Attach second Curtain Track Long with pan Screws
Assembly x2
Make sure to measure 2" up from bottom of beam and that the track rests tight to the
Gusset and Beam. Attach with Pan Screws. Add all 18 curtain track hangers to the
Important Hardware
•Y00918-142 Curtain Track Long x4
•#12x1" Pan Screw x40
Step 3: Attach Curtain Track Long - Paso 3: Fijación de la guía de cortina larga -
Étape 3: Fixation du rail pour rideaux long
Images - Fotos - Images
Assembly x2
x2
•Y00918-142 Curtain Track Long
x40
Insect Screen Inst - Attach Short Tracks
x2
•#12x1" Pan Screw
•Y00918-143 Curtain Track Short
Hardware
Important
Centre the end of one Curtain Track Short in the opening between the long
side of Posts (measure 2" up from bottom of beam), make sure the track rests tight to the Gusset and Beam. Attach with Pan Screws.
Add all 14 curtain track hangers to the short track. Attach second Curtain Track Short.
When installing Curtain Track Long, repeat steps above, adding 18 curtain track hangers
Insect Screen Inst (12x14) - Curtain Hangers -Short Track
Feed 7 Gazebo Curtain Hangers Y00800-142 -Through the2nd channel of the Curtain Track Short -Y00918-143; furthest from Beam.
Repeat for a second assembly.
S6 F3.1 F3.2
F3.3
Beam Assembly /
Ensamble de Viga /
Assemblage de poutre
Gusset /
Refuerzo /
Gousset
Beam Assembly /
Ensamble de Viga /
Assemblage de poutre
Beam Assembly /
Ensamble de Viga /
Assemblage de poutre
Gusset /
Refuerzo /
Gousset
Gusset / Refuerzo /
Gousset
Gusset /
Refuerzo /
Gousset
Side View /
Vista lateral /
Vue de côté
Tight / Ajustado /
Bien appuyé
Tight / Ajustado /
Bien appuyé
Tight / Ajustado
/ Bien appuyé
Tight /
Ajustado /
Bien appuyé
Curtain Track
Long / Guía de
Cortina Larga /
Rail pour rideaux
long
Curtain Track Long
/ Guía de Cortina
Larga / Rail pour
rideaux long
S6
Curtain Track Long / Guía
de Cortina Larga / Rail pour
rideaux long
Curtain Track
Long / Guía de
Cortina Larga
/ Rail pour
rideaux long
Center of beam / Centro de
la viga / Centre de la poutre
F3.4
Beam Assembly /
Ensamble de Viga /
Assemblage de poutre
Curtain Hanger
/ Gancho
de cortina
/ Support à
rideaux
Tight / Ajustado / Bien
appuyé
2”

Assembly x2
x8•#12x1" Pan Screw
pair of Curtain tracks, using 2-#12 Pan Screws.
Important
Attach Curtain Tracks together at the centre af beam using 1 Track Gusset per
Hardware
•Y00418-176 Curtain Track Gusset x4
Insect Screen Inst - Attach Track Gussets
Assembly x2
x8•#12x1" Pan Screw
pair of Curtain tracks, using 2-#12 Pan Screws.
Important
Attach Curtain Tracks together at the centre af beam using 1 Track Gusset per
Hardware
•Y00418-176 Curtain Track Gusset x4
Insect Screen Inst - Attach Track Gussets
Step 4: Attach Curtain Track Gussets - Paso 4: Fijación de los refuerzos de
las guías de cortina - Étape 4 : Fixation des goussets de rail pour rideaux
A: Where each set of Curtain
Track Shorts and each set of
Curtain Track Longs meet attach
tracks to Beam Assemblies with
one Curtain Track Gusset and two
(S6) Pan Screws per track set.
(F4.1 and F4.2)
4 x Curtain Track Gusset / Refuerzo de Guía de
Cortina / Gousset de rail pour rideaux
8 x #12 x 1”
S6
S6
Curtain Track Long / Guía
de Cortina Larga / Rail pour
rideaux long
Beam Assembly /
Ensamble de Viga /
Assemblage de poutre
Short Beam Assembly
/ Ensamble de Viga
Corta / Assemblage de
poutre court
Curtain Track Short / Guía
de Cortina Corta / Rail pour
rideaux court
Beam /Short Beam
Assembly / Ensamble
de Viga/Viga Corta /
Assemblage de poutre /
poutre courte
Curtain Track / Guía de
Cortina / Rail pour rideaux
Curtain Track / Guía de
Cortina / Rail pour rideaux
Curtain Track Gusset
/ Refuerzo de Guía de
Cortina / Gousset de rail
pour rideaux
F4.1
F4.2
Hardware / Tornillos y accesorios / Quincaillerie
Components / Componentes / Composants
A: Donde se une cada juego de
Guía de Cortina Corta con cada
juego de Guía de Cortina Larga,
je las guías a los Ensambles de
Viga con un Refuerzo de Guía de
Cortina y dos Tornillos de cabeza
plana (S6) por juego. (F4.1 y F4.2)
A: Là où chaque ensemble
de Rails pour rideaux courts et
chaque Ensemble de rails pour
rideaux longs se rencontrent,
xez les rails aux Assemblages
de poutre avec un gousset de rail
pour rideaux et deux Vis à tête
cylindriques (S6) par ensemble de
rail. (F4.1 et F4.2)

Insect Screen Inst - Fasten #8 x 2.5" screws
•#8 x 2-1/2" Wood screws
Hardware
Install wood screws at post/track corners, Only if there is a large gap between the post and the Gazebo Curtain Tracks.
Important
Insect Screen Inst - Fasten #8 x 2.5" screws
•#8 x 2-1/2" Wood screws
Hardware
Install wood screws at post/track corners, Only if there is a large gap between the post and the Gazebo Curtain Tracks.
Important
Step 5: Attach End Screws - Paso 5: Fijación de los tornillos de los extremos
- Étape 5 : Fixation de vis d’extrémité
A: If there is a gap between
the Curtain Track and the Post
Assembly install one (S3) Wood
Screw into Beam/Short Beam
Assembly where needed. This will
prevent the Curtain Hangers from
falling out of the tracks. (F5.1 and
F5.2)
8 x #8 x 2-1/2”
S3
Curtain Track / Guía de
Cortina / Rail pour rideaux
Curtain Track / Guía de
Cortina / Rail pour rideaux
F5.1
F5.2
Side View /
Vista lateral /
Vue de côté
Top View / Vista
superior / Vue du haut
Beam/Short Beam Assembly /
Ensamble de Viga/Viga Corta /
Assemblage de poutre /poutre courte
S3
S3
Beam/
Short Beam
Assembly /
Ensamble
de Viga/
Viga Corta /
Assemblage
de poutre /
poutre courte
Post Assembly /
Ensamble del Poste /
Assemblage de montant
Hardware / Tornillos y accesorios / Quincaillerie
A: S’il y a un espace entre le rail
pour rideaux et l’assemblage de
montant, installez une Vis à bois
(S3) dans l’assemblage de Poutre /
Poutre Courte là où cela est requis.
Cela évitera que les supports à
rideaux tombent des rails. (F5.1 et
F5.2)
A: Si queda un espacio entre la
Guía de Cortina y el Ensamble
del Poste, coloque un tornillo para
madera (S3) en el Ensamble de
Viga/Viga Corta si es necesario
para evitar que los Ganchos de
Cortina se salgan de las guías.
(F5.1 y F5.2)

Insect Screen Inst - Attach Curtain Ties
•#12 x 1" Pan Screw
•#12 Screw Bezel
At corner of Post, attach one Tie Back Ribbon per post, about half way up using #12 Pan Screw and Bezel
Important
Hardware
Other
Tie Back Ribbon -Y20118-036
Insect Screen Inst - Attach Curtain Ties
•#12 x 1" Pan Screw
•#12 Screw Bezel
At corner of Post, attach one Tie Back Ribbon per post, about half way up using #12 Pan Screw and Bezel
Important
Hardware
Other
Tie Back Ribbon -Y20118-036
Step 6: Attach Tie Back Ribbons - Paso 6: Colocación de los lazos traseros -
Étape 6: Fixation des rubans d’attache arrière
A: On the inside corner of each
Post Assembly attach one Tie Back
Ribbon using 2 (S6) Pan Screws
(with SB) per ribbon. (F6.1 and
F6.2)
8 x 12 x 1”
8 x #12 Screw Bezel / Bisel para tornillo
No.12 / Vis à collerette #12
4 x Tie Back Ribbon / Lazo de Sujeción Trasero / Ruban d’attache arrière
Inside Corner of Post
Assembly / Esquina interior
del Ensamble del Poste /
Coin intérieur d’assemblage
de montant
F6.1
Tie Back Ribbon / Lazo de
sujeción trasero / Ruban
d’attache arrière
SB
SB
SB
S6
S6
S6
Hardware / Tornillos y accesorios / Quincaillerie
Components / Componentes / Composants
A: En la esquina interior de cada
Ensamble del Poste, je un Lazo
de Sujeción Trasero con 2 tornillos
de cabeza plana (S6) (con SB) por
lazo. (F6.1 y F6.2)
A: Dans le coin intérieur de
chaque assemblage de montant,
xez un ruban d’attache arrière à
l’aide de 2 Vis à tête cylindriques
(S6) (avec SB) par ruban. (F6.1 et
F6.2)
F6.2

Assembly x4
Insect Screen Inst - Attach Insect Panels
Gazebo curtain Hangers within the track. Note: Button Snaps are provided in each panel to
connect to each curtain hanger. Repeat x3
•Y20118-145 Insect Panel x4
Important
Starting at the centre of one beam, attach one insect panel to the Other
Note
•Y00918-143 Curtain track short is shown above. It has 7
curtain hangers to snap to. For the other side, the Curtain Track
Long has 9 hangers to snap to.
ZIPPER PULL SIDE
OF PANEL
Step 7: Attach Insect Panel Part 1 - Paso 7: Fijación de panel mosquitero Parte
1 - Étape 7: Fixation du Panneau pour insecte Partie 1
A: Starting at the centre of one
Beam Assembly attach one Insect
Panel using the button snaps to 9
Curtain Hangers then attach Insect
Panel to 7 Curtain Hangers on
Short Beam Assembly. (F7.1, F7.2
and F7.3)
B: Repeat Step A for remaining 3
Insect Panels, starting at the end
of the rst panel and continuing
around the Gazebo.
4 x Insect Panel / Panel Mosquitero / Panneau pour insecte
F7.1
Insect Panel / Panel
Mosquitero / Panneau pour
insecte
Insect Panel / Panel
Mosquitero / Panneau
pour insecte
F7.2
F7.3
Beam Assembly /
Ensamble de Viga /
Assemblage de poutre
Short Beam Assembly /
Ensamble de Viga Corta /
Assemblage de poutre courte Beam/Short Beam Assembly /
Ensamble de Viga/Viga Corta /
Assemblage de poutre /poutre courte
Curtain Hanger / Gancho de
Cortina / Support à rideaux
Beam/Short Beam Assembly
/ Ensamble de Viga/Viga
Corta / Assemblage de
poutre /poutre courte
Button Snap / Botón
a presión / Fixation
à bouton
Components / Componentes / Composants
Insect Panel / Panel
Mosquitero / Panneau
pour insecte
A: Comenzando por el centro de
un Ensamble de Viga, je un Panel
Mosquitero usando los botones a
presión a 9 Ganchos de Cortina y
luego fíjelo a 7 Ganchos de Cortina
en el Ensamble de Viga Corta.
(F7.1, F7.2 y F7.3)
B: Repita el paso A para los 3
Paneles Mosquiteros restantes,
comenzando al nal del primer panel
y continuando alrededor del Gazebo.
A: En débutant au centre de l’un
des assemblages de poutre, xez un
Panneau pour insecte à l’aide des
xations à bouton aux 9 Supports à
rideaux puis xez le Panneau pour
insecte aux 7 supports à rideaux à
l’assemblage de poutre courte. (F7.1,
F7.2 et F7.3)
B: Répétez l’étape A pour les 3
Panneaux pour Insecte restants, en
débutant à l’extrémité du premier
panneau et en poursuivant autour du
Gazebo.

C: Join Insect Panels by zipping
them together. (F7.4)
F7.4
Step 7: Attach Insect Panel Part 2 - Paso 7: Fijación de panel mosquitero Parte 2 -
Étape 7: Fixation du panneau pour insecte Partie 2
C: Una los Paneles Mosquiteros
con el cierre de cremallera. (F7.4)
C: Joignez les panneaux pour
insecte en fermant la fermeture
éclair les reliant. (F7.4)

X
X
Step 8: Attach Insect Panels to Posts - Paso 8: Fijación de los paneles mosquiteros a
los postes - Étape 8 : Fixation des panneaux pour insecte aux montants
A: At the top of each Post
Assembly locate Button Snaps
on Insect Panel then fasten Male
Snaps with Screw to Post Assembly
so it lines up with the Button Snap.
Connect Button Snaps to Male
Snaps. (F8.1 and F8.2)
F8.1
F8.2
Male Snap with Screw / Broche
Macho con Tornillo / Fixation
mâle avec vis
Top of Post Assembly / Parte
superior del Ensamble del Poste /
Dessus de l’assemblage de montant
8 x Male Snap with Screw / Broche Macho con Tornillo /
Fixation mâle avec vis
Hardware / Tornillos y accesorios / Quincaillerie
Post Assembly /
Ensamble del Poste /
Assemblage de montant
Button Snap / Botón
a presión / Fixation
à bouton
A: En la parte superior de cada
Ensamble del Poste, ubique los
Botones a Presión de los Paneles
Mosquiteros y ajuste los Broches
Machos con Tornillo al Ensamble del
Poste de manera que coincidan con
los Botones a Presión. Conecte los
Botones a Presión con los Broches
Machos. (F8.1 y F8.2)
A: Au haut de chaque
Assemblage de montant, situez
les Fixations à bouton sur le
Panneau pour insecte, puis posez
les xations mâles à l’assemblage
de montant en les alignant avec
les Fixations à bouton. Fermez
les xations en les joignant. (F8.1
et F8.2)

•Tighten Panels to each corner using 4 -#12 Bezels with #12 x 1" Pan Screws per Post.
Insect Screen Inst - Optional Step
Hardware
•#12 Screw Bezel x16
•#12 x 1" Pan Screws x16
16 x #12 x 1”
16 x #12 Screw Bezel / Bisel para tornillo
No.12 / Vis à collerette #12
SB
Step 9: Secure Insect Panels - Paso 9: Sujeción permanente de los
paneles mosquiteros - Étape 9 : Pose des panneaux pour insectes
Note: Only complete this step if
you plan on keeping your Insect
Panels up at all times.
A: To outside corners of Post
Assemblies secure Insect Panels
with 2 (S6) Pan Screws (with SB)
on the top and bottom of each post.
Screws are beside each Male Snap
on top of posts. (F9.1 and F9.2)
S6
Hardware / Tornillos y accesorios / Quincaillerie
F9.1
F9.2
Bottom of Post Assembly /
Parte inferior del Ensamble
del Poste / Bas de
l’assemblage de montant
Top of Post Assembly / Parte
superior del Ensamble del
Poste / Haut de l’assemblage
de montant
Insect Panel / Panel
Mosquitero / Panneau
pour insecte
Beam Assembly /
Ensamble de Viga /
Assemblage de montant Short Beam Assembly
/ Ensamble de Viga
Corta / Assemblage
de poutre courte
SB SB
SB
SB
Male Snap /
Broche Macho /
Fixation mâle
Post Assembly / Ensamble
del Poste / Assemblage de
montant
Post Assembly /
Ensamble del Poste /
Assemblage de montant
S6
S6
S6
S6
Nota: Realice este paso solo si
planea dejar colocados los paneles
mosquiteros en forma permanente.
A: En las esquinas exteriores de
los ensambles de los postes, je los
Paneles mosquiteros con 2 Tornillos
de cabeza plana (S6) (con SB) en
la parte superior e inferior de cada
poste. Los tornillos están al lado
de cada broche macho en la parte
superior de los postes. (F9.1 y F9.2)
Note: Complétez cette étape
uniquement si vous planiez de
garder les panneaux pour insectes
installés en tout temps.
A: Sur les coins extérieurs des
assemblages de montants, attachez
les Panneaux pour insecte avec 2 Vis
à tête cylindrique (S6) (avec SB) en
haut et en bas de chaque montant.
Les vis sont à côté de chaque xation
mâle en haut des montants. (F9.1 et
F9.2)

Limited Warranty -
This Warranty gives you specic legal rights. You may have other rights as well which vary from state to state or province to province. This warranty
excludes all consequential damages, however, some states/provinces do not allow the limitation or exclusion of consequential damages, and
therefore this limitation may not apply to you.
Yardistry warrants that this product is free from defect in materials and workmanship for a period of one (1) year from the original date of purchase.
In addition, for any product with lumber, all lumber is warranted for ve (5) years against rot and decay. This warranty applies to the original owner
and registrant and is non-transferable.
Regular maintenance is required to assure the integrity of your product and is a requirement of the warranty. This warranty does not cover any
inspection costs.
This Limited Warranty does not cover:
• Labour for replacement of any defective item(s);
• Incidental or consequential damages;
• Cosmetic defects which do not aect performance or integrity;
• Vandalism; improper use or installation; acts of nature, including but not limited to wind, storms, hail, oods, excessive water exposure;
• Minor twisting, warping, checking or any other natural occurring properties of wood that do not aect performance or integrity.
Yardistry products have been designed for safety and quality. Any modications made to the original product could damage the structural integrity of
the product leading to failure and possible injury. Yardistry cannot assume any responsibility for modied products. Furthermore, modication voids
any and all warranties.
This product is warranted for RESIDENTIAL USE ONLY. Yardistry disclaims all other representations and warranties of any kind, express
or implied.
Garana Limitada - Garane limitée
Esta Garantía le brinda derechos legales especícos. Puede tener otros derechos también que varían de estado a estado o provincia a provincia.
Esta garantía excluye todos los daños consecuentes, sin embargo, algunos estados no permiten la limitación or exclusión de daños consecuentes, y
por lo tanto esta limitación no se aplica con usted.
Yardistry garantiza que este producto está libre de defectos en materiales y mano de obra por un período de un (1) año de la fecha original
de compra. Adicionalmente, para cualquier product con madera, toda la madera está garantizada por cinco (5) años contra la degradación y
putrefacción. Esta garantía aplica al dueño orignal y registrante y no es transferible.
Se requiere mantenimiento regular para asegurar la integridad de su producto y es un requisito de la garantía. Esta garantía no cubre cualquier
costo de inspección..
Esta Garantía Limitada no cubre:
• Trabajo para el reemplazo de cualquier artículo(s) defectuoso;
• Daños incidentales o consecuentes;
• Defectos cosméticos que no afecten el rendimiento o la integridad;
• Vandalismo, uso o instalación inapropiados, actos de la naturaleza incluyendo pero no limitándose a los vientos, tormentas, granizo,
inundaciones, excesco de exposición al agua;
• Menor torsión, deformación, agrietado, o cualquier otra propiedad natural concurrente a la madera que no afecte su rendimiento o integridad.
Los productos Yardistry han sido diseñados para seguridad y calidad. Cualquier modicaciones hechas al producto original pueden dañar la
integridad estructural del producto, provocando fallas o posibles lesiones. Yardistry no puede asumir ninguna responsabilidad para productos
modicados. Además, las modicaciones anulan cualquiera y todas las garantías.
Este producto está garantizado para USO RESIDENCIAL SOLAMENTE. Yardistry renuncia a todas las representaciones y garantías de
todo tipo, expresas o implícitas.
Cette garantie vous octroie des droits légaux spéciques. Vous pourriez bénécier d’autres droits, qui varient selon l’état ou la province ou vous
résidez. Cette garantie exclut tous les dommages indirects, toutefois, certains états ne permettent pas la restriction ou l’exclusion des dommages
indirects, alors cette restriction pourrait ne pas s’appliquer à votre situation.
Yardistry garantit que ce produit est exempt de défauts de fabrication ou de conception pendant une période d’un (1) an suivant la date d’achat. De
plus, pour tout produit avec du bois, tout le bois est garanti pendant cinq (5) ans contre la dégradation et la pourriture. Cette garantie s’applique à
l’acheteur original, et n’est pas transférable.
Un entretien régulier est requis an d’assurer l’intégrité de votre produit, et constitue une exigence pour cette garantie. Cette garantie ne couvre
aucun coût d’inspection.
Cette garantie limitée ne couvre pas:
• Main d’oeuvre pour le remplacement de tout élément défectueux;
• Dommages indirects ou consécutifs;
• Défauts esthétiques n’aectant pas la performance ou l’intégrité;
• Vandalisme; installation ou usage inadéquat; actes de la nature incluant, sans s’y limiter, le vent, les tempêtes, la grêle, les inondations ou une
exposition excessive à l’eau;
• Faible torsion, déformation ou fendillement, ou toute autre transformation naturelle du bois n’aectant pas la performance ou l’intégrité.
Les produits Yardistry ont été conçus dans une optique de qualité et de sécurité. Toute mondication eectuée au produit original pourrait
endommager l’intégrité structurelle du produit, entraînant des défaillances et potentiellement des blessures. Yardistry ne peut assumer aucune
responsabilité pour les produits ayant été modiés. De plus, toute modication annule toutes les garanties, quelles qu’elles soient.
Ce produit est garanti pour un USAGE RÉSIDENTIEL SEULEMENT. Yardistry décline toute autre déclaration ou garantie, expresse ou
implicite.

Customer Registraon Card - Tarjeta de Registro del Cliente - Carte d’inscripon du client
First Name - Primer Nombre - Prénom Initial - Incial - Initiale Last Name - Apellido - Nom de famille
City - Ciudad - Ville State/Province - Estado/Provincia - État/Province
ZIP/Postal Code - Código Postal -
ZIP/Code postal
Country - País - Pays
Street - Calle - Rue PO Box - Casilla postal -
Boîte postale
Apt. No. - App.
E-mail Address - Dirección de E-mail - Adresse courriel Telephone Number - No. de Teléfono - Node téléphone
Date of Purchase - Fecha de Compra - Date d’achat
(mm/dd/yyyy) (mm/dd/aaaa) (mm/jj/aaaa)
Place of Purchase - Comprado a - Lieu d’achat
Model Name - Nombre del Modelo -
Nom du modèle
Model Number (from front cover) - Número de Modelo (de la portada) -
Nodu modèle (page de couverture)
Comments - Comentarios - Commentaires:
Mail To - Enviar por Correo a - Envoyer par courrier à:
Yardistry
375 Sligo Road West, PO Box 10
Mount Forest, Ontario, Canada, N0G 2L0
Aenon: Consumer Relaons
Atención a: Servicio de Atención al Cliente
À l’aenon de: Service à la clientèle
Yardistry would like to say “Thank you” for your me and feedback.
Yardistry quiere “Agradecerle” por su empo y su opinión.
Yardistry aimerait vous remercier d’avoir pris le temps de répondre au sondage.
CUT ALONG LINE - CORTAR POR LA LÍNEA DE PUNTOS - DÉCOUPEZ SUR AL LIGNE
08/31/2017
Online Registraon - Registro online - Enregistrement en ligne:
hp://yardistrystructures.com/warranty.php
Table of contents
Other Yardistry Tent manuals
Popular Tent manuals by other brands

Hercules
Hercules Star Marquee 12m instruction manual

GigaTent
GigaTent LIBERTY TRAIL 3 owner's manual

VONDOM
VONDOM VELA 54183F Assembly instructions

Anchor
Anchor Navi-Trac Lite installation instructions

SKYLUX
SKYLUX Climalux 36179 Mounting instructions

KING CANOPY
KING CANOPY StorGuardII SG1327S-GV instructions