6
Device Mode
7
WPP30
8
Device Mode Video
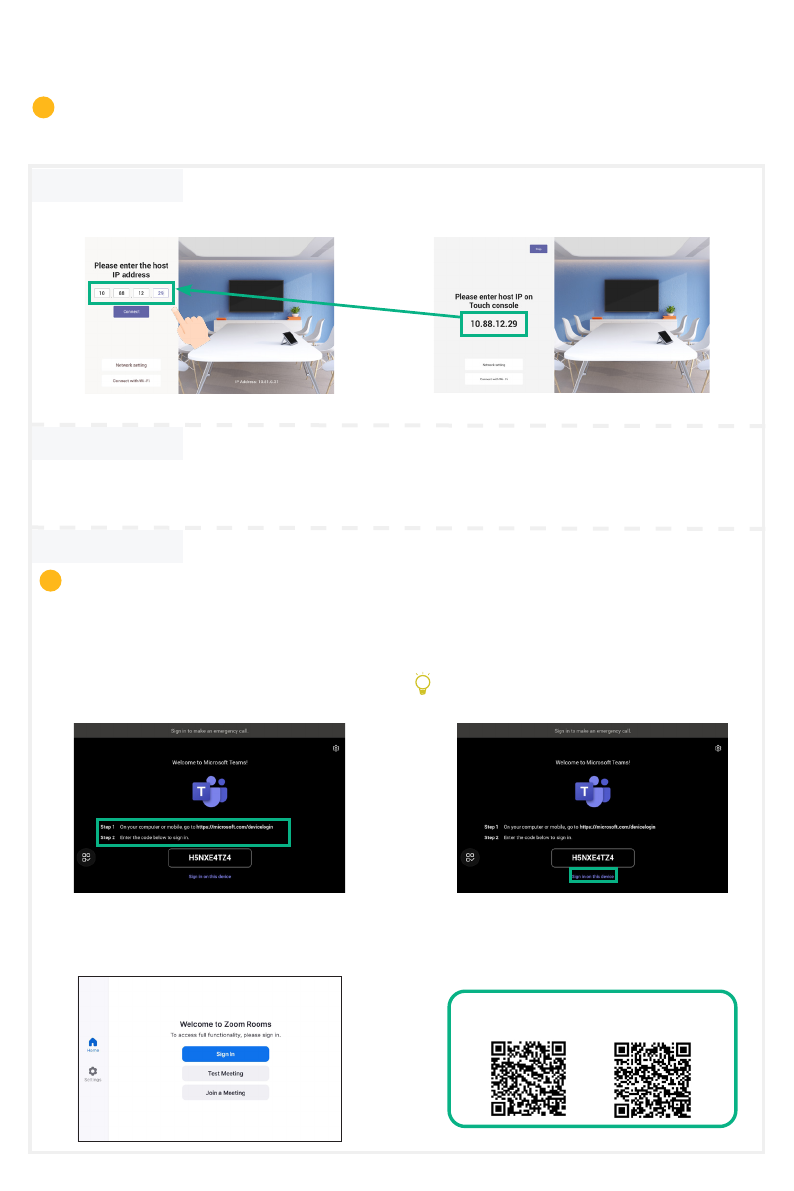
1. Do one of the following to select Device Mode:
• When selecting a platform during power-on initialization, select Device Mode.
• Switch platforms after signing in:
Teams: Follow steps 1, 2 and 3 of Updating the Firmware section, then go to System >UC Provider
on the web user interface, select Device Mode and click Conrm.
Zoom: Go to Settings > General >System Settings >UC Provider and select Device Mode.
2. Refer to the Wireless Content Sharing section.
Wireless Content Sharing
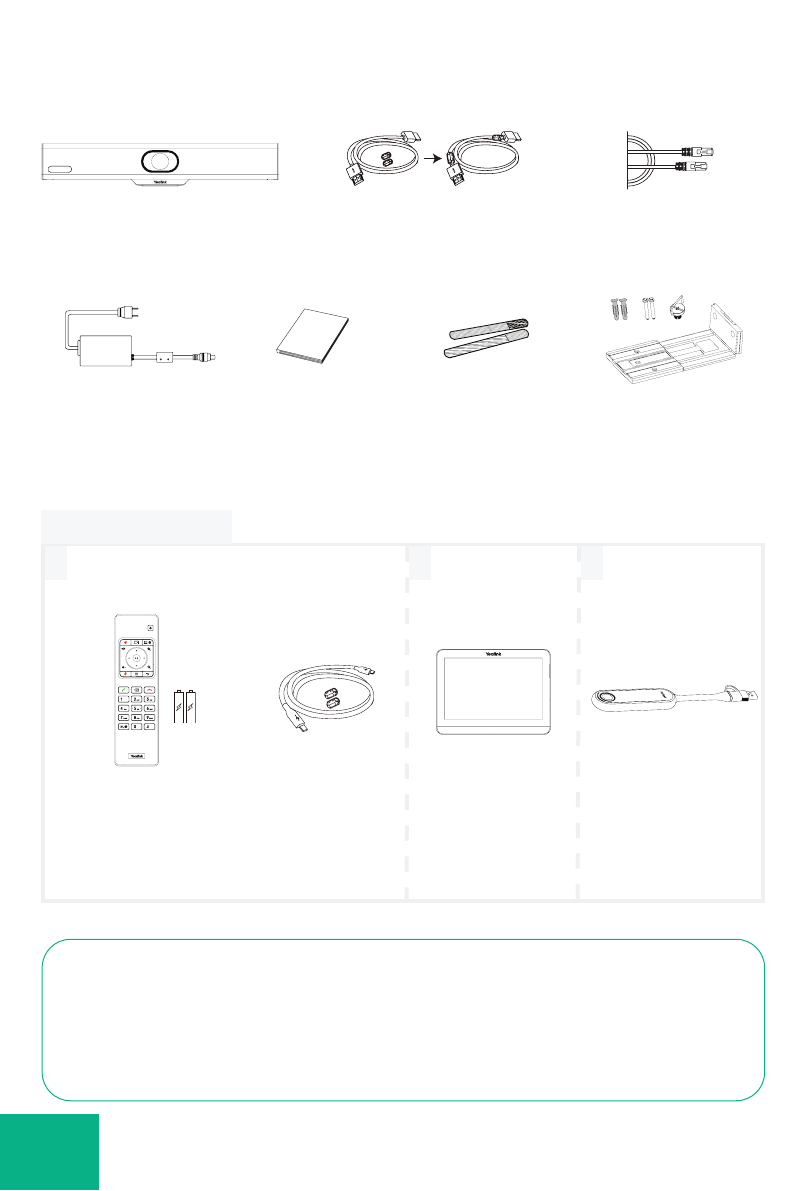
1. Connect the WPP30 to the USB-A port of the
MeetingBar A10. Waiting for 3 seconds, MeetingBar A10
prompts “Wireless presentation pod pairing successfully”.
2. Connect the WPP30 to the USB-A port or USB-C port
of PC and press the Presentation button to share the
screen.
WPP30
WPP30 cannot be used when the endpoint uses a wireless network.
PC
1. Connect the WPP30 to the USB-A port of the
MeetingBar A10. Waiting for 3 seconds, MeetingBar A10
prompts “Wireless presentation pod pairing successfully”.
2. Connect the WPP30 to the USB-A port or USB-C port
of the PC, and do one of the following on the Yealink
Wireless Presentation Pod Software:
• On Teams/Zoom mode, click BYOD Mode >Press to
share.
• On Device Mode, click Press to share.
Presentation button
Wireless Content
Sharing Video (Teams)
Wireless Device
USB Mode Video
(Teams)
Wireless Device
USB Mode Video
(Zoom)
Wireless Content
Sharing Video (Zoom)
i
Wireless Device-USB Mode