2 3
Thank you for choosing Yellowtec products.
Enjoy m!ka, the most exciting support system
for microphones and monitors. m!ka is robust,
sleek and exible.
All components are designed to t with each
other and can be combined in multiple ways.
Check this Brieng Book to get initial infor-
mation on how to install and adjust the system.
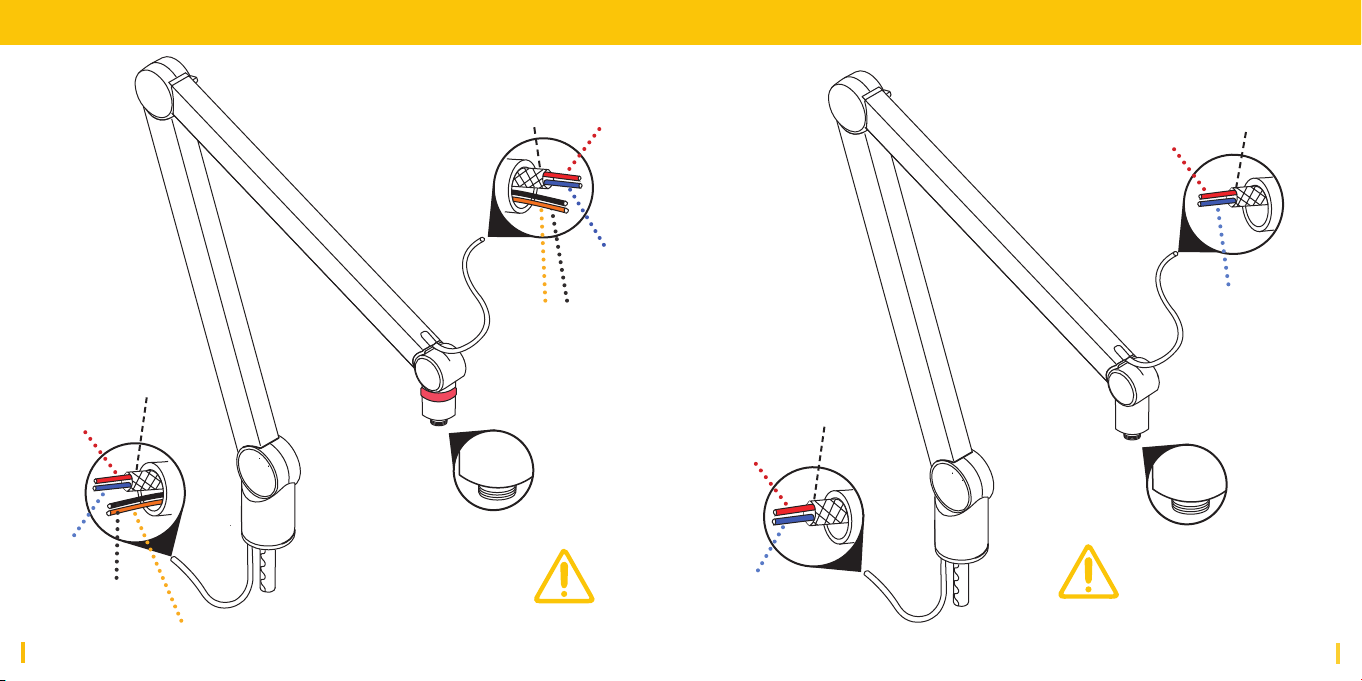
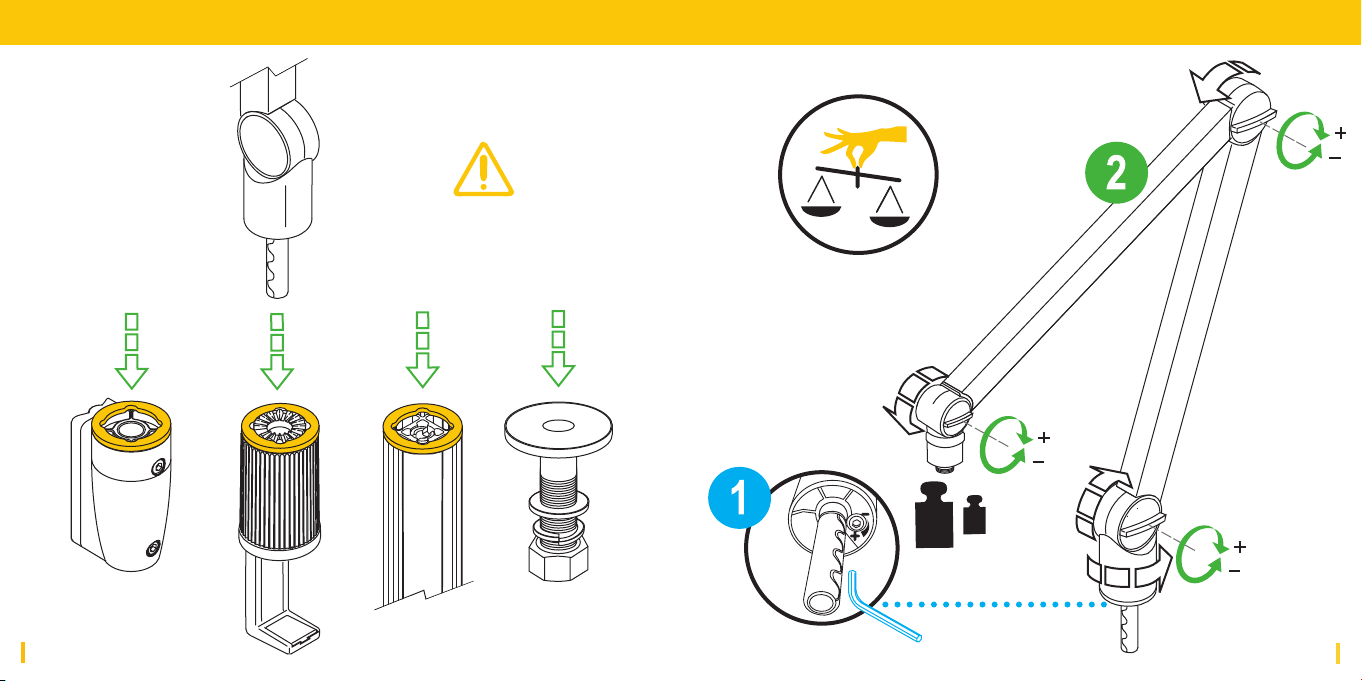
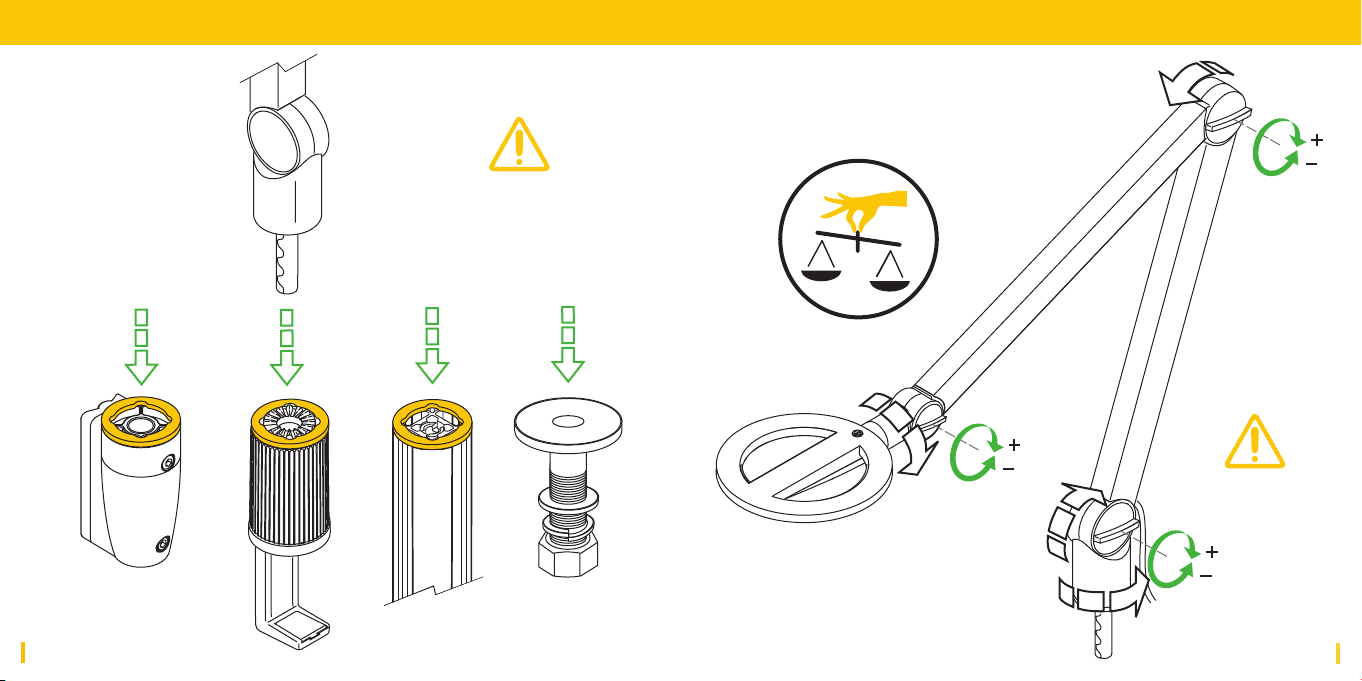
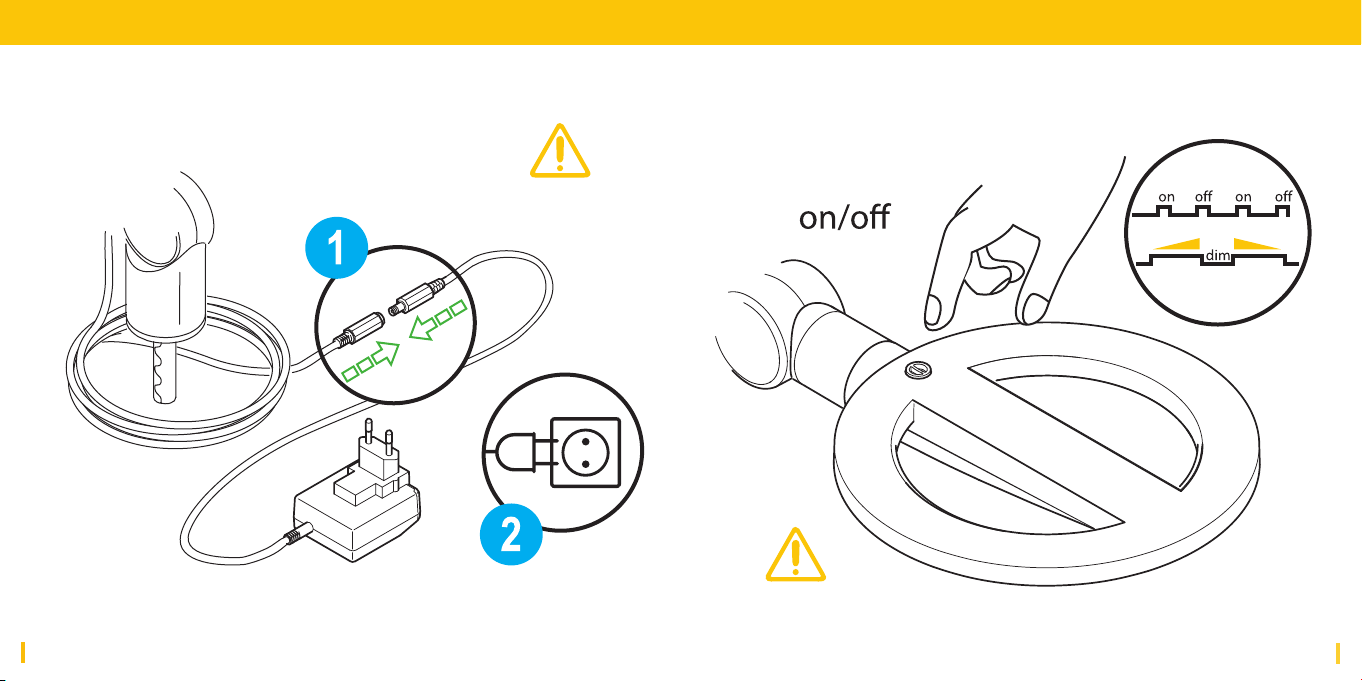
Please note: Safety instructions should be
followed at all times!
Brieng Book Content
m!ka Mic Arm
m!ka Studio Light
MMS PDM Kit
MMS Power Sting
MMS Ceiling Mount
MMS Wall Mount
MMS Monitor Mount
m!ka QuickFix
MMS Cable Clamp
MMS Safety Stop
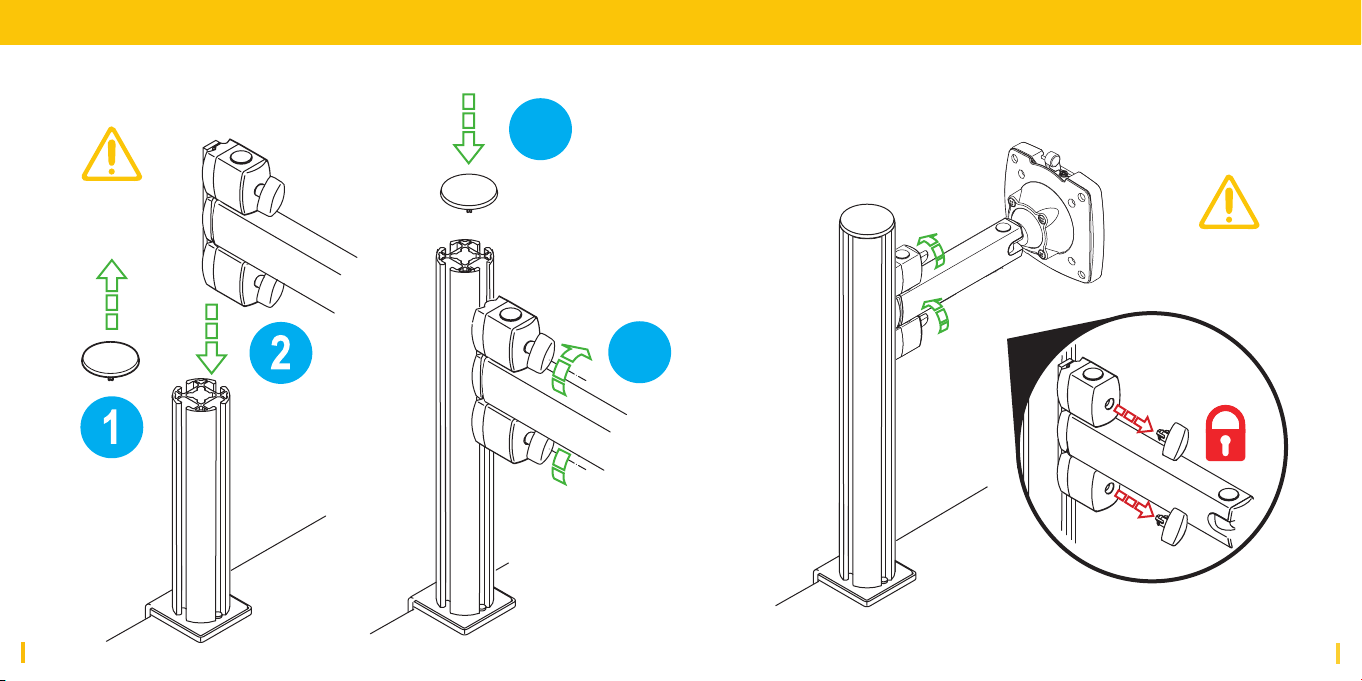
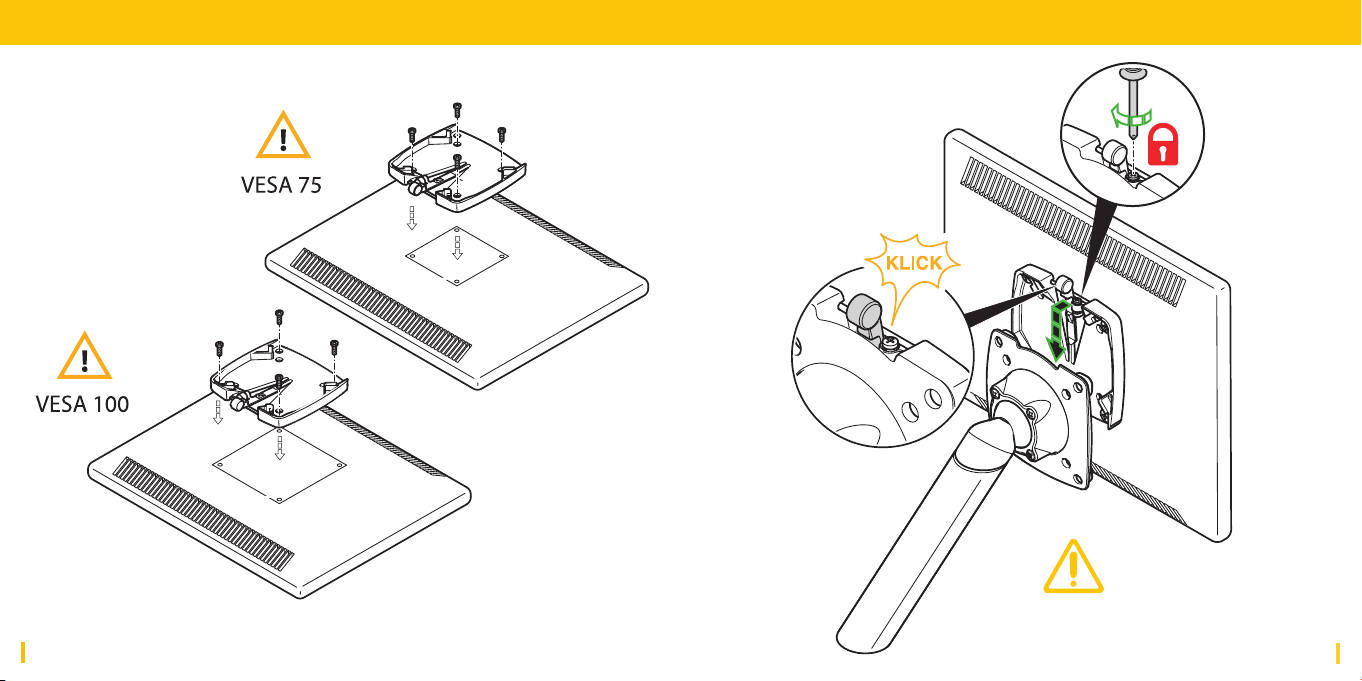
m!ka Monitor Arm
m!ka Bushing
m!ka Pole Adapter
m!ka Table Clamp
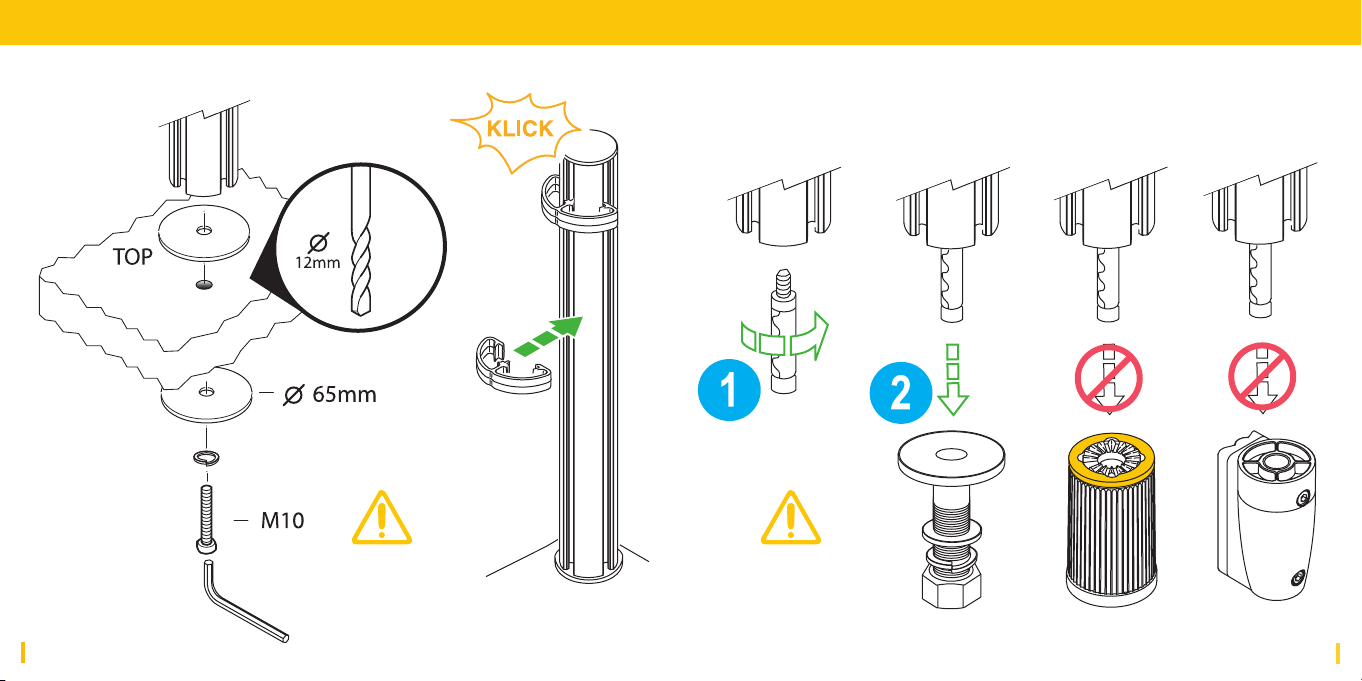
m!ka Table Through Mount
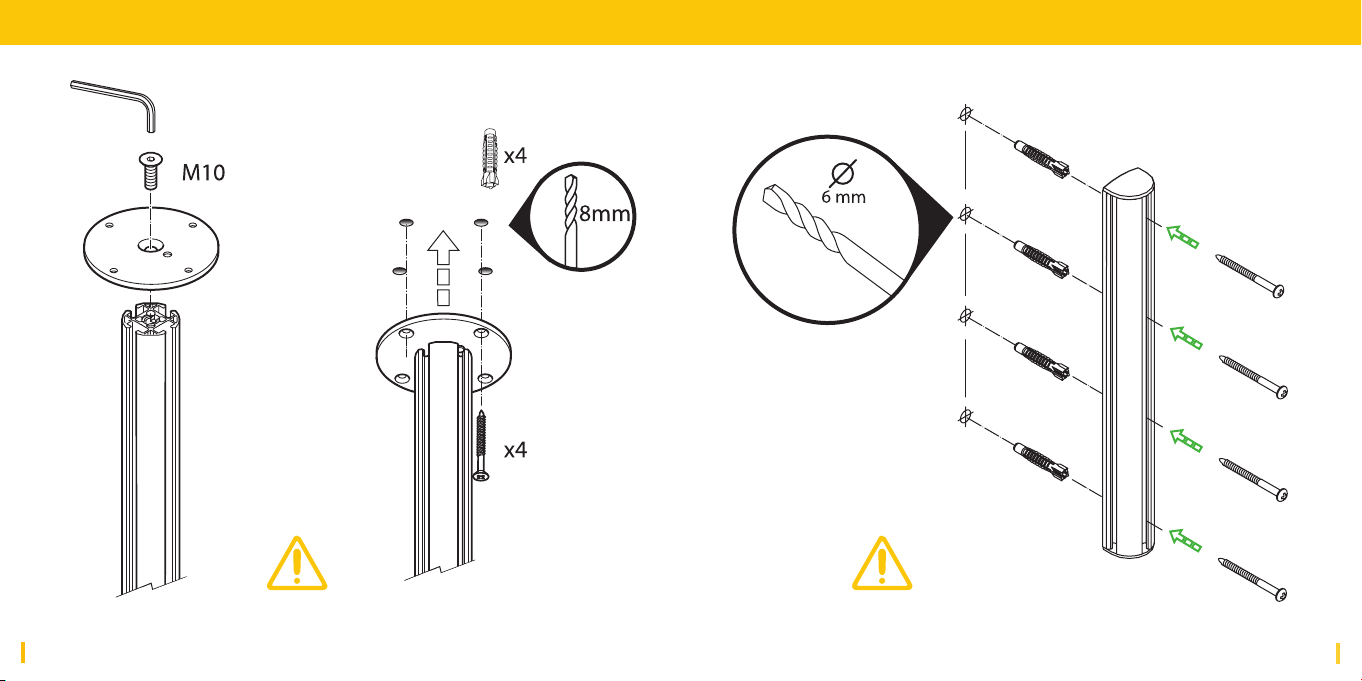
m!ka Table Top Mount
MMS Wall Bracket
MMS System Wall
m!ka PadDock
m!ka Copy Stand
Remarks
4
8
12
13
14
15
16
18
20
21
22
23
24
25
26
27
28
29
30
32
34