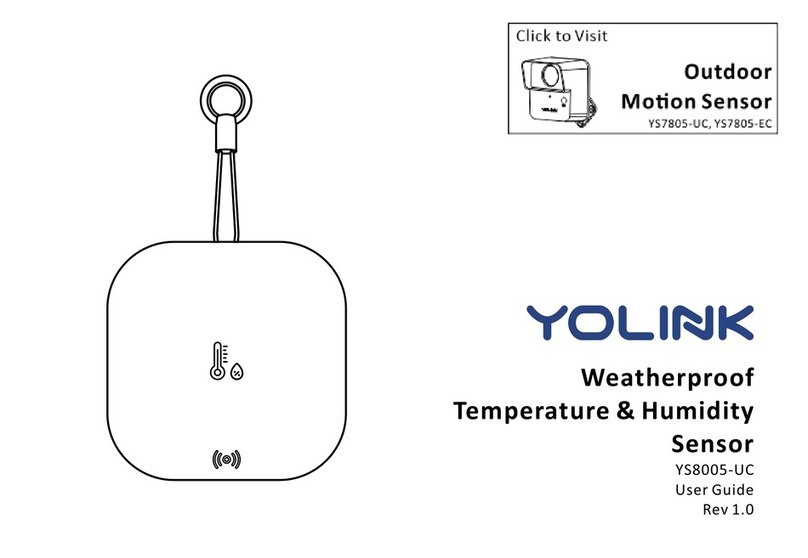
Yolink YS8004-UC User manual

Weatherproof
Temperature Sensor
YS8004-UC
User Guide
Rev 1.0

Sincerely,
Queenie, Clair, James, Eric
Customer Support Team
Thank you for purchasing YoLink products and for entrusng us with your smart home needs!
Your 100% sasfacon is our goal. If you experience any problems with seng up your new
YoLink Weatherproof Temperature Sensor, please give us a chance to assist you, before
returning your purchase.
We at Customer Support are here for you.If you need any assistance installing , seng up or
using a YoLink product or our app.
Find addional support and ways to reach us at:
www.yosmart.com/support-and-service
Or scan this QR code with your smartphone
Email us, 24/7 at:
service@yosmart.com
Call us, 9AM to 5PM Pacific Standard Time at:
(949) 825-5958
You may chat with us on Facebook (non-urgent maers):
www.facebook.com/YoLinkbyYoSmart

Contents
A.
B .
C .
D.
E .
F .
G.
H.
I .
In the Box ······· ····· · ·· · ··1······················ ····· ···················································· · ·
·Introducon ······························································································ 2
Set Up ····································································································· · 4· ·
Using the YoLink App ···················································································7
Maintenance ······················································································· ····16·
Specificaons ····················································································· ·····20·
Troubleshoong ················································································· ·····22·
Warning ······························································································ ····23·
Customer Service & Warranty ······························································· ····25·
Revised: 08/06/2021
Copyright 2021 YoSmart Inc. All rights reserved©

A. In the Box
1
A. Weatherproof Temperature Sensor
B. Quick Start Guide
B.
A.

B. Introducon
The YoLink Weatherproof Temperature Sensor
is a smart thermometer sensor. By monitoring
the real-me temperature level in your indoor
or outdoor locaon, you will know the exact
temperature in the space, at any me. You can
set high and low levels alerts for temperature.
When an alert level is reached, the LED will blink
red once, and noficaons will be sent to you
via the YoLink app. Available noficaon types
are: email, and banner ("push") noficaons on
you r Ap ple or And roi d sm art ph one , ea ch
configurable in app sengs.
2
*High-volume use fees may apply (subscripon
service available)
Hanging Loop & Ring
Used for hanging the device
Sensor Body
Cable Whip
Handle gently to avoid
damaging the whip
Detecon Probe
Used for temperature
sensing
SET Buon
& Status LED
Back Side

The LED light indicates the current status of the Weatherproof Temperature Sensor:
3
Blinking Red Once, then Green Once
Device turned on
Blinking Green
Connecng to Cloud
Slow Blinking Green
Updang
Blinking Red Once
Device is connected to the cloud and is funconing normally
Fast Red Every 30 Seconds Blinking
Baeries are low; please replace the baeries (see page 18 & 19)
Blinking Red And Green Alternately
Restoring to Factory Defaults

C. Set Up
C-1. Set Up - First-Time YoLink Users (Exisng users proceed to C-2. Add Device, next page)
4
The YoLink Hub is required to
set up your Weatherproof
Temperature Sensor. Please
set up your YoLink Hub first
(refer to YoLink Hub manual)
3
Power
Adapter
YoLink Hub
Log in to the YoLink app
2
Create a new account if
required
Download the YoLink app through
Apple App Store or Google Play
Store (Search in the store or use
the QR code on the right)
1
Apple iPhone or tablet that is iOS 9.0
or higher, or an Android phone or
tablet that is Android 4.4 or higher
YS1603-UC
User Guide
2. Ethernet patch cable (included) to
your network (router, switch, etc.),
recommended. Otherwise connect
your Hub to your home 2.4 GHz Wi-Fi
network (only when necessary).
Refer to the Hub set up manual for
more informaon:
1. Make sure your Hub is connected
to the internet (green LED indicator is
blinking, blue LED indicator is always
on)

C-2. Add Device
5
Ta p “ ” bu on , t h e n s ca n Q R
C od e o n t h e de v ic e . Fo l lo w t h e
st ep s t o a d d t he de v i ce
1
1. You will need to press the SET buon once again if the device failed to connect to the cloud
2. Pressing the SET buon at any other me aer this inial process will result in the LED blinking
red once, only. This indicates the device is connected to the cloud and is funconing normally
3. If the red LED does NOT blink as noted this may indicate a problem with the sensor. Please see
the troubleshoong secon and the contact secon for technical support
Press the SET buon once to turn
on the device. The Status LED will
blink red once, then green several
mes, indicang your device has
connected to the cloud and is
ready to use
2
SET Buon
Weat herpr oof Temp Se nsor
Mad e in Chin a SN: 8 00000 0001
Mod el: YS80 04-UC
Bae ry: 2 AAA , 3V DC
FCC ID : 2ATM78 005
Weat herpr oof Temp Se nsor
Mad e in Chin a SN: 8 00000 0001
Mod el: YS80 04-UC
Bae ry: 2 AAA , 3V DC
FCC ID : 2ATM78 005

C-3. Device Placement
Sensor Body Placement
6
Detecon Probe Placement
Care f u l ly s e c u re t h e d ete c o n p robe a n d e x ternal strip s o they a re s e c u re
and w i l l not b e a c c identa l l y move d o r k n o c ke d d o w n
Pla c e t he p ro be at the loc ao n w h ere te mperat ure m o nitorin g is re quired,
whi l e i n stall i ng t he s enso r body at a se cure, stable an d su ita ble locao n
(Pl e ase note: t he sens o r b o dy must N OT be subm erged)
Surface -, She lf- or cou nter top -mo un ng: pla ce the s enso r b ody on a stable
sur face so that it wil l n ot fall off or be kn ocked dow n
Wa l l- m o u n n g : h a n g t he s e n so r b o d y f r o m t he wa l l , o n a na i l o r s crew o r
o t h er s e c ure o b j ec t , u si n g t h e m o un n g r in g
Applicaon and Installaon Examples:
Place b oth t h e sensor b o dy a n d pro b e i nside a fre e ze r or r efrig e ra tor ( s e e
page 1 8 fo r operang e nvi ronment ra n g es)
Place b o th t h e s ensor b o d y and p robe i n a k i tchen, b asement , ga rage , etc.
Pla c e the p r o b e i n a h ot t u b o r s p a , swimm i n g poo l , fish t a n k /aq u a r i u m o r
pet ha b i tat , while plac i n g t h e s e n s o r bo d y a t a s uita b l e r e m o t e l o c aon
Aach t h e p robe to a h o t wat e r recir c u l aon p i p e , i n or o n a wat e r heate r,
on e q u i p m e nt o r m a c h i n e r y, wh i l e pl a c i n g t h e senso r body at a s u i table
re m o t e loca o n

D. Using the YoLink App
D-1. Device Page
7
Connecon Status of and HubWeatherproof Temperature Sensor
Baery Level of Weatherproof Temperature Sensor
Shown red if baery level is low-
Details
- Tap to go to Details page(refer to page 9 & 10)
Latest Refresh me for Temperature Value
Sensor refresh frequency refer to page 8-
Device Alert History
Historical log of temperature alerts, logged with date & me
Chart for Historical Chart
of Temperature
- Hourly: last twenty-four hours ;
Daily: last seven days
- Download the history values of
last seven days
Latest Refresh Temperature Value
- Blue: Normal, Red: Warning

Sensor Refresh Frequency
Temperature value refresh when one of the following condions are met:
8
a. The SET buon
has been pressed
b. At least 0.9°F(0.5°C)
change over a period
longer than 1 minute
c. At least 3.6°F(2°C)
change within 1
minute
d. Otherwise, the values will
be refreshed automacally
once an hour
e. Device alert level
reached or restored
to normal range
SET Buon

D-2. Details Page
i. Real-me Status: Normal, Warning
g. Add/Remove from favorites
a. Device Type
c. Choose a Room for device
e. A calibraon Value for temperature
b. Rename the Device
d. Alert Sengs
- Select an alarm strategy for the device
Set alert range for temperature
Set re-noficaon interval aer a temperature alert(refer to page 11)
h. Historical Log of temperature alerts, logged with date & me
f. Switch Temperature Display Mode: °F / °C
9
- Tap to get device manual link, feedback, contact us informaon, etc.
Aer changing “Alert” and / or “Calibraon” sengs, press the device’s SET buon once, to sync the new
sengs to the device. Otherwise, the device will automacally update within 4 hours (maximum)

j. Device Model
k. Device EUI (unique)
l. Device SN (unique)
m. Connecon Status of sensor and Hub
n. Current Baery Level
Shown red if baery level is low-
o. Firmware Version
- “#### ready now (refer to page 16)” indicates a new update is available
p. Remove Device From Current Account
Tap to delete the device from your YoLink account-
10

Alert Settings
a.
b. c.
d.
e.
f. a. Enable or disable alert
is below the low alert value or - Receive noficaons when the temperature value
above the high alert value set below
Slide to set the low temperature alert value (Default is 64°F (18°C))b.
c. Slide to set the High temperature alert value (Default is 95°F (35°C))
d. Enable or disable re-noficaon aer a temperature alert
e. Set the re-noficaon duraon between addional alerts
f. Tap to save the sengs
Desired range of temperature
- Device will alert outside of this range
Re-noficaon interval
11

D-3. Alarm Strategy
Se t up r u le s to s en d n o fic a on s ( ap p pus h no fic a on , em a il n o fi ca o n, S M S( tex t )
no fic a on ) wh e n a dev i ce a le rt i s de tec te d (s u ch a s Hi gh / Lo w Te m pe rat ur e Al er t by
Tem pe rat u re S en so r, Wa te r d ete c ted by Wat er L e ak S e ns o r, Mo on S e ns o r, etc .) . Fo l lo w
in st r uc on s b el ow to e na b le De vi c e Al e rt fi rst
Go to Sengs > Alarm Strategy for noficaons preferences sengs (Only support Host account)
Tap “ ” in the upper le corner to go to My Profile
a. Alarm Strategy Sengs
a-1 The alarm strategy
should be enabled
(Noficaon will be sent)
a-2 Noficaon will not be
sent during the Do Not
Disturb me
a-3 Sengs for receiving
device alert noficaons
via the app/email/SMS (text)
a-1
a-2
b. Alarm Strategy
sengs should
be enabled
a-3
Weatherproof Temperature
Sensor is not supported SMS
(text) noficaons
b.
12

D-4. Automaon
The Weatherproof Temperature Sensor can be set as a trigger only, with two trigger opons: Low
Temperature Alert; High Temperature Alert
a. Tap the “+” icon to add
an automaon
b. Add an automaon
b-1 Edit name
b-2 Edit trigger
b-3 Edit behavior (You must have at least one acon
device, or you cannot set a behavior)
b-4 Edit when (Set a me range for the automaon:
always or during specific days or mes)
b-5 Tap to save the sengs
c.
1. Tap “ ” buon to enable or disable the
automaon
2. Swipe le to view the history logs and to edit or
delete the automaon
c. Click to edit the automaon
Swipe Le
a.
b-1
b-2
b-3
b-5
b-4
Go to the “Smart” screen, tap “Automaon”
13

D-5. Third-Party Services
Go to Sengs > Third -Part y Ser vices a nd sel ect the applicable se rvice
Tap “ ” in the upper le corner to go to My Profile
W i t h t h i r d - p a r t y s e r v i c e s c o n n e c t e d t o y o u r Y o L i n k a c c o u n t , y o u r t e m p e r a t u r e
s e n s o r c a n t r i g g e r a u t o m a o n s , a n d a p p l e t s w i t h s m a r t h o m e / I o T d e v i c e s a n d
s e r v i c e s f r o m t h i r d - p a r t y ( n o n - Y o L i n k ) b r a n d s
Follow the instrucons, to authorize and add the connecon to your YoLink account
1. YoLink Weatherproof Temperature Sensor is integrated with Alexa,
and is also integrated with IFTTT.com (works as a trigger device using
IFTTT)
2. Google Assistant is not compable with the Weatherproof
Temperature Sensor at this me
3. Refer to the associated app or website for addional informaon
specific to the third-party service. Addional informaon may also
be found on our website at www.yosmart.com/support-and-service
or by contacng Customer Support (refer to page 25 for contact
informaon)
14

D - 5 - 1 . I F T T T
T h e H i g h / L o w Te m p e r a t u r e A l e r t c a n b e u s e d a s a t r i g g e r f o r c u s t o m a p p l e t s . V i s i t
w w w. i . c o m f o r m o r e i n f o r m a o n a n d p r i c i n g
D - 5 - 2 . A l ex a
Mo ni tor t he l ate st t emp erat ure va lu e of t he Weat he rpro of Tem pe ra tu re S en so r
T h e l a te st t e m p e ra t u r e v a l u e ca n b e q u e r i e d b y v o i c e c o m m a n d ( F o r ex a m p l e ,
“A l e xa , w h a t i s t h e t e m p e ra t u re o f t h e We a t h e r p r o o f Te m p e ra t u r e S e n s o r ? ” - - “ T h e
t e m p e ra t u r e o f t h e We a t h e rp ro o f Te m p e r at ur e S e n s o r i s 7 5 ° F ”
D - 5 - . 3 V i r t u Ala r m
Se rv ic e pro vi ded by Vi rt uA la rm
15

E. Maintenance
E-1. Firmware Update
To ens ure o ur c ustomers have th e be st us er exp erien ce, we h ighl y recom mend you update
to t he n ewest versi on fi rmware when an upd ate is availa ble
The device’s firmware will be
updated automacally within
1 hours (maximum). To force an
immediate update, press the
SET buon on the device twice
to make the device enter update
mode
In “Firmware”, if a new version
is li sted as avai la bl e (# ## #
ready now), click it to start the
firmware update process
You may use your device during
the update as it is performed in
the background. The LED light
will slowly blink green during
the update and the process will
be complete within 2 minutes
aer the light stops blinking
16

E-2. Factory Reset
Factory reset will erase all of your sengs and restore it to factory defaults. Aer the factory reset,
your device will remain in your Yolink account
SET Buon
Factory reset will be complete when the status light stops blinking
Hold the SET buon for 20-25 seconds unl the status light blinks red and green alternately,
then, release the buon (Hold the SET buon longer than 25 seconds will ABORT the factory
reset operaon)
17
Table of contents
Other Yolink Security Sensor manuals