manuals.online logo
Brands
  1. Home
  2. •
  3. Brands
  4. •
  5. Yomei
  6. •
  7. Indoor Furnishing
  8. •
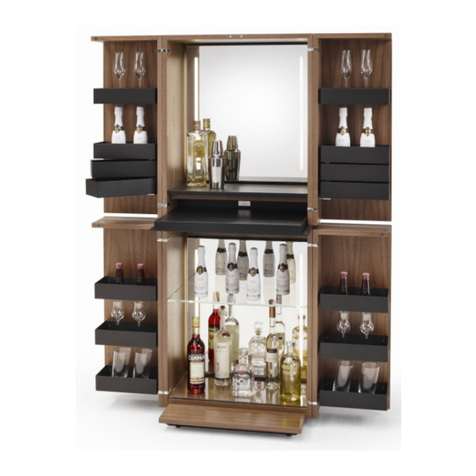
  9. Yomei Ray User manual

Yomei Ray User manual

Ray Montageanleitung Assembly instruction 安装指南
- 1 -
Ray
Montageanleitung
Assembly instruction
安装指南
Stand 11.06.18
Ray Montageanleitung Assembly instruction 安装指南
- 2 -
1. Auftragszeichnung prüfen
Check the drawing
检查图纸
2. Auspacken, Schrauben etwas lösen, Aufhängung herausziehen
Unboxing, Open the screw a little bit, Pull out the suspension
拆箱, 拧松螺钉, 拉出悬挂装置
8mm
2,5mm
3mm
Ray Montageanleitung Assembly instruction 安装指南
- 3 -
3. Positionen festlegen
Confirm the positions
确认位置
Oberkante Boden bis Mitte Befestigungsbohrung
18mm
Upper edge of the board to the middle mounting
hole 18mm
层板上边缘至中间的 18mm 固定钻孔
Maße aus der Auftragszeichnung sind für die Montage bindend.
Der Kabelsatz ist darauf abgestimmt.
Dimensions from the drawing are binding for the assembly
The cable set is tuned to it.
图纸上的尺寸与安装相结合
电缆组件与此相协调
Ray Montageanleitung Assembly instruction 安装指南
- 4 -
Die Kabelführungen bzw. die Wandhalterungen müssen vertikal exakt
ausgerichtet sein.
The cables or the wall brackets must be aligned vertically exactly.
排线或墙壁支架必须垂直对齐
4. Befestigung der Wandhalterung nach Beschaffenheit der Wand nach
Möglichkeit in jedem dafür vorgesehenem Befestigungsloch. Mindestens an
den Außenenden und in unmittelbarer Nähe eines Trägers
Fix the wall bracket according to the condition of the wall, if possible in each
designated mounting hole. At least at the outer ends and closing to the
beam.
根据墙壁的情况固定墙壁支架,如果可能的话,对准每个指定的安装孔。
至少在支架的外端和附近
Ray Montageanleitung Assembly instruction 安装指南
- 5 -
6. Anbringen des Kabelsets
Attach the cable set
安装电缆组件
6a. Die Zugentlastungen
herausnehmen
Remove the strain reliefs
取出张力件
6b. Kabelset einfügen, sodass das
Gewicht unten einen Abstand von
3cm zum Boden aufweist.
Insert the cable set so that the
weight at the bottom has a
distance of 3cm to the board
插入电缆组件,使得下面的重量与层板
间有 3厘米的距离。
6c. Von unten nach oben die
Kabel mit den Zugentlastungen
fixieren, dabei darauf achten das
das Kabel zwischen den Böden
gepannt wird.
From bottom to top, fix the cables
with the strain reliefs, making
sure that the cable is clamped
between the boards.
从底部到顶部,使用张力件固定电线,
确保电线紧固在层板之间。
6d. Anschließend die LED
Konverter anschließen (Achtung
Elektrofachkraft) und einen
Funktionstest durchführen.
Wenn nötig Steuerung mit
Fernbedienung koppeln siehe
Beilage.
Then connect the LED converter
(Attention electrician) and
perform a function test. If
necessary, couple control with
remote control see attachment. 然后连接 LED 转换器(注意由电工)执行功能测
试。 如有必要,使用遥控器进行遥控控制,请参阅附件
6d
6a
6b
Ray Montageanleitung Assembly instruction 安装指南
- 6 -
7. Anbringen des Deckenabschlusses
Attach the top end
安装顶面终端
7a. Position des oberen Anschlusses von
der Wandboard-Kabelführung hochloten.
Confirm the position of the top connector of
the wallboard-cables
确定壁板走线的上层连接位置
7b. Das Sockelstück mit an der Decke
anbringen.
Attach the base piece to the top
将底座部件安装到顶面
7c. Federhalterung aufschrauben.
Screw the spring retainer
拧上弹簧座
7d. Das Kabel vom oberen Boden durch das
Rohr und in die Federhalterung fädeln.
Ggf. muss das Kabel hier gekürzt werden.
Thread the cable from the top board
through the tube and into the spring
retainer. The cable possibly has to be
shortened here.
将电线从上面层板穿过管道进入弹簧座
如有必要可能需要截短电线
7e. Die Feder herunterziehen und das Kabel
mit der Zugentlastung fixieren sodass die
Feder das Kabel straff hält.
Pull down the spring and fix the cable with
the strain relief so that the spring holds the
cable tight.
拉下弹簧并用张力件固定电线,以便让弹簧紧固电
线
7f. Das Röhrchen auf das Sockelstück
schrauben.
Screw the tube onto the base piece
将管道安装到底座部件
7b
7c
7e
Ray Montageanleitung Assembly instruction 安装指南
- 7 -
8. Ausrichten der Träger
Align the beam
调整支架
Die Träger sollten vor dem Aufstecken des Bodens mithilfe eines 8mm
Maulschlüssels waagerecht eingestellt werden.
The beams should be horizontally adjusted with an 8mm open end wrench
before putting on the board
在插入层板前需用 8mm 开口扳手对支架进行水平校准
9. Aufstecken und Fixieren der Böden
Attach and fix the boards
层板的安装和固定
9a. Die Kabelführung gibt die Richtung beim Aufschieben vor.
The cable goes along the direction of the board when pushed on.
电缆引线方向为层板移动方向。
9a
Ray Montageanleitung Assembly instruction 安装指南
- 8 -
9b. Bei optionalem USB oder QI muss dieser noch in die gekennzeichnete
LED Buchse eingesteckt werden. With optional USB or QI, this must still be
plugged into the marked LED socket 可选的 USB 或QI,必须插入标有的 LED 插
座
9c. Wenn die Böden anliegen -ACHTUNG! Alle Kabel müssen untergebracht
sein- wird der Boden mit den Fixierungsschrauben vorsichtig gesichert, nicht
zu fest anschrauben Formschluss reicht aus!
When the boards are concerned -ATTENTION! All cables must be placed- If
the board is carefully secured with the fixing screws, do not screw too tight,
fitting form is enough
关于层板 注意先要把电线处理好!用固定螺丝小心地固定层板,不要拧得太紧。形状配
合连接已足够!
Ray Montageanleitung Assembly instruction 安装指南
- 9 -
10. Die Kabelblenden in die vorgesehenen Führungsbohrungen einlegen,
sie werden durch Magnete gehalten. Die Positionierung in der Höhe kann mit
den Stellschrauben bei Bedarf ausgerichtet werden.
Insert the cable shields in the guide holes provided, they are held by
magnets. The height positioning can be aligned with the set screws as
needed.
将集线器需要穿过事先做好的孔位。并用磁铁固定。 高度定位可以根据需要与固定螺钉对齐
10
Ray Montageanleitung Assembly instruction 安装指南
- 10 -
Wandbefestigung
Unser mitgeliefertes Befestigungsmaterial eignet sich nur für Beton-, Vollziegel- und Hochlochziegelwände. Für
andere Wandtypen müssen zwingend Spezialdübel verwendet werden. Wird dieser Sicherheitshinweis nicht befolgt,
kann die Wandbefestigung nicht ausreichend ausgeführt werden und Folgeschäden verursachen. Mitgelieferte Dübel
nur bei massivem Mauerwerk verwenden. Wenn nötig, Probebohrung vollziehen. Bei Holraumziegeln ohne Schlag
bohren. Bohrung ausreiben. Aus Sicherheitsgründen darf nur ein Öffnungsmechanismus betätigt werden. Bei Möbeln,
die bei geöffneten Funktionsteilen (Türen, Auszüge) ein Kippmoment verursachen, muss bauseits eine zusätzliche
Kippsicherung angebracht werden. Dabei ist vom Fachpersonal die Eignung des Untergrundes zu prüfen und zu
kontrollieren, ob die Befestigungsmittel den auftretenden Kräften standhalten.
Wall Mounting
The fixings that we supply are suitable only for concrete, solid brick, and perforated hollow brick walls. Special wall
plugs must be used for other types of wall. If this safety instruction is not complied with, the wall mounting may be
inadequate and may cause consequential damage. Use the wall plugs supplied with the furniture for solid masonry
only. Perform a test drilling if necessary. Do not use a hammer drill on hollow bricks. Wipe the inside of the drill hole.
For safety reasons, only one opening mechanism must be activated. If furniture exerts a tilting force when functional
parts (doors, drawers) are open, an additional anti-tilt fixture must be installed in the wall. Skilled personnel must
test the suitability of the substrate and check whether the fixtures can resist any forces that arise.
墙面固定
我们附带提供的固定材料仅适用于混凝土墙面,砖墙及空心砖墙。其他材质墙面必须使用特殊的膨胀螺钉。
如果不遵循安全指示,则无法正确地固定在墙面,且会造成损失。附带提供的膨胀螺钉只用于实心墙面。
如果有必要的话,可尝试打孔。空心砖墙钻孔时不可敲打!清理钻孔。出于安全考量,只允许使用打开机
械装置。打开的功能部件(门,深抽屉)会造成倾斜力矩,所以必须另外安装倾斜保险装置。同时,专业
人士要检测地板是否合适,还要检查固定工具是否能承受现有的重量
Ray Montageanleitung Assembly instruction 安装指南
- 11 -
Ray Montageanleitung Assembly instruction 安装指南
- 12 -
Yomei Service Hotline
Germany: +49 5231 9707-60
China 中国: 400 821 3470
Allgemeine Montagehinweise, Materialinformation und Hinweise zu Reinigung & Pflege
entnehmen Sie bitte unserem Produkt- und Qualitätspass.
For general installation instructions, material information and information on cleaning and
care, please refer to our product and quality pass.
通用安装说明、材质信息、护理说明书&清洁提示,请参阅我们的产品和质量证书。
Yomei GmbH | Westerfeldstr. 4 | 32758 Detmold | Germany
Fon: +49 5231 - 970760 | Fax: +49 5231 - 970761 | info@yomei.de | www.yomei.de

Other Yomei Indoor Furnishing manuals

Yomei S100 User manual

Yomei

Yomei S100 User manual

Yomei Magix Matrix User manual

Yomei

Yomei Magix Matrix User manual

Yomei S100 Parts list manual

Yomei

Yomei S100 Parts list manual

Yomei Magic Cube Bar L User manual

Yomei

Yomei Magic Cube Bar L User manual

Yomei S100 User manual

Yomei

Yomei S100 User manual

Popular Indoor Furnishing manuals by other brands

Songmics VASAGLE LET040 Assembly instructions

Songmics

Songmics VASAGLE LET040 Assembly instructions

Lightolier Calculite C4P20MHA specification

Lightolier

Lightolier Calculite C4P20MHA specification

Parmco LS-SLIM Installation and operating instructions

Parmco

Parmco LS-SLIM Installation and operating instructions

Cooper Lighting METALUX 15/ASY Specification sheet

Cooper Lighting

Cooper Lighting METALUX 15/ASY Specification sheet

Sylvania DULUX 20566 Product information bulletin

Sylvania

Sylvania DULUX 20566 Product information bulletin

Noble House Home Furnishings 72716.00BRN-40K User guide and instruction manual

Noble House Home Furnishings

Noble House Home Furnishings 72716.00BRN-40K User guide and instruction manual

decortie TETRA manual

decortie

decortie TETRA manual

Intercon SM-HO-7232B-GRY-C Assembly instructions

Intercon

Intercon SM-HO-7232B-GRY-C Assembly instructions

calligaris BARON manual

calligaris

calligaris BARON manual

Madeira 10250303 Assembly instructions

Madeira

Madeira 10250303 Assembly instructions

ThunderX3 ED5 user manual

ThunderX3

ThunderX3 ED5 user manual

Mason Green SOMERVILLE D71 M20779 Use and care guide

Mason Green

Mason Green SOMERVILLE D71 M20779 Use and care guide

Oxford Garden Dartmoor Bar Chair Assembly instructions

Oxford Garden

Oxford Garden Dartmoor Bar Chair Assembly instructions

PW 1171-315G manual

PW

PW 1171-315G manual

Schildmeyer Pisa 624360 Assembly instructions

Schildmeyer

Schildmeyer Pisa 624360 Assembly instructions

LF Style selections 1142VA-24-220 manual

LF

LF Style selections 1142VA-24-220 manual

Mocka Safari Tent Assembly instructions

Mocka

Mocka Safari Tent Assembly instructions

Wilhelm Schildmeyer ANGERS-80 Assembly instructions

Wilhelm Schildmeyer

Wilhelm Schildmeyer ANGERS-80 Assembly instructions

manuals.online logo
manuals.online logoBrands
  • About & Mission
  • Contact us
  • Privacy Policy
  • Terms and Conditions

Copyright 2025 Manuals.Online. All Rights Reserved.