Yuel Beast Designs Motif Monument User manual

1
Yuel Beast Designs
Motif Monument
Thank you for your interest in the Motif Monument.
This is an open chassis for Mini-ITX motherboard
computers. The purpose of this design is to present
small form factor components in a compact and
elegant configuration. The Monument and all of our
other products are designed and Manufactured in
the United States.
The Motif Monument is the result of careful
consideration of form and function. The design
began as a simple shape that was gradually
adjusted to accommodate most combinations
of compatible components. The finished build is
meant to function as a showpiece computer without
significantly sacrificing performance potential.
The chassis consists of 2 pieces of 3/16” steel
that are painstakingly cut, bent and finished to
the highest possible manufacturing standards.
The unique shape and small size present many
fabrication constraints that do not allow for error in
the production process.
This is a project kit designed for advanced PC
builders who have experience and familiarity with
the challenges of custom PC building. We hope this
product will be an important part of your next build
and that you will make something both useful and
captivating. Enjoy!
-Eric and Ken, Yuel Beast Designs
Scan this QR code to
see completed build
photos and up to date
info about our products.

2

3
The body and backplate begin as 4x5’ sheets of 4.5mm thick
hot-rolled steel. Two parts are made using a 2500 watt CNC
laser cutter. The main body is bent in four places using a two die
setups on a precision hydraulic press brake.
The GPU mounting hole is machined into the edge of the I/O
flange and tapped with a 6-32 thread using a custom drill
fixture. The female threaded 6-32 standoffs for the backplate
and motherboard are hydraulic pressed into the steel. Then the
body and backplate are bead-blasted for a smooth, consistent
pre-finish. The final step is a powder coating process. The parts
are hung up, electrically charged, carefully sprayed and placed
in a curing oven.
Each unit is hand numbered and quality assured before
shipping.
Fabrication and Material Specifications
1. Chassis
2. Backplate
3. Motherboard fasteners (4)
4. Backplate fasteners (4)
5. PSU fasteners (4)
6. GPU mounting fastener (1)
Black-oxide alloy steel socket head screw
7/64 head, 6-32 thread, 3/8” long
7. Hex wrench for fasteners
8. 16mm power button
9. Power button wire with ferrule ends
10. Power button o-ring
11. Self adhesive rubber feet (4)
Included Parts and Hardware

4
Backplate
Backplate standoffs (4)
GPU mounting fastener (1)
PSU mounting fastener (4)
Baseplate
I/O flange
Power button clearance hole
Built in Motherboard
Standoffs (4)
Motherboard Standoffs (4)
Motherboard plate
Motherboard plate cut out
Assembly Instructions
1. Locate the 4 motherboard stand-offs that are built into the
chassis and fasten your motherboard into place. Monuments
manufactured prior to 2021 have threaded holes, where standoffs
can be screwed in by hand.
2. After installing the motherboard and seating the GPU in the PCI
Slot, screw the GPU mounting fastener into the threaded hole on
the edge of the I/O flange.
3. Mount the PSU to the four through holes on the bottom portion of
the chassis.
4. Wrap the O-ring around the power button at the base of the
threads. Insert the button into the through hole on the backplate
and secure it with the silver hex ring.
5. Insert the ferrule ends of the power button wire into the terminals
and tighten the two screws.
6. After running the PSU cables through the motherboard plate
cutout, mount the backplate to its four standoffs using the
backplate fasteners. Again, early versions of the Monument will
have tapped holes for the backplate standoffs to be screwed in.

5
Recommended Components
Motherboard
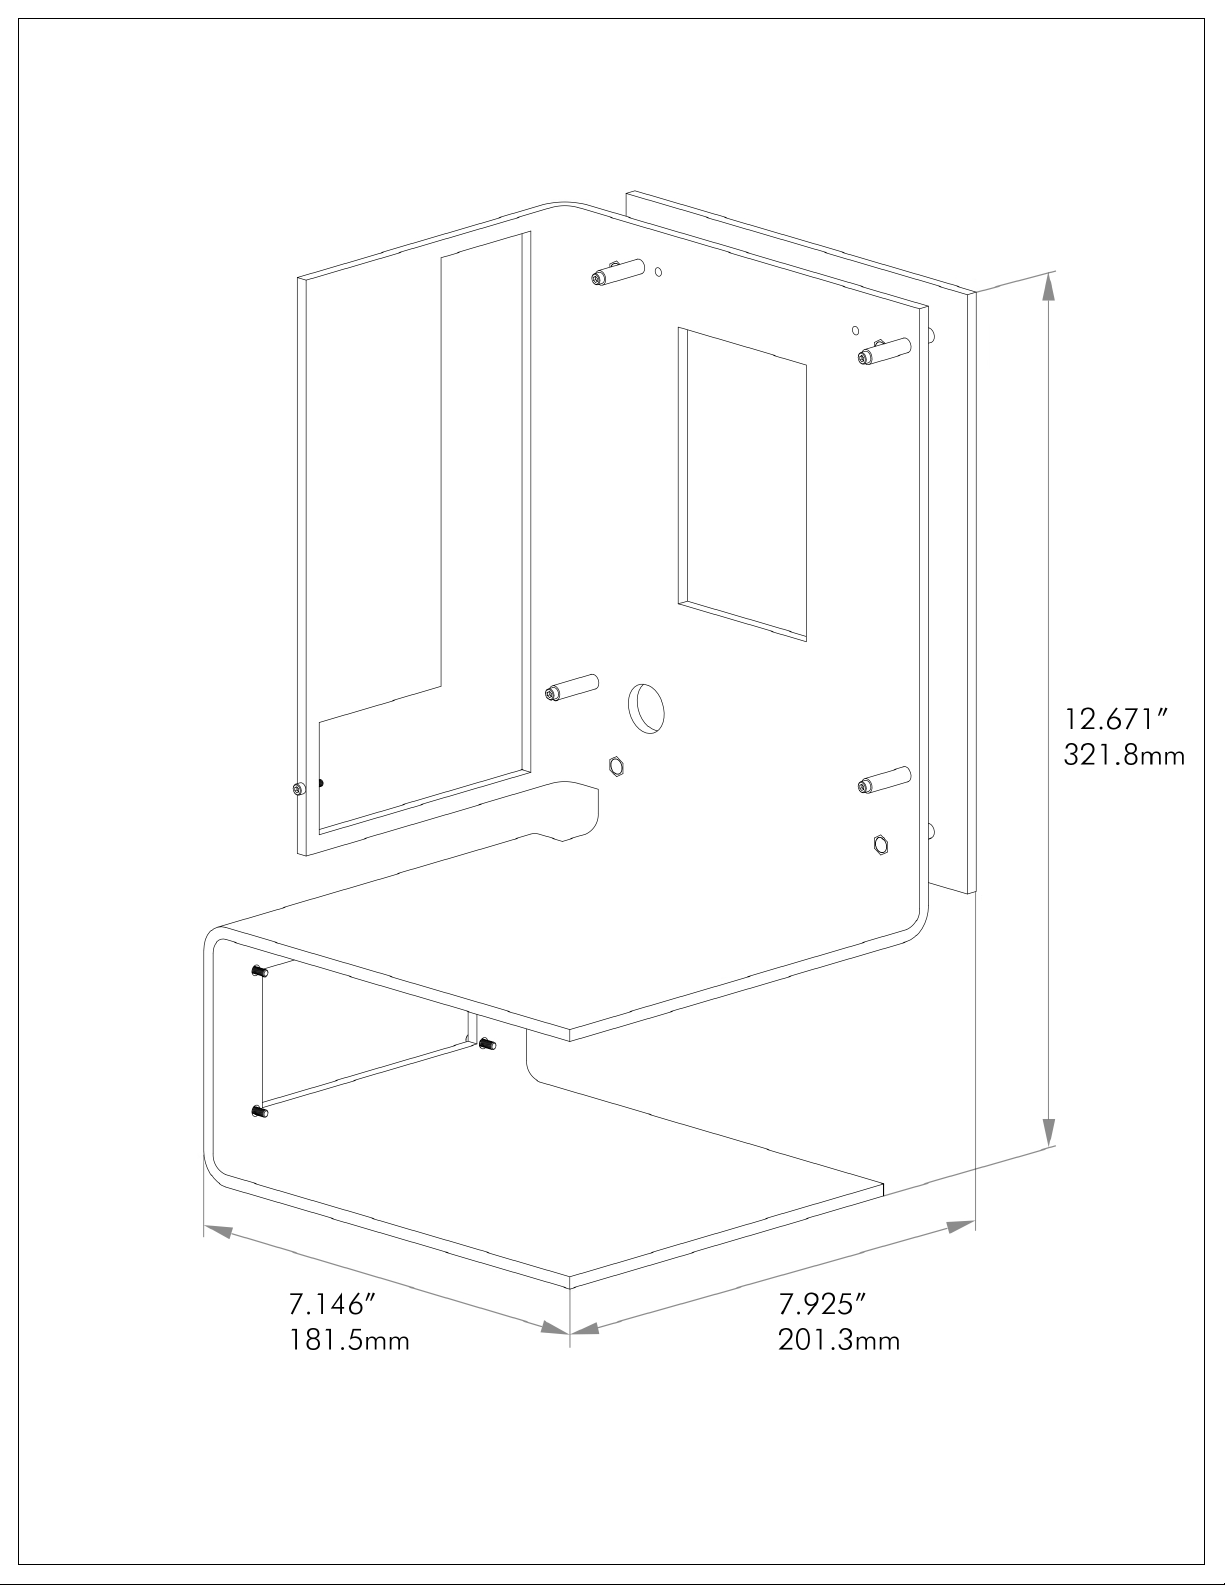
The Motif Monument is designed to be compatible with Mini-ITX motherboards.
We recommend using a board with two M.2 ports as there is little room for
a 2.5” SSD. It is possible to install a 2.5” SSD behind the motherboard or
backplate, but it is not recommended.
CPU Cooler
The chassis was designed with moderately sized air coolers in mind. The bequiet!
Dark Rock TF or similar provide excellent cooling in an appropriately sized form
factor. There is no aesthetically pleasing configuration for closed loop CPU
coolers or custom water cooling, however we encourage users to experiment
with different solutions.
RAM
As this design is best suited for air coolers, use a relatively low profile RAM that
will fit underneath your CPU cooler. We had success with Corsair Vengeance
RGB.
GPU
While any 2 slot GPUs can be mounted, it is highly recommended to use a small
form factor GPU. The chassis is approximately 7” wide, using a significantly
longer GPU may look unbalanced. Three slot GPUs are not guaranteed to fit
well, especially if you intend on running the GPU power cable underneath it.
PSU
The mounting holes on the PSU flange are compatible with SFX PSUs. Only use
fully modular PSUs as custom cables are recommended to make a clean build
on this chassis.
Power Cables
This case was designed to use custom sleeved PSU cables. In our production
prototypes, we successfully used 60-70cm PSU cables, though it is highly
recommended that you take careful measurements with your own components
installed on the case. The backplate has plenty of room for cable management
clips to properly arrange the runs in an organized way. Feel free to cut, crimp,
and sleeve your own cables or buy professionally made cables and accessories
from third party vendors such as Cable Mod or Mainframe Customs
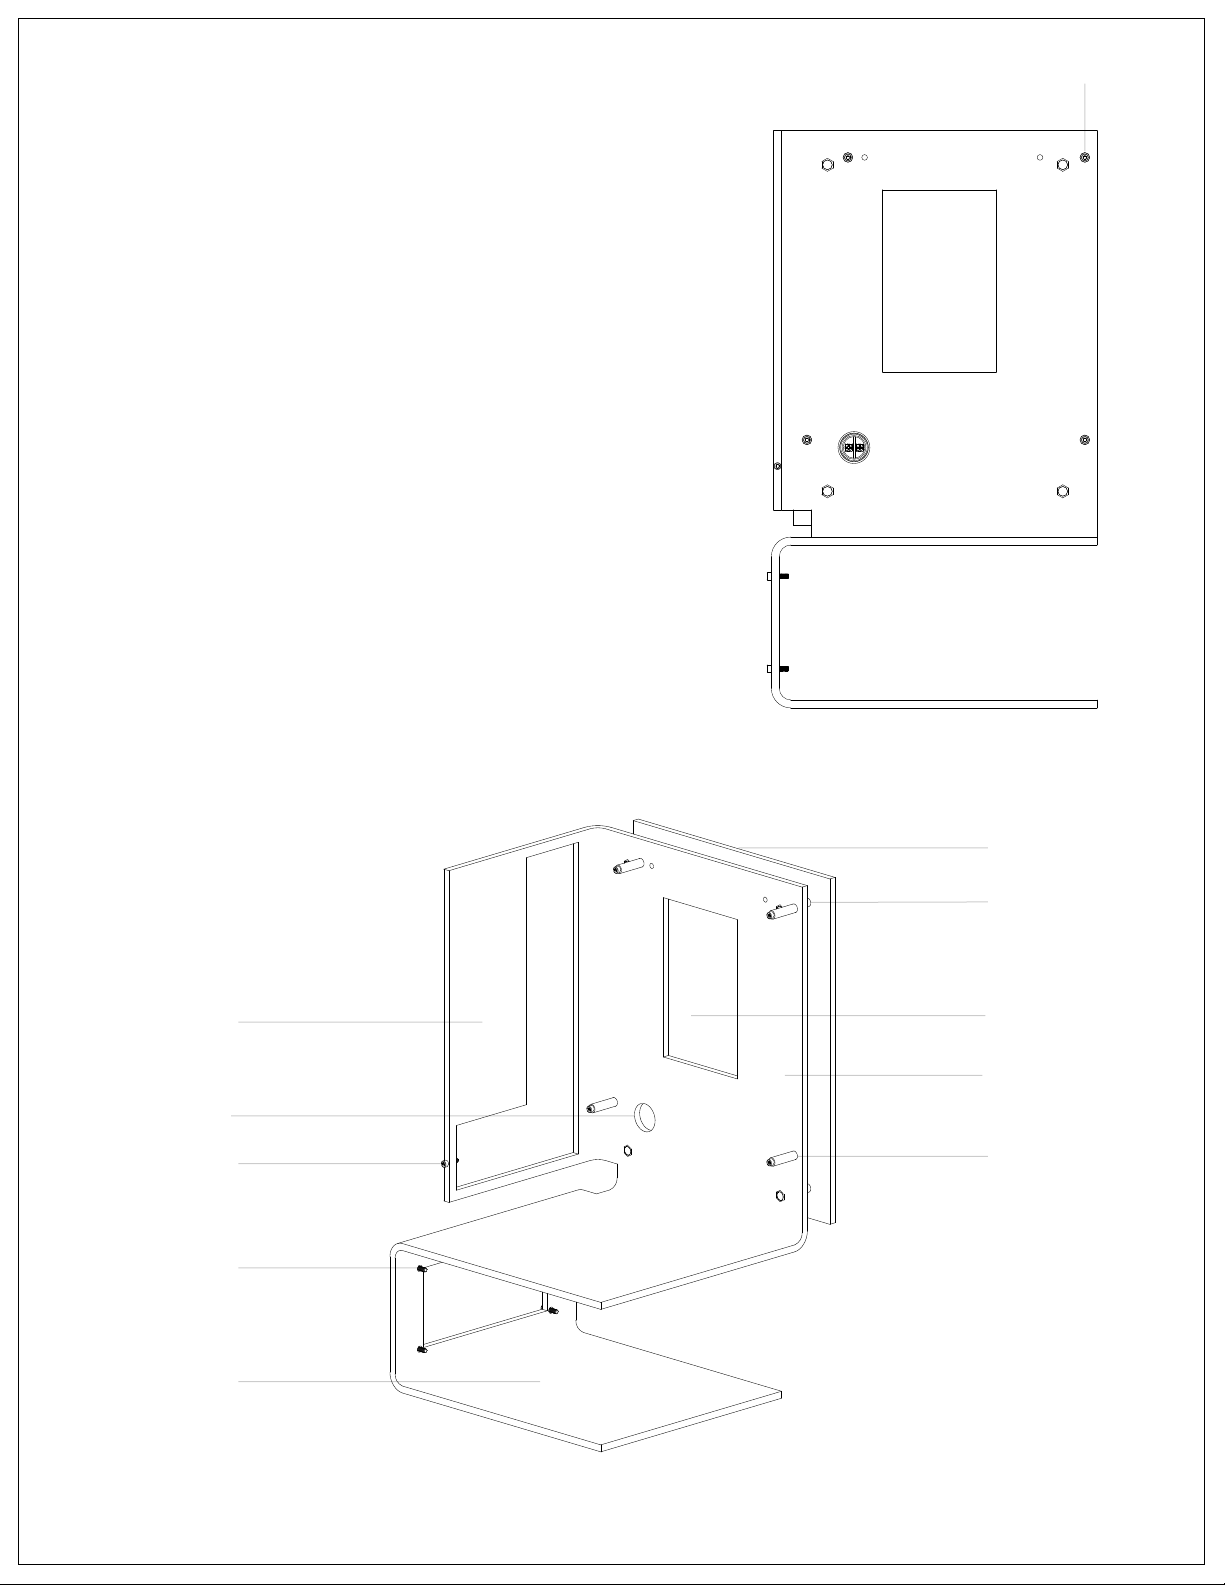
Power Button Mounting Hole
The Motif Monument does ship with an included button. There are a pair of
through-holes on the bottom right of the backplate that are specifically designed
for a 16mm momentary switch.

6
Please visit our website for our up to date return policy, terms of service,
privacy policy, and other important information.
www.yuelbeast.com
© Yule Beast Designs, 2021
SHARE YOUR BUILD
Thank you for supporting our work! We
really appreciate it, and would love to see
what you do with our designs. Tag us!
Insta
g
ram | Facebook | Twitter
@yuel_beast | #yuelbeast
Table of contents