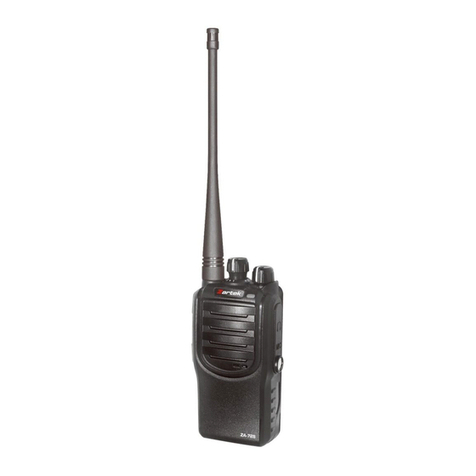
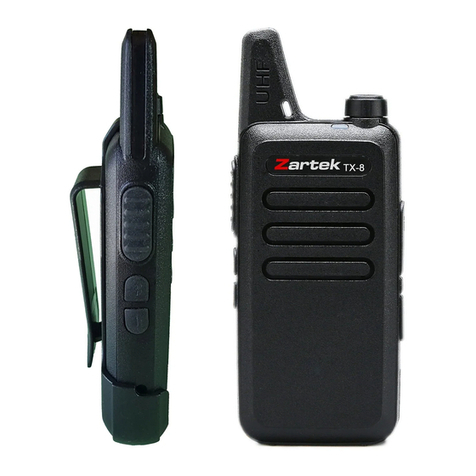
Zartek ZA-720 User manual

USER’S MANUAL
• Extra Long Range
• Ultra Thin & Durable
• Li-ion Battery
• Desktop Charger
• Loud Clear Audio
• 16 Channels

·i ·
Thank you for purchasing the Zartek ZA-720 Portable Two
Way Radio. This radio is easy to use and gives you reliable
and clear communication. The ZA-720 UHF transceiver
operates at 0.5W on both license-free bands namely 464
MHz consisting of 5 frequencies and 446MHz consisting of
8 frequencies. This transceiver is also approved by ICASA
to operate on licensed bands from 400 – 470MHz on 2W of
transmitting power.
Please read this manual carefully before using the radio.
The information presented here will ensure that you get
maximum performance and functionality from the radio.
There are also important battery and charging maintenance
procedures.
High strength materials and quality components have been
used in the manufacture of this two-way radio to give many
years of product use. It is designed for every day general
use both indoors and outdoors. The ZA-720 radio is slim and
lightweight for easy handling yet still durable and easy to op-
erate.

·ii · · iii ·
yPlease turn o the radio when you are close to a blast area or detonator
zone.
yDo not use any radio which has a damaged antenna. It may cause a mi-
nor burn when the damaged antenna touches your skin.
yTo avoid the problems caused by EMI and EMC, turn o your radio where
notices “Please turn o your radios” are posted, such as hospitals.
yTurn o your radio before boarding an aircraft. Any use of the radio must
be in accordance with airline regulations or ight crew’s instructions.
yIf a vehicle is tted with an air bag, do not place the antenna of the radio
within the air bag expand area.
yWhen the portable radio is transmitting, hold the radio in a vertical posi-
tion and speak into the Microphone.
yIf you carry a radio on your body, please keep the antenna away from
your body by at least 2.5cm when transmitting.
PROGRAMMING NOTICE!
This transceiver has been factory programmed and can be used immediate-
ly once purchased. All 16 channels have been activated with channels in the
license free bands as per the table below and on the back of the box. There
are 2 bands, PMR 446MHz band with 8 frequencies (1-8) and the 464MHz
band with 5 frequencies (1a-5a). Select the same channel on any ZA-720
radio to communicate.
Compatibility:
The ZA-720 is factory programmed to be directly compatible with all 16
channels on the TX-8, channels 1 to 12 on the ZA-748, ZA-725 and ZA-758
and the rst 8 channels on the ZA-708 if they are set to factory program-
ming. You will need to reprogram your ZA-720 radio when there are other
channels to be set. Both the frequency (1-8 or 1a-5a) and CTCSS sub tones
(1-38) / DCS tone must be the same on all radios for full intercommunica-
tion. Should there be interference on a specic channel, select a dierent
channel. Note that Channel 9, 10 & 11 are set on the open frequency with-
out a sub tone and channels 13 to 16 have been set with a tone 20 for more
privacy. A sub tone is used to privatise conversations when using the same
frequency.
WARRANTY
There is a 12 month factory warranty on the unit. Warranty does not cover
speakers, battery or accessories. The product must be used for the intend-
ed purpose and not subject to willful or accidental damage. If the product
has been tampered with in any way, the warranty shall be considered null
and void.
SAFETY INFORMATION
yStudy this manual carefully to understand your transceiver well.
yFor safety reasons, it is important that the user is aware of and under-
stands the potential hazards common to using any transceiver.
yTo clean the radio, wipe with a soft cloth dampened with water. Never
use solvents or cleaners on the radio, they can harm the body and leak
inside, causing permanent damage.
yYour radio is not splash proof or waterproof. If the radio gets wet, turn it
OFF and remove battery immediately. Dry the battery compartment to
minimize potential water damage. Leave cover o battery compartment
and do not use until completely dry.
yHandle the radio with care and never hold the radio by the antenna. Do
not drop or impact the radio as it contains sensitive electronics.
yDo not operate the transceiver or replace/charge the battery in an explo-
sive environment (dust, gas, fumes etc).
yDo not transmit without the correct antenna connected fully or the radio
could get damaged.
ySwitch the transceiver o whilst lling gas or when parked at a petrol sta-
tion.
yDo not open or modify the transceiver in any way.
yRefer to a qualied technician for any service or repairs.
yDo not expose the transceiver to long periods of direct sunlight, extreme
hot environments or surfaces.
yDo not place the transceiver in excessively dusty, humid, wet and/or un-
stable areas.

·iv · · v ·
lengthen the charge time.
6) During charging, do not plug in/pull out the power supply or the battery
frequently, it would aect battery charging.
7) Do not charge when the battery or radio is wet. Please dry it with a soft
cloth before charging.
8) Do not use the charger, cable or battery if it is damaged, cracked or
frayed in any way.
9) The battery life is over when the operating time is obviously shorter than
normal even if it’s fully and correctly charged. Please then replace with a
new battery.
To Prolong Battery Life
1) Battery performance will degrade when the current temperature is below
0°C. A spare battery may be necessary in cold weather. Please keep the
cold batteries, as these batteries will work under room temperature.
2) If the battery contact is dusty, it may inuence its normal use or normal
charge.
Battery Storage
1) Fully charge a battery before storing for a long time, to avoid battery dam-
age caused by over-discharge.
2) Recharge the Li-Ion battery after 6 months as the battery will lose small
amounts of charge even when not in use. This regular maintenance will
avoid the battery capacity reducing which is caused by over-discharging.
3) When storing your battery, keep it in a cool and dry place under room
temperature.
An optional programming cable is available to program different PMR
446MHz and 464MHz channels and sub tones on the ZA-720 Software is
available for free download from www.zartek.co.za. The programming cable
is connected to the radio to the USB port on a PC. Other settings such as
Squelch level, VOX or reassigning the side key for dierent functions can
also be programmed. Licence free use of this transceiver limits the fre-
quencies to the 446MHz and 464MHz bands and the power is restricted to
500mW. If an ICASA license is granted for use of other frequencies (400-470
MHz) and power (2W), special software is available from a registered two-
way radio dealer. The supplier and manufacturer take no responsibility if a
user operates the transceiver not in accordance with ICASA regulation.
Please refer to the sections in this manual for instructions on programming
and the functions available.
BATTERY INFORMATION
Initial Use
New batteries are not charged fully in the factory. Please charge the battery
for 3 hours at least before first use. This initial charge pre-conditions the
battery for full capacity. Failure to charge fully may shorten the life span of
the battery. Recharge the battery immediately once it goes at as it could
get damaged if left very at for long periods. The maximum battery capacity
and performance is achieved after three full charge-discharge cycles.
Battery Pack
Please only use a battery which is approved by the manufacturer. Unautho-
rized batteries may cause failure of protection circuitry and result in bodily
injury and property damage.
Safety Information
1) Do not throw the battery into re!
2) The battery should be recycled and disposed of correctly.
3) Never attempt to disassemble the battery pack.
4) Only charge the battery, when the ambient temperature is between 5°C~
40°C.
5) Please turn off the radio when the battery is charging. Using the radio
during charging will aect the normal charging of the battery pack and will

·vi · · vii ·
VOX (Voice-operated Transmission) .......................................................12
VOX level ................................................................................................12
Scan ........................................................................................................12
Scan Add/Delete......................................................................................13
Low Battery Alert .....................................................................................13
Announce Voice Channel ........................................................................13
Power Selection (only in dealer license version).....................................13
Programmable Side Key .........................................................................13
OPTIONAL ACCESSORIES.......................................................................14
TROUBLESHOOTING................................................................................15
SPECIFICATION .........................................................................................16
CONTENTS
STANDARD ACCESSORIES........................................................................1
Item List.....................................................................................................1
RADIO OVERVIEW.......................................................................................2
GETTING STARTED.....................................................................................3
Install & Remove the Battery.....................................................................3
Install & Remove the Antenna ...................................................................3
Install & Remove the headset / programming cable..................................3
Charging the Battery .................................................................................3
BASIC OPERATION .....................................................................................5
Power ON/OFF..........................................................................................5
Adjust the Volume .....................................................................................5
Select a Channel .......................................................................................5
Transmit.....................................................................................................5
Receive .....................................................................................................5
Monitor ......................................................................................................5
Communication Range..............................................................................6
PROGRAMMING (OPTIONAL) ....................................................................7
USB installation .........................................................................................7
Software installation ..................................................................................7
Reading data .............................................................................................7
Writing data ...............................................................................................8
Licence-free bands....................................................................................8
Sub-tones ................................................................................................10
OPTIONAL FEATURES..............................................................................11
Battery Save Function .............................................................................11
Squelch ...................................................................................................11
Time-out Timer ........................................................................................11
Table of contents
Other Zartek Transceiver manuals
Popular Transceiver manuals by other brands

Kenwood
Kenwood ProTalk TK-3201 instruction manual

City Theatrical
City Theatrical SHoW DMX SHoW Baby user manual

Standart Horizont
Standart Horizont HX407 owner's manual

B&G
B&G V90S quick start guide

VictelGlobal
VictelGlobal ALK300 series Operation manual

Cactus
Cactus Wireless Flash Transceiver V6 user manual